
Geometric Line Art in Illustrator
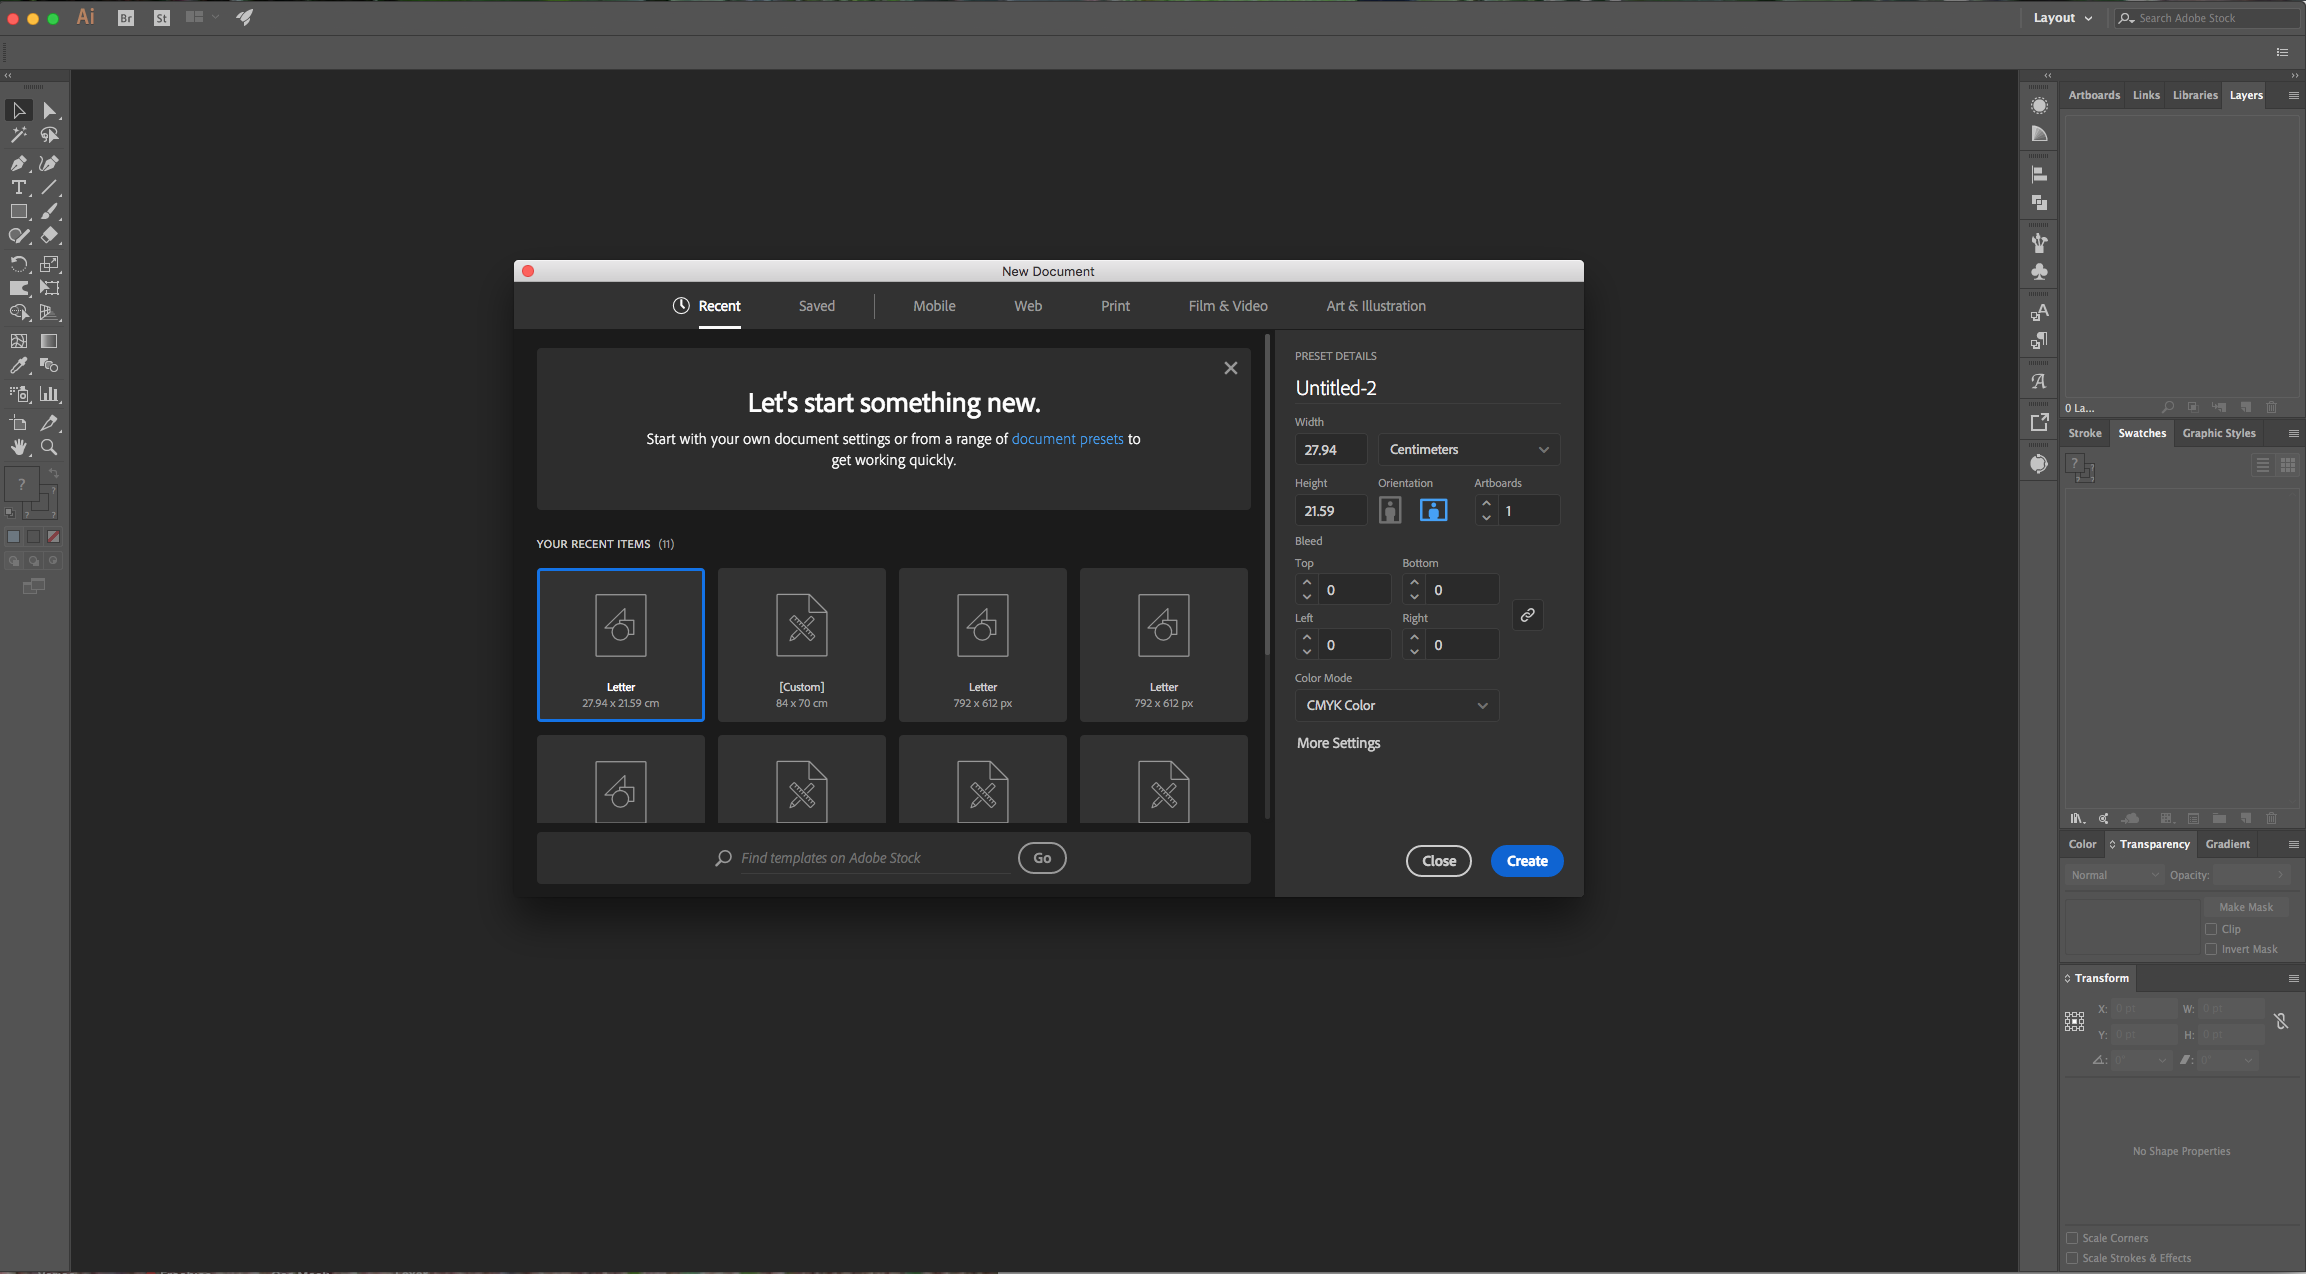
1 - In Illustrator, create a “New Document”.
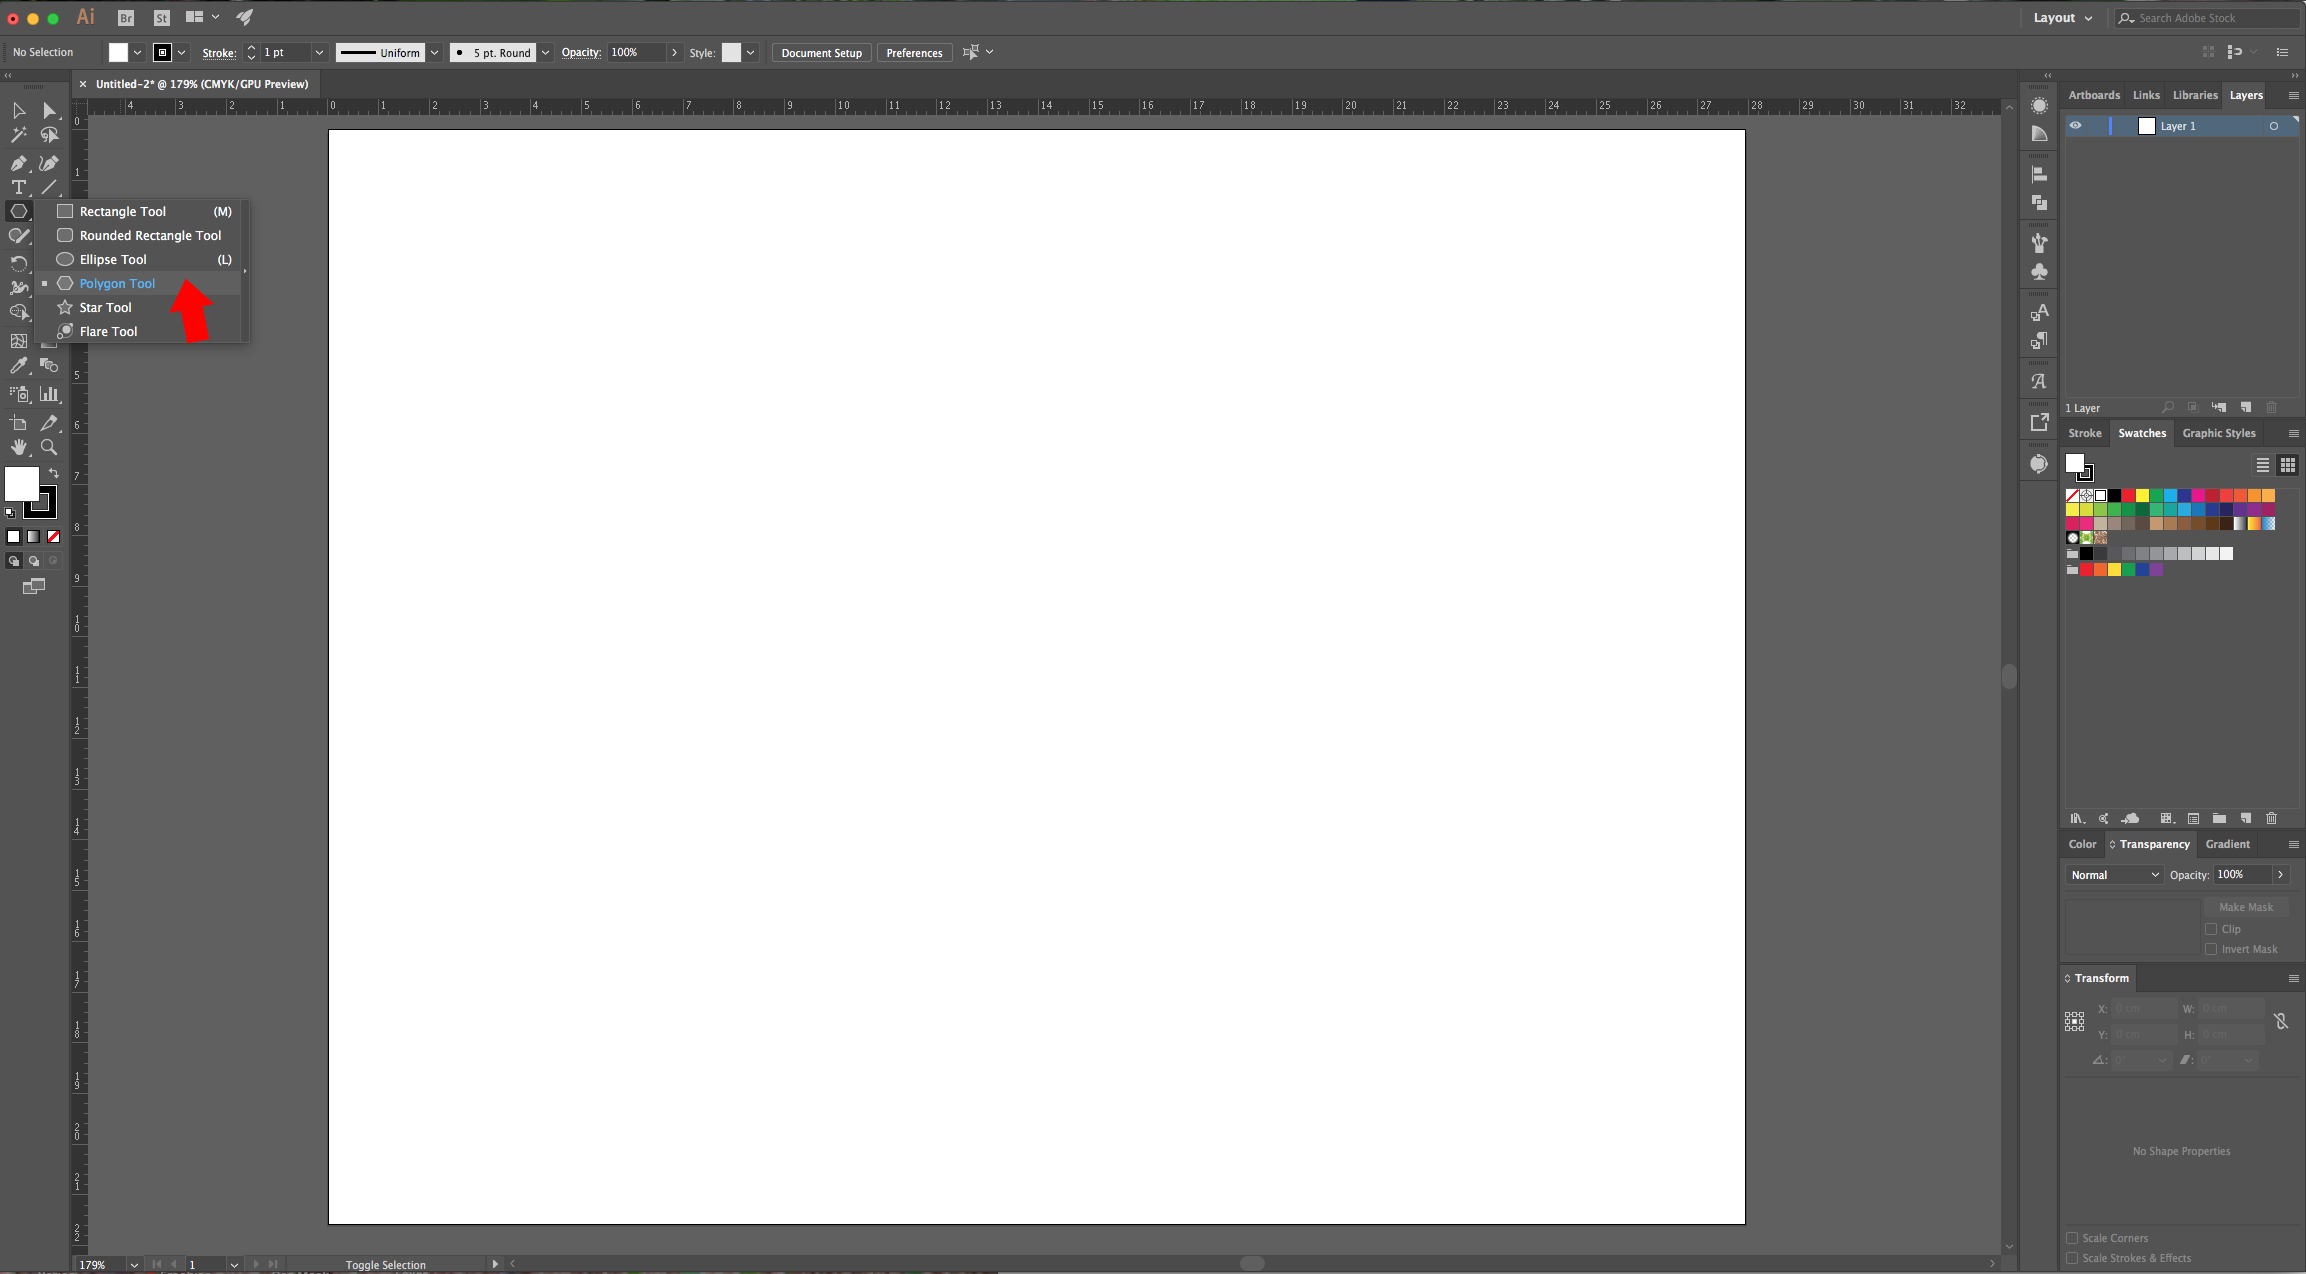
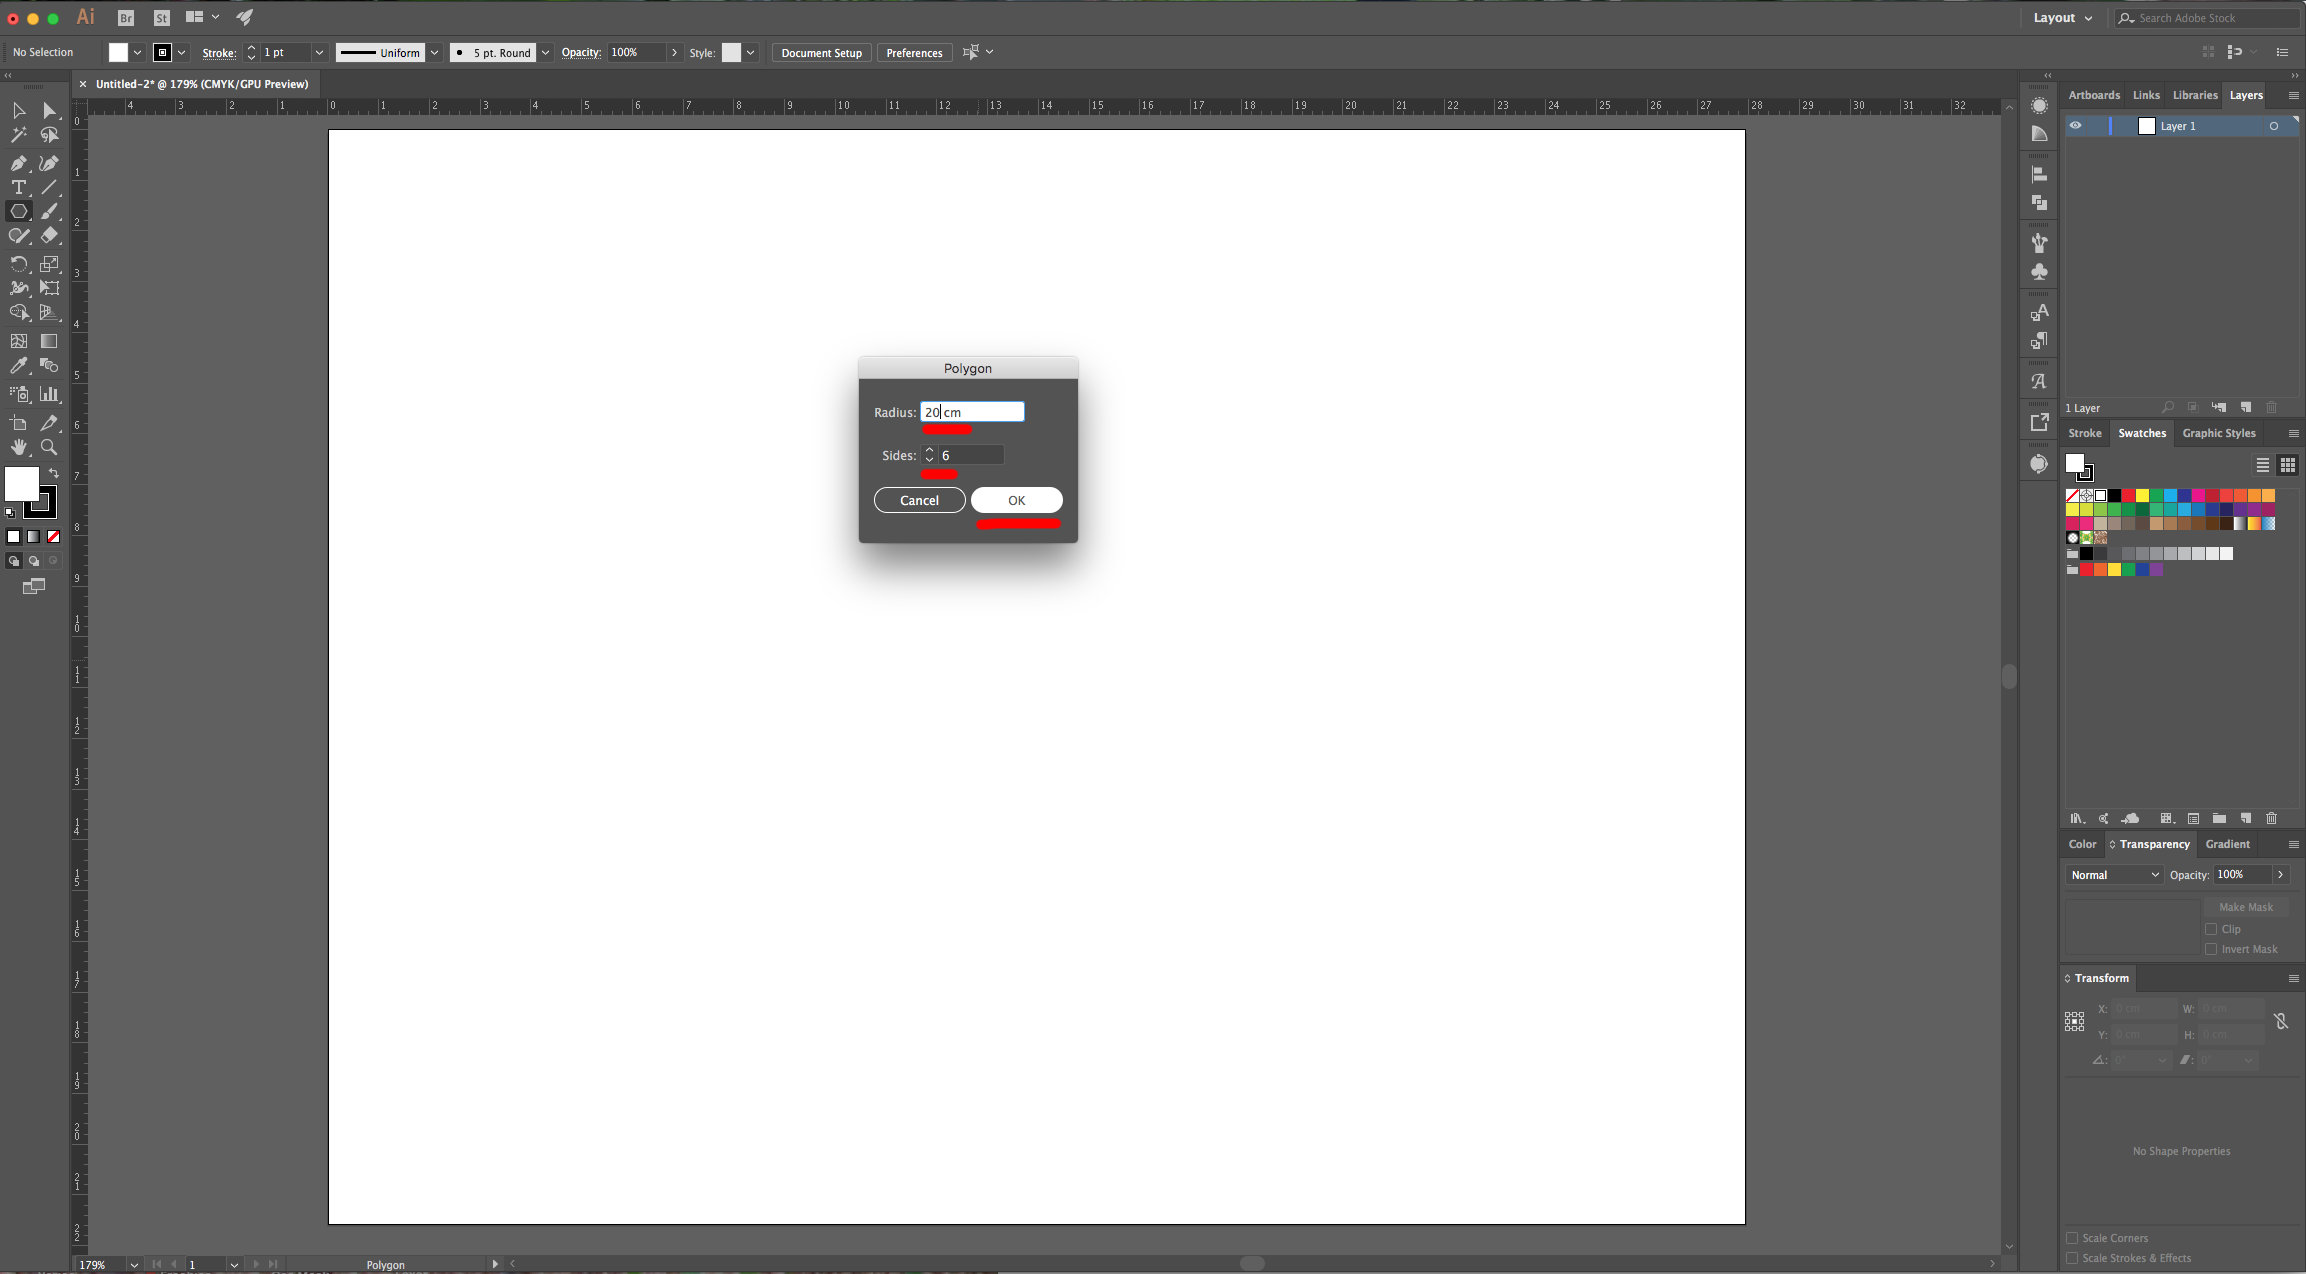
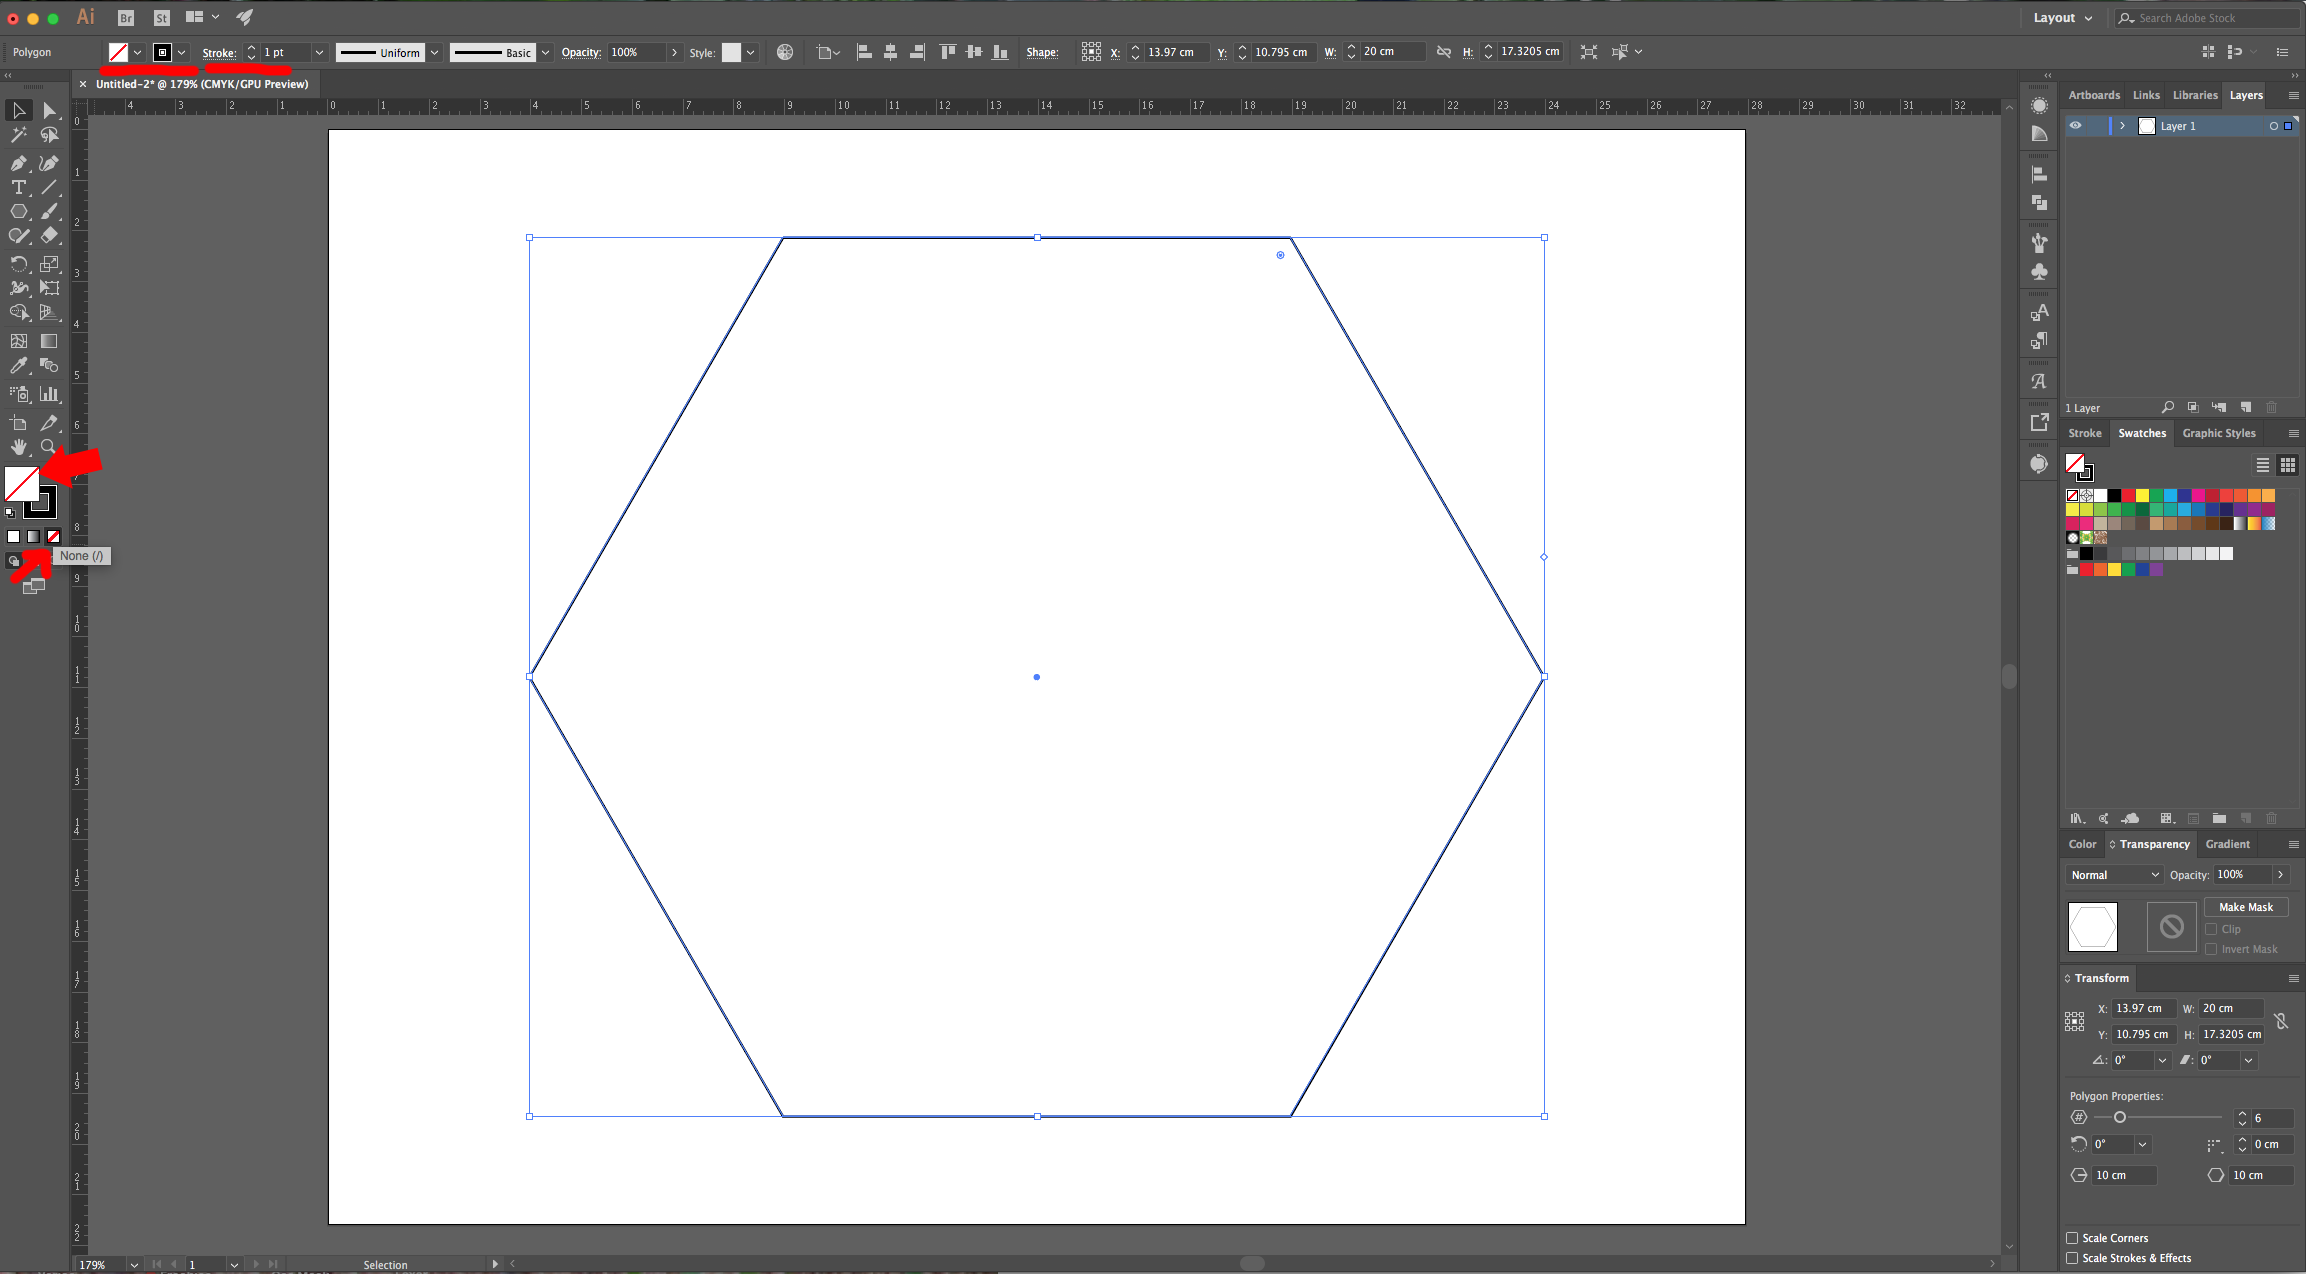
2 - Select the “Polygon Tool” and click inside of your “Canvas”. Use a “Radius” of 20 cm and 6 “Sides” and click “OK”.
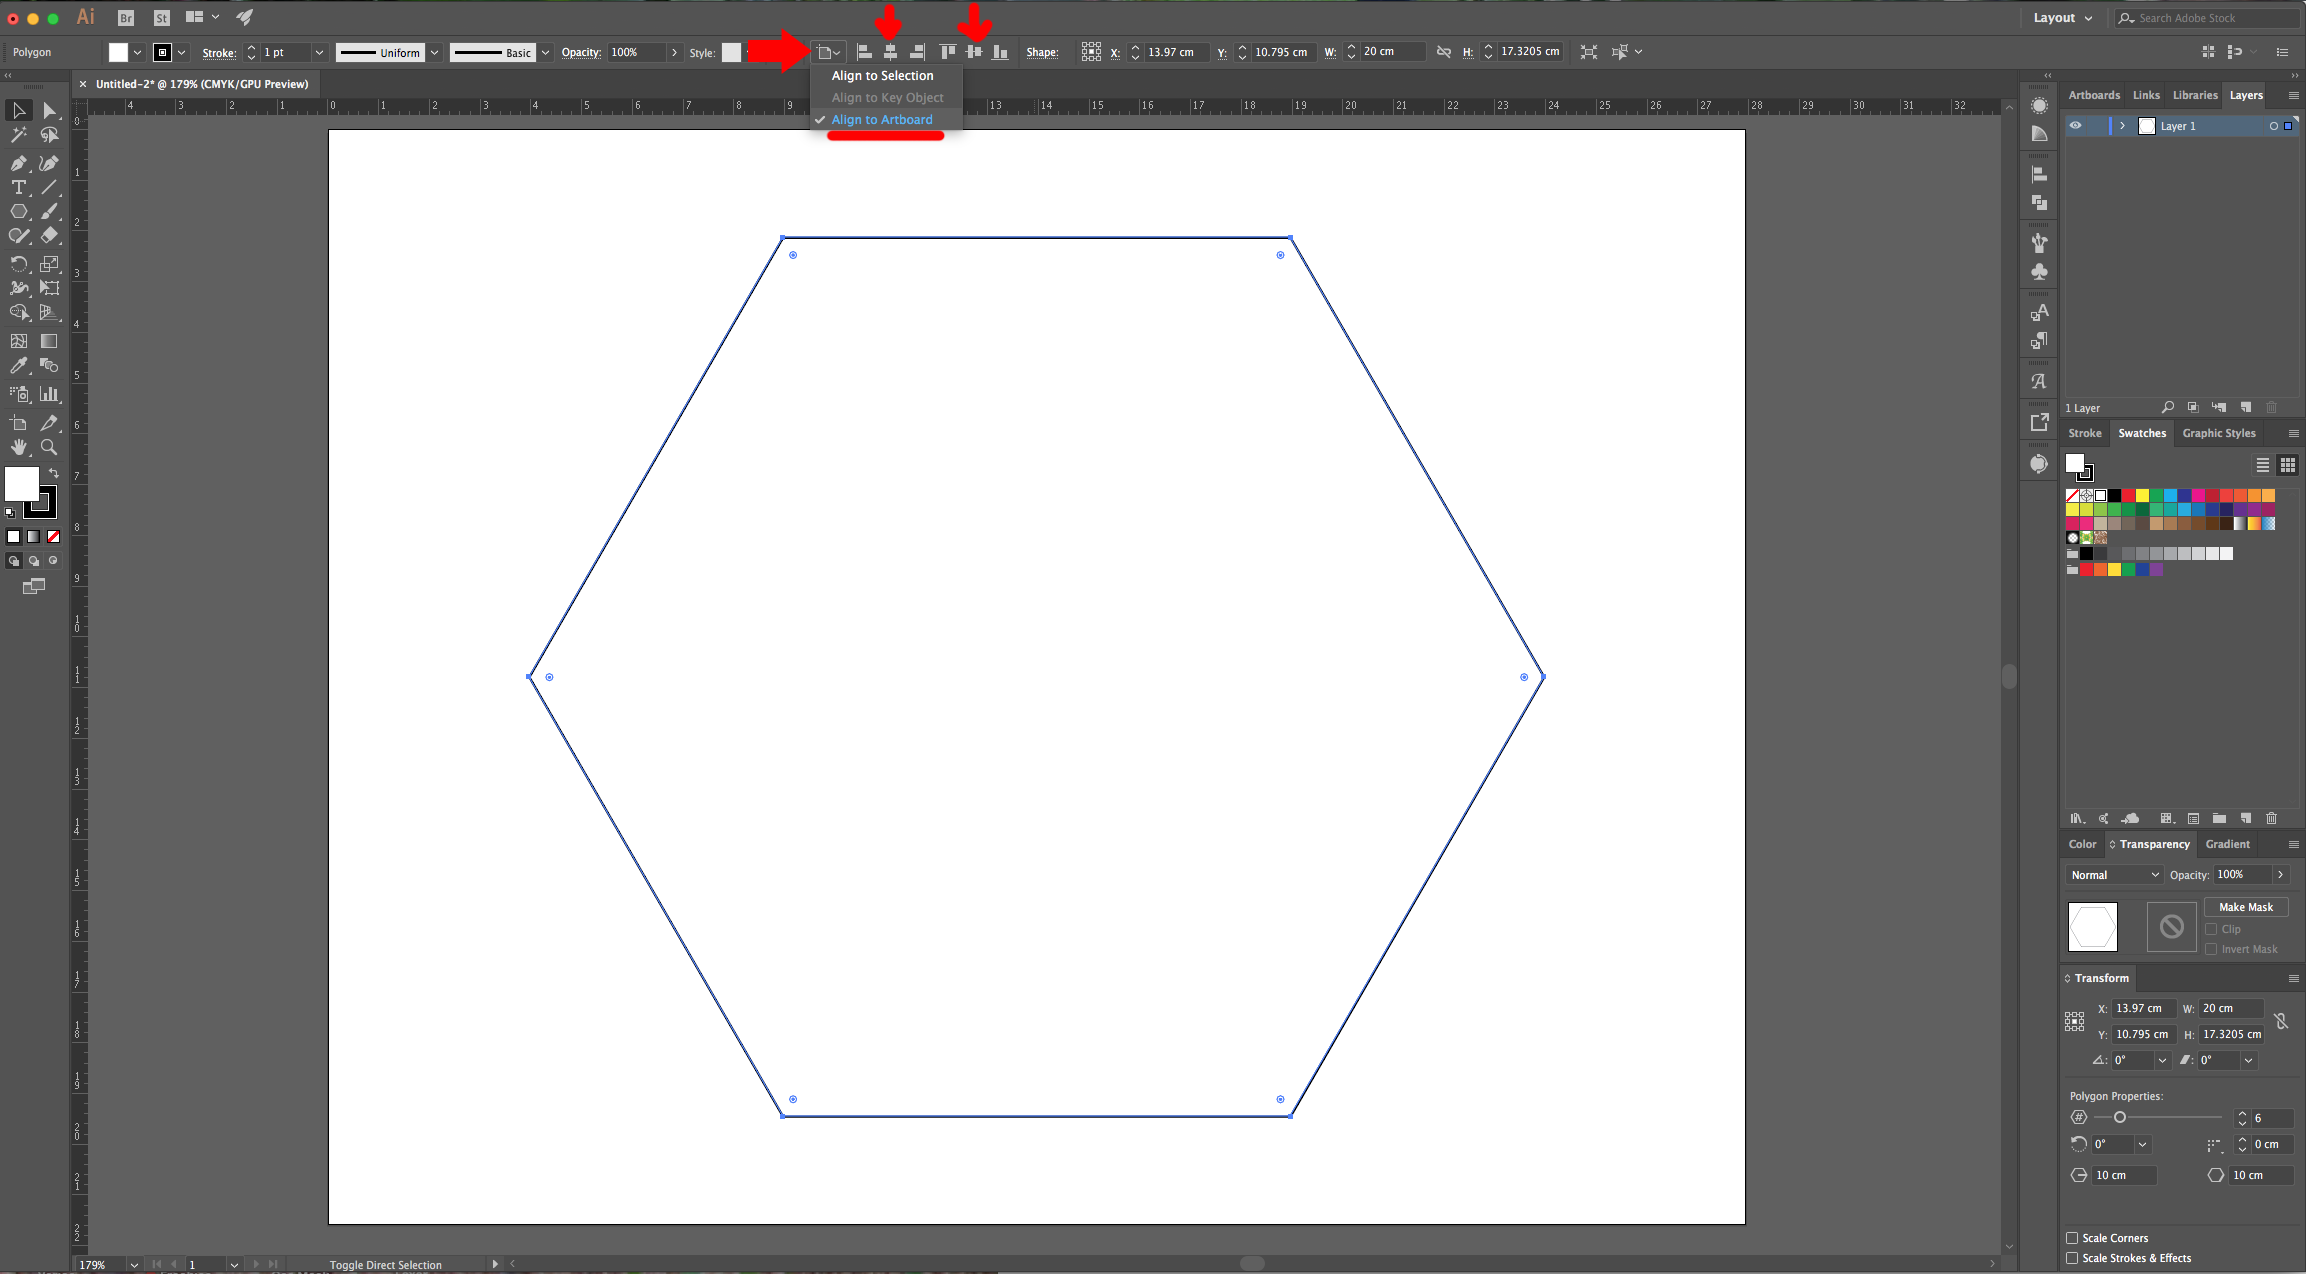
3 - Center it to using the “Horizontal and Vertical Align Center” options on your Top Menu and make sure that “Align to Artboard” is selected. Or use the same options in the “Align Panel”.
4 - Make sure that the “Fill” is “None” and that the “Stoke” is Black and has 1 pt.
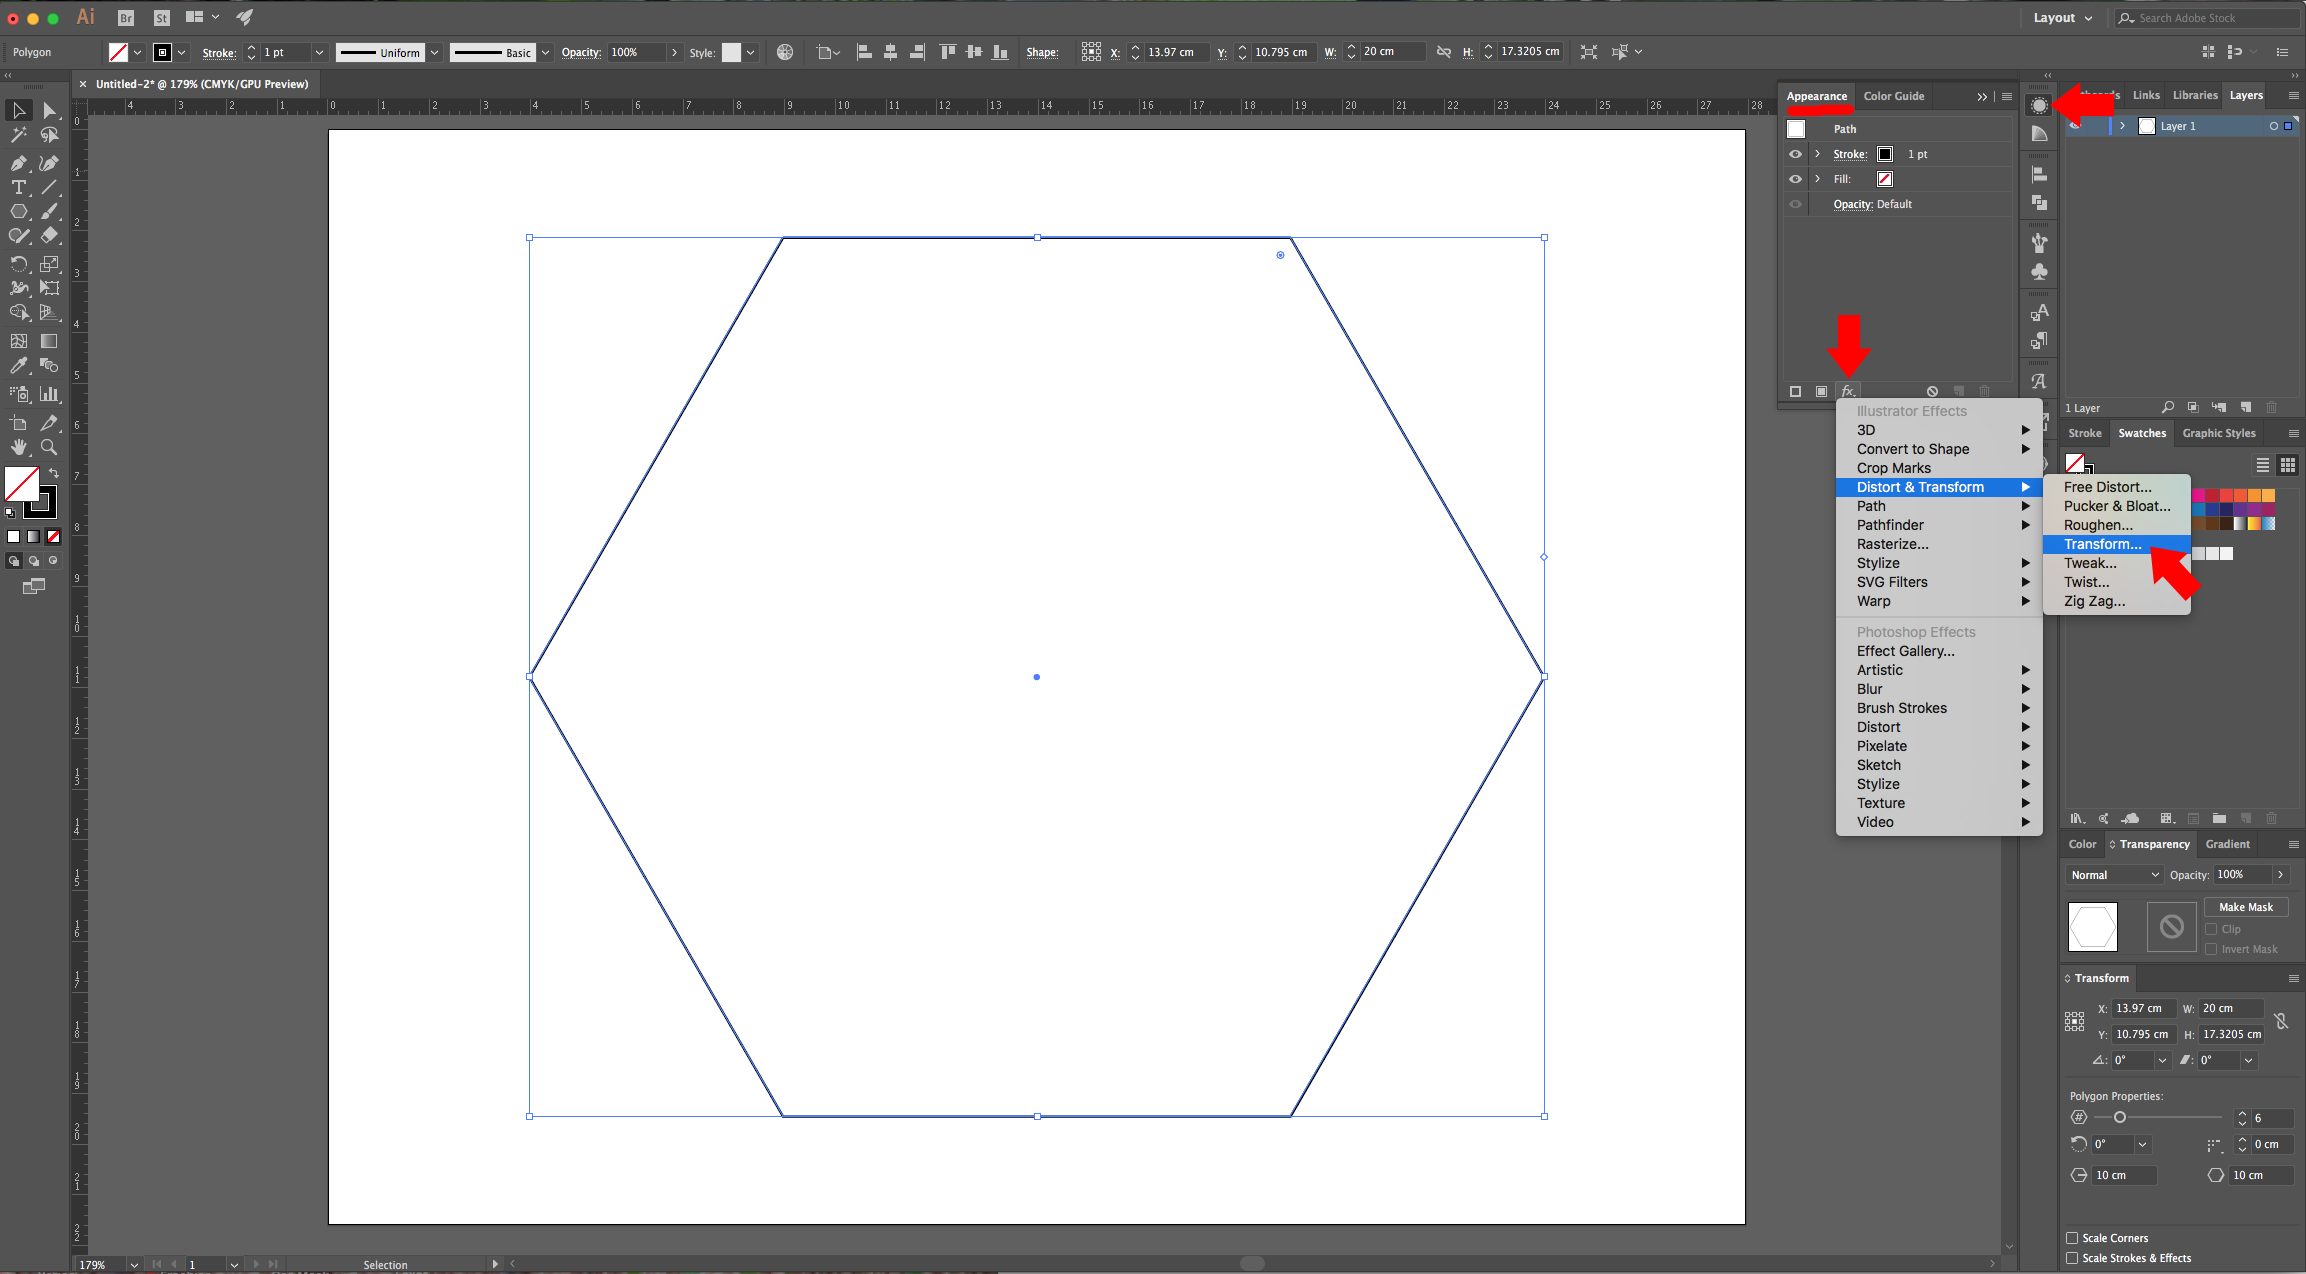
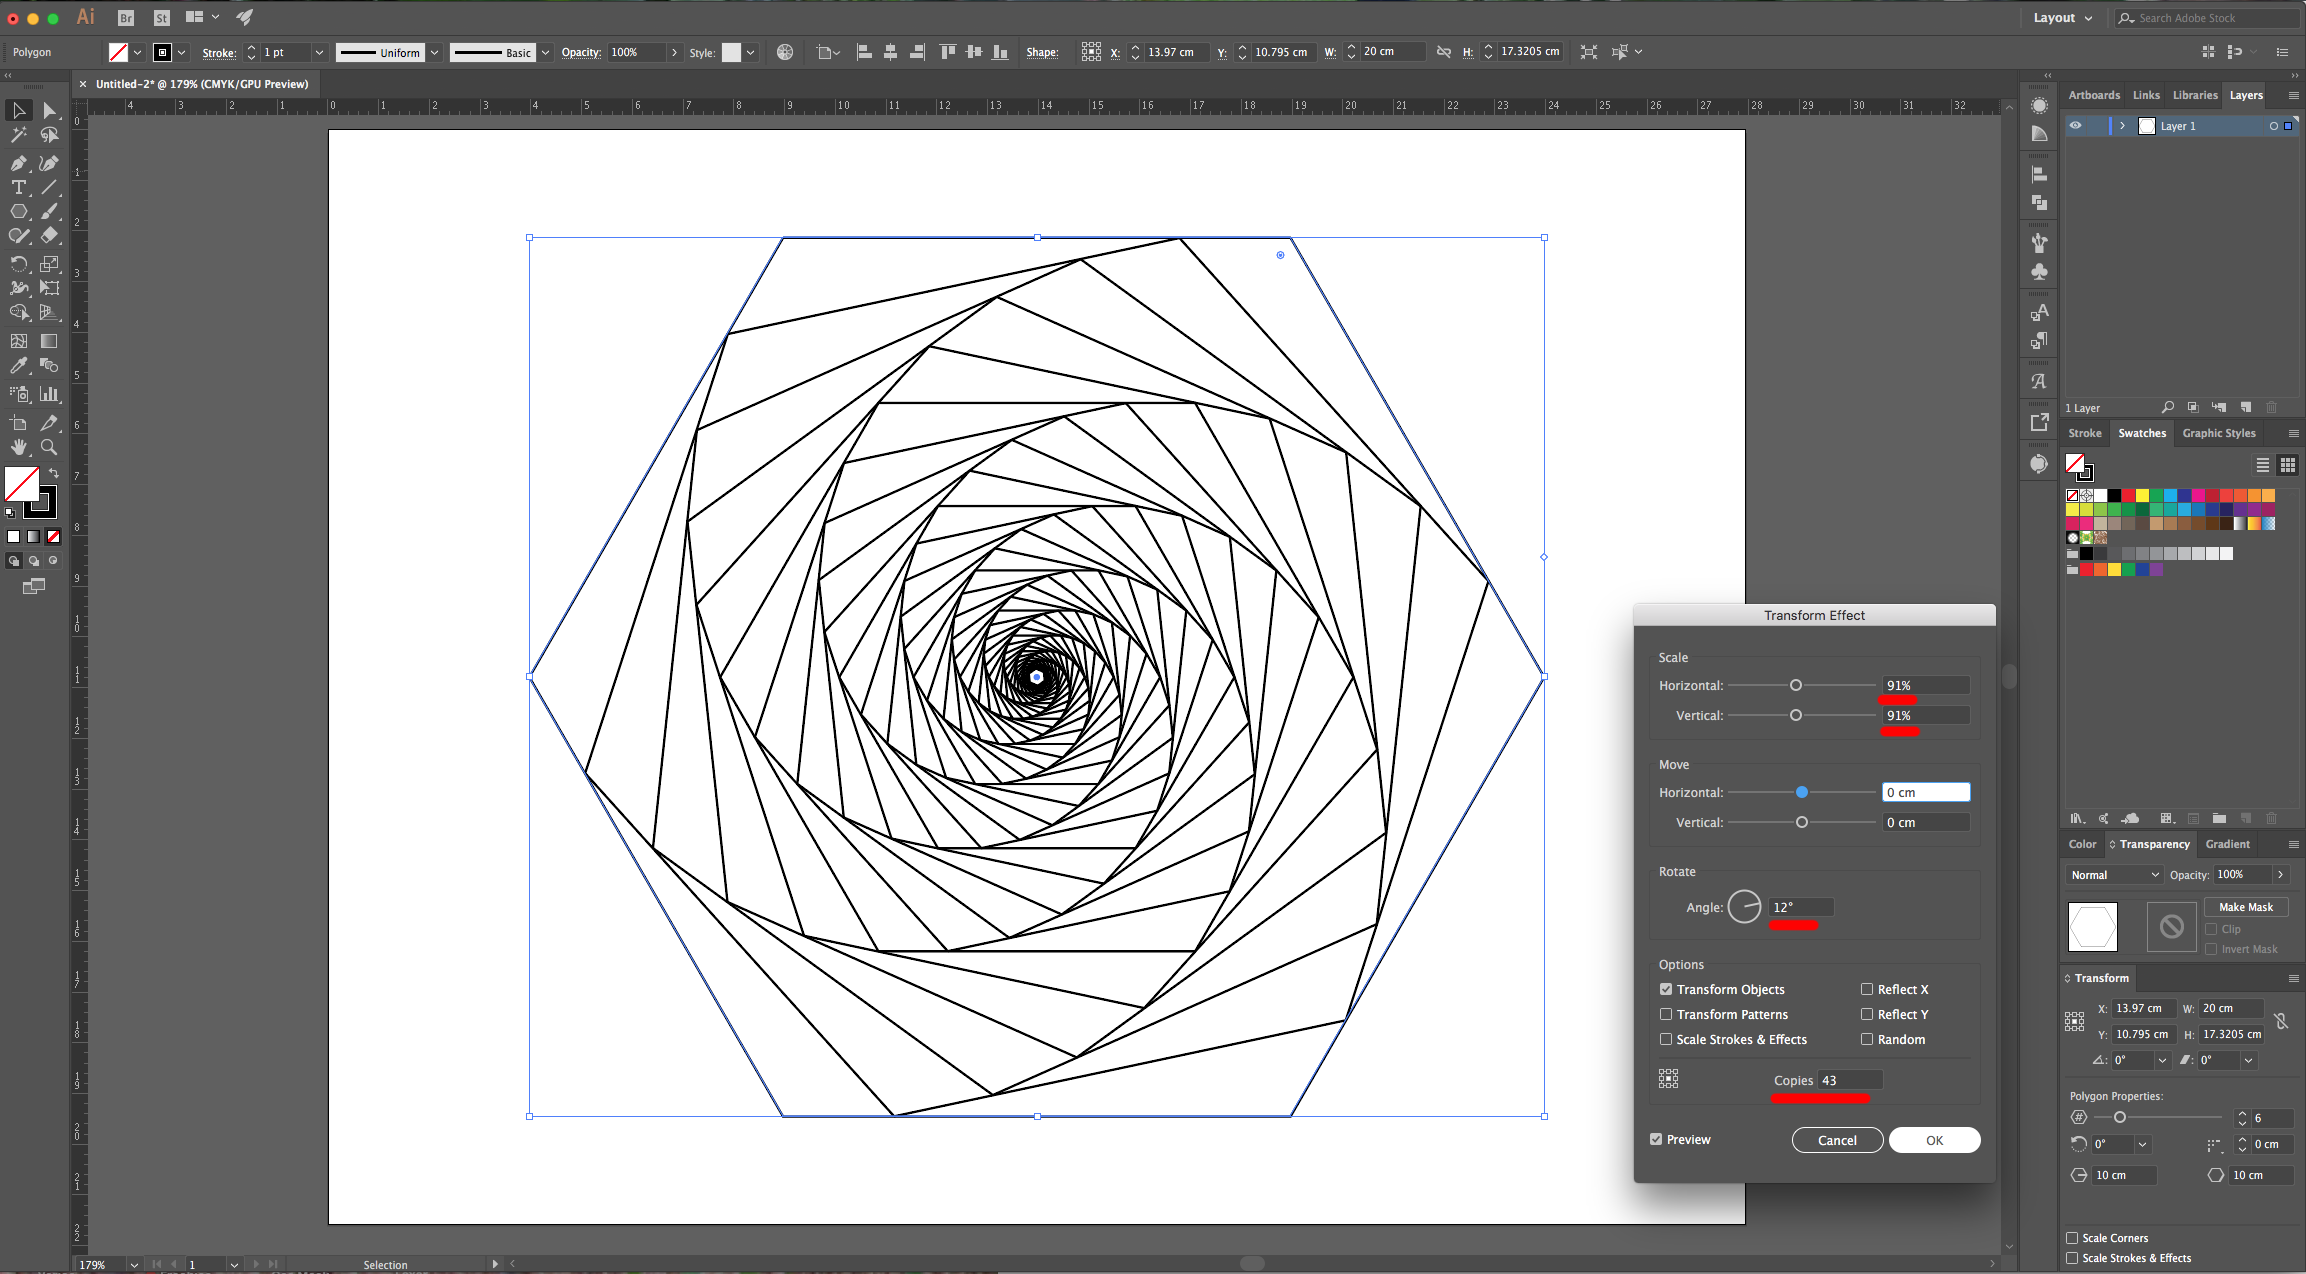
5 - Select your Shape, go to the “Appearance Panel” and click on the “Effects Menu” at the bottom-left. Go to Distort & Transform > Transform… use 91% as “Horizontal” and “Vertical” Scale value, a “Rotate” Angle of 12° and input the number 45 in the “Copies” section. Click “OK”.
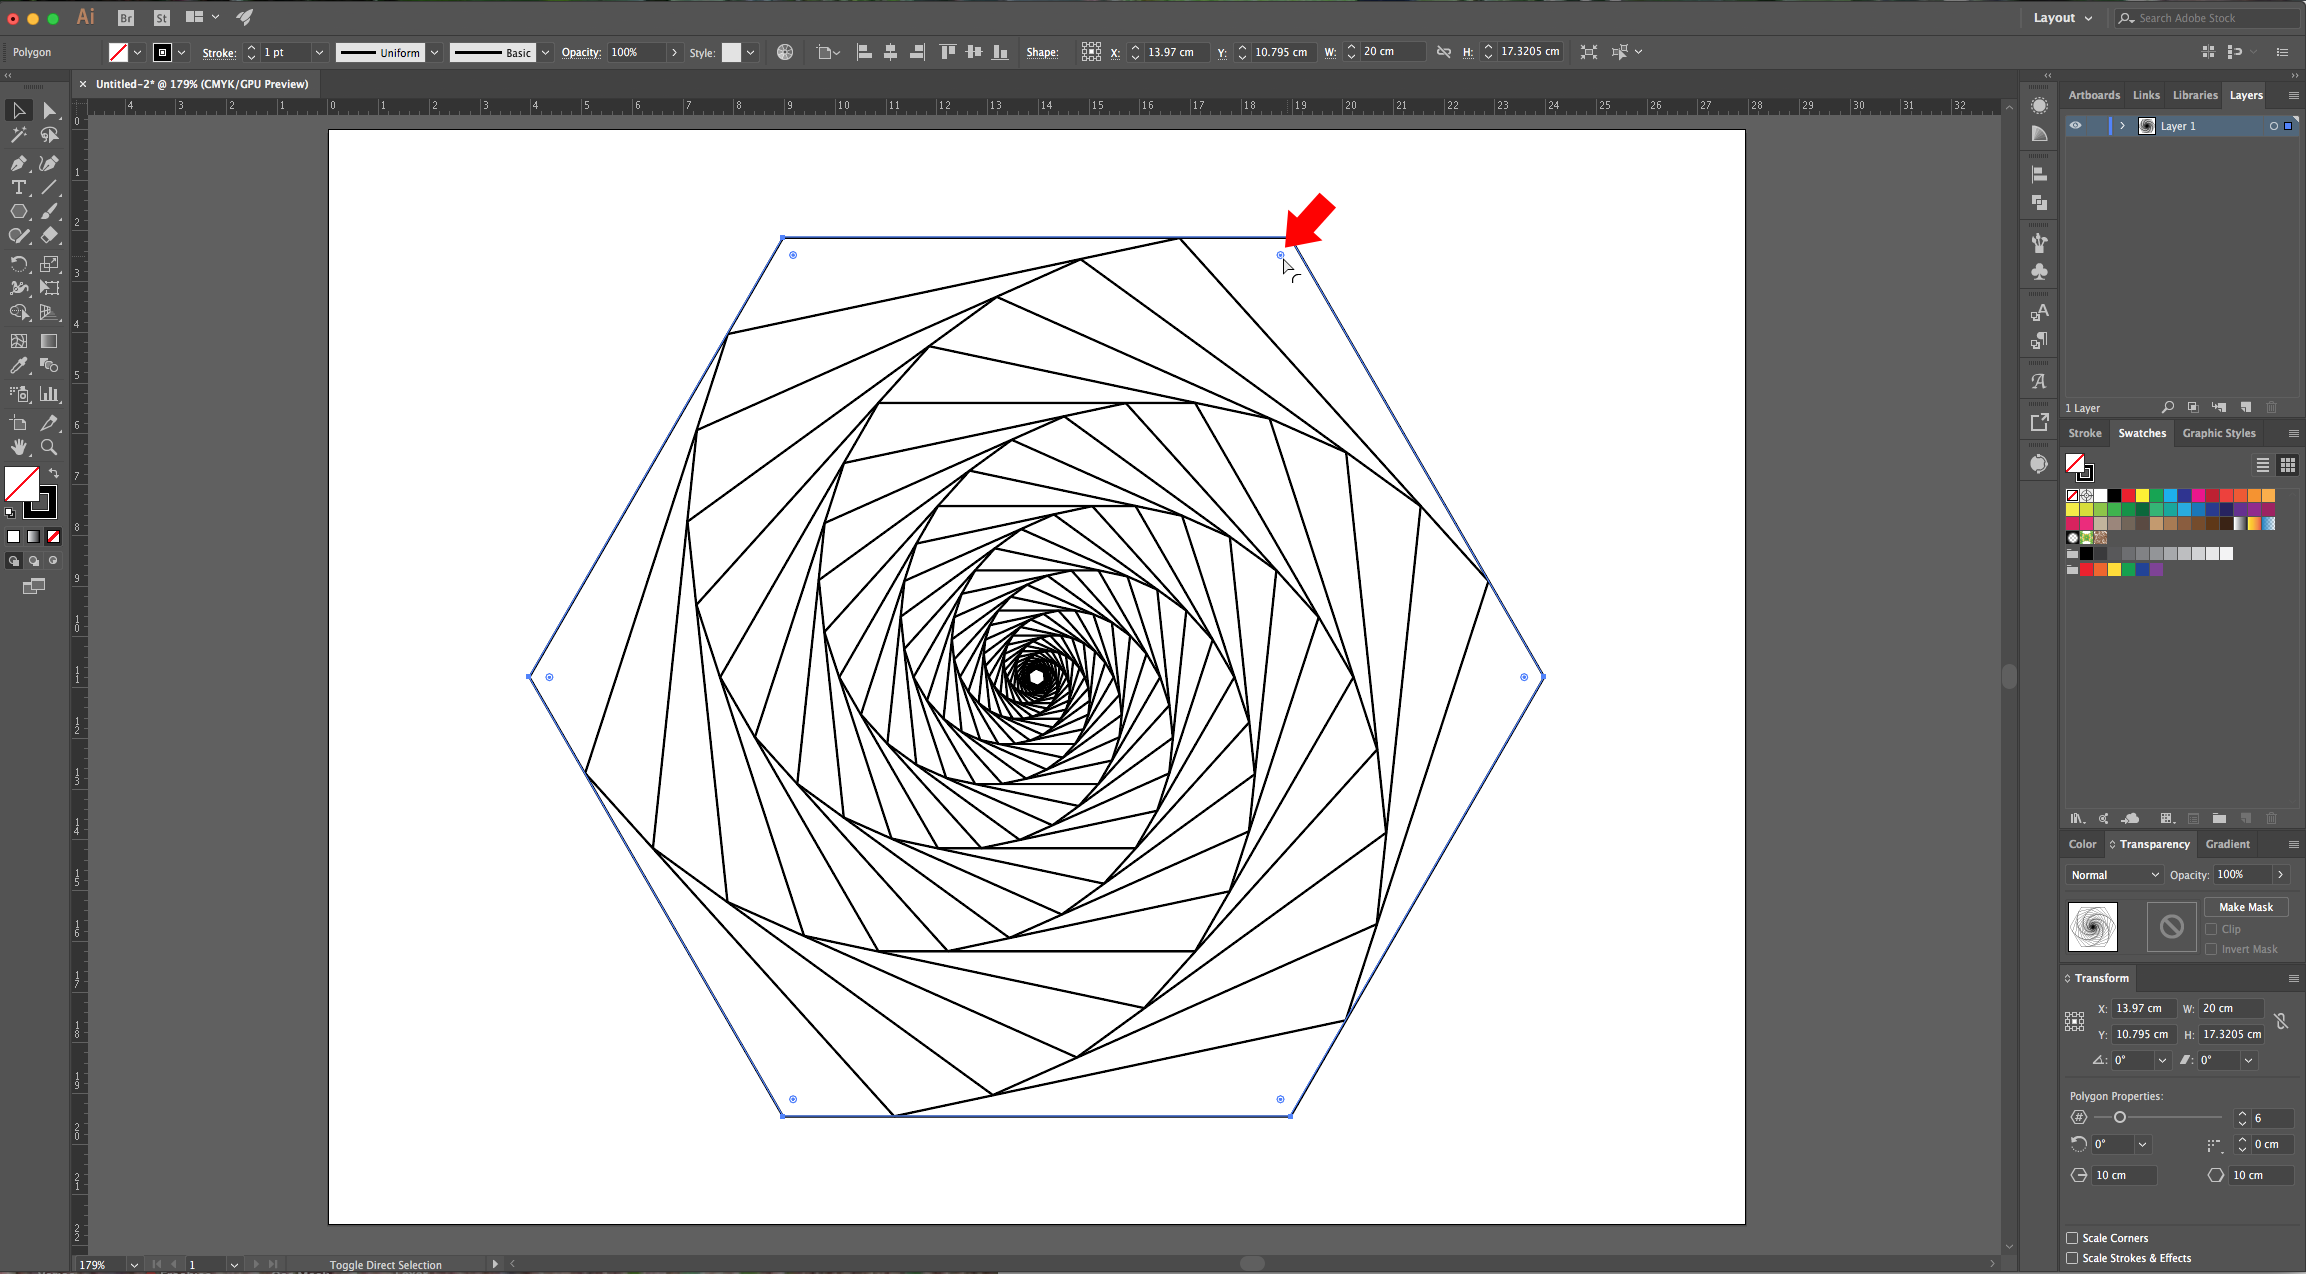
6 - You will see a small circle in every corner. If you want to round them, click and drag down until you are satisfied.

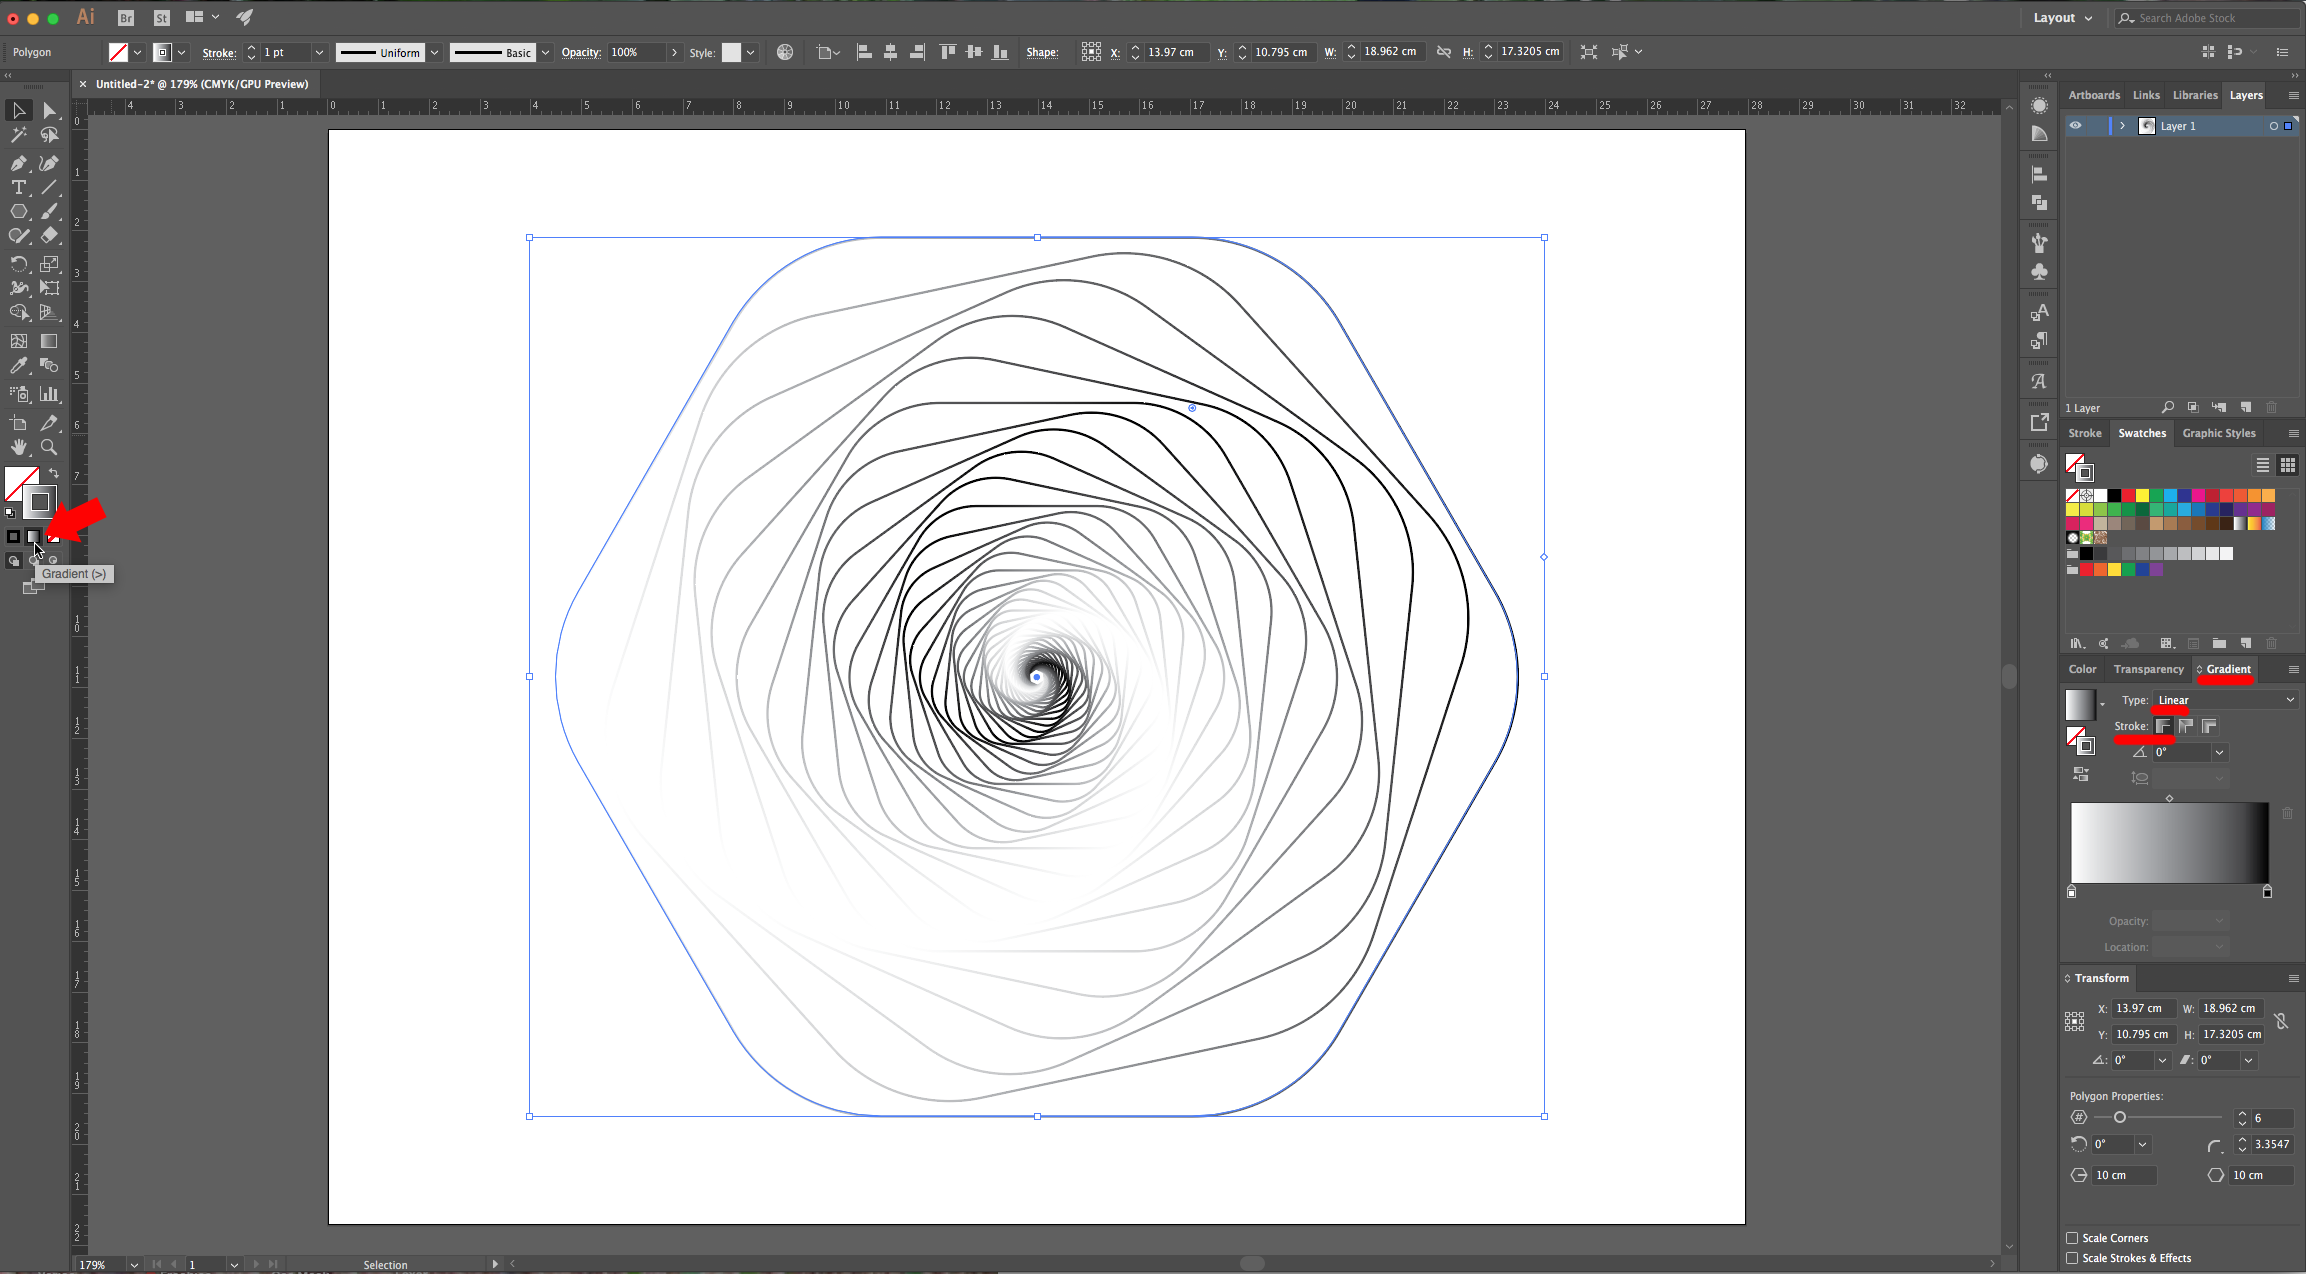
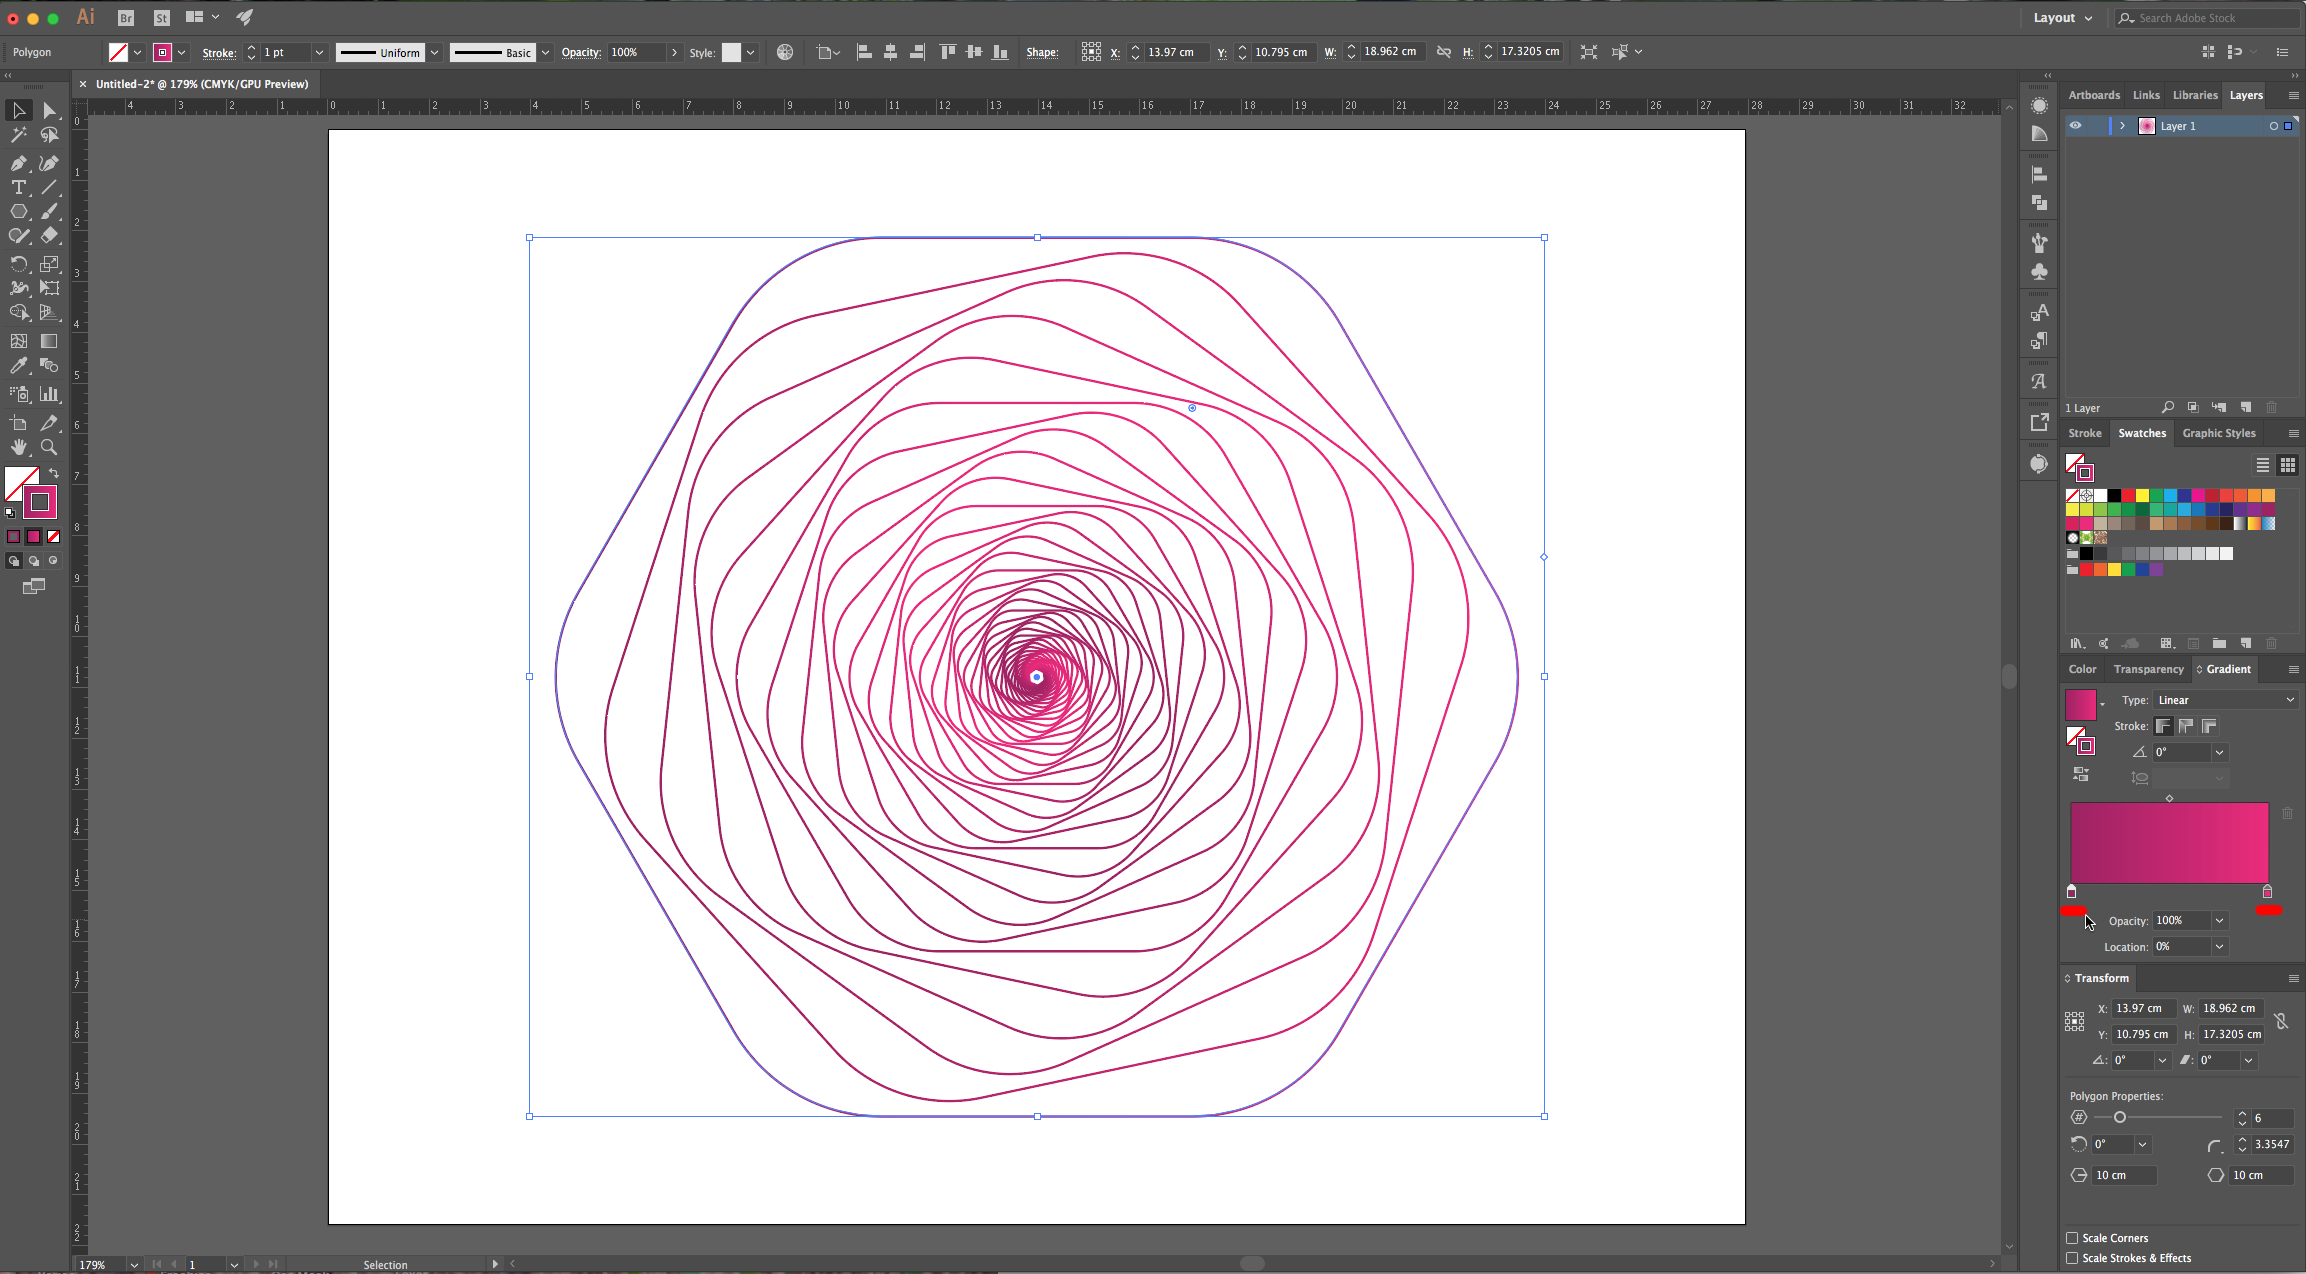
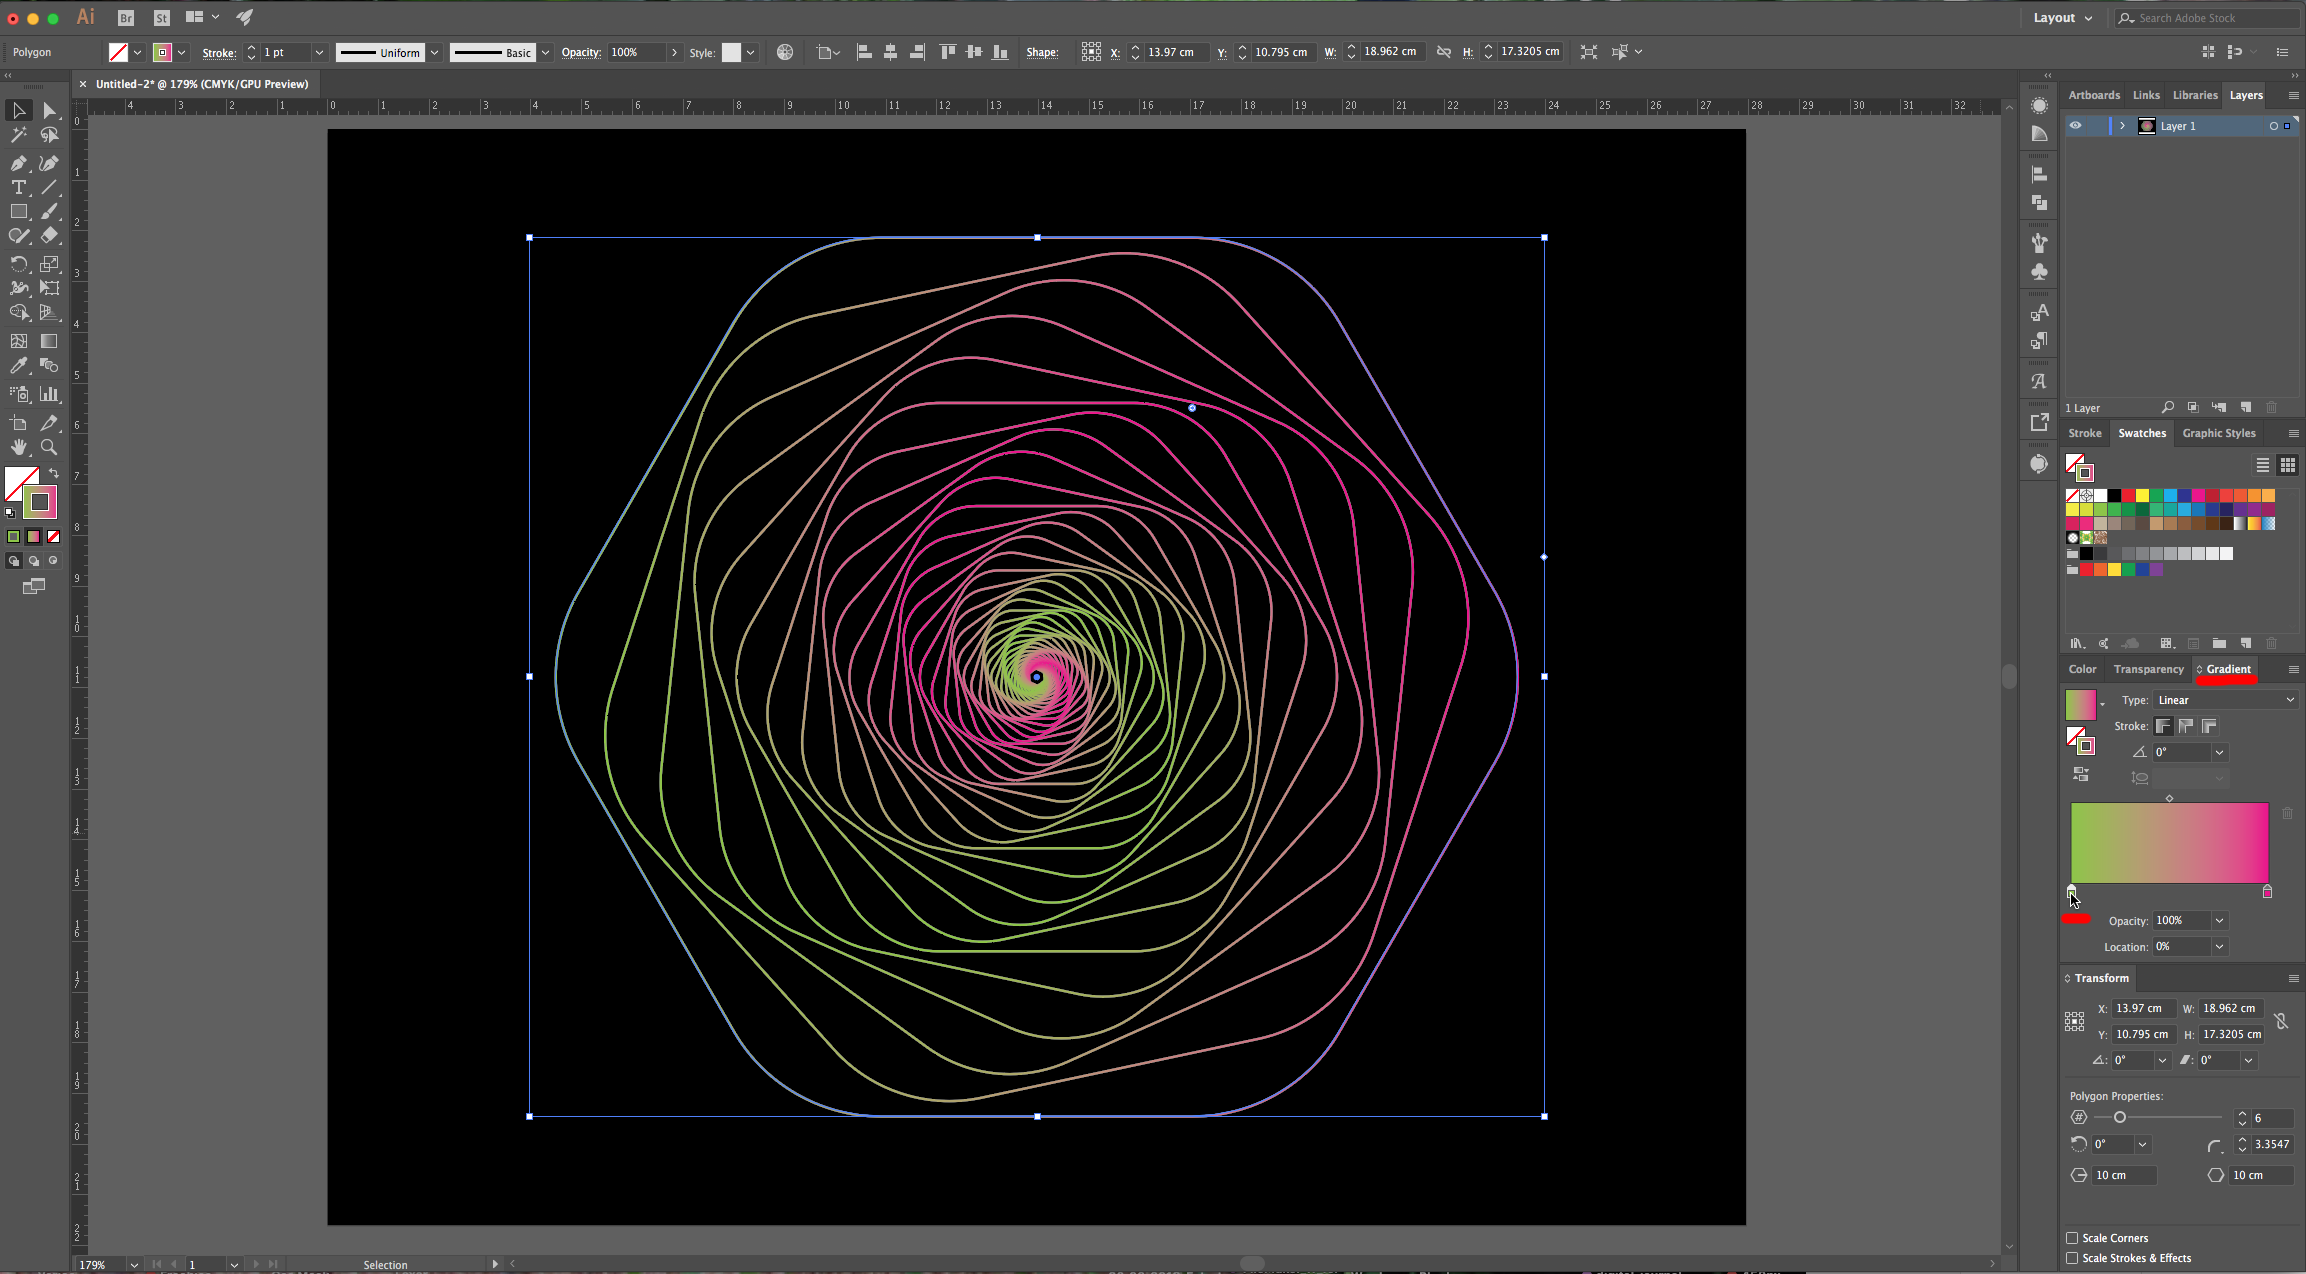
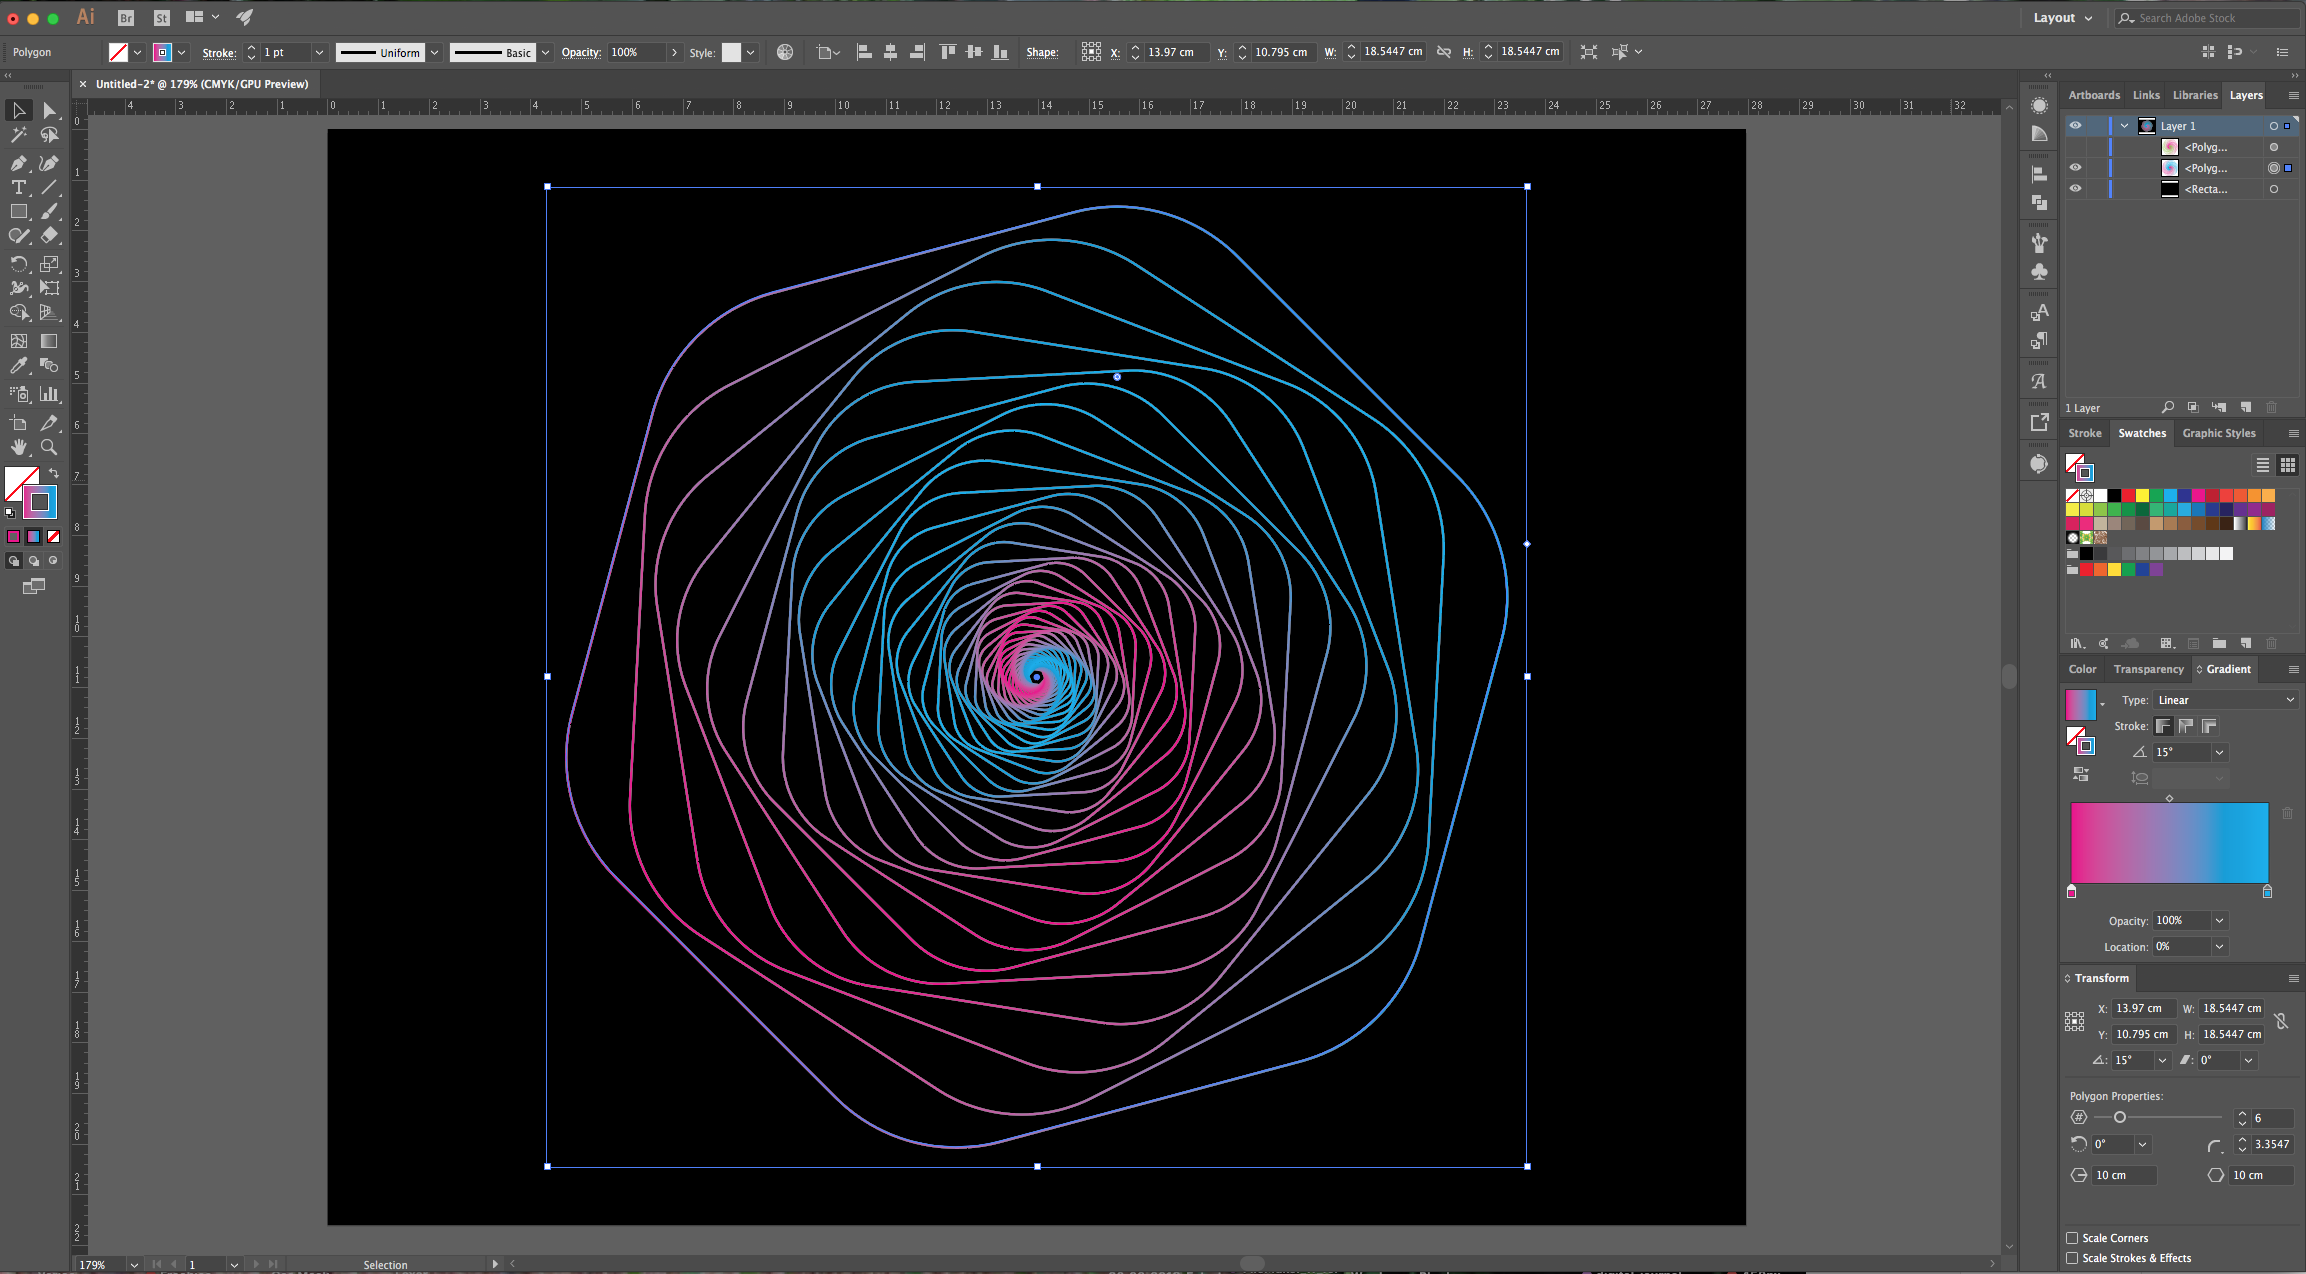
7 - Head to the “Toolbar” and choose “Gradient” as “Fill” method for your “Stroke” (the small square in the center just under the “Fill” and “Stroke” selectors). You can also choose it from the “Gradient Panel”, then, change the colors by double-clicking on the small squares and choose some contrasting colors from your “Swatches”.
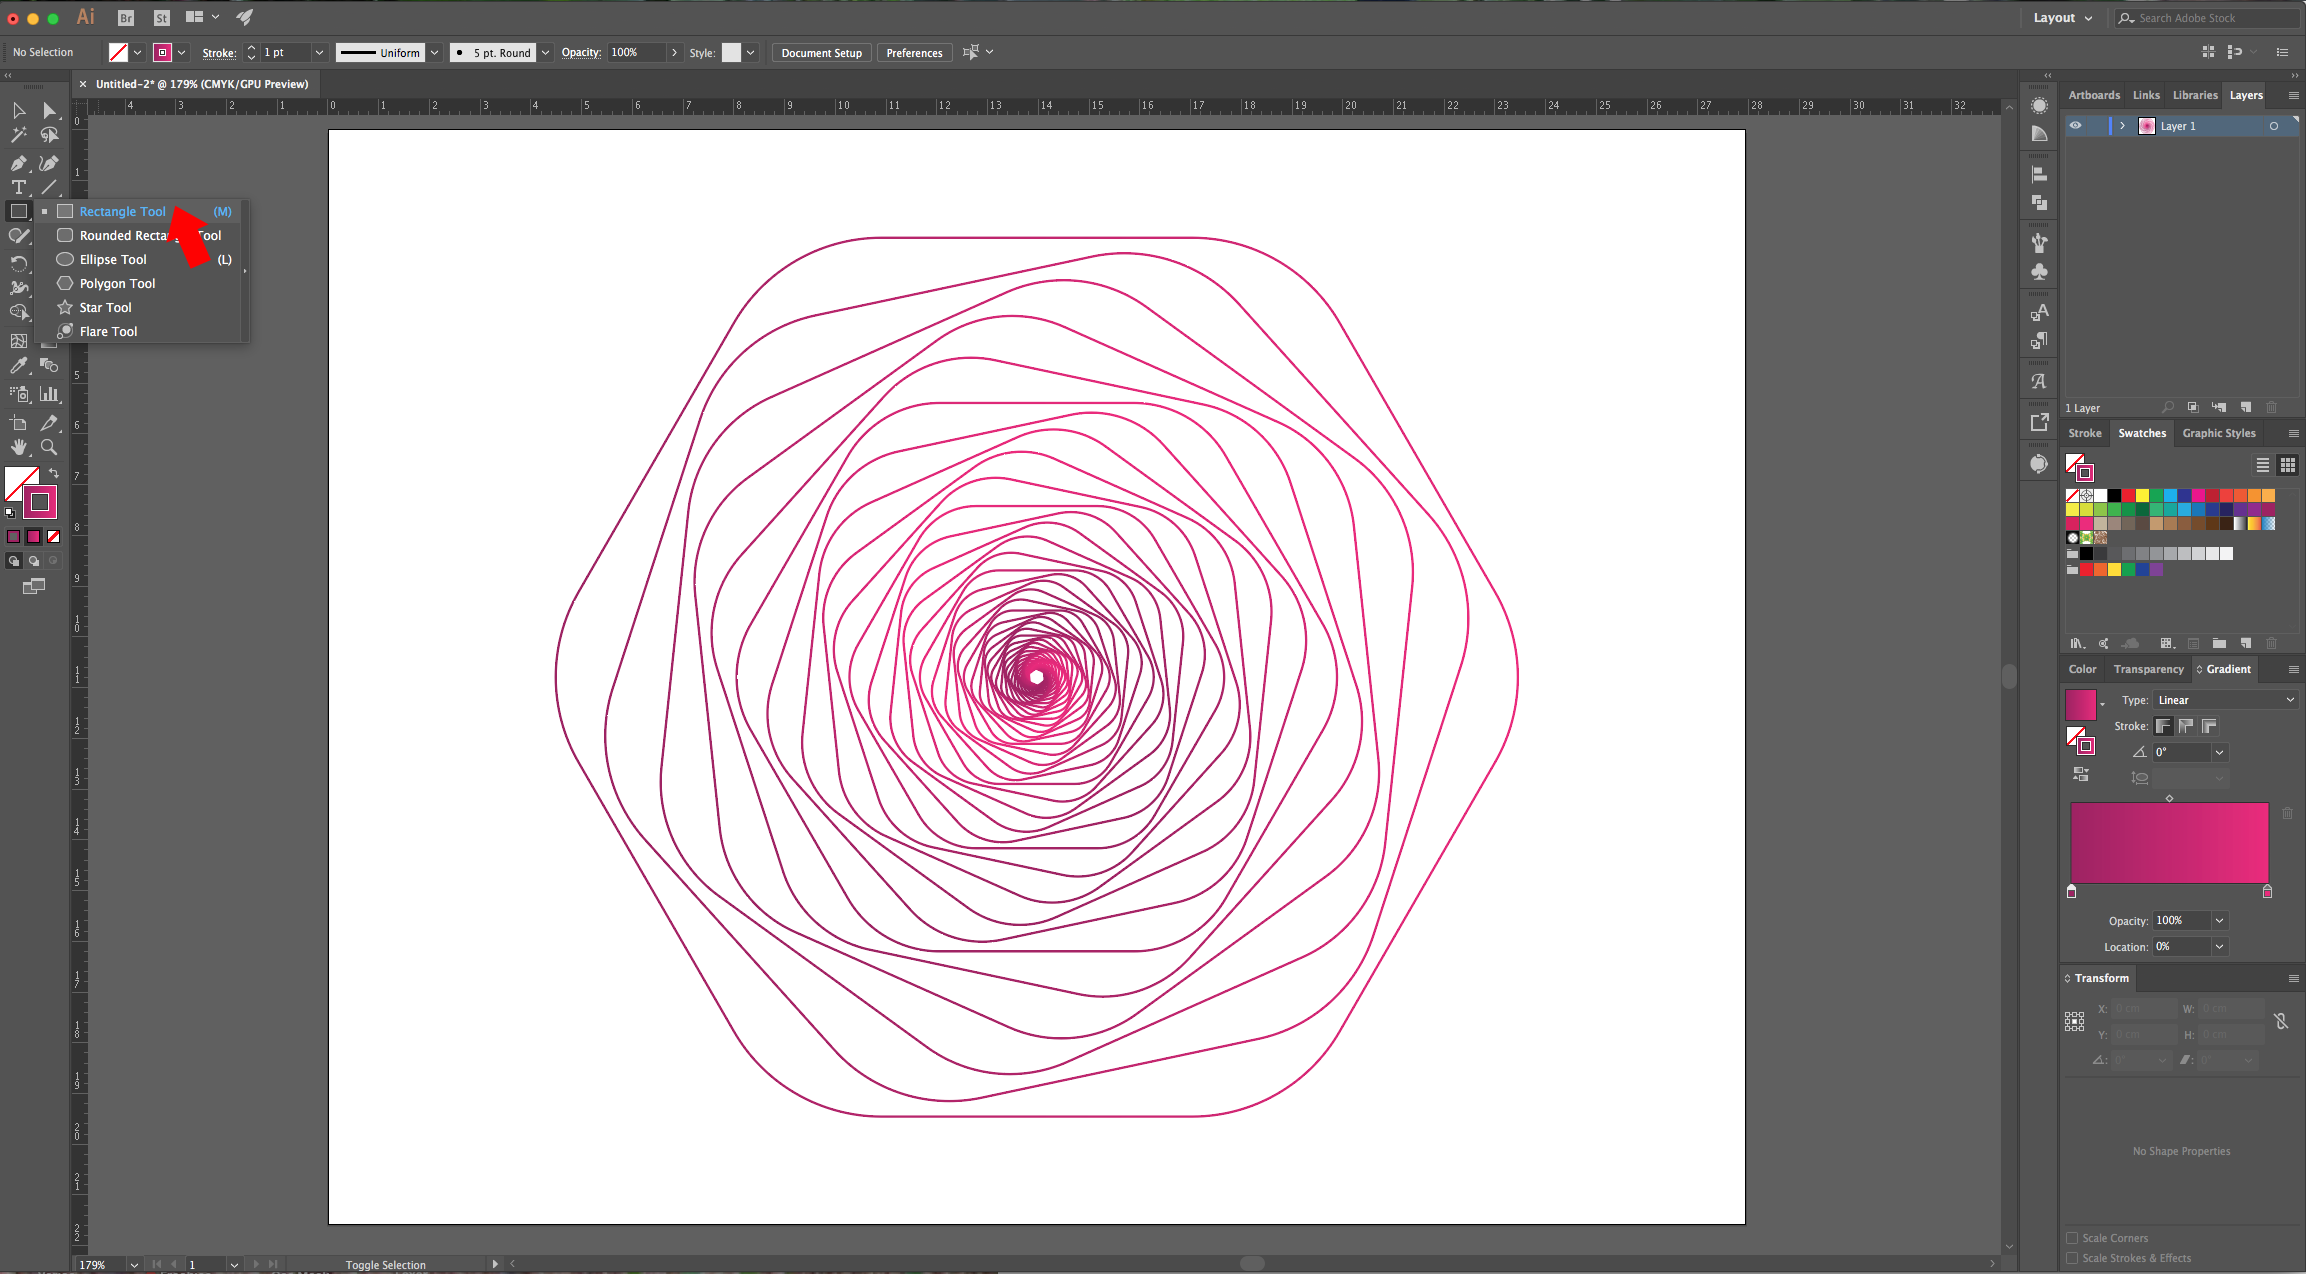
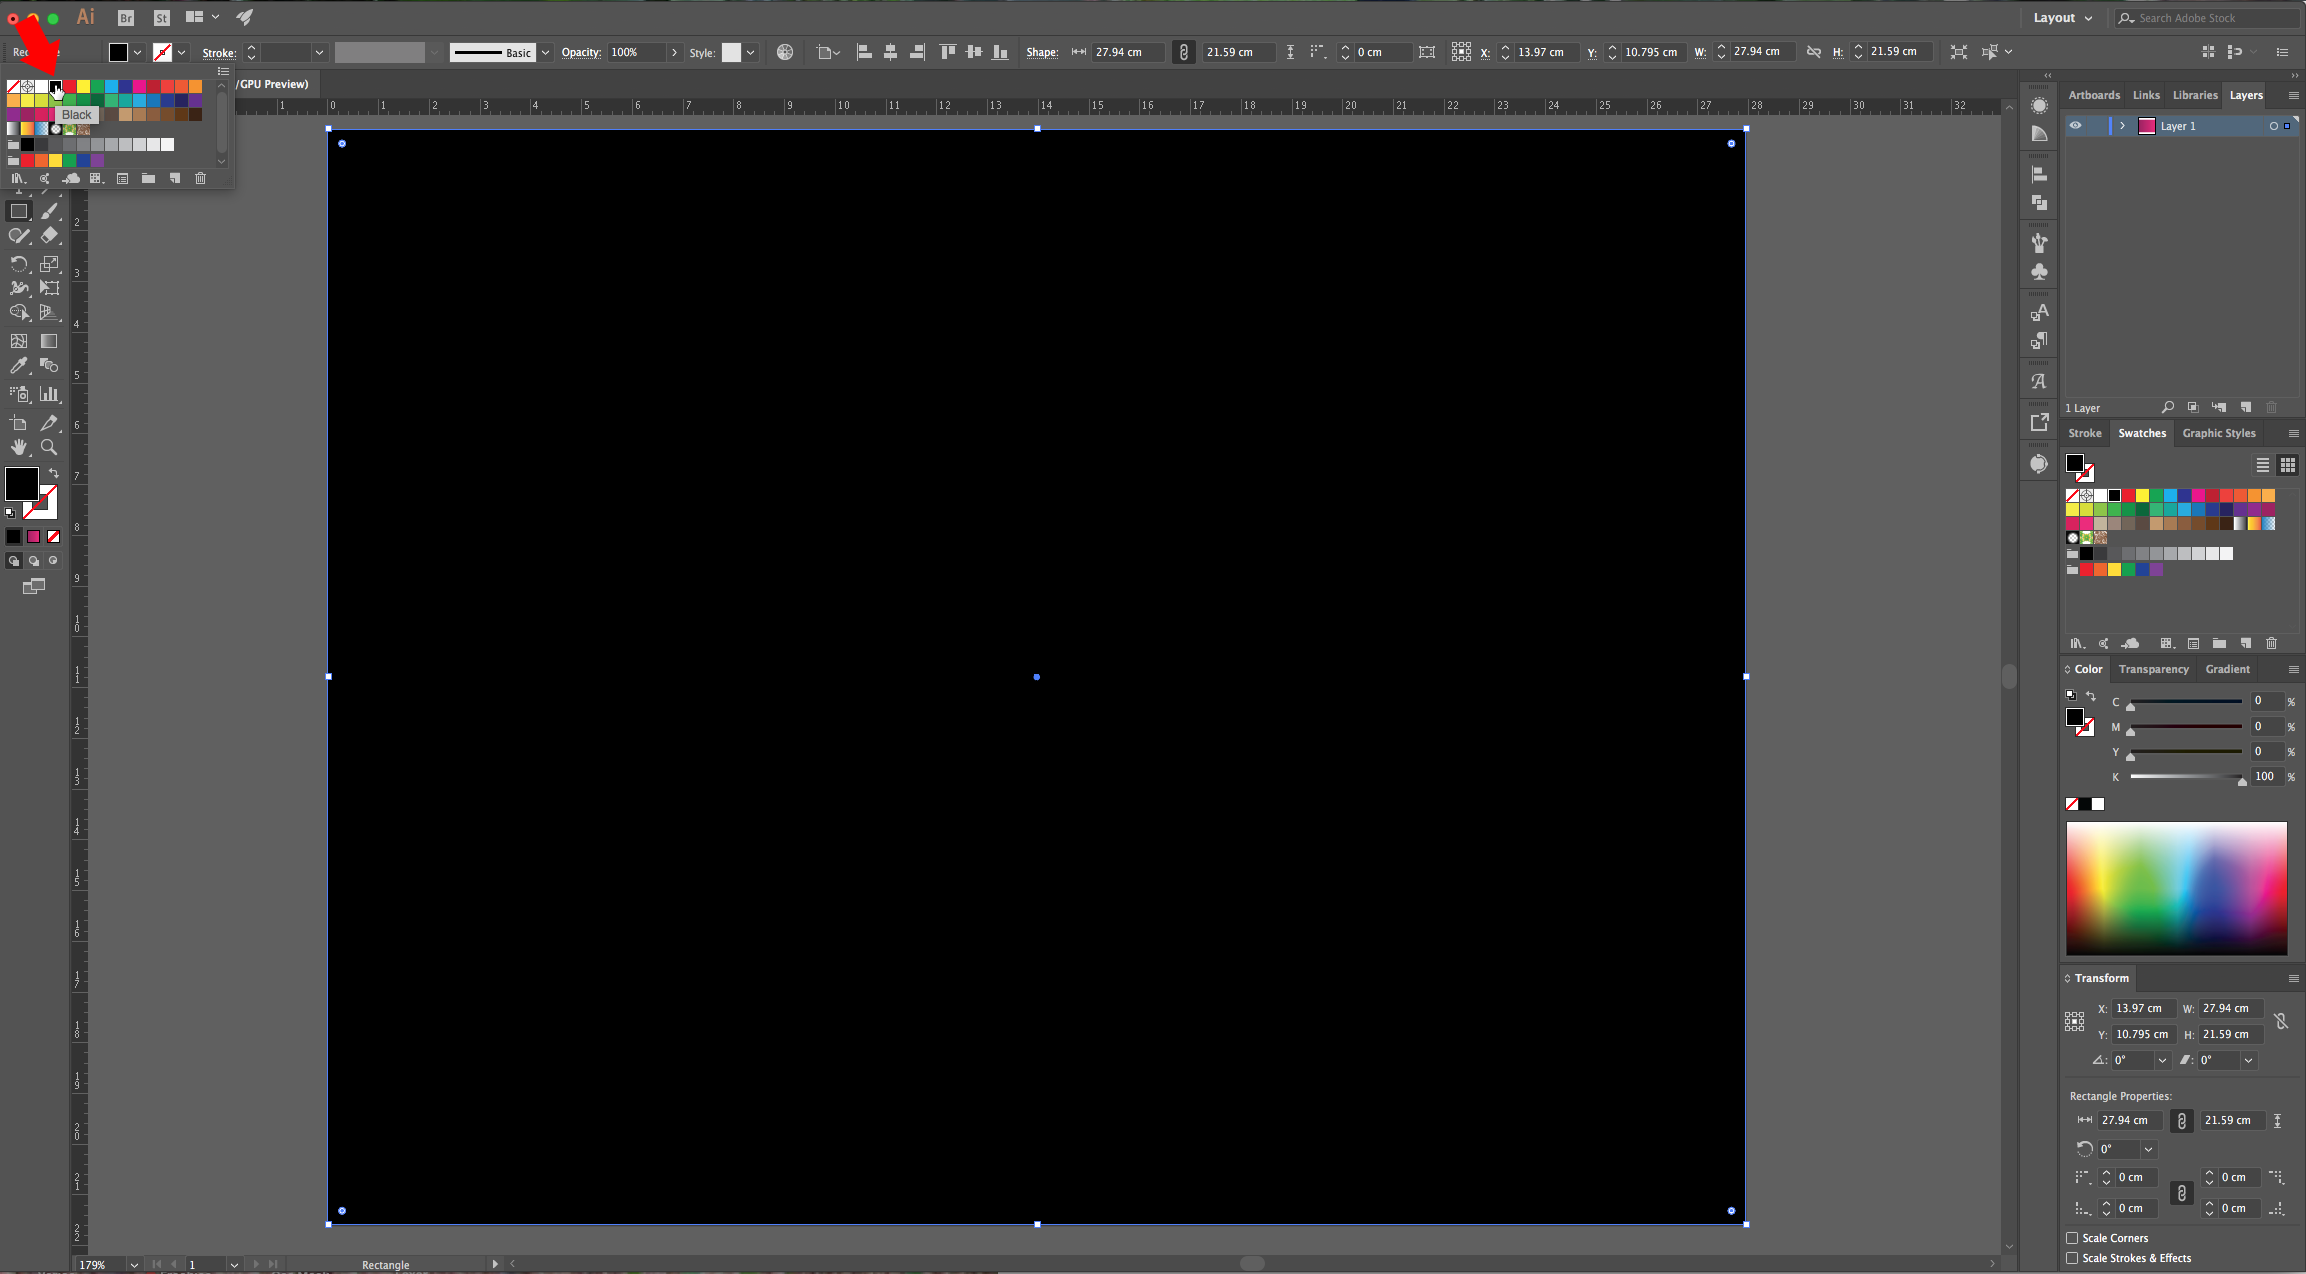
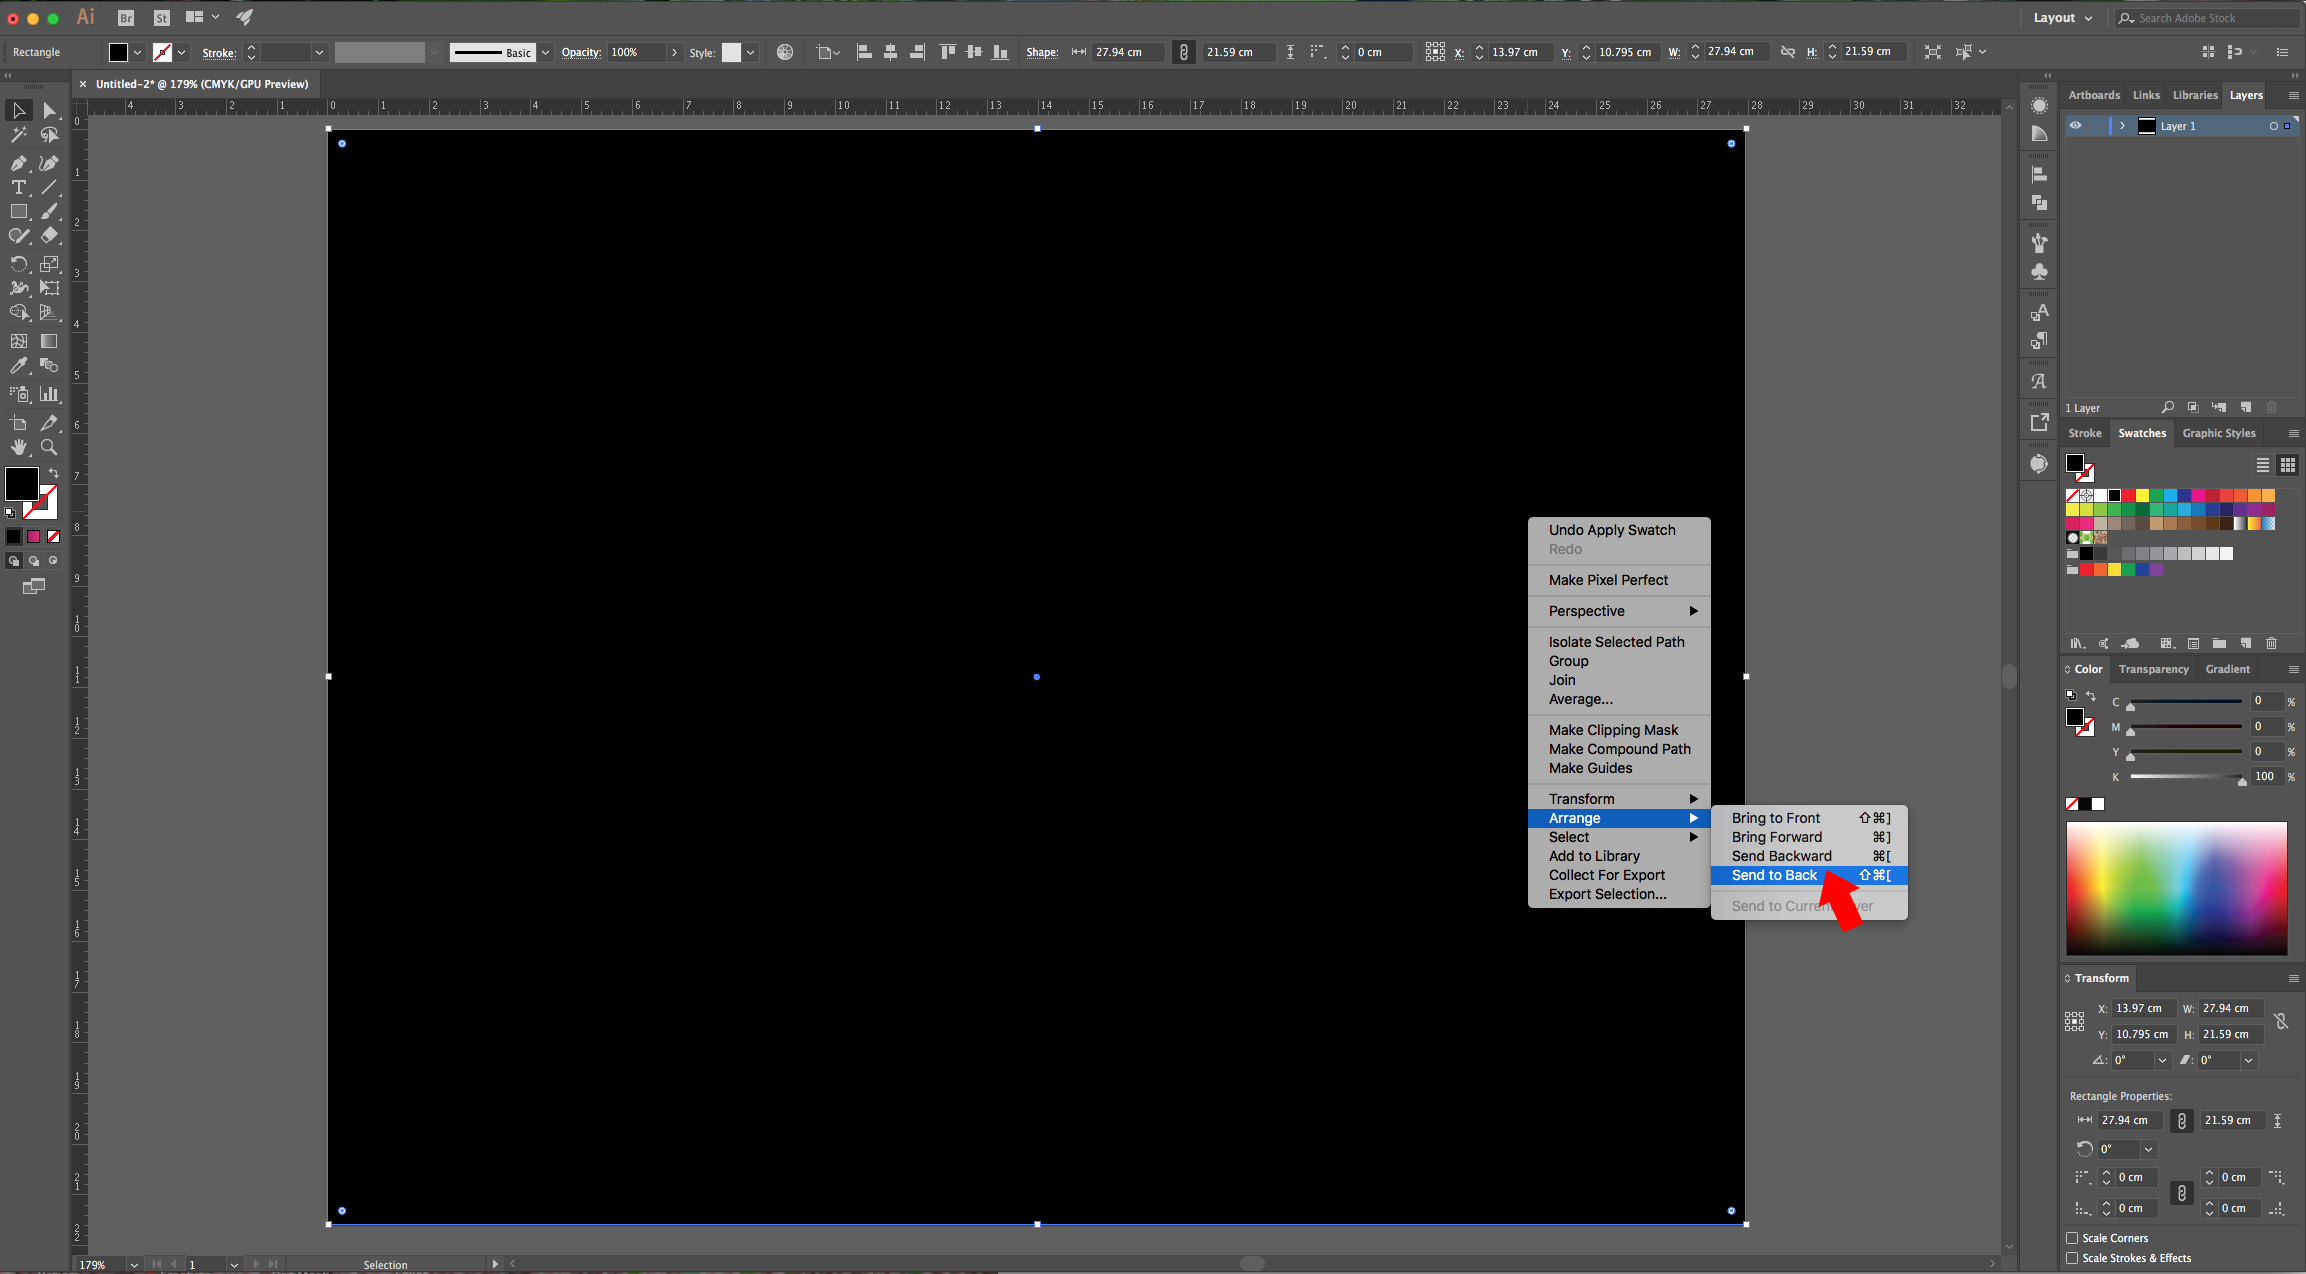
8 - Select the “Rectangle Tool” (M) and create a Black “Rectangle” covering your entire “Canvas”. Right-click on top of it and choose Arrange > Send to Back…
9 - If you wish to change the colors you chose for the “Stroke Gradient”, double-click on the small square on the “Gradient Panel” and choose another one (we used green). “Copy” your “Shape” (Command/Control + C) and “Paste in Front” (Command/Control + F)- Then, change the colors of the “Gradient”. (You can hide the first “Shape” to have a better view of the new one).

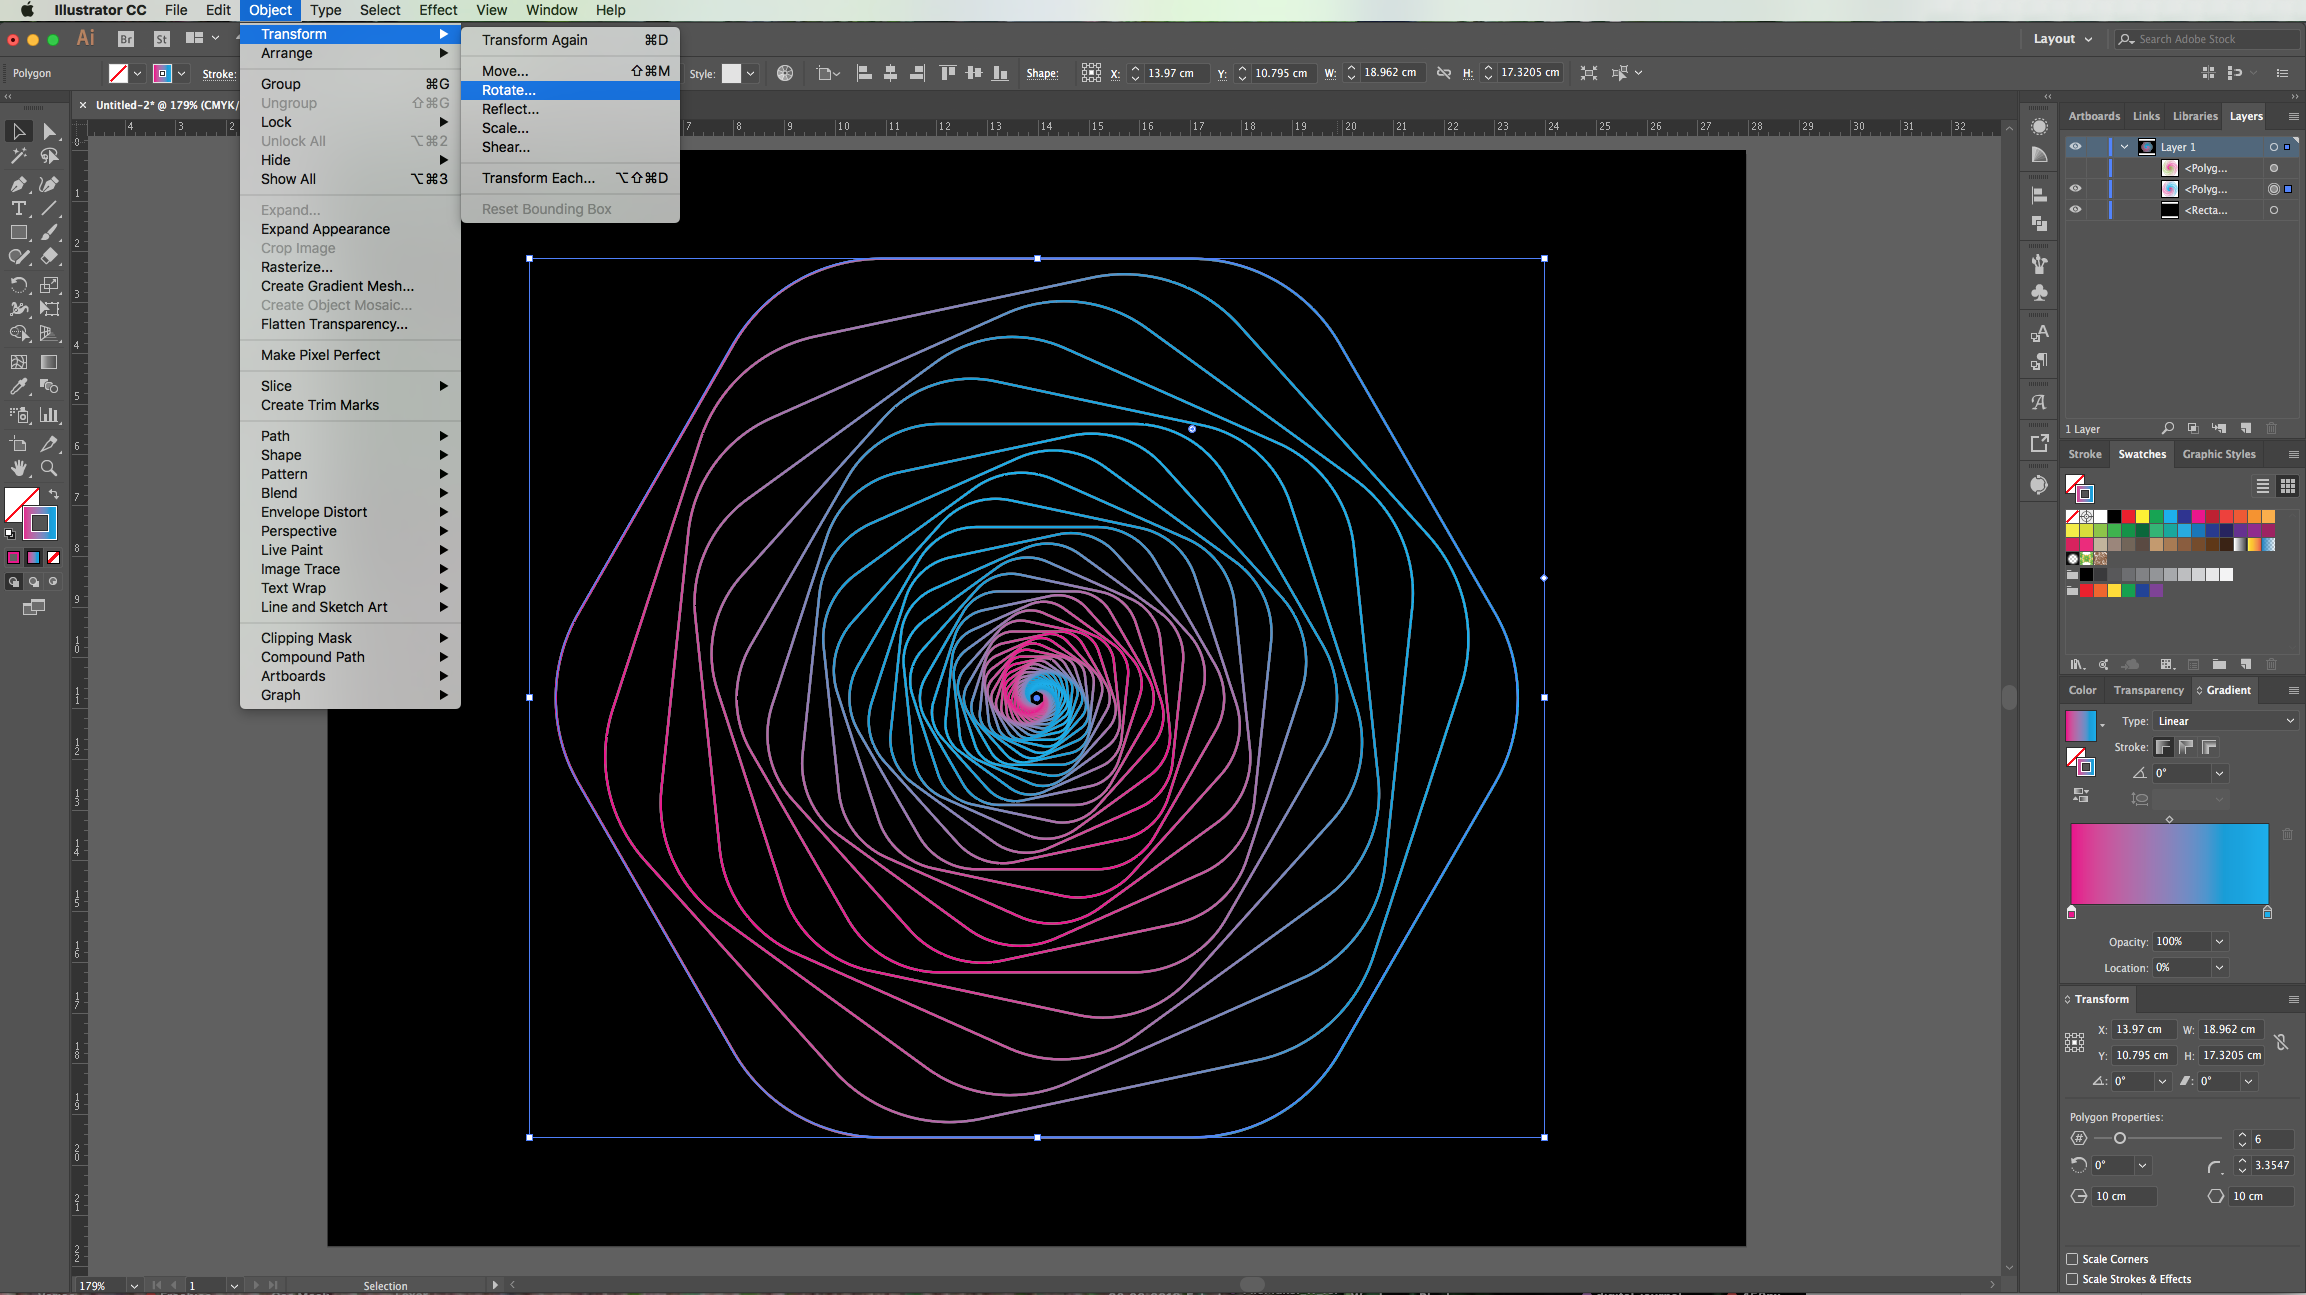
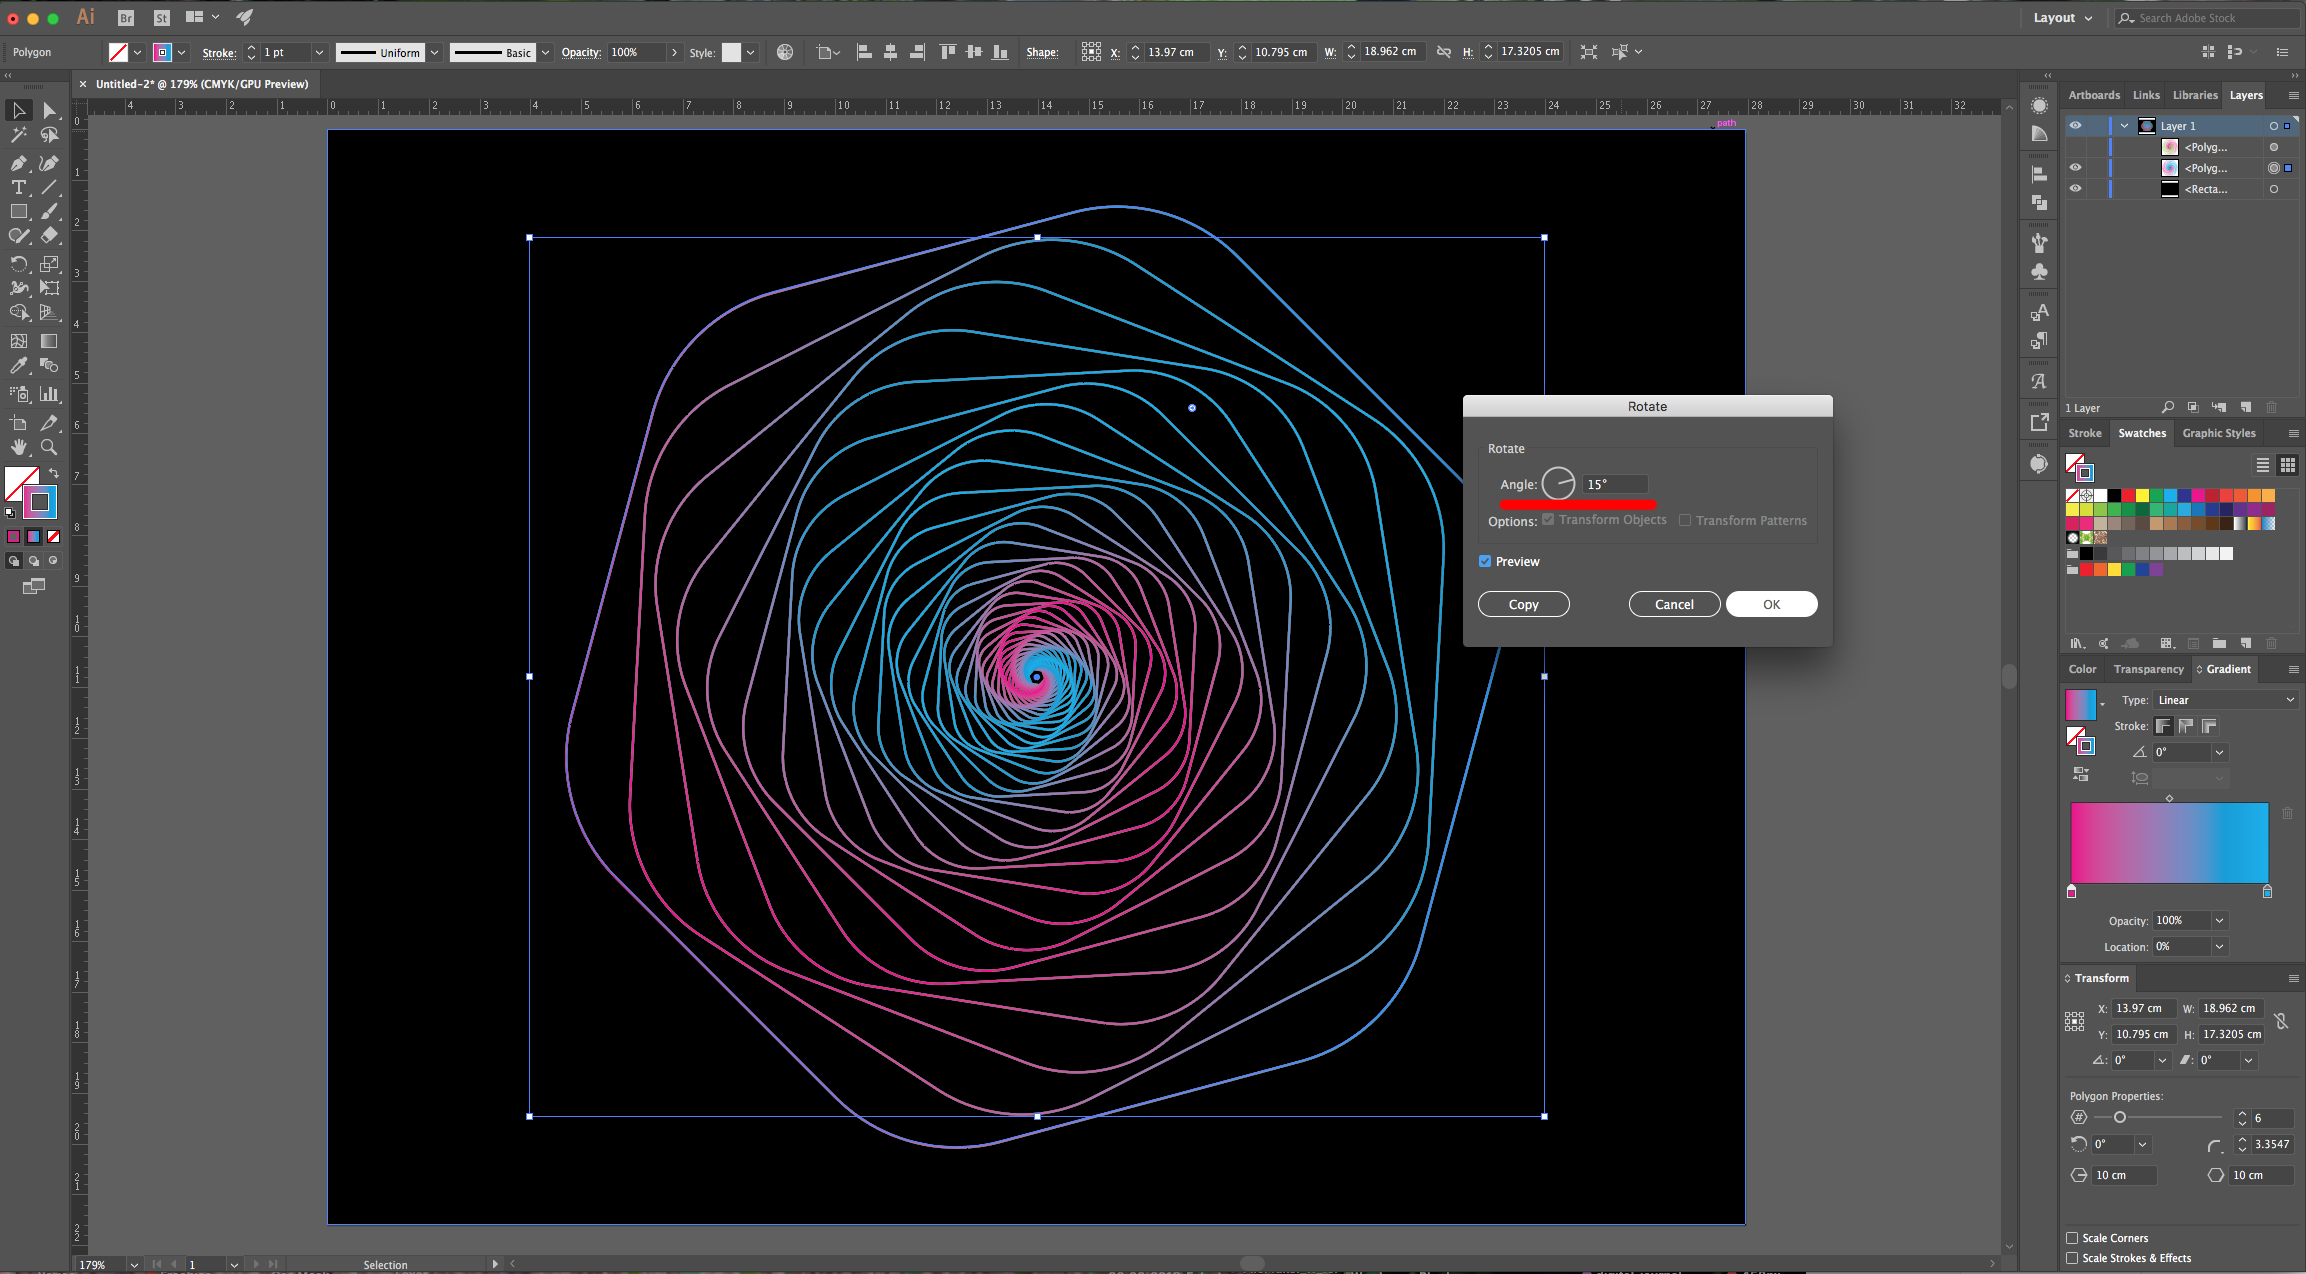
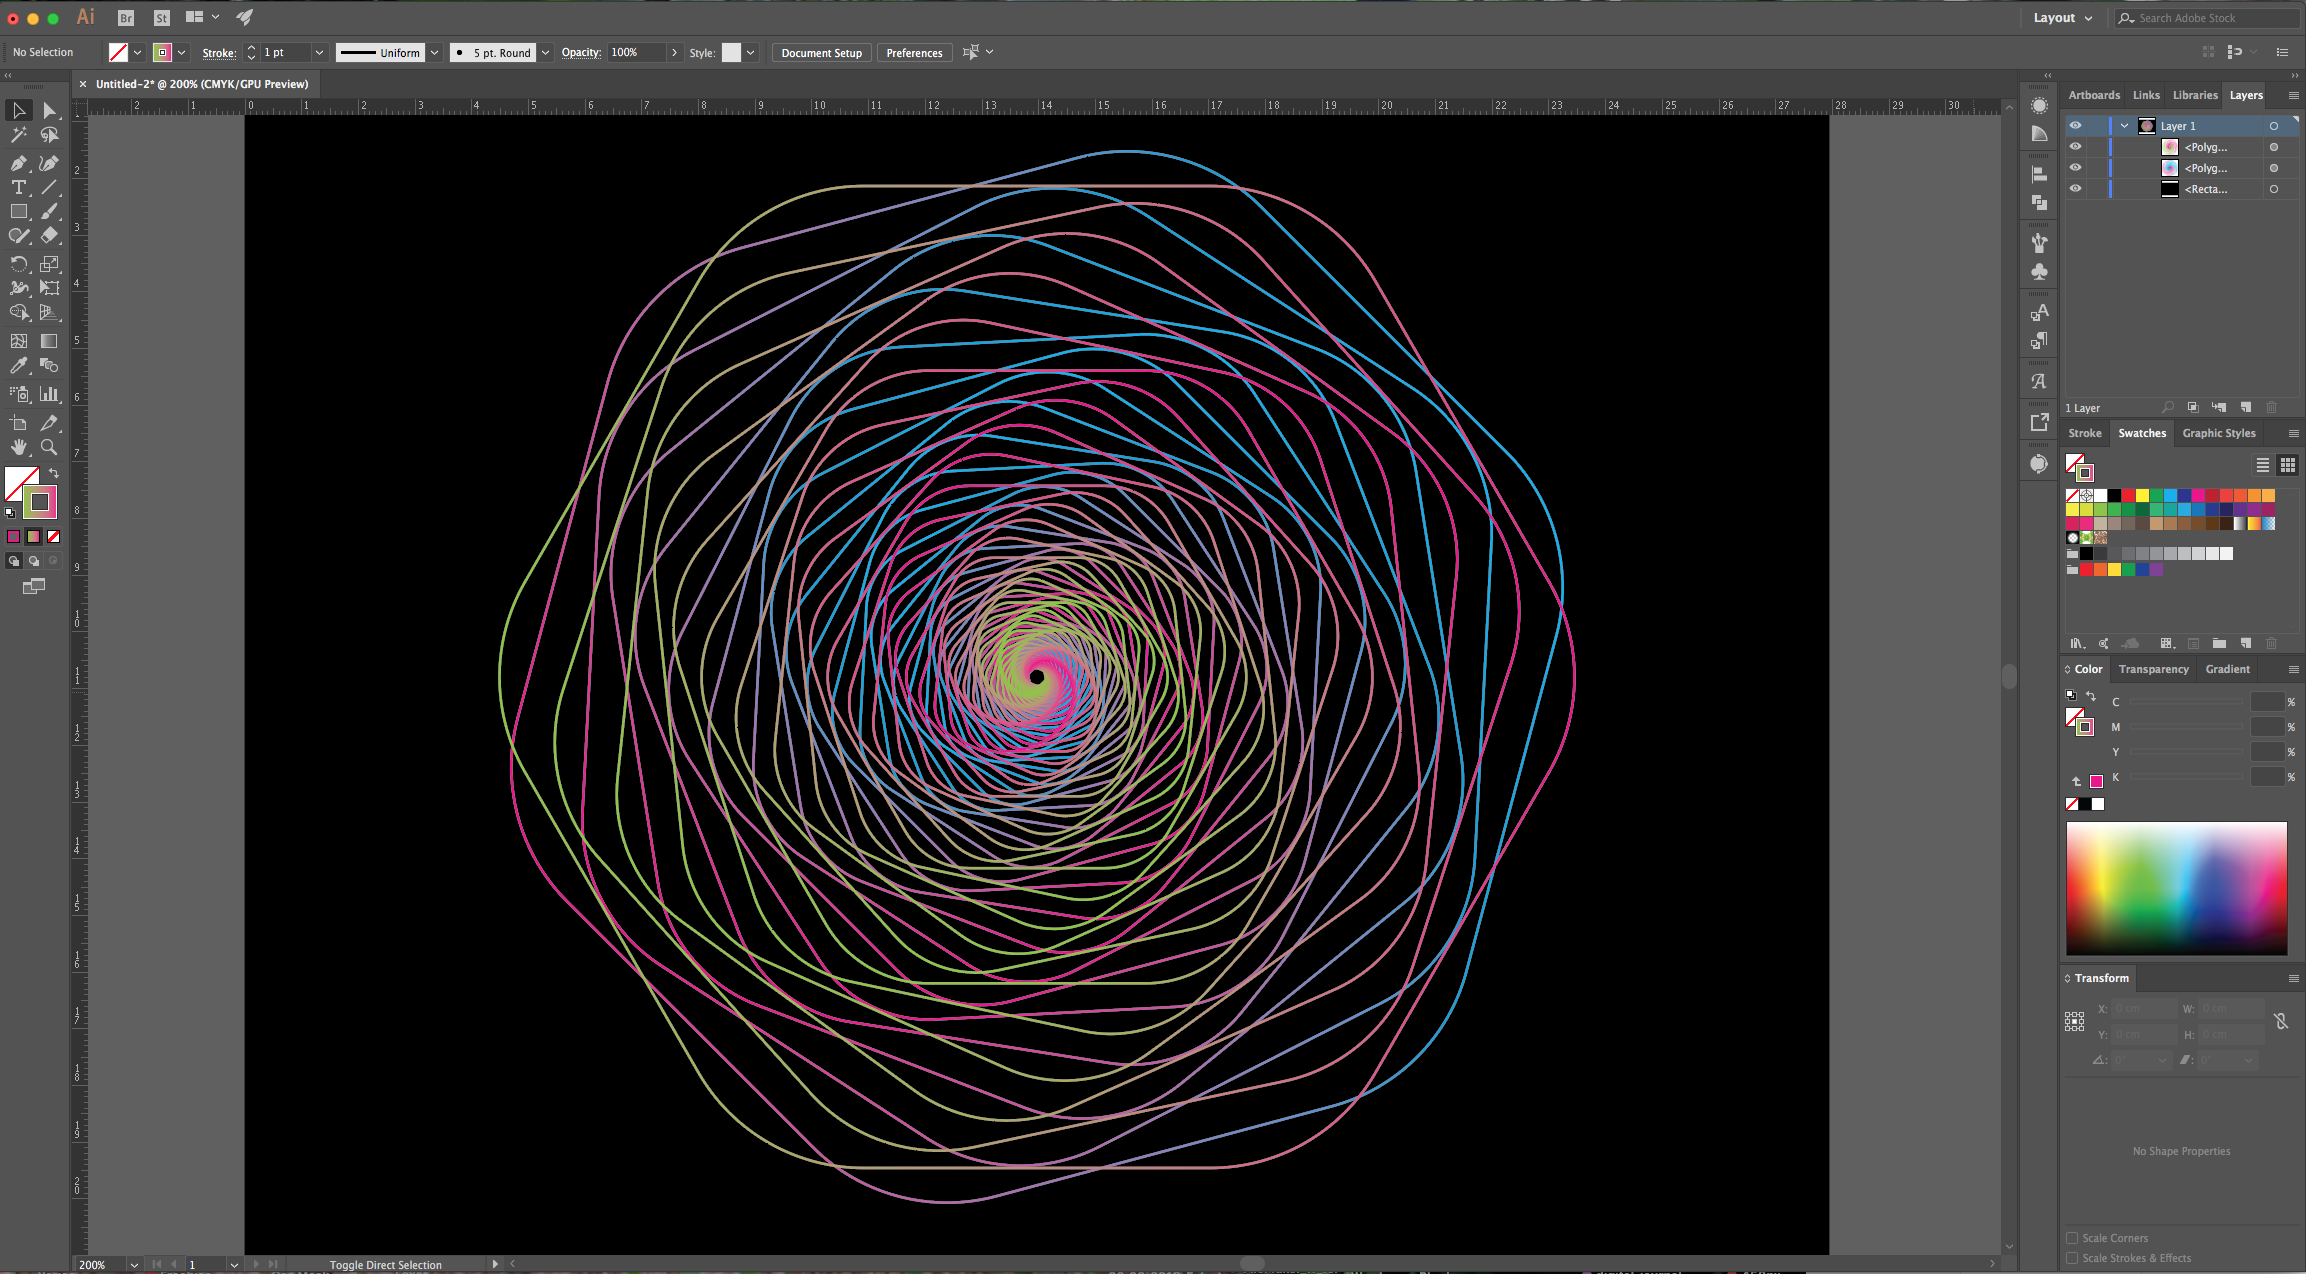
10 - Select your second Shape, go to Object > Transform > Rotate… and use a 15° Angle. Click “OK” and Turn On your Original Shape.
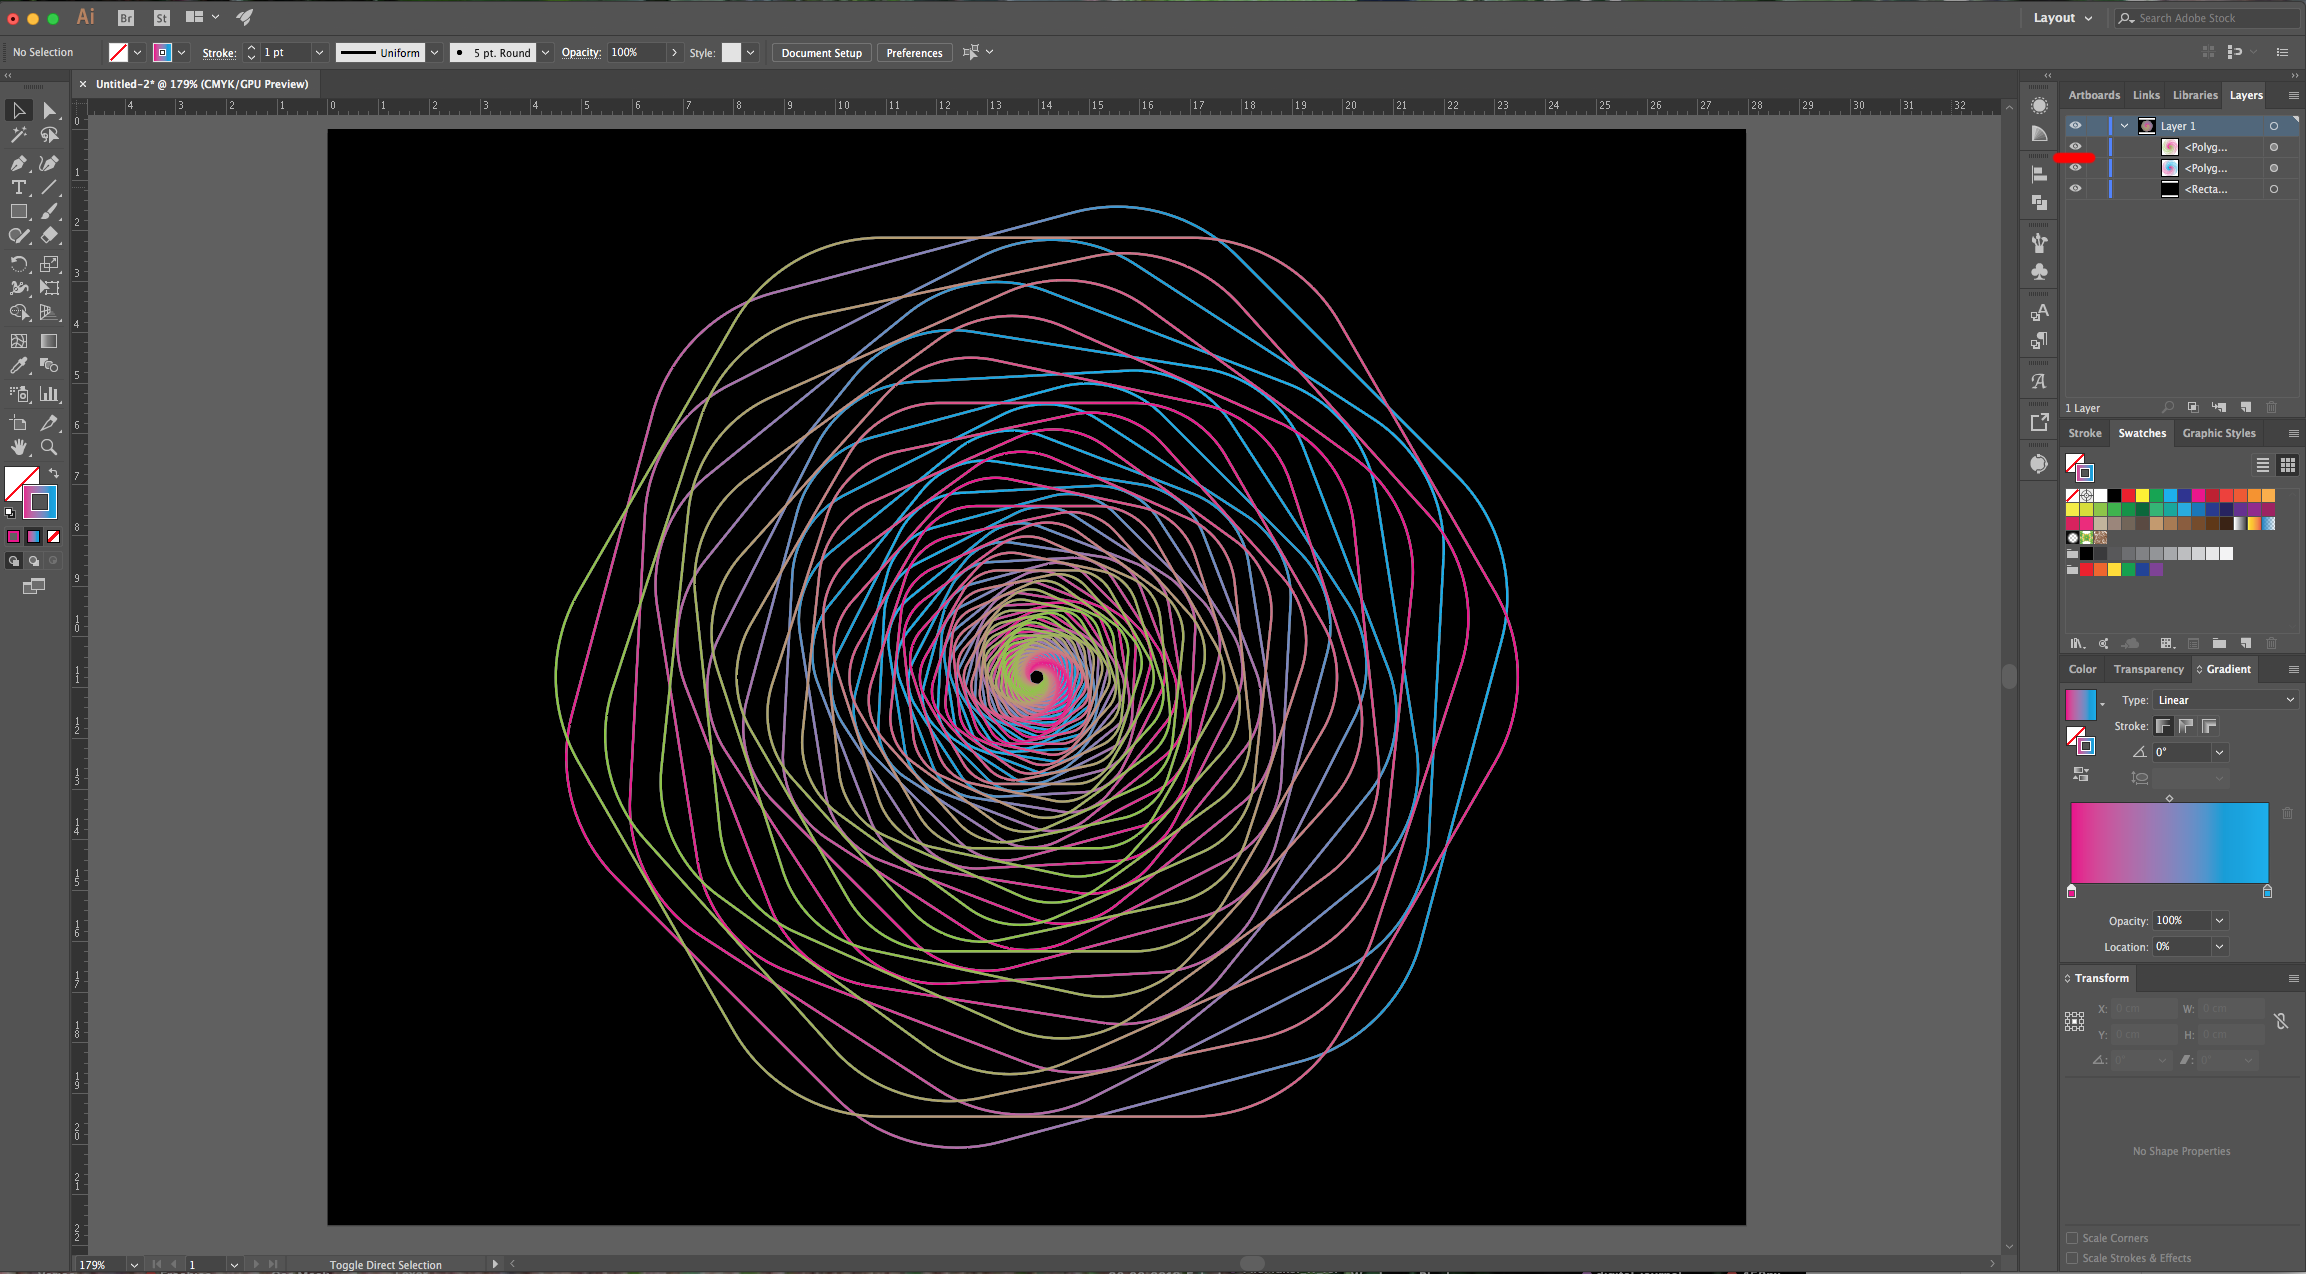
11 - Check it out.
2 - Select the “Polygon Tool” and click inside of your “Canvas”. Use a “Radius” of 20 cm and 6 “Sides” and click “OK”.
3 - Center it to using the “Horizontal and Vertical Align Center” options on your Top Menu and make sure that “Align to Artboard” is selected. Or use the same options in the “Align Panel”.
4 - Make sure that the “Fill” is “None” and that the “Stoke” is Black and has 1 pt.
5 - Select your Shape, go to the “Appearance Panel” and click on the “Effects Menu” at the bottom-left. Go to Distort & Transform > Transform… use 91% as “Horizontal” and “Vertical” Scale value, a “Rotate” Angle of 12° and input the number 45 in the “Copies” section. Click “OK”.
6 - You will see a small circle in every corner. If you want to round them, click and drag down until you are satisfied.
7 - Head to the “Toolbar” and choose “Gradient” as “Fill” method for your “Stroke” (the small square in the center just under the “Fill” and “Stroke” selectors). You can also choose it from the “Gradient Panel”, then, change the colors by double-clicking on the small squares and choose some contrasting colors from your “Swatches”.
8 - Select the “Rectangle Tool” (M) and create a Black “Rectangle” covering your entire “Canvas”. Right-click on top of it and choose Arrange > Send to Back…
9 - If you wish to change the colors you chose for the “Stroke Gradient”, double-click on the small square on the “Gradient Panel” and choose another one (we used green). “Copy” your “Shape” (Command/Control + C) and “Paste in Front” (Command/Control + F)- Then, change the colors of the “Gradient”. (You can hide the first “Shape” to have a better view of the new one).
10 - Select your second Shape, go to Object > Transform > Rotate… and use a 15° Angle. Click “OK” and Turn On your Original Shape.
11 - Check it out.
by @lornacane


