
How to Make a Dotted Line in Illustrator
Learn how to make a Dotted Line in Illustrator with this beginner tutorial.
In this tutorial, you will learn how to easily create a dotted line in Adobe Illustrator. Dotted lines can be a great way to divide up a document, label graphics, create texture in a line art illustration, or emphasize information on an infographic design.
Step 1 - Draw a Line
There are a couple of ways to draw a line in Illustrator. You can use the Pen tool (P) or the Line Segment tool (\).

Using the Line Segment tool (\), click anywhere on your artboard to bring up the Line Segment Tool Options dialog, where you can specify the length of your line.

You can also simply click and drag your cursor across the artboard to draw the line. Holding the Shift key while clicking and dragging will keep the line to the X or Y axis.
Step 2 - Enable the Dashed Line Option
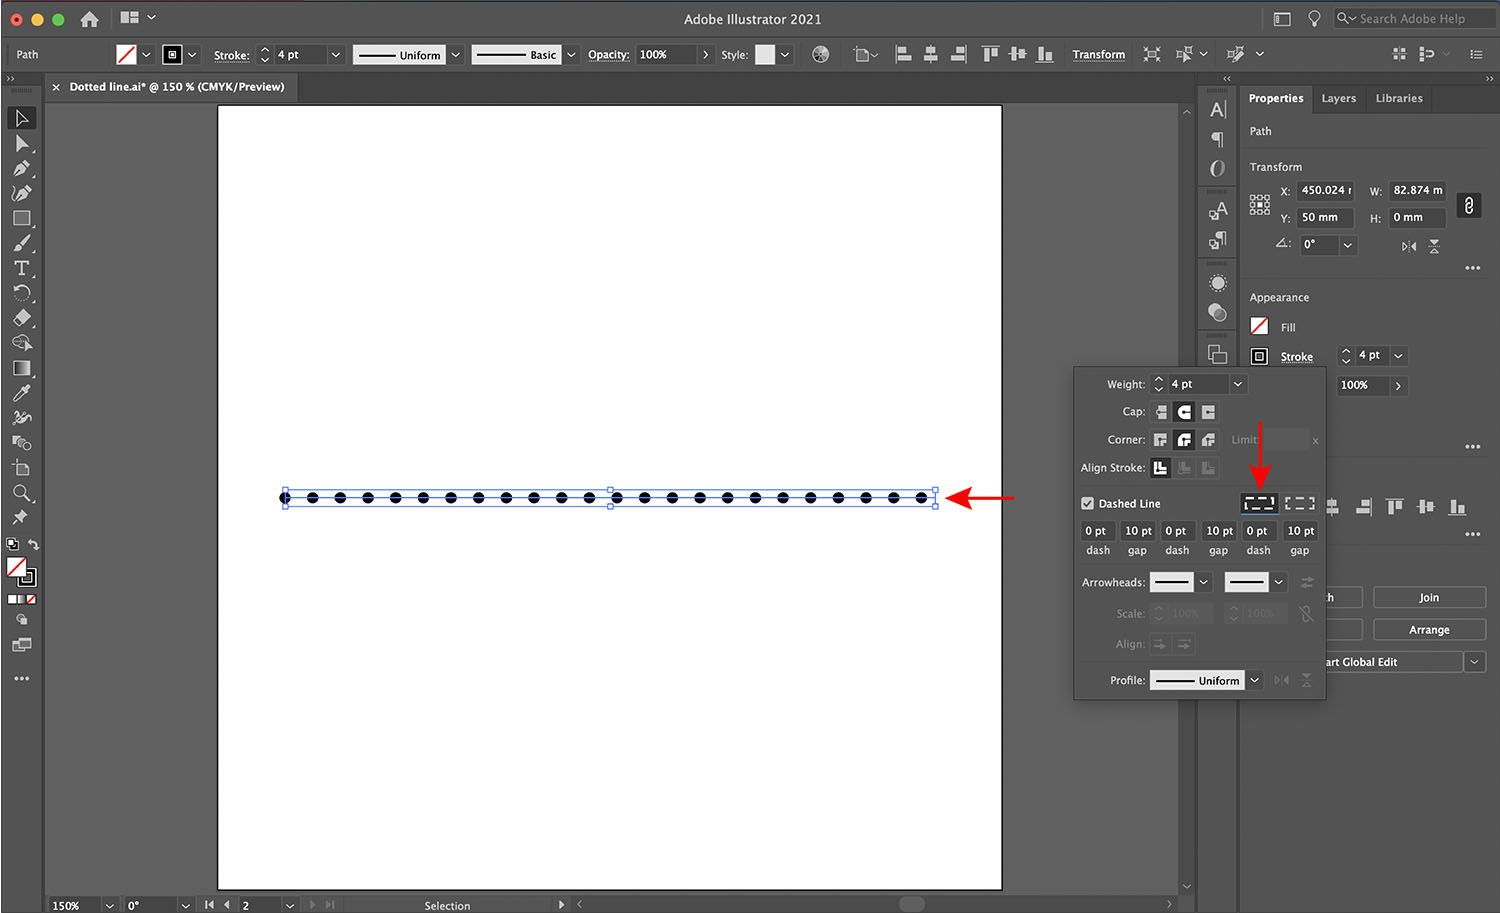
Open the stroke options by clicking on Stroke in the Appearance panel. Click the Dashed Line checkbox to enable it. In order to make the dashed line a dotted line, you must select Round Cap or Projected Cap. I selected Round Cap.
You must also enter 0 pt for the dash. I entered 10 pt for the gap, but the gap will depend on the size of your dots and how far apart you want them to be.

Note: if the Appearance panel isn’t already open, go to Window > Appearance.
Step 3 - Edit the Dotted Line Properties
Change the Stroke Weight
After clicking on Stroke in the Appearance panel, change the stroke weight by clicking the up and down arrows or typing in the number. For a dotted line, the stroke weight will affect the size of the dots. Adjust the gap size if needed.

Change the Caps and Corners
As previously mentioned, you must select Round Cap or Projected Cap to create a dotted line. Round Cap will make round dots, while Projected Cap will make square dots.
You can also change the corners of your stroke. Corners matter if you have created a shape or have bends in your lines.
If you have selected Projected Cap, select Miter Join for the corners to keep the dot shape consistent.
Edit Path/Line Ends
The option to preserve exact dash and gap lengths will ensure that the sizes of your dashes/dots and gaps are not compromised.
This can mean that your dots may not exactly meet the end of your drawn line.
Whereas the option to align dashes to corners and path ends will compromise the length of your dashes/dots slightly, which will allow the dots to evenly meet each corner and end of your line.

Edit Gap Size
You can experiment with various gap sizes. Again, to achieve your dotted line, the dashes should always be set to 0 pt. You can change the space between each dot by changing the figure for your gap. Here I have added a 20 pt gap.

Optional Dotted Line Modifications
The following changes/additions are optional but may give you more of the look you want for your dotted line.
You can make your dots a little longer by adding a higher value to the dash boxes. Here I have added 5pt dashes.

You can also add arrowheads on the ends of your dotted line by taking a look at our guide on making an arrow in Illustrator.
You have successfully learned how to create and personalize your dotted line to your specific needs! You can apply these settings to any line, including shapes and illustration outlines, so you can now create more diversity within your designs and illustrations.


