
Fireworks in Illustrator
For this tutorial, we will be using “Playlist Font” from Artimasa.
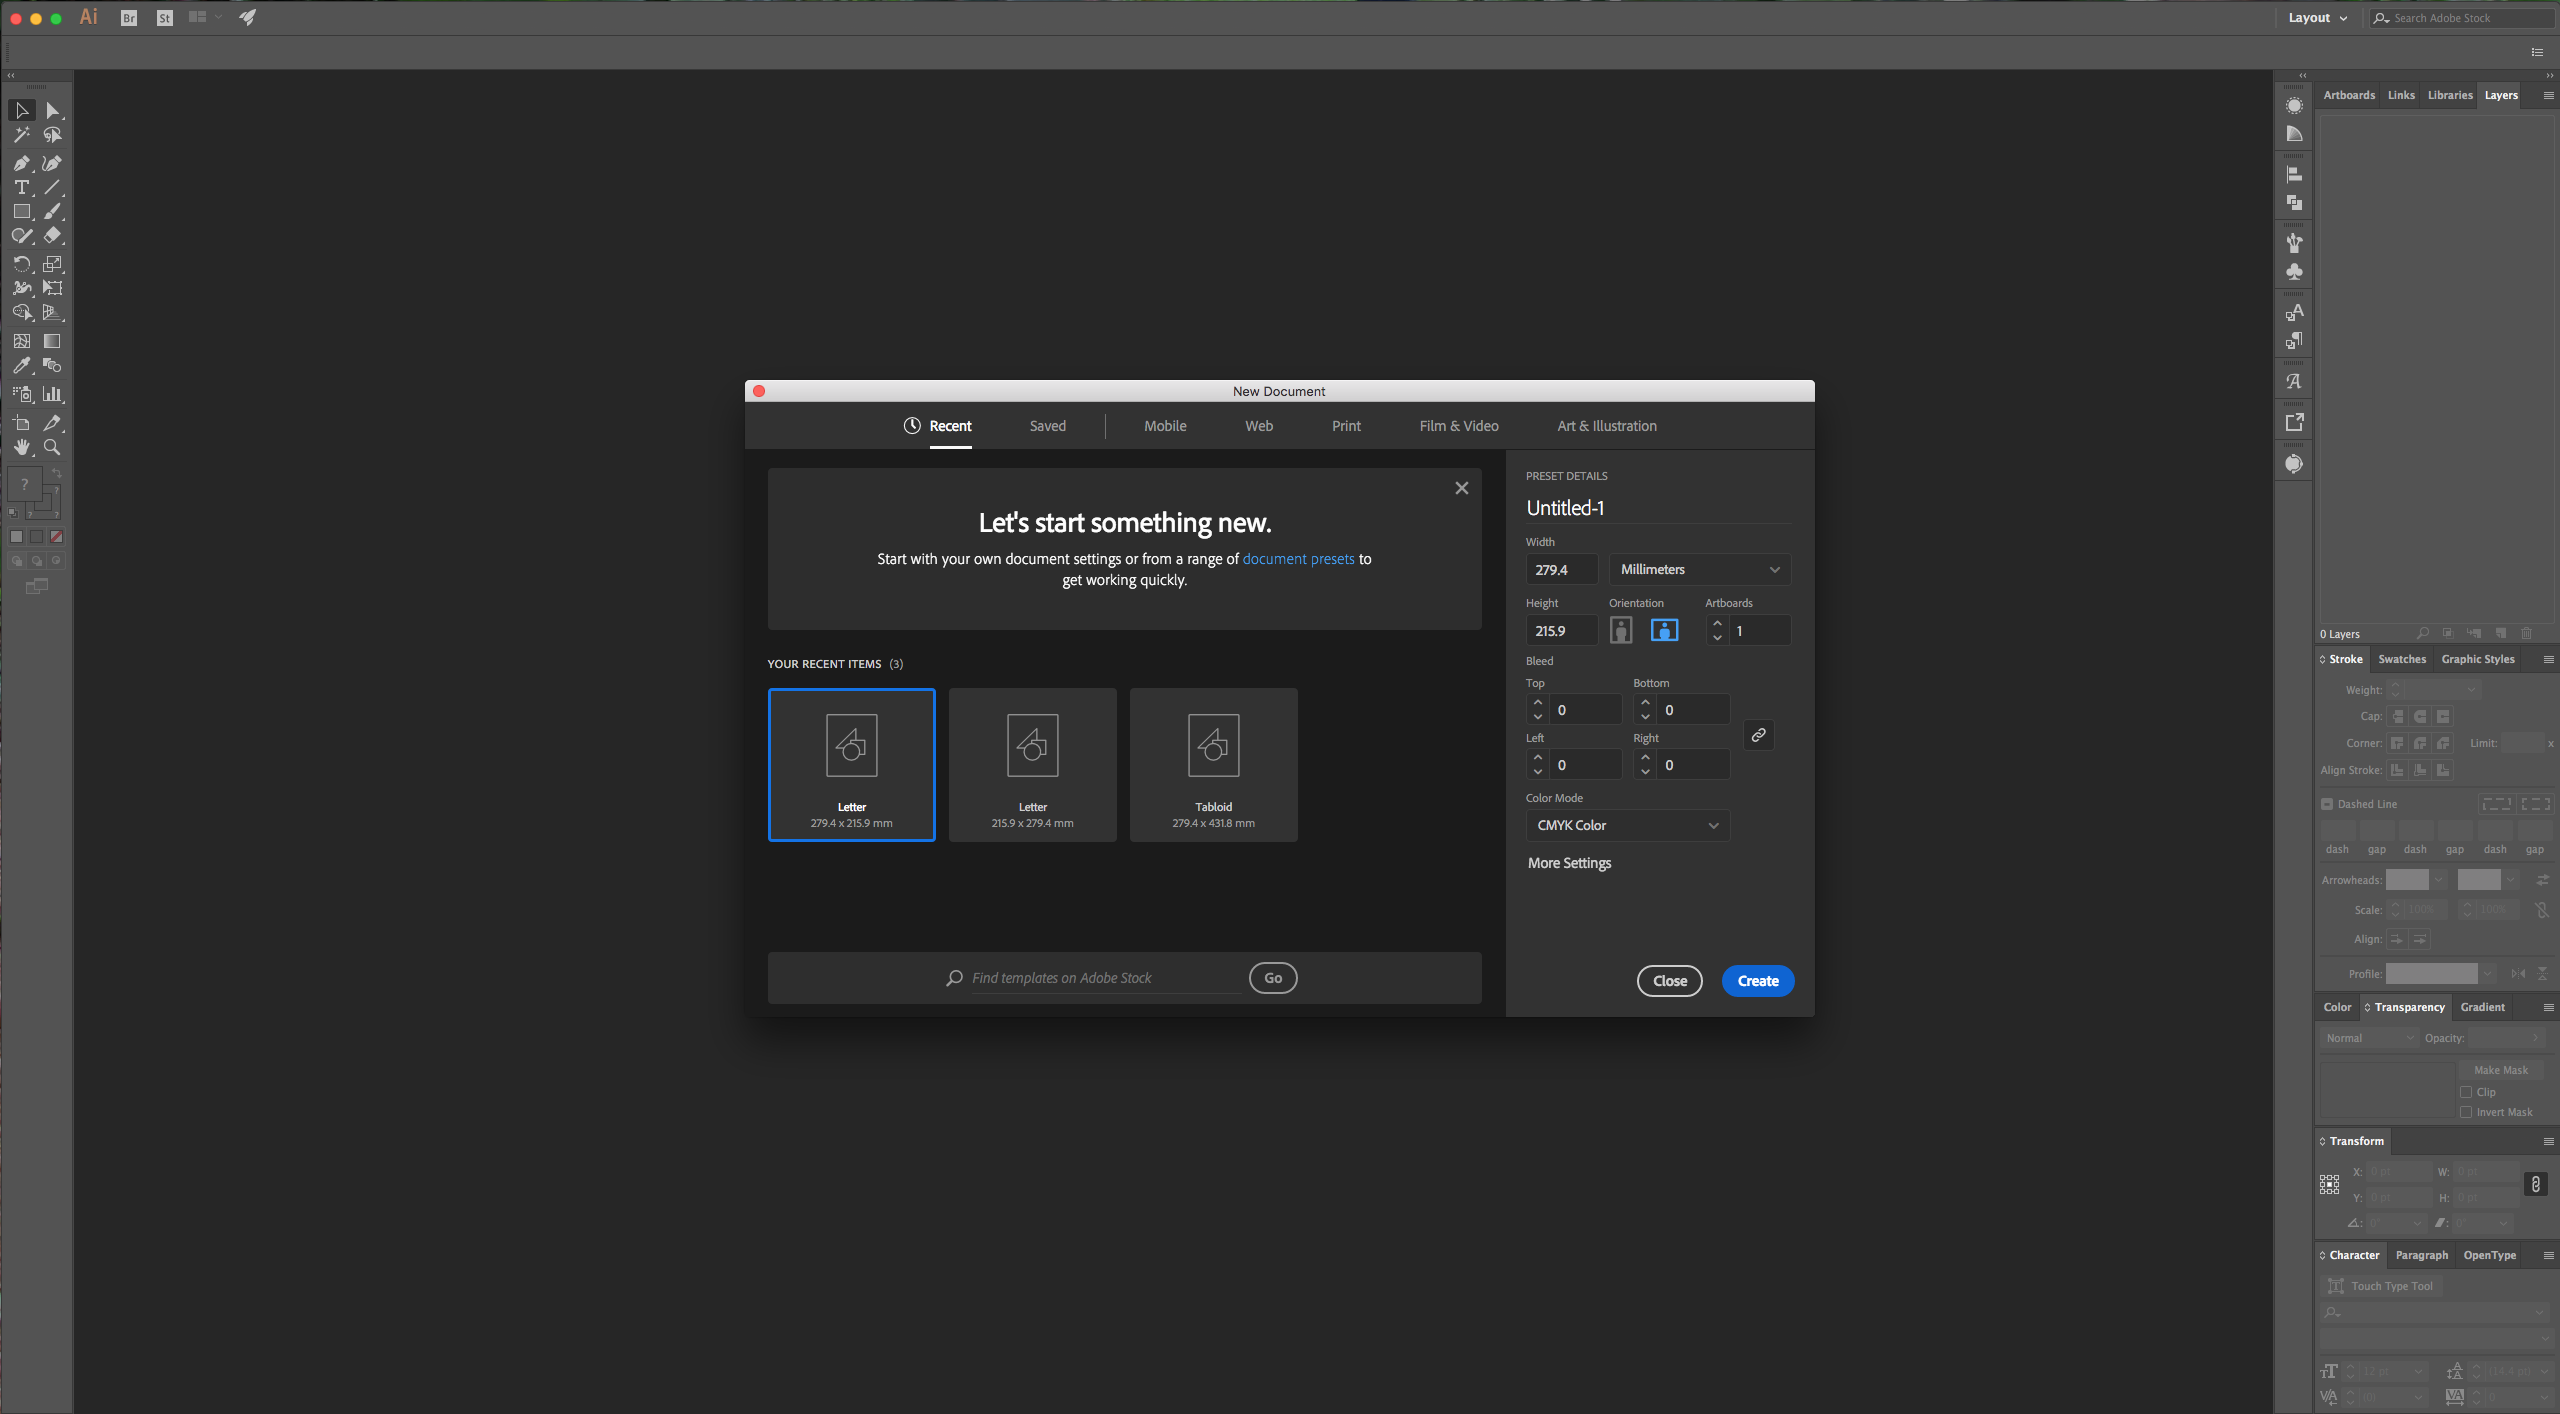
1 - In Illustrator, create a New Document.
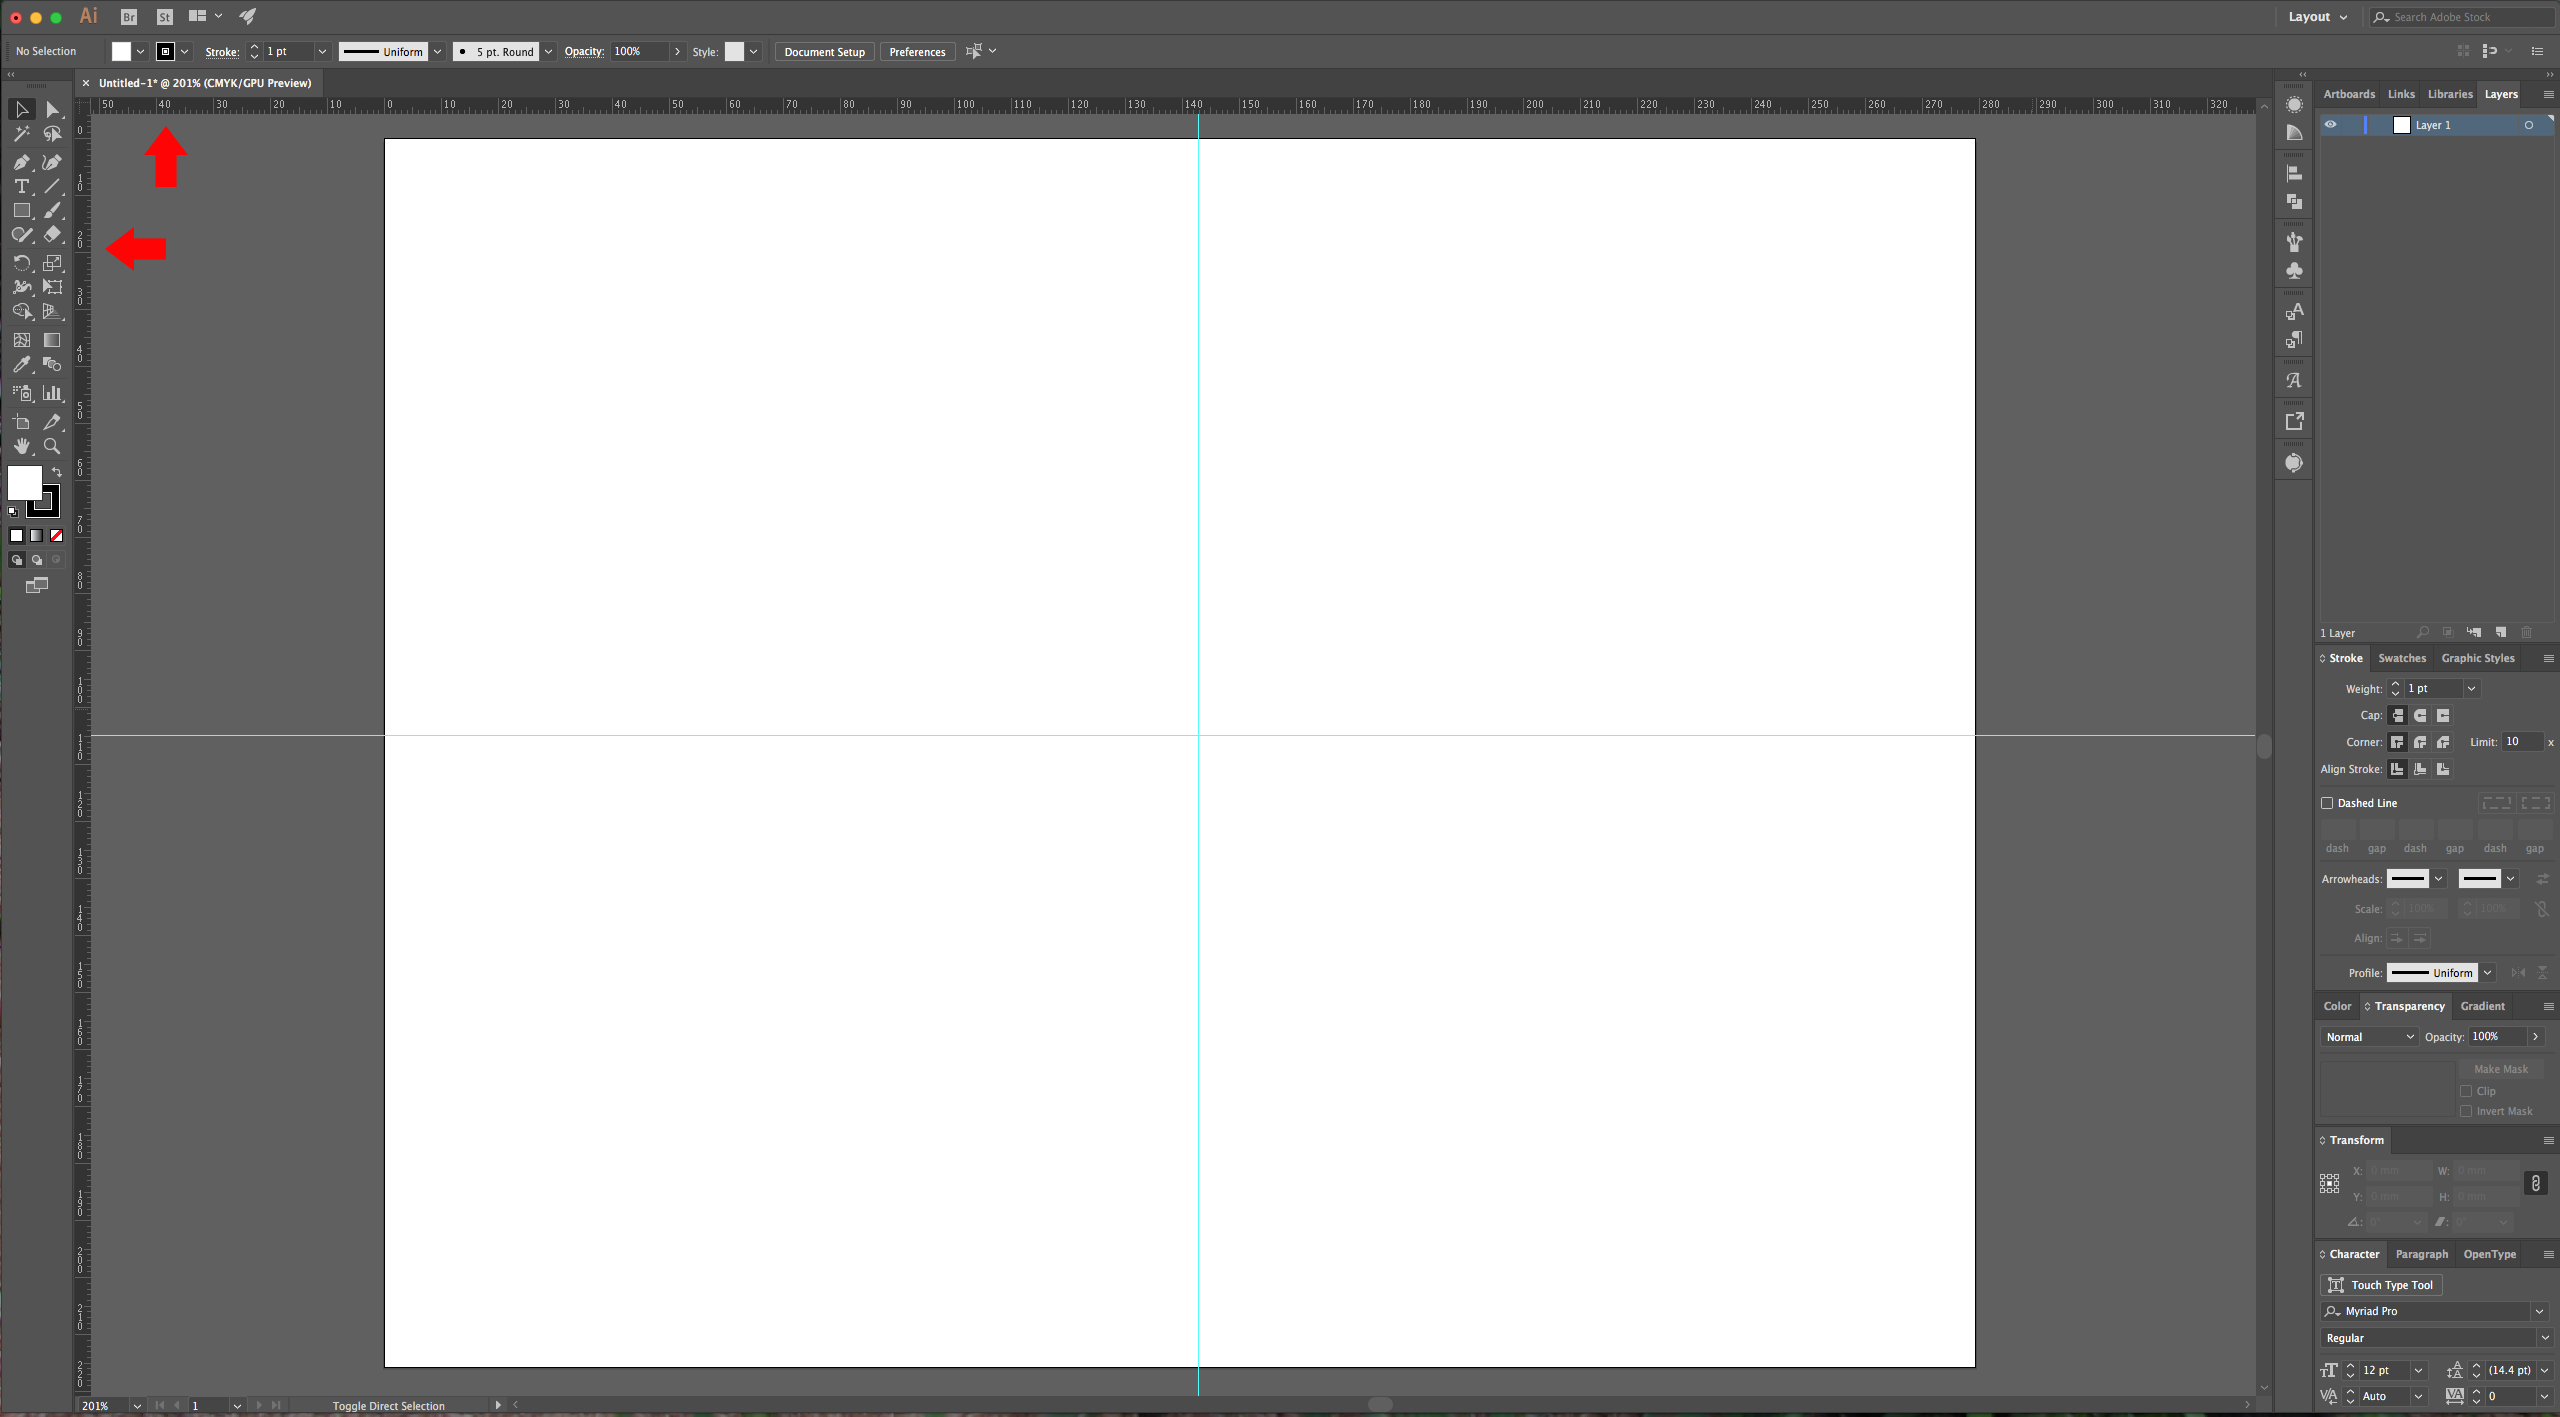
2 - Make sure that the “Rulers” are on (Command/Control + R). Drag a “Guide” from your top ruler to the center of the document, then, drag another one from the left to form an intersection.
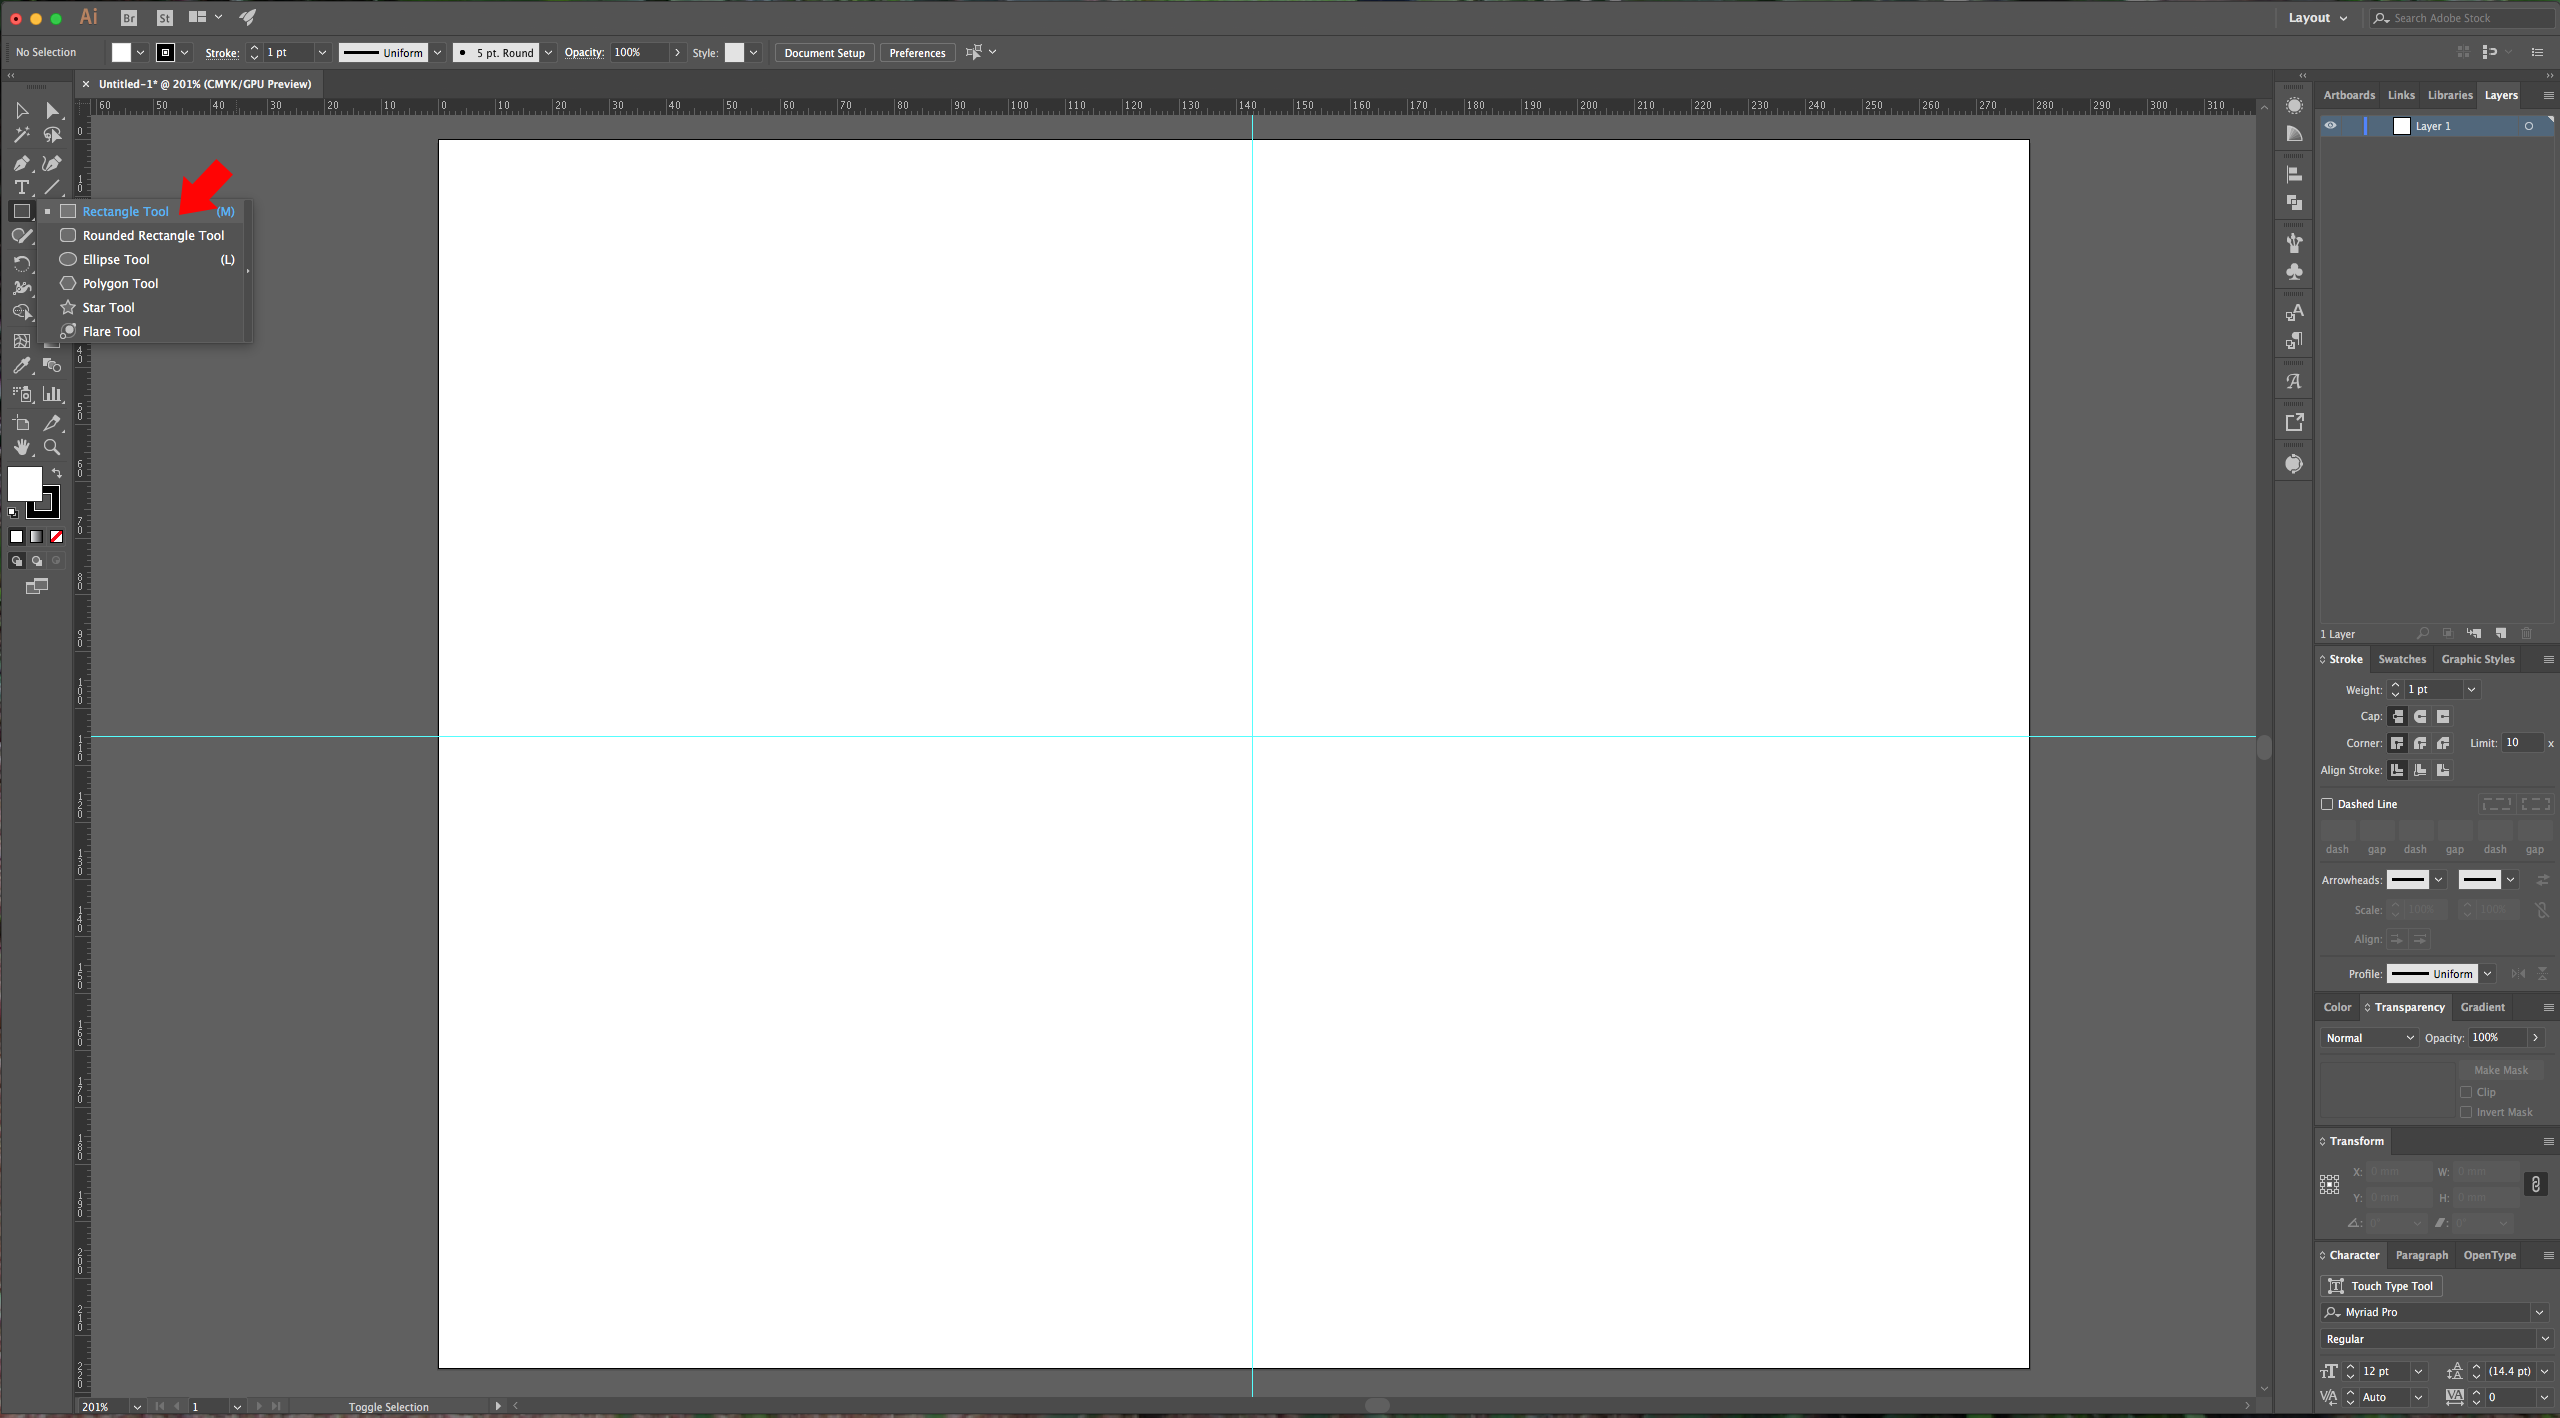
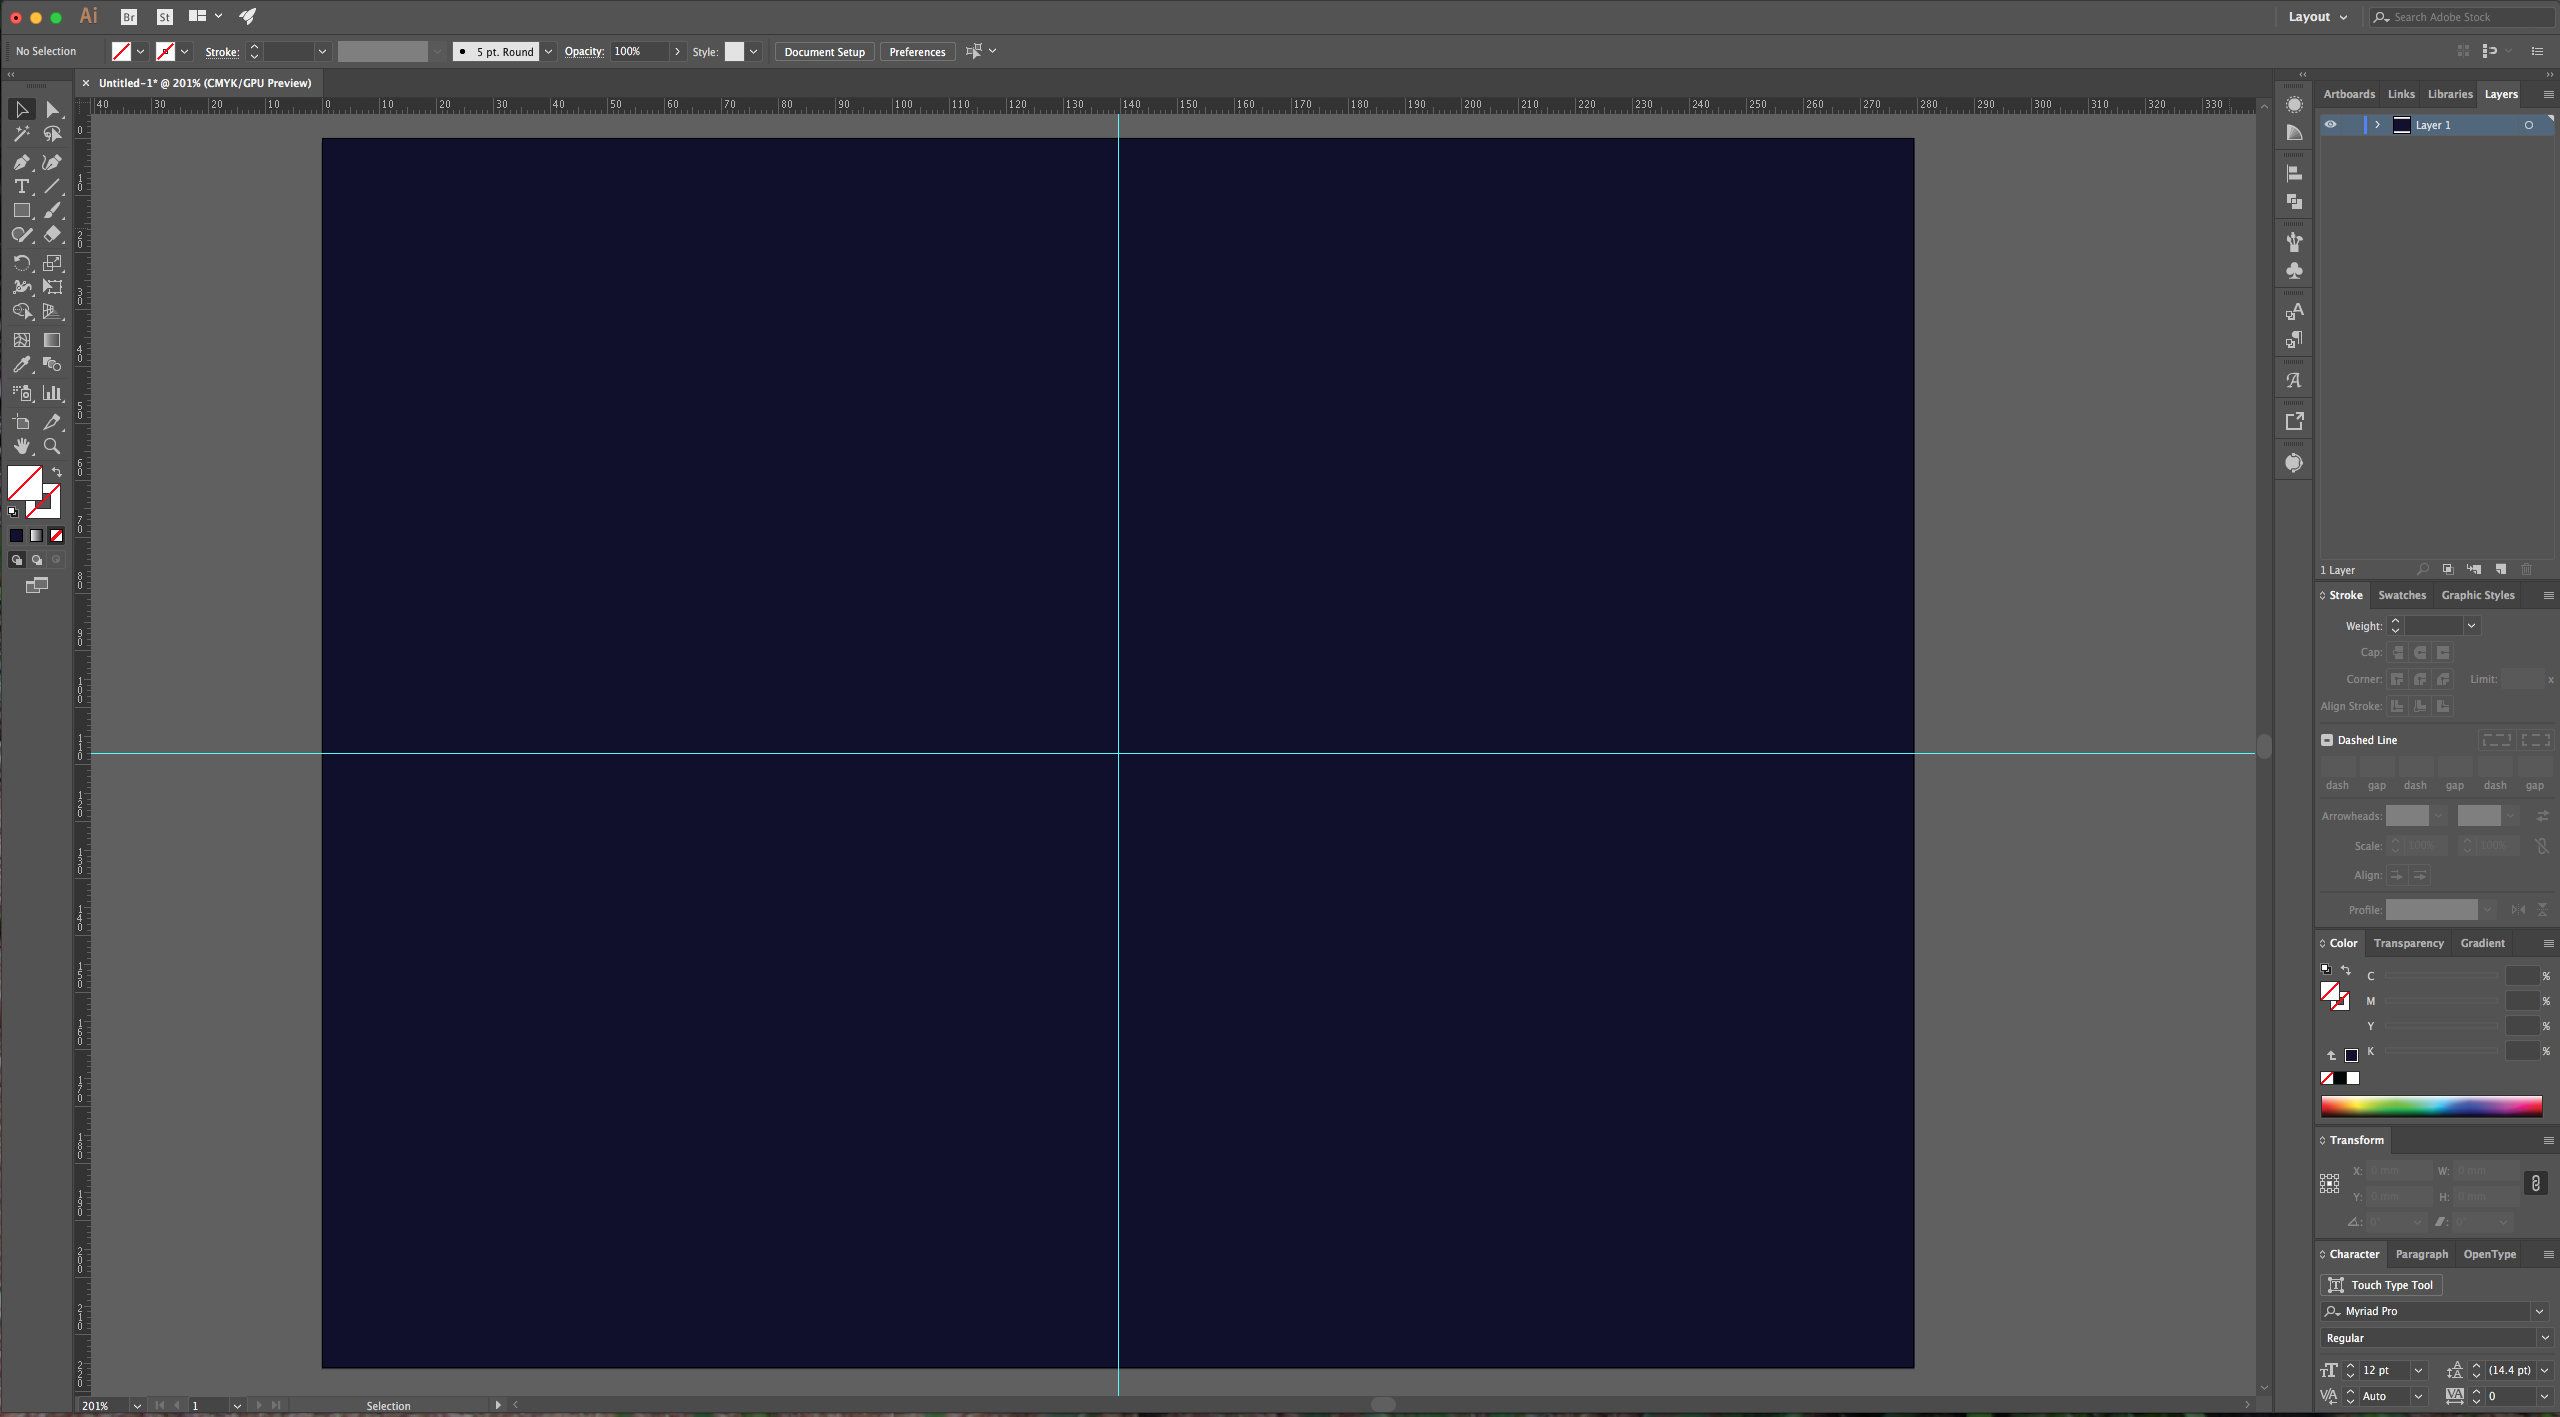
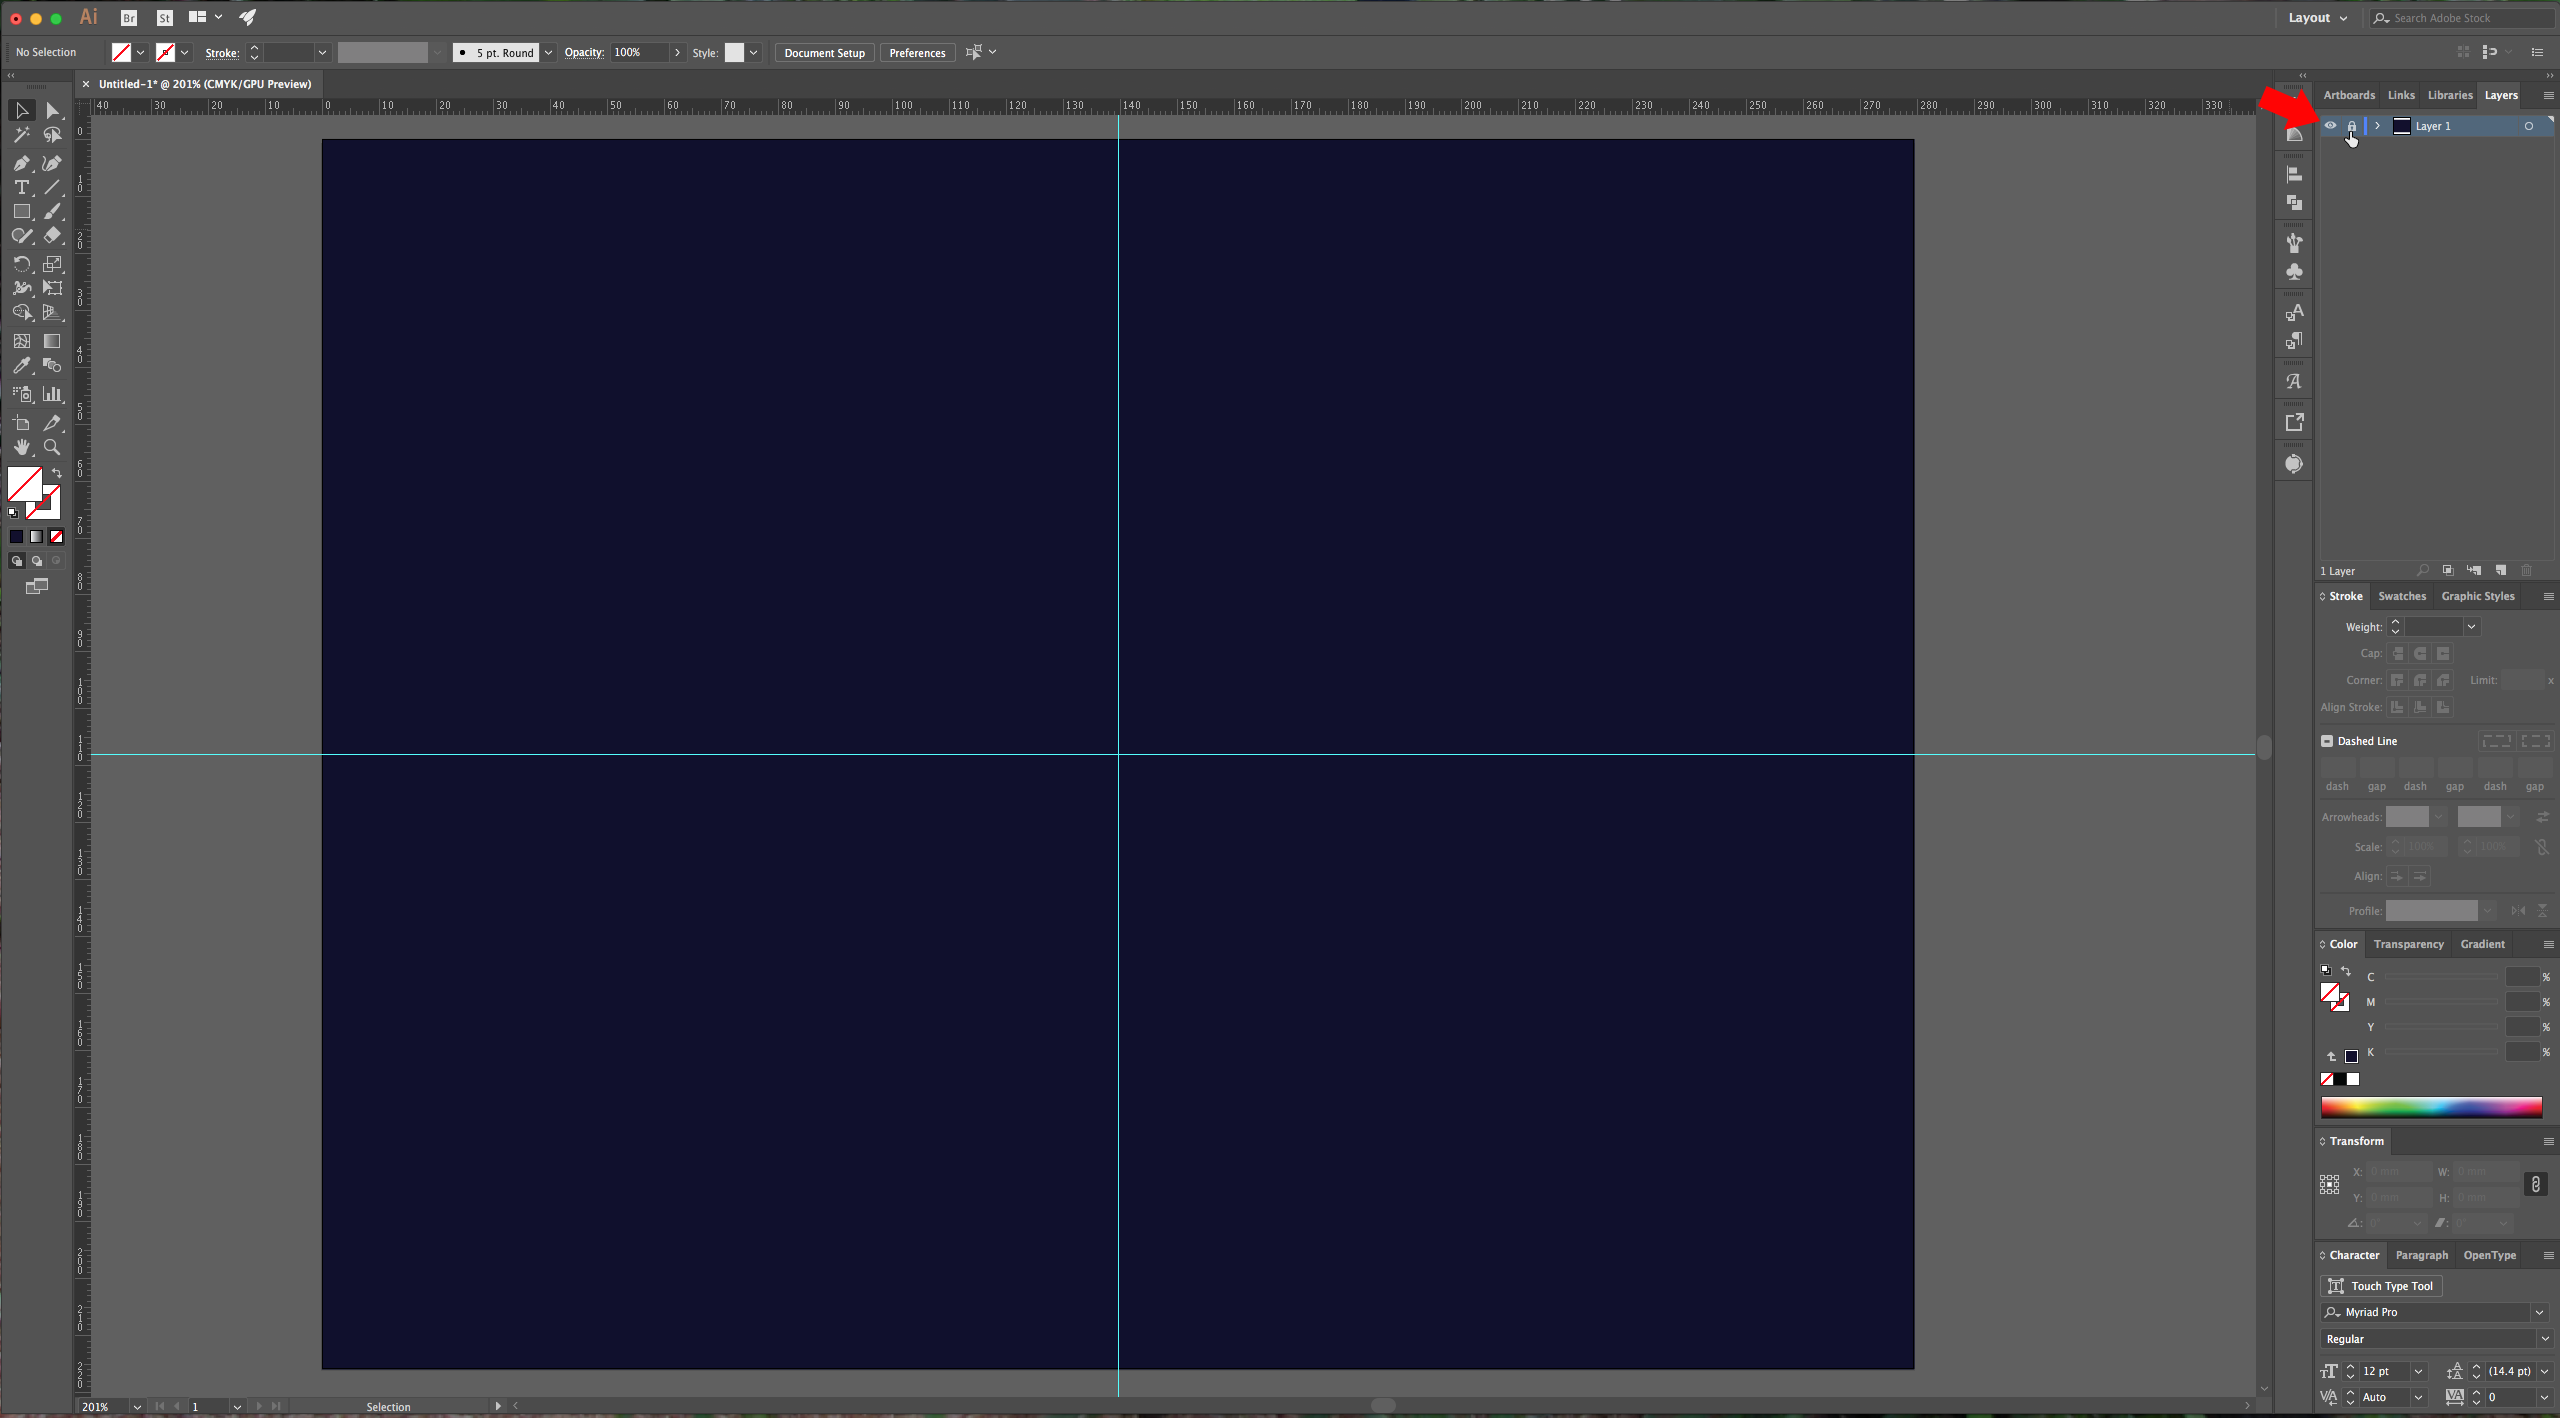
3 - Select the “Rectangle Tool” (M) and draw a rectangle that covers your whole page. Fill it with a dark blue color (we used #020130) and “Lock” the layer by turning on the little lock icon to the left of your layer in the “Layers Panel”.
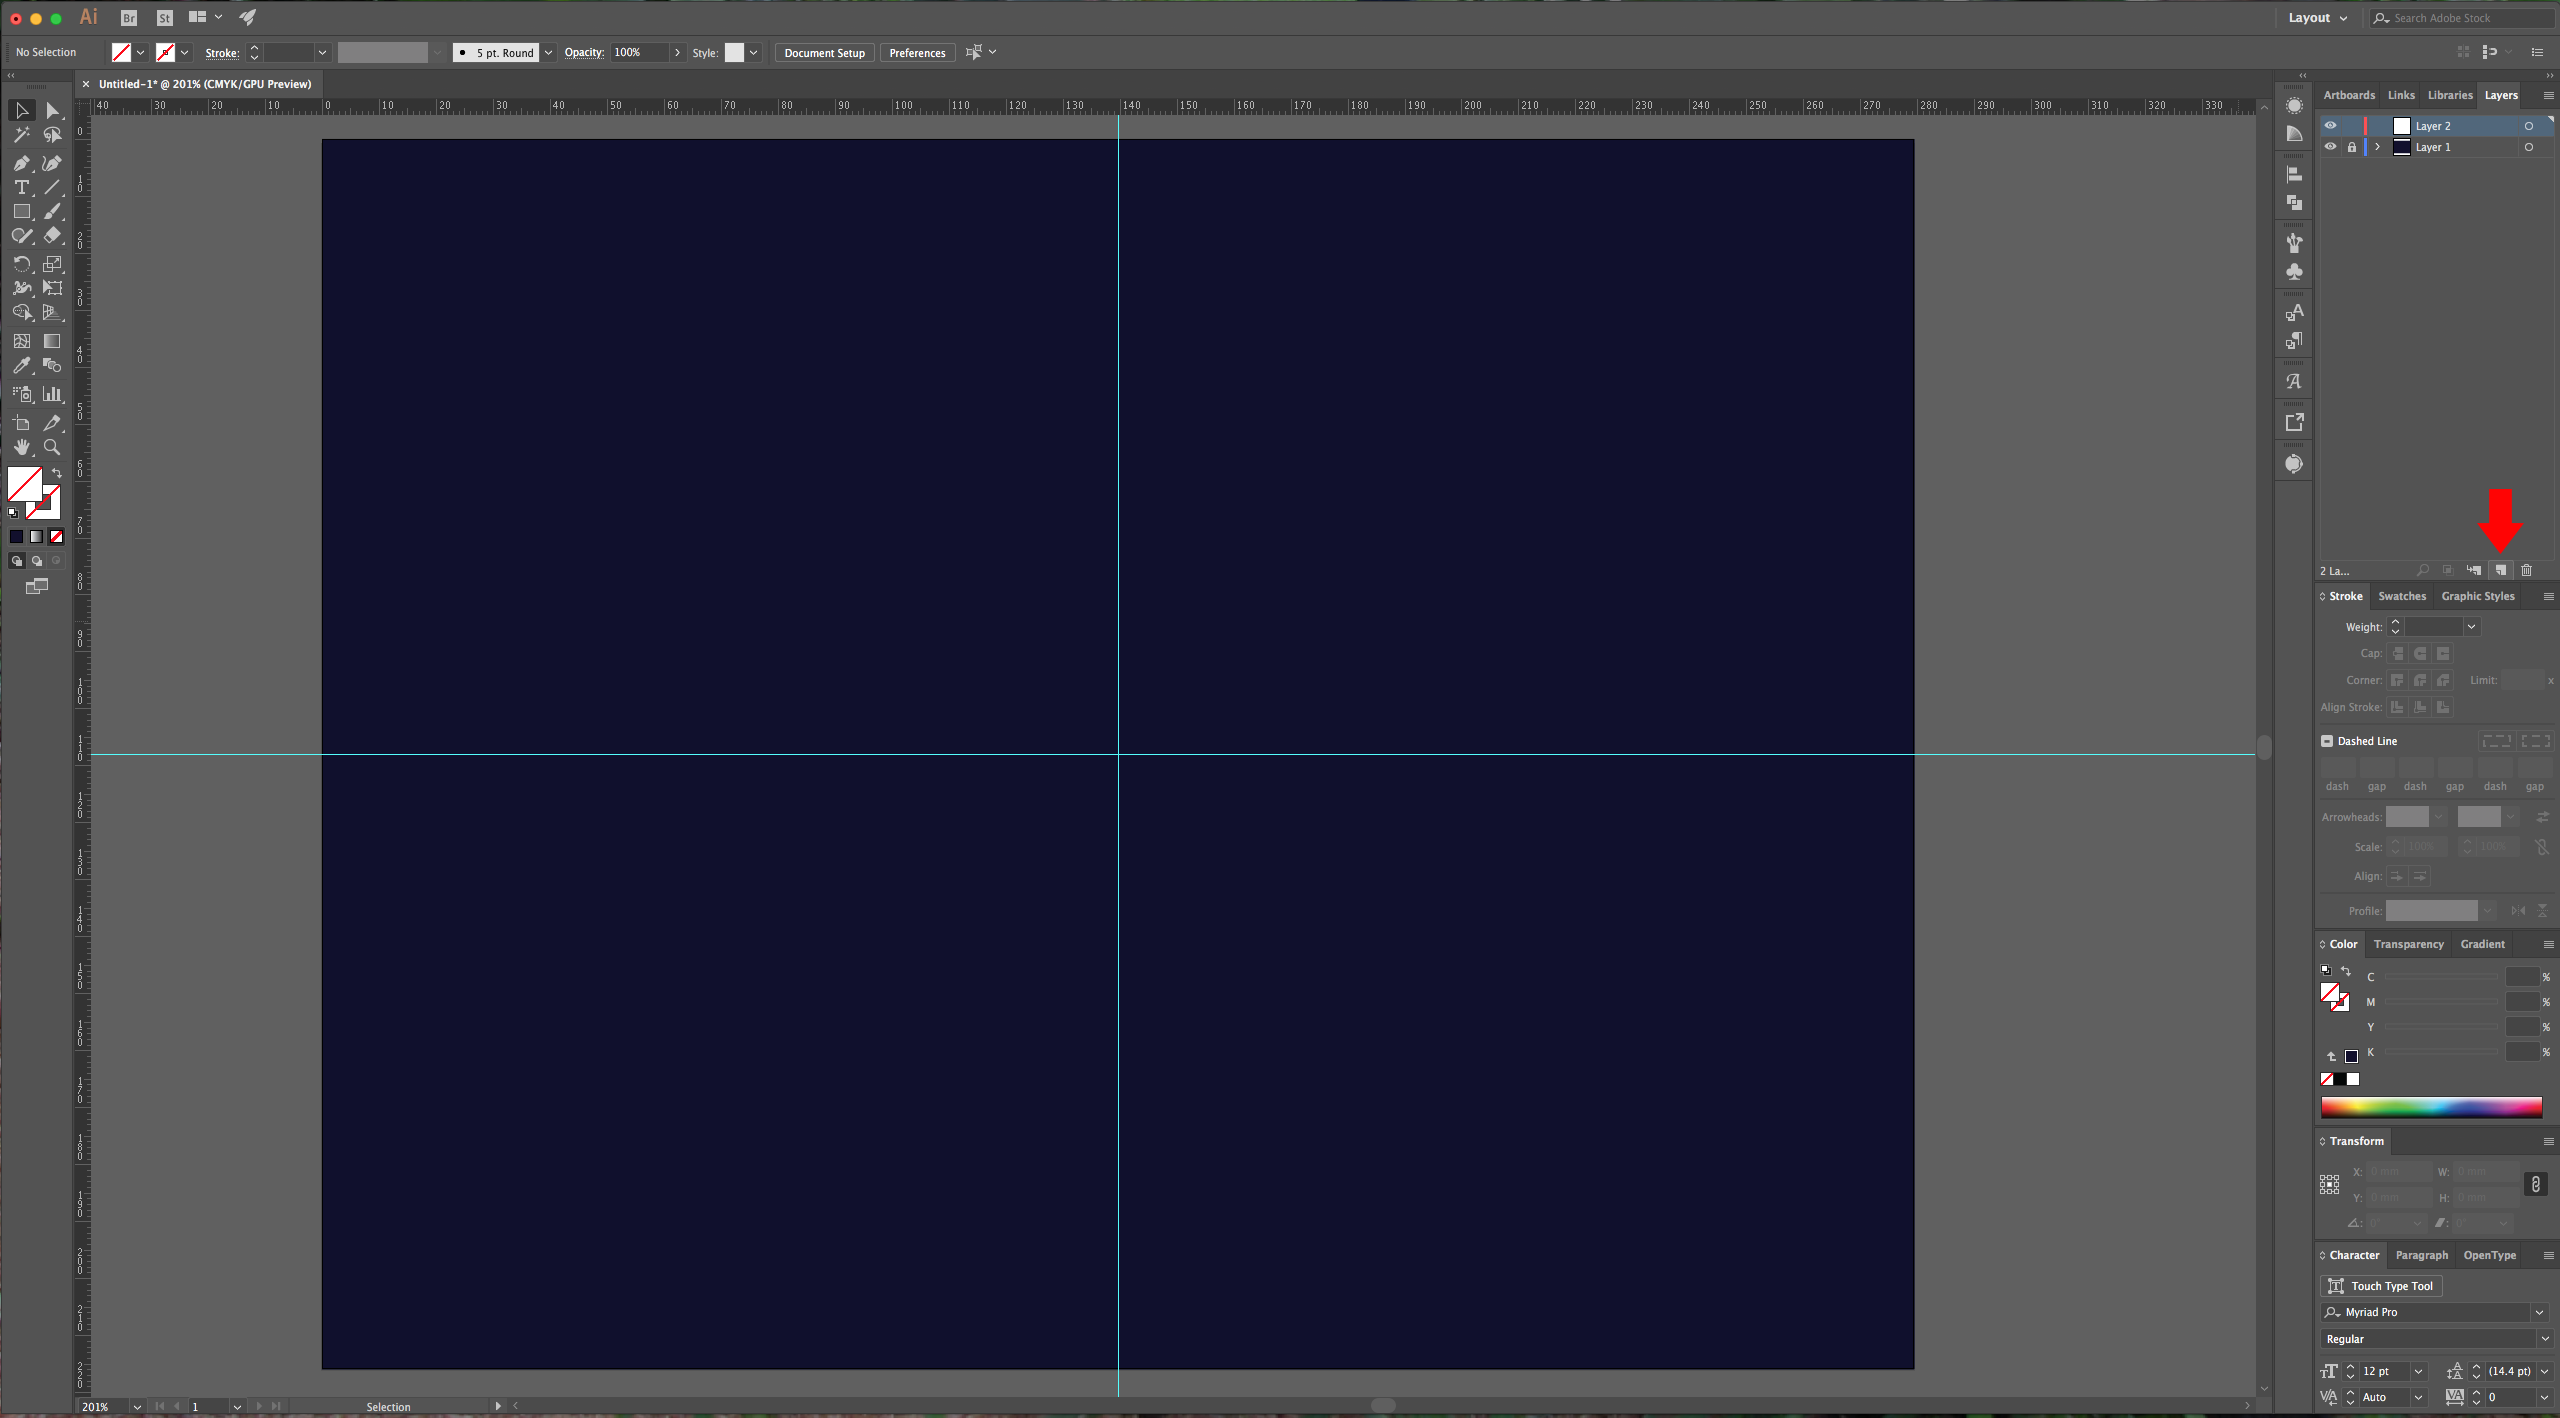
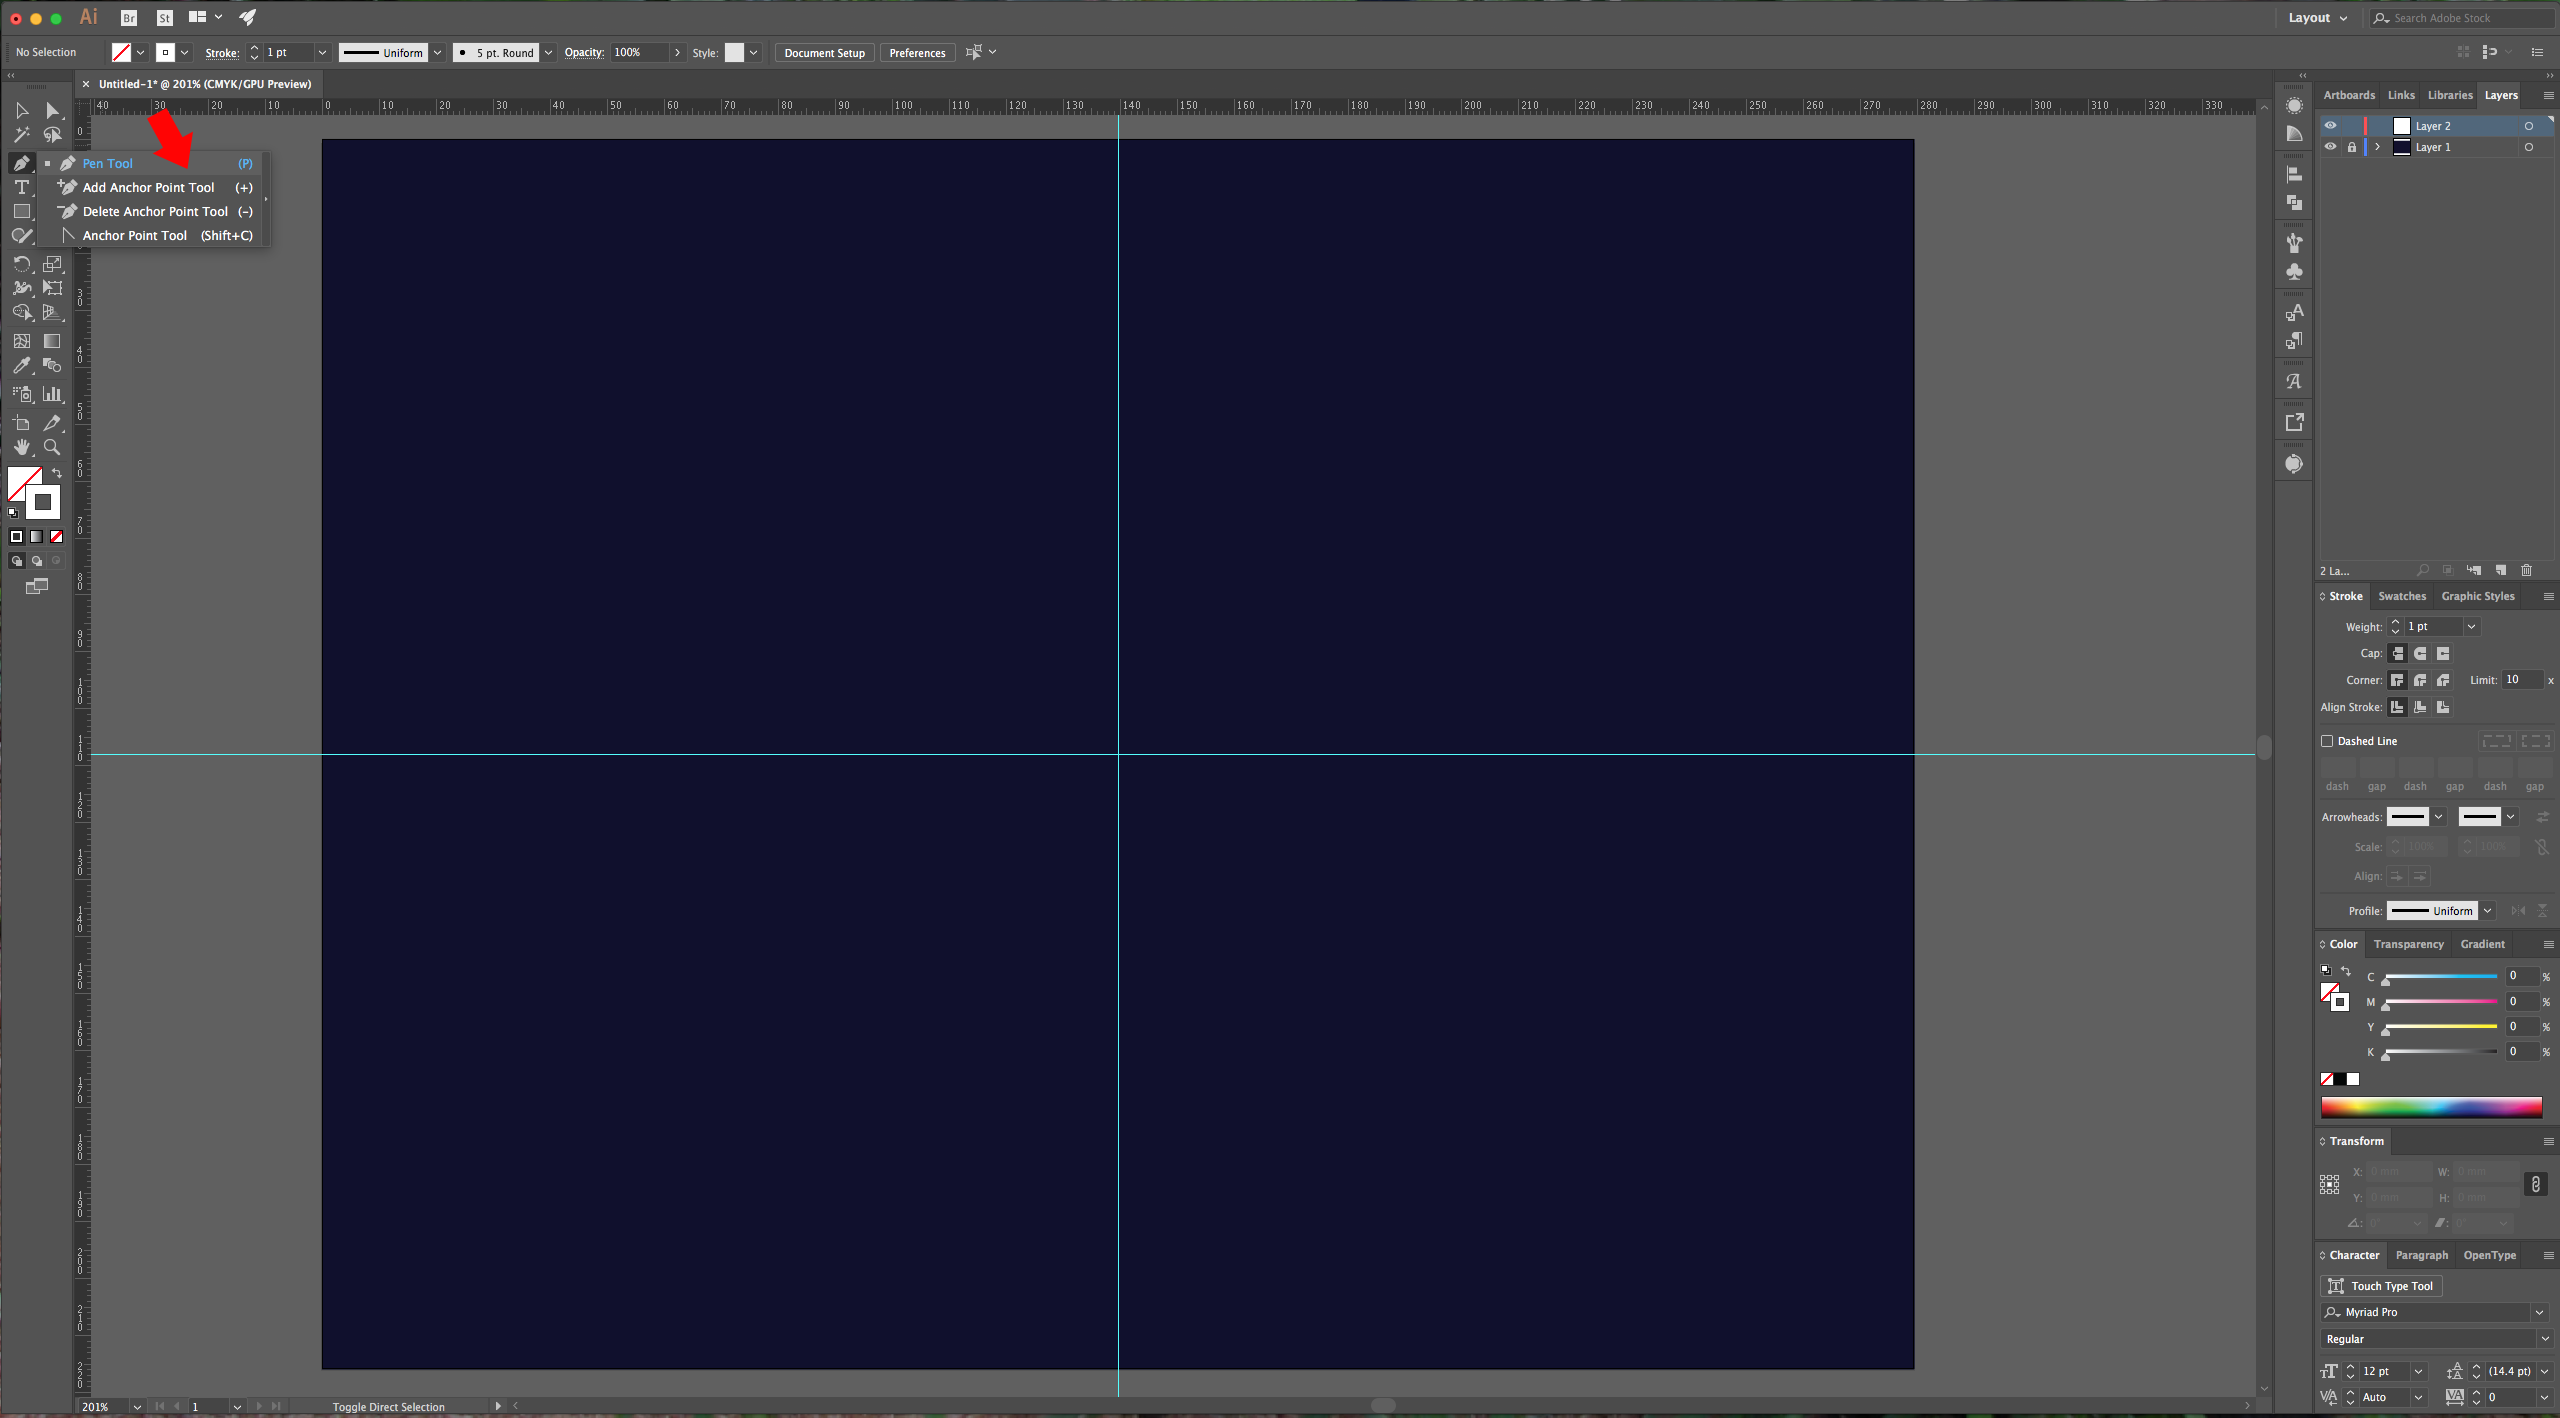
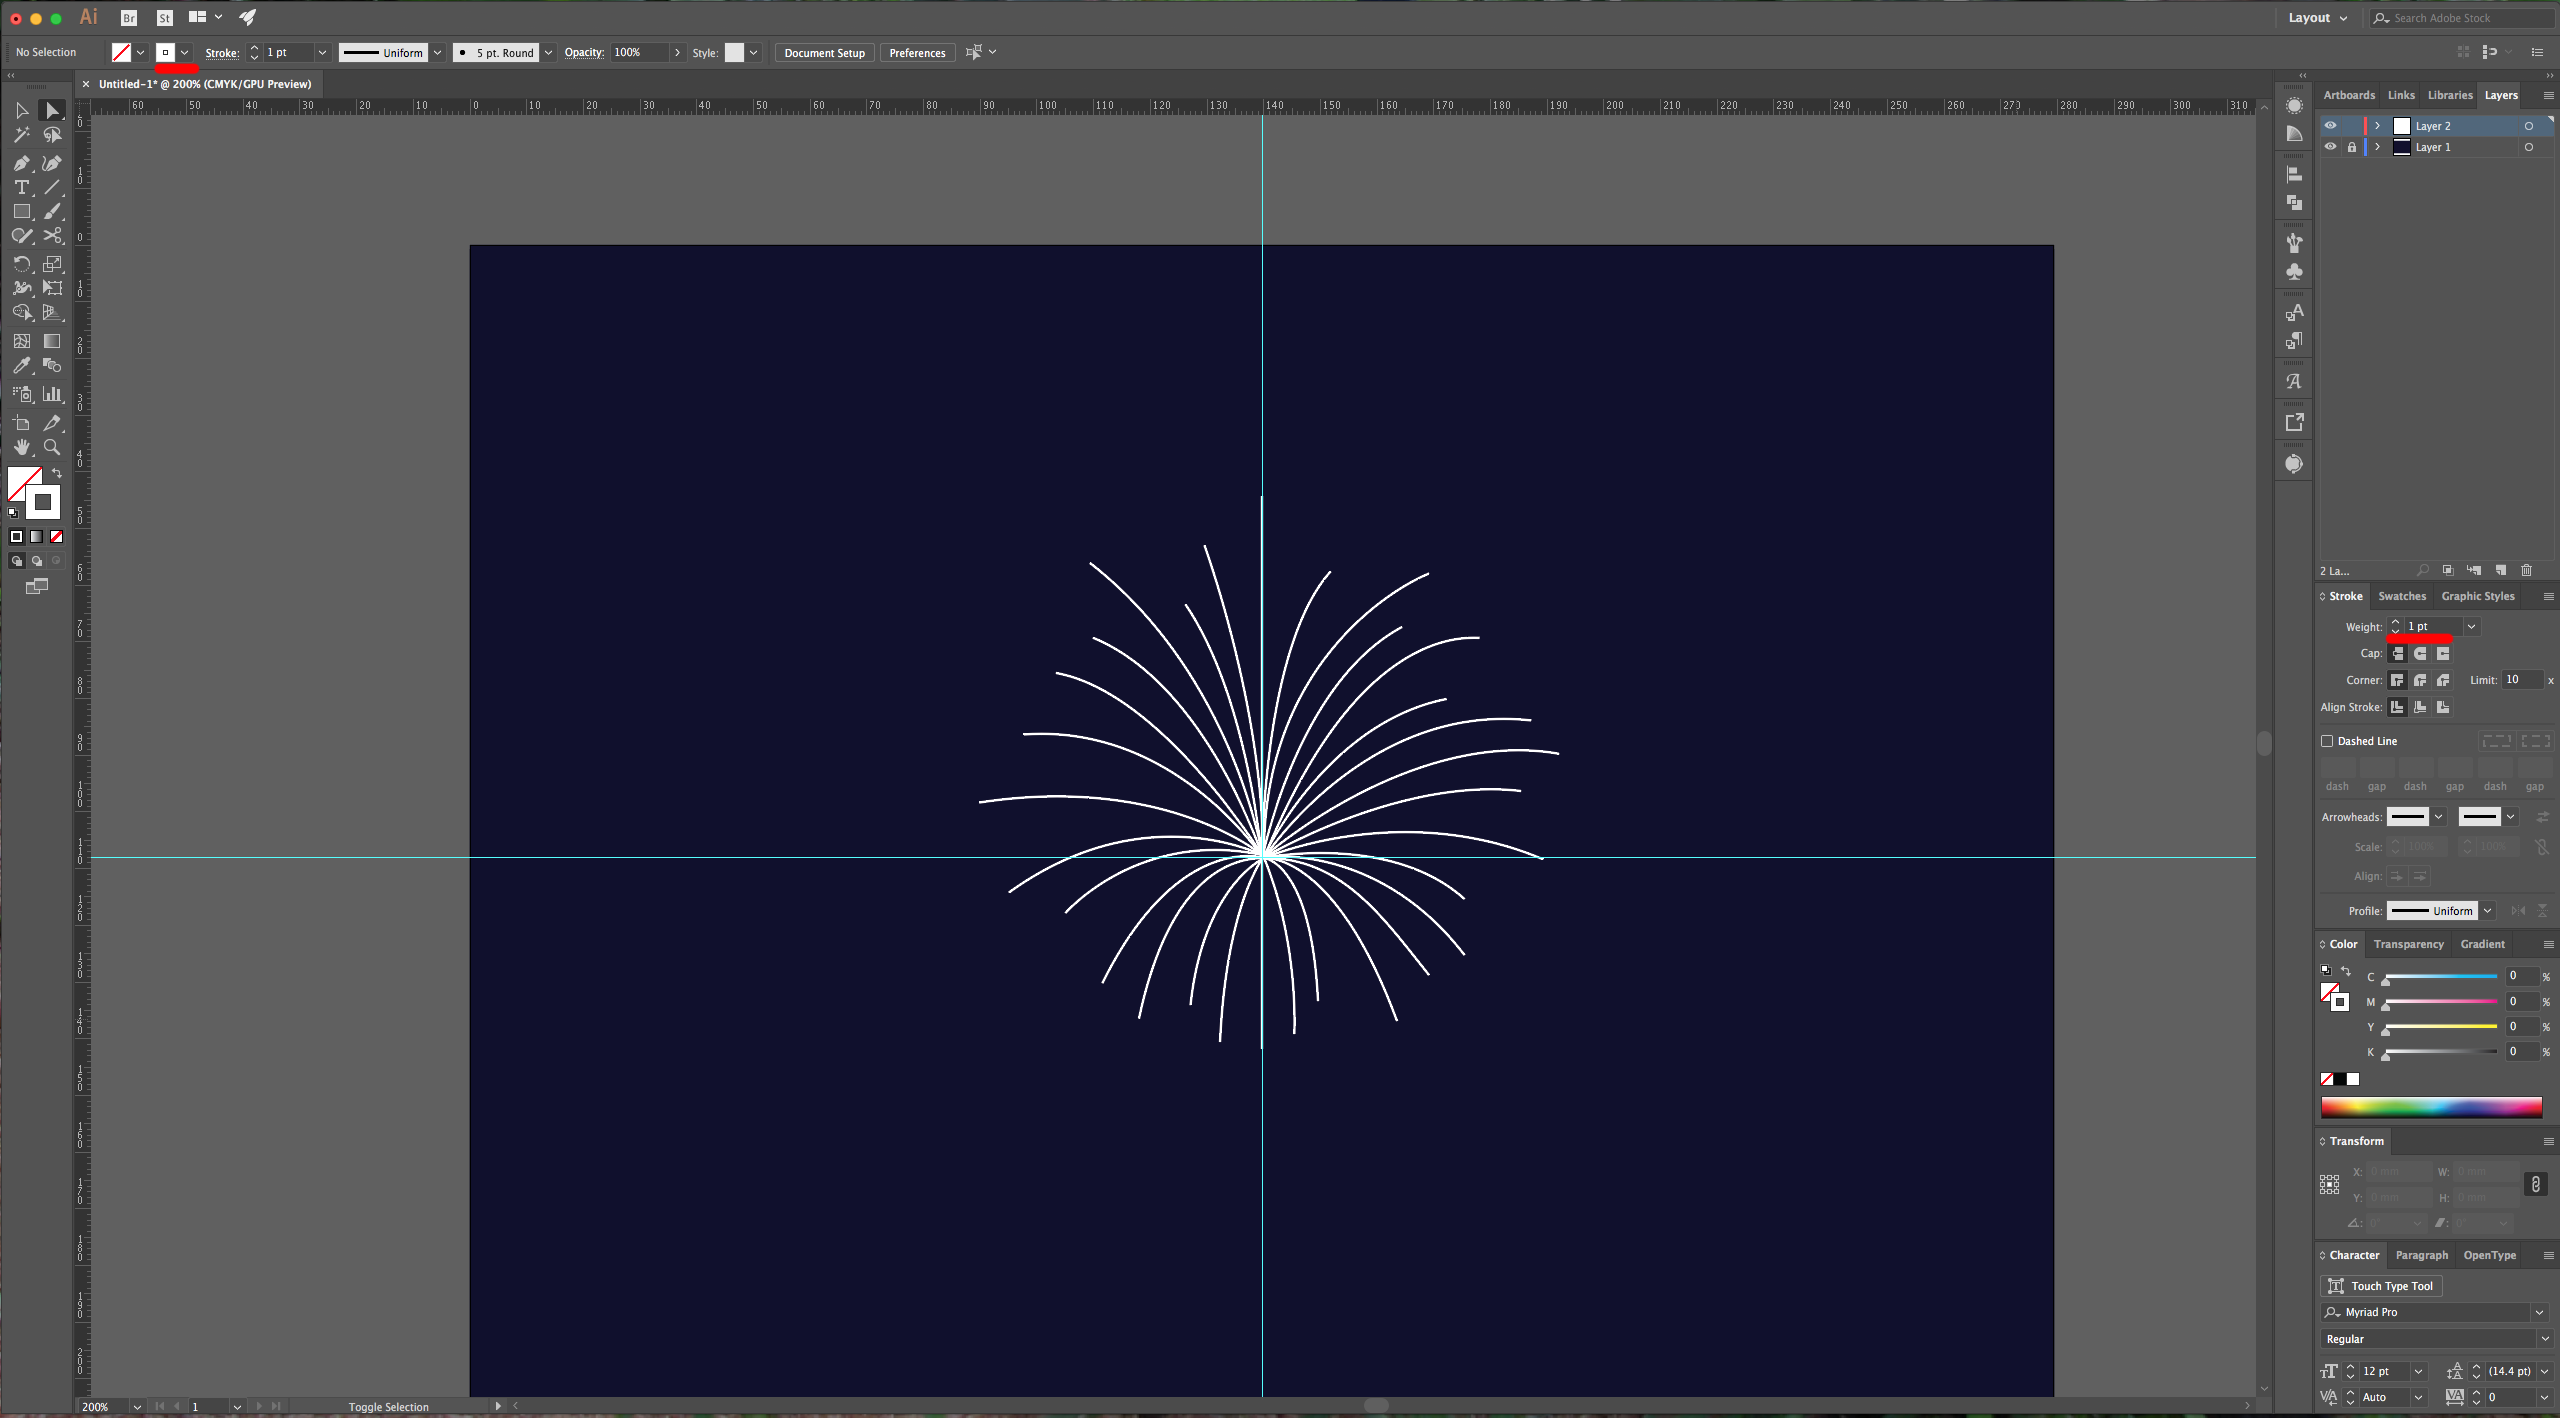
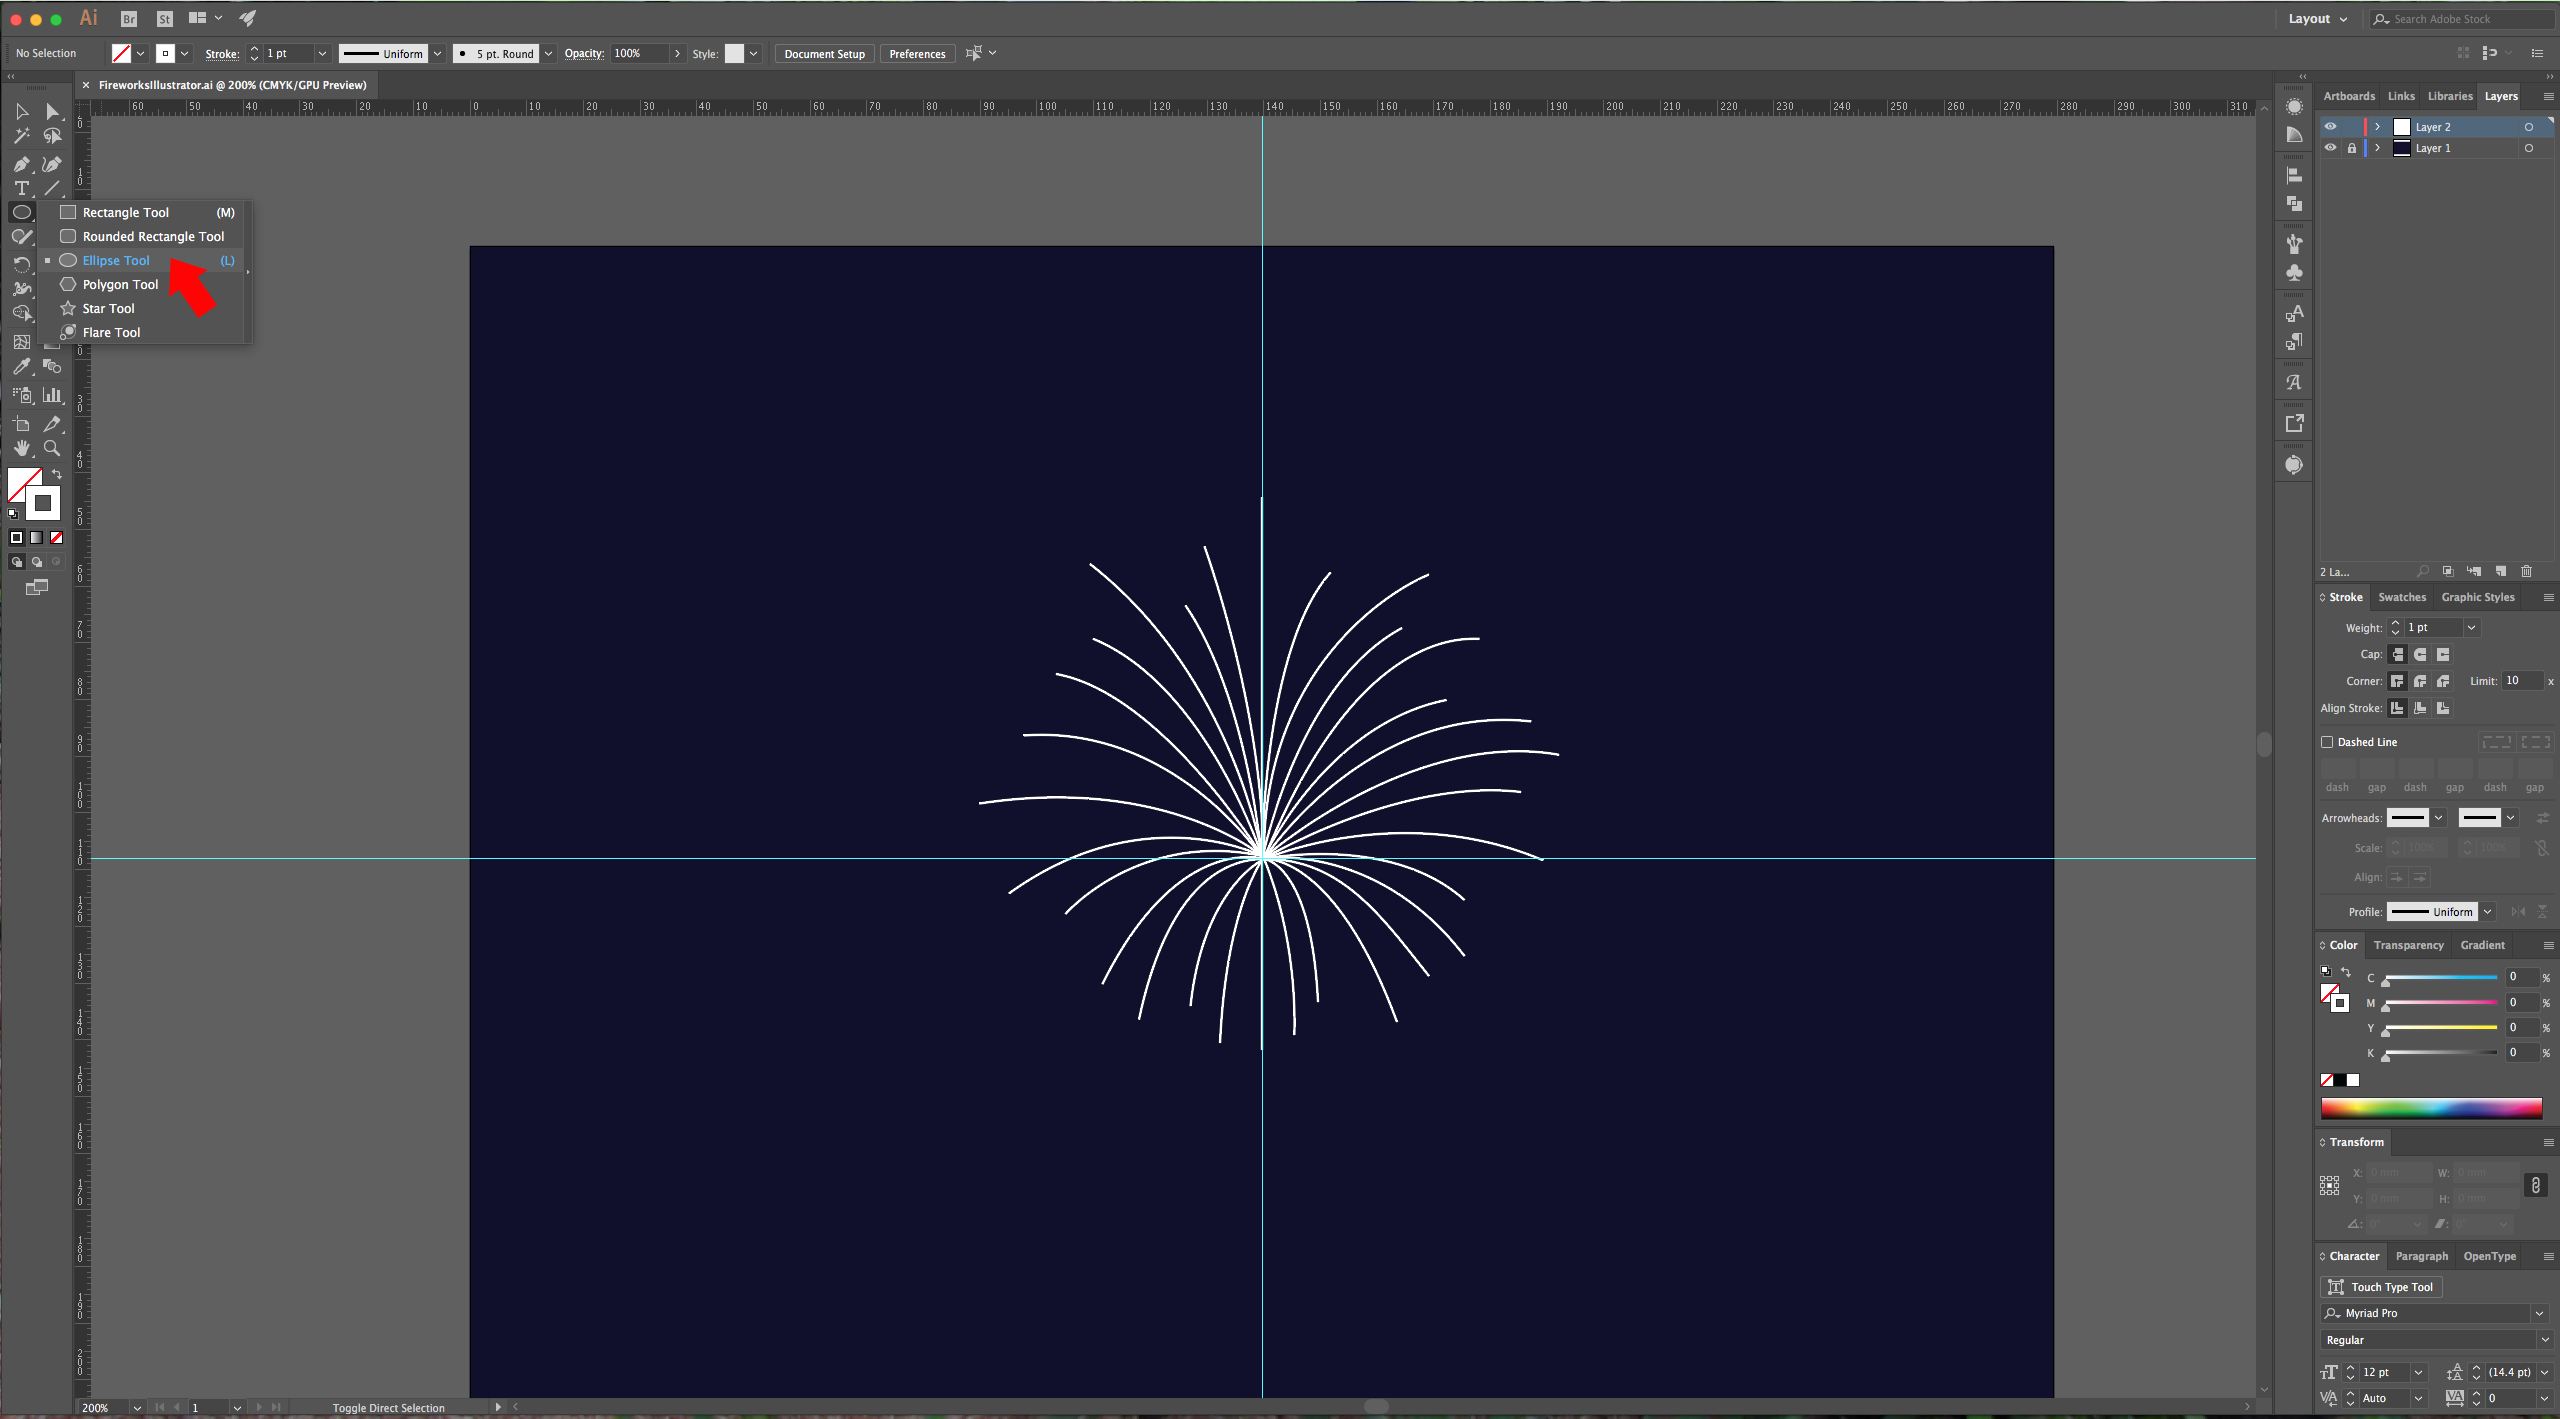
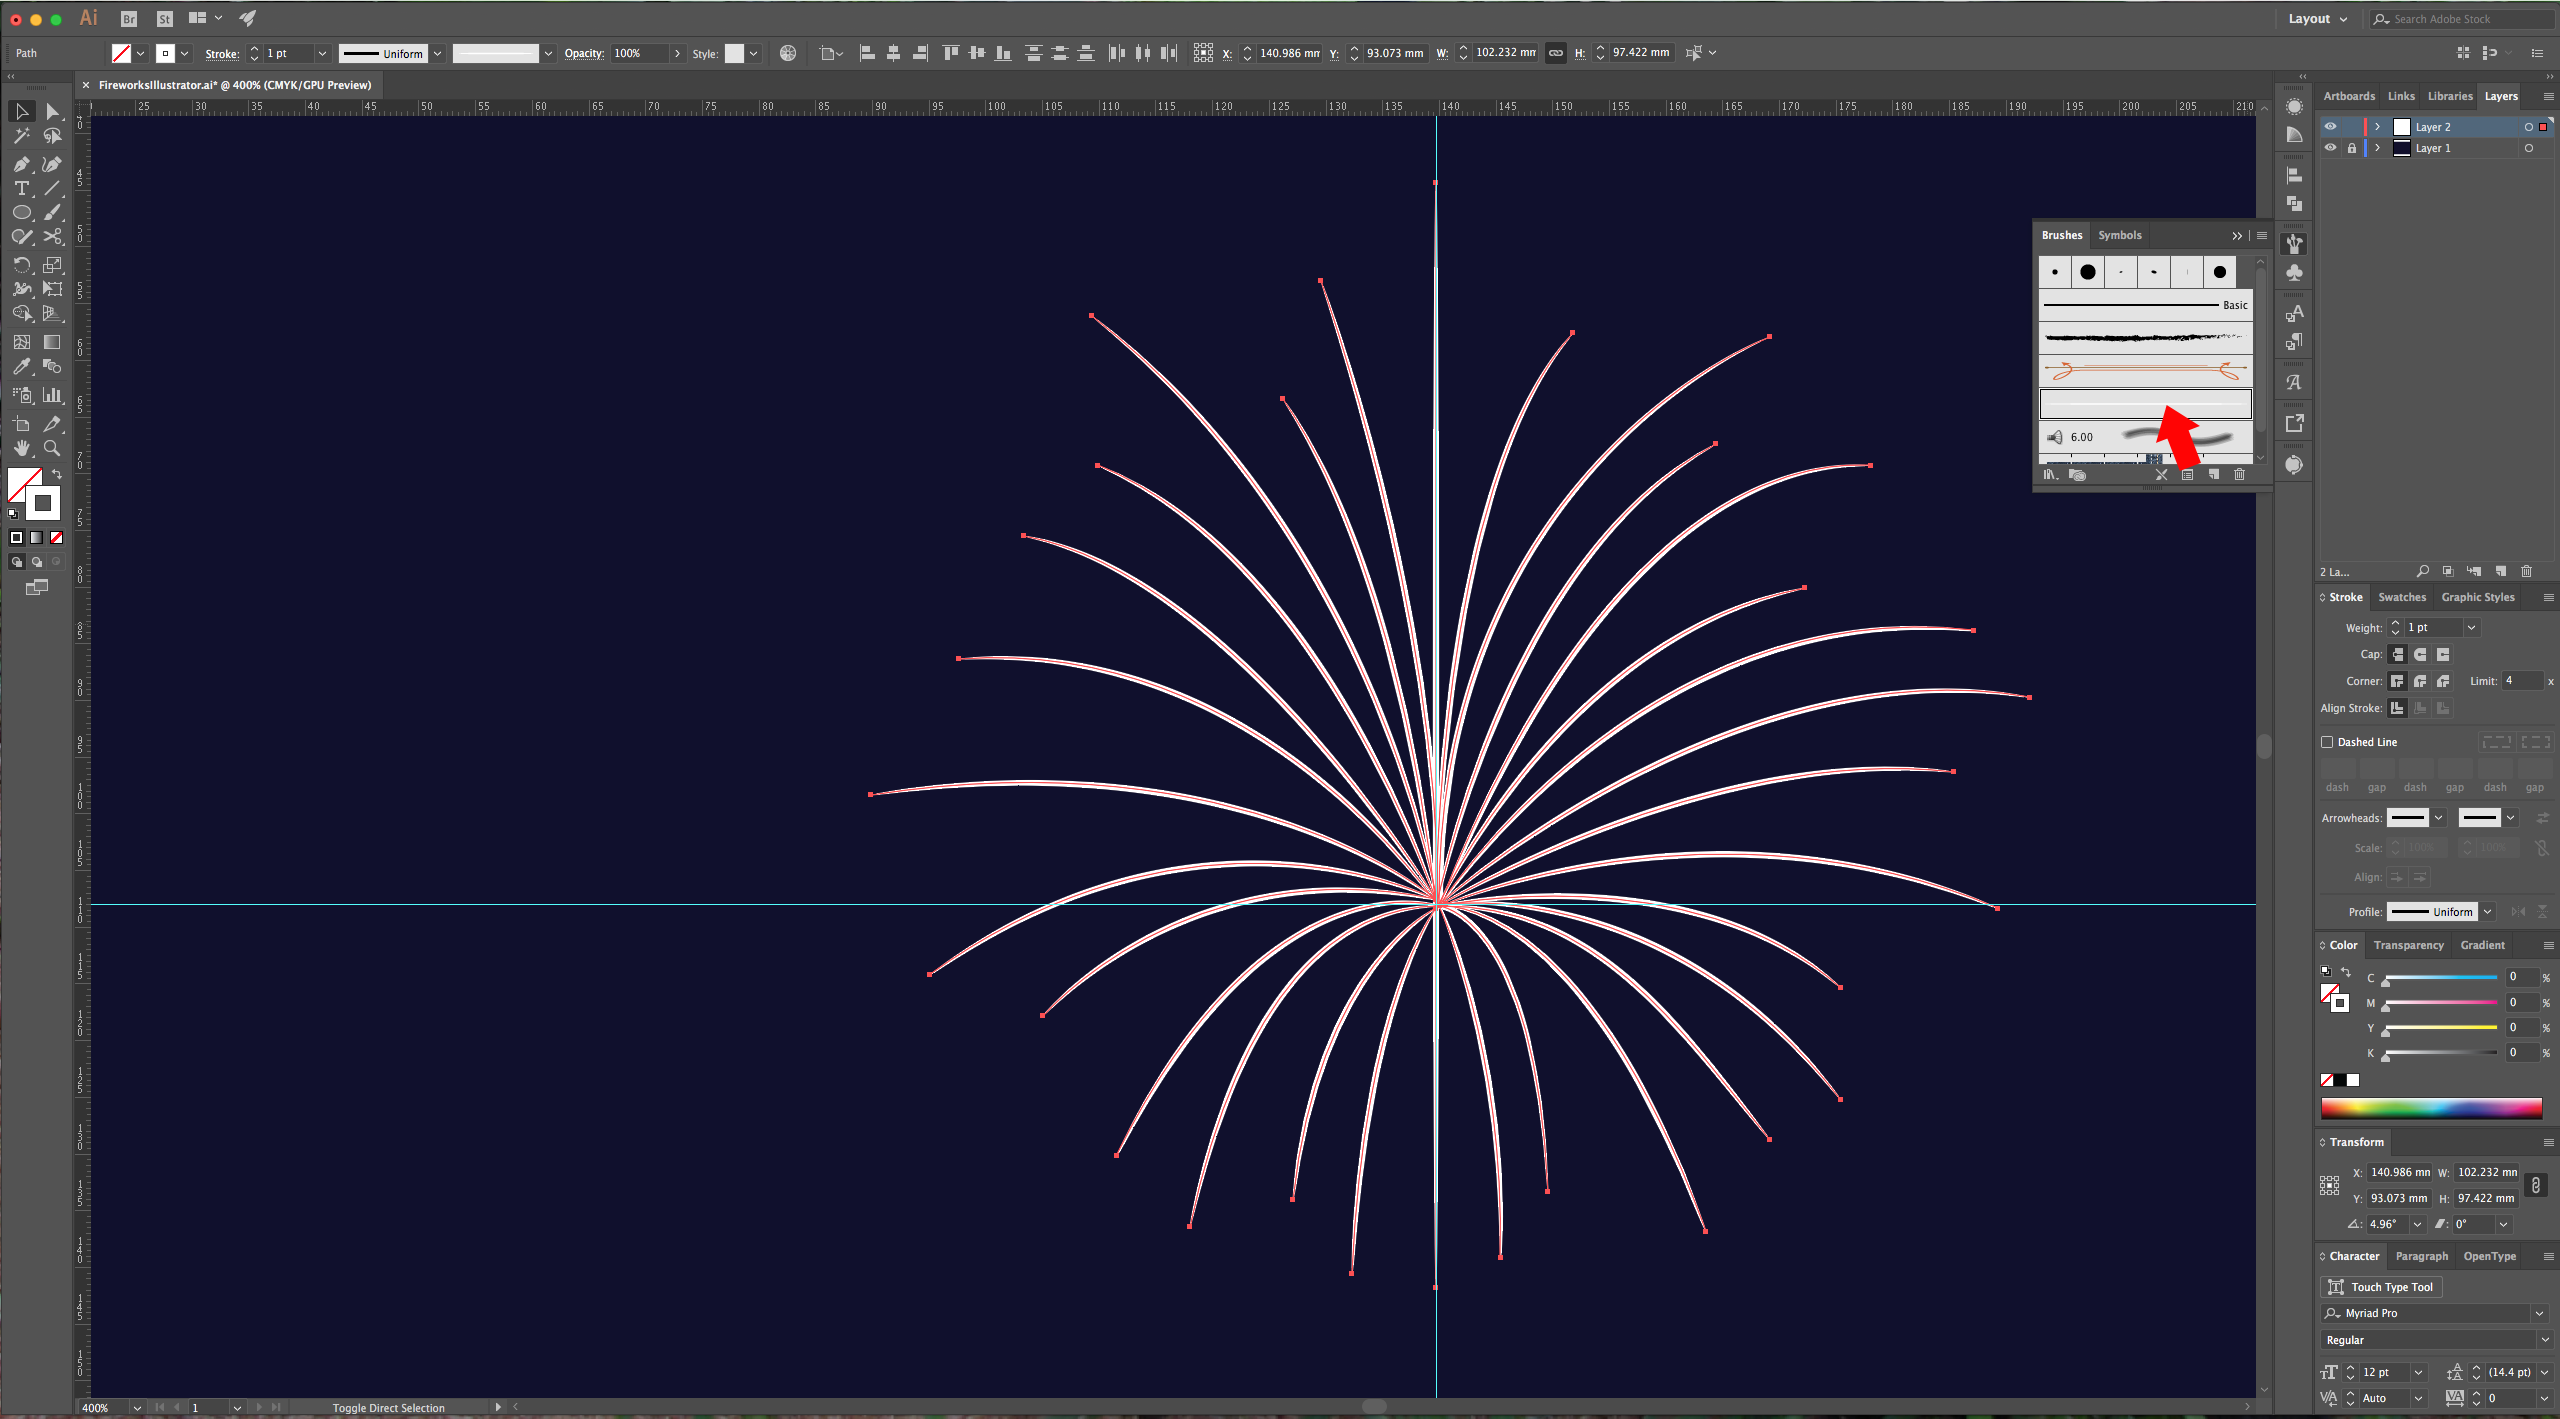
4 - Create a “New Layer” by clicking on the button at the bottom of the “Layers Panel. Select your “Pen Tool” (P) and draw the “Fireworks” (use a 1 point brush, and white as “Stroke” color). Make sure to draw each line as an individual path (hit “Enter” to stop creating more points). To curve your “Path”, drag your cursor. The final shape should look like a flower of sorts.
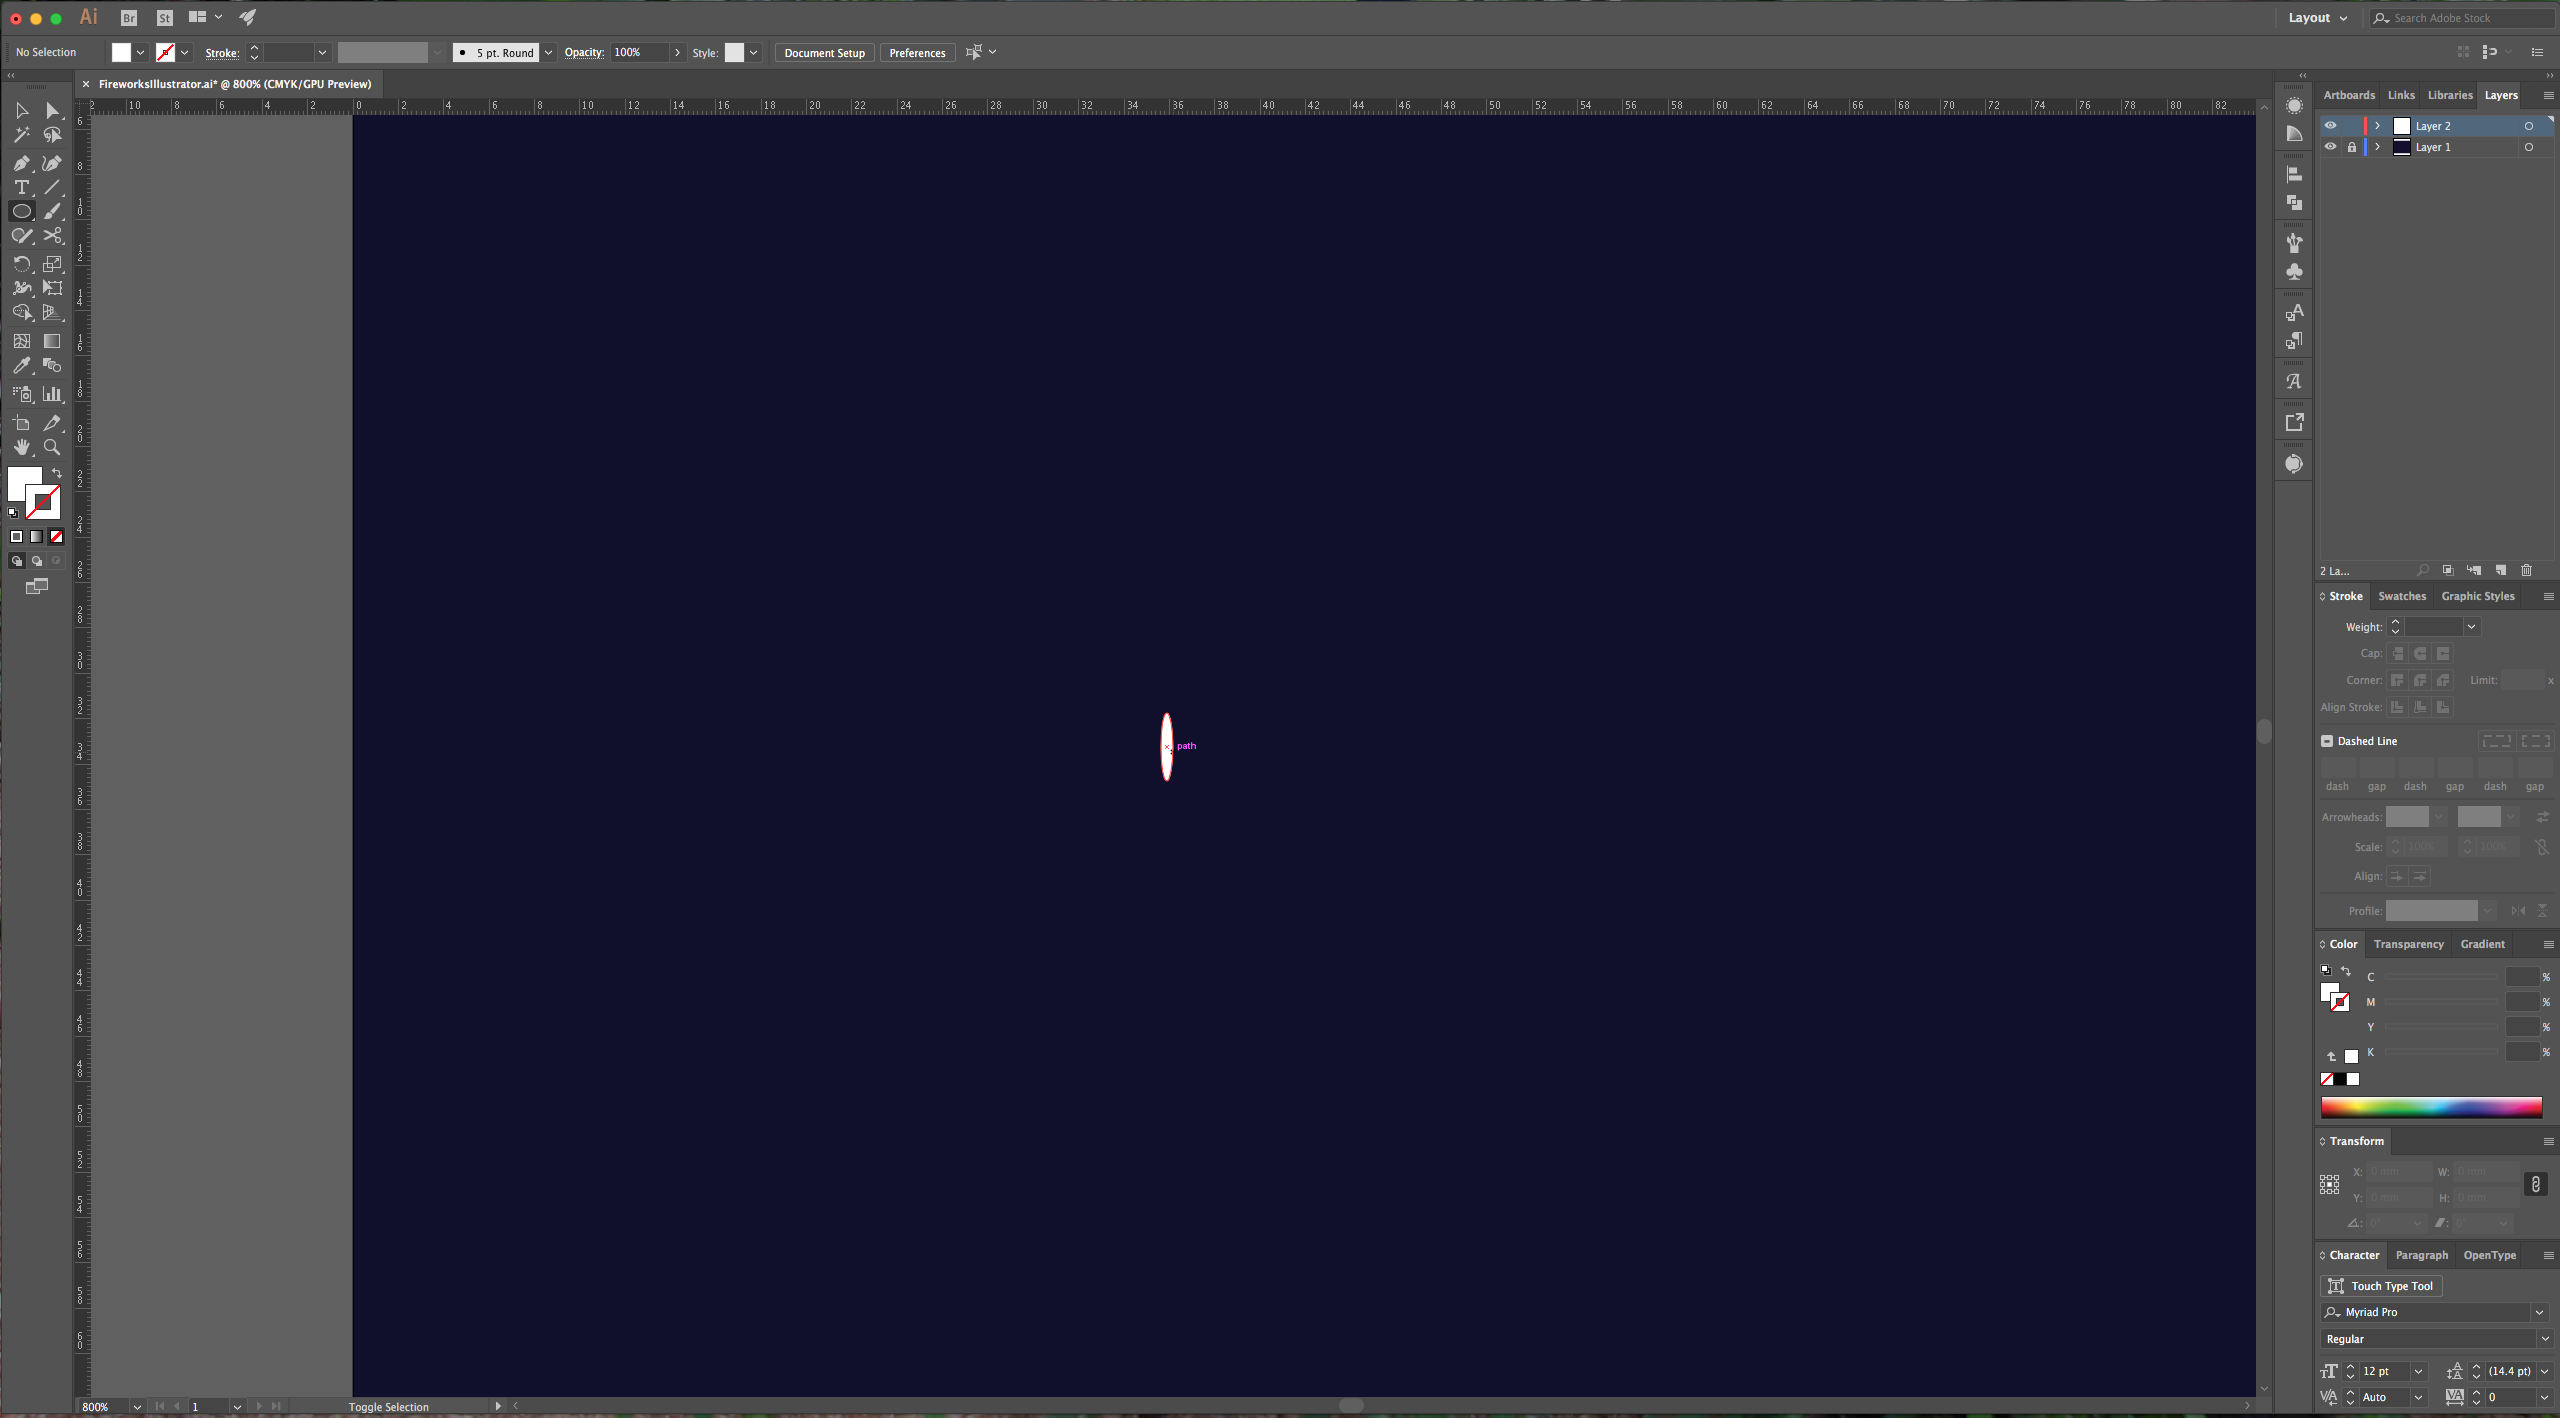
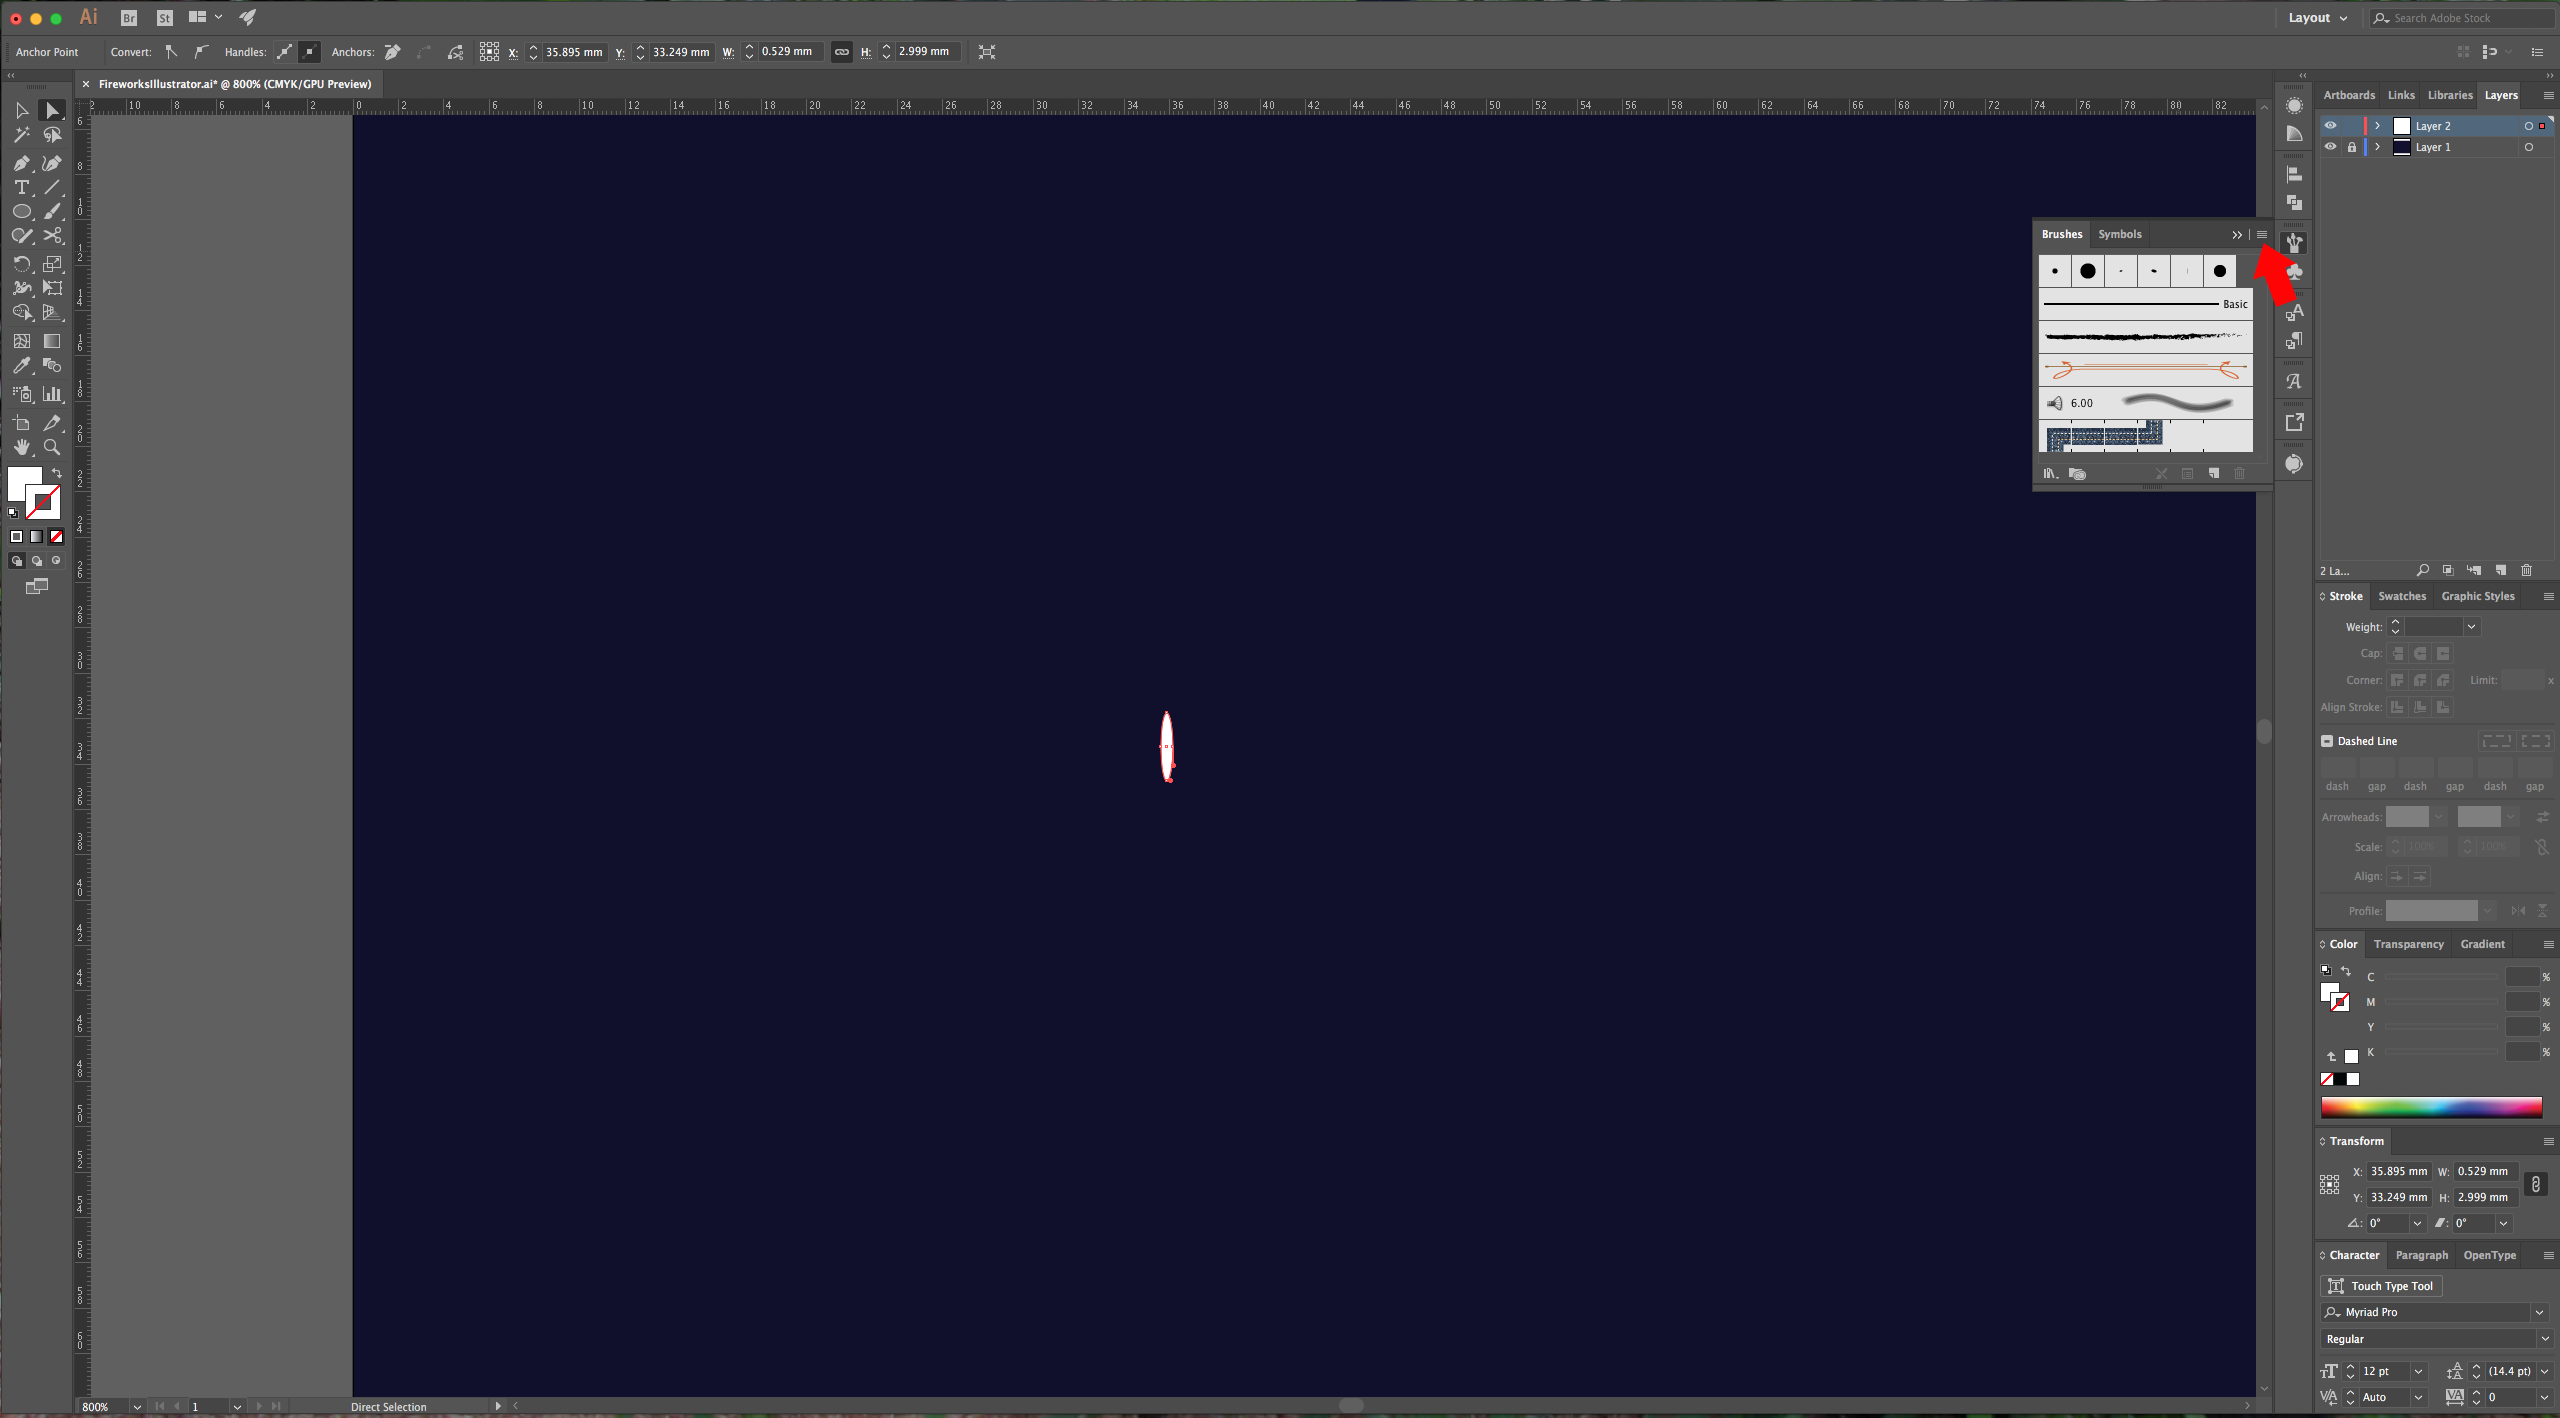
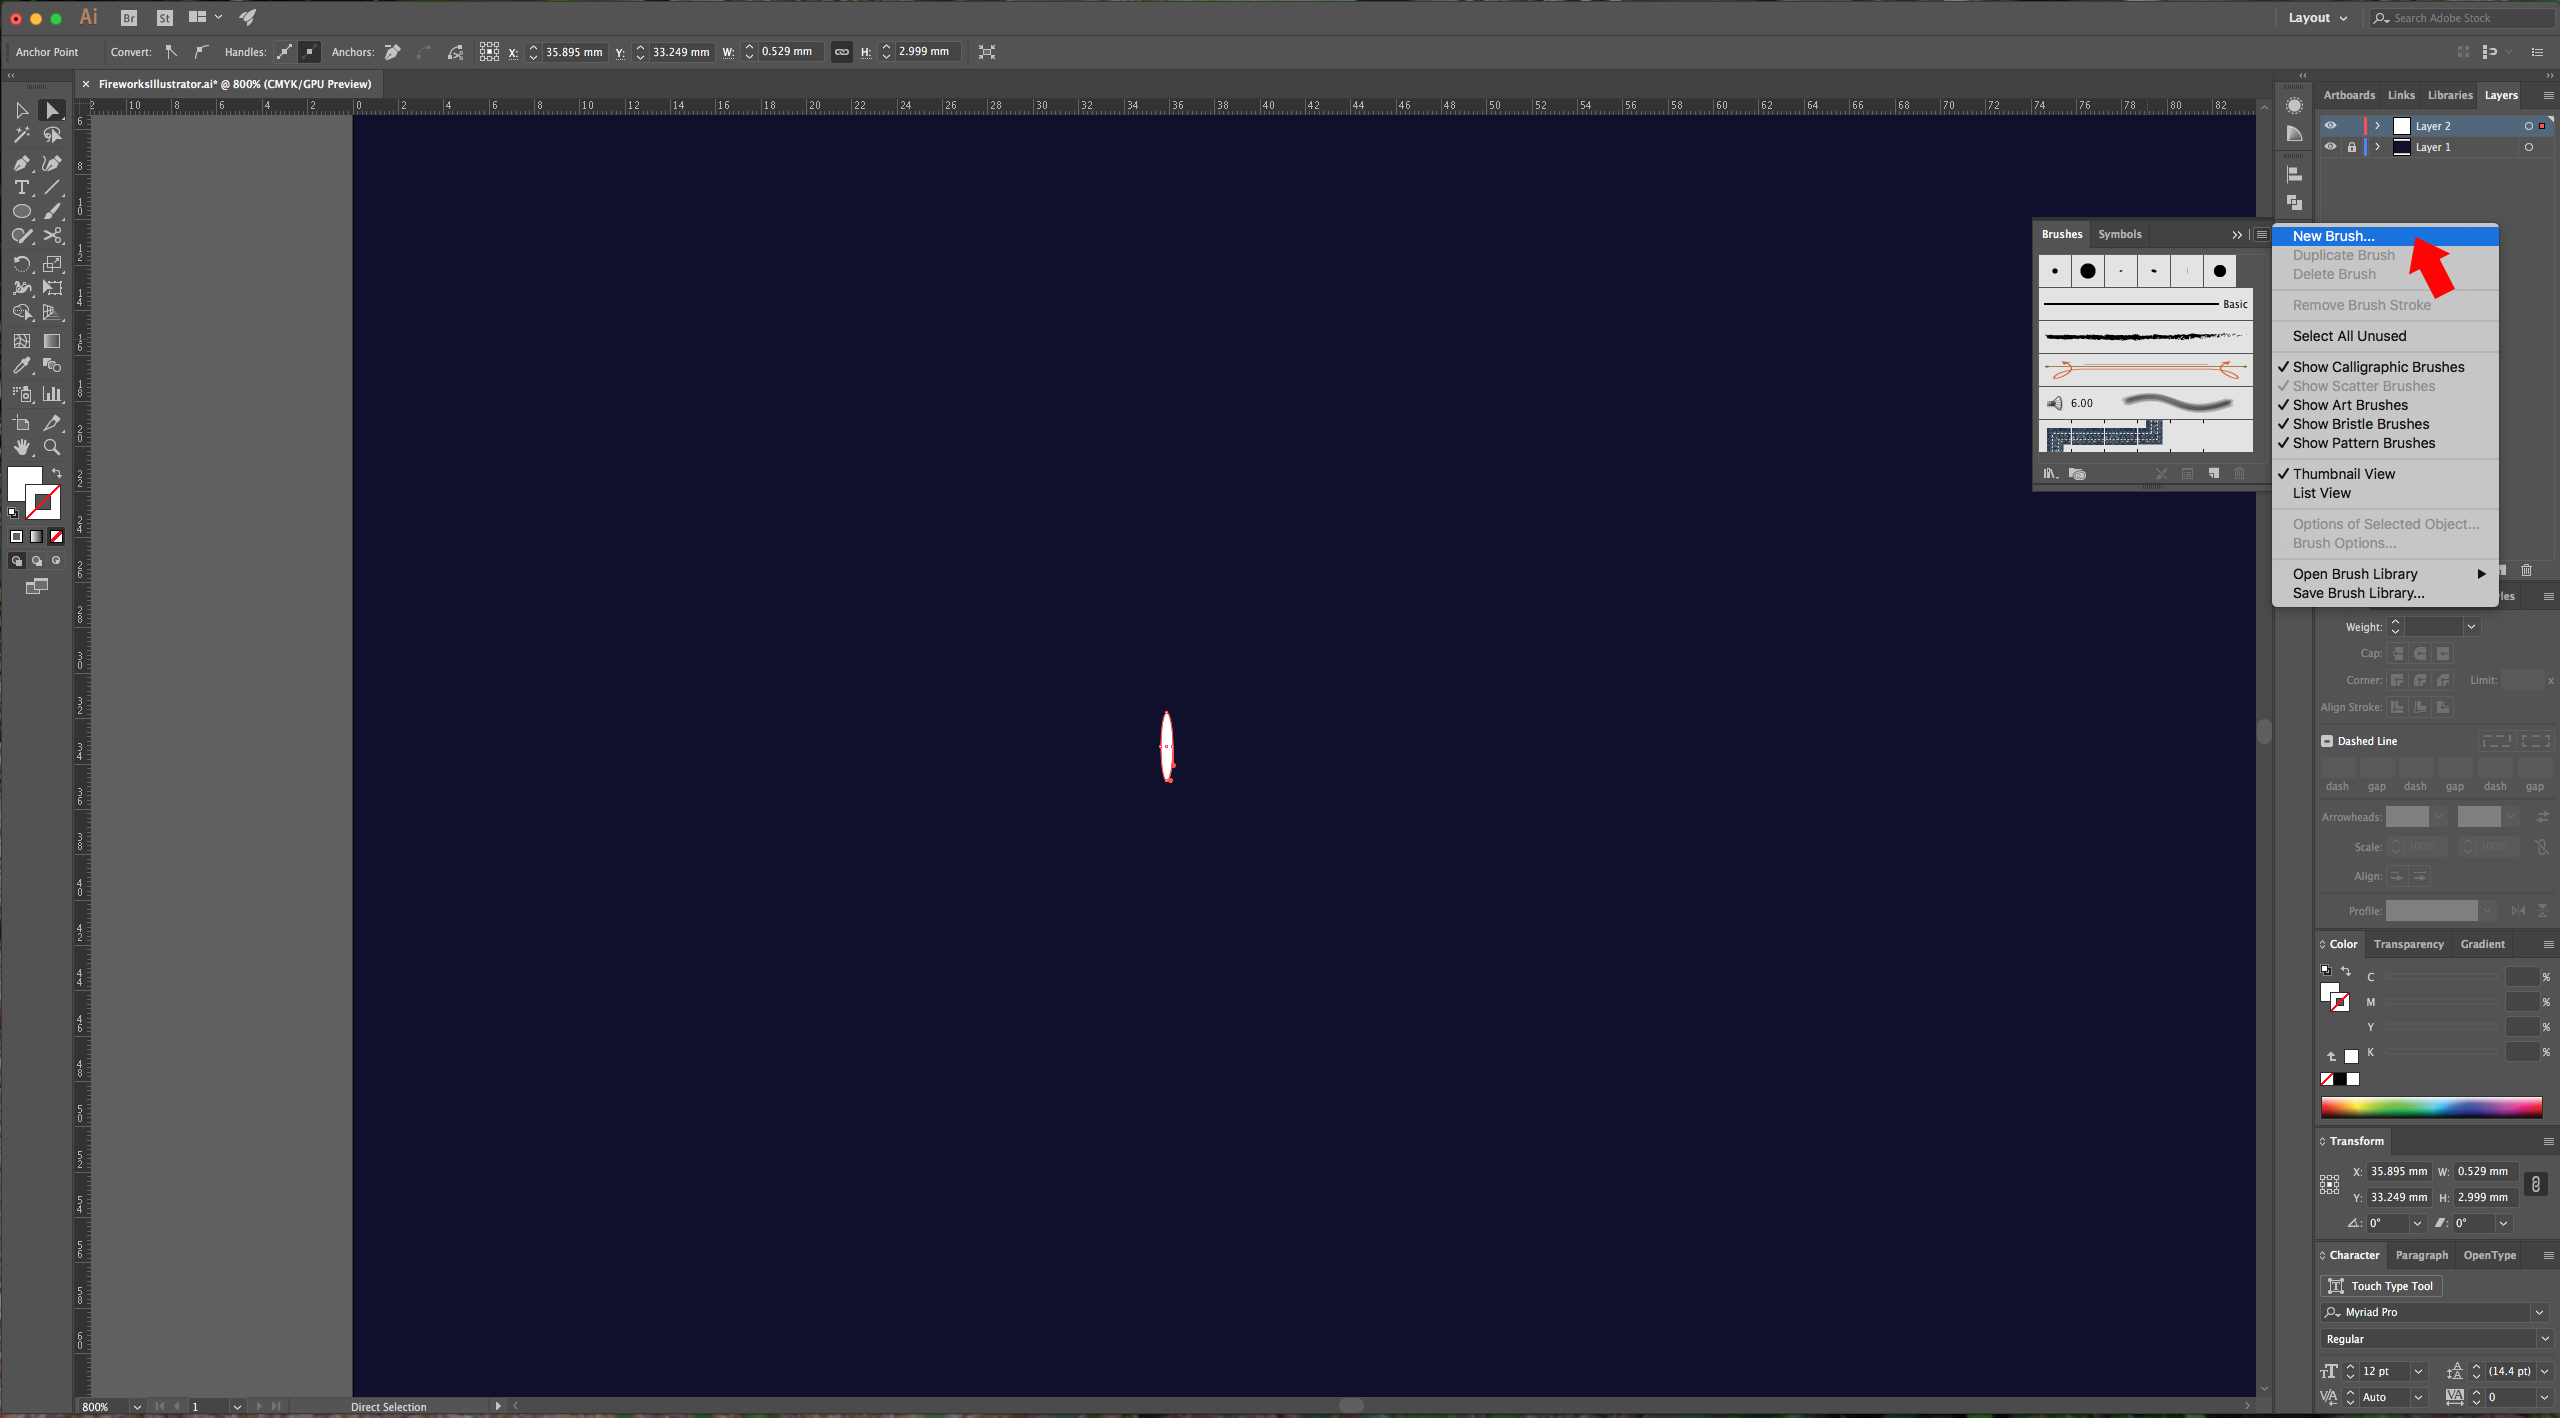
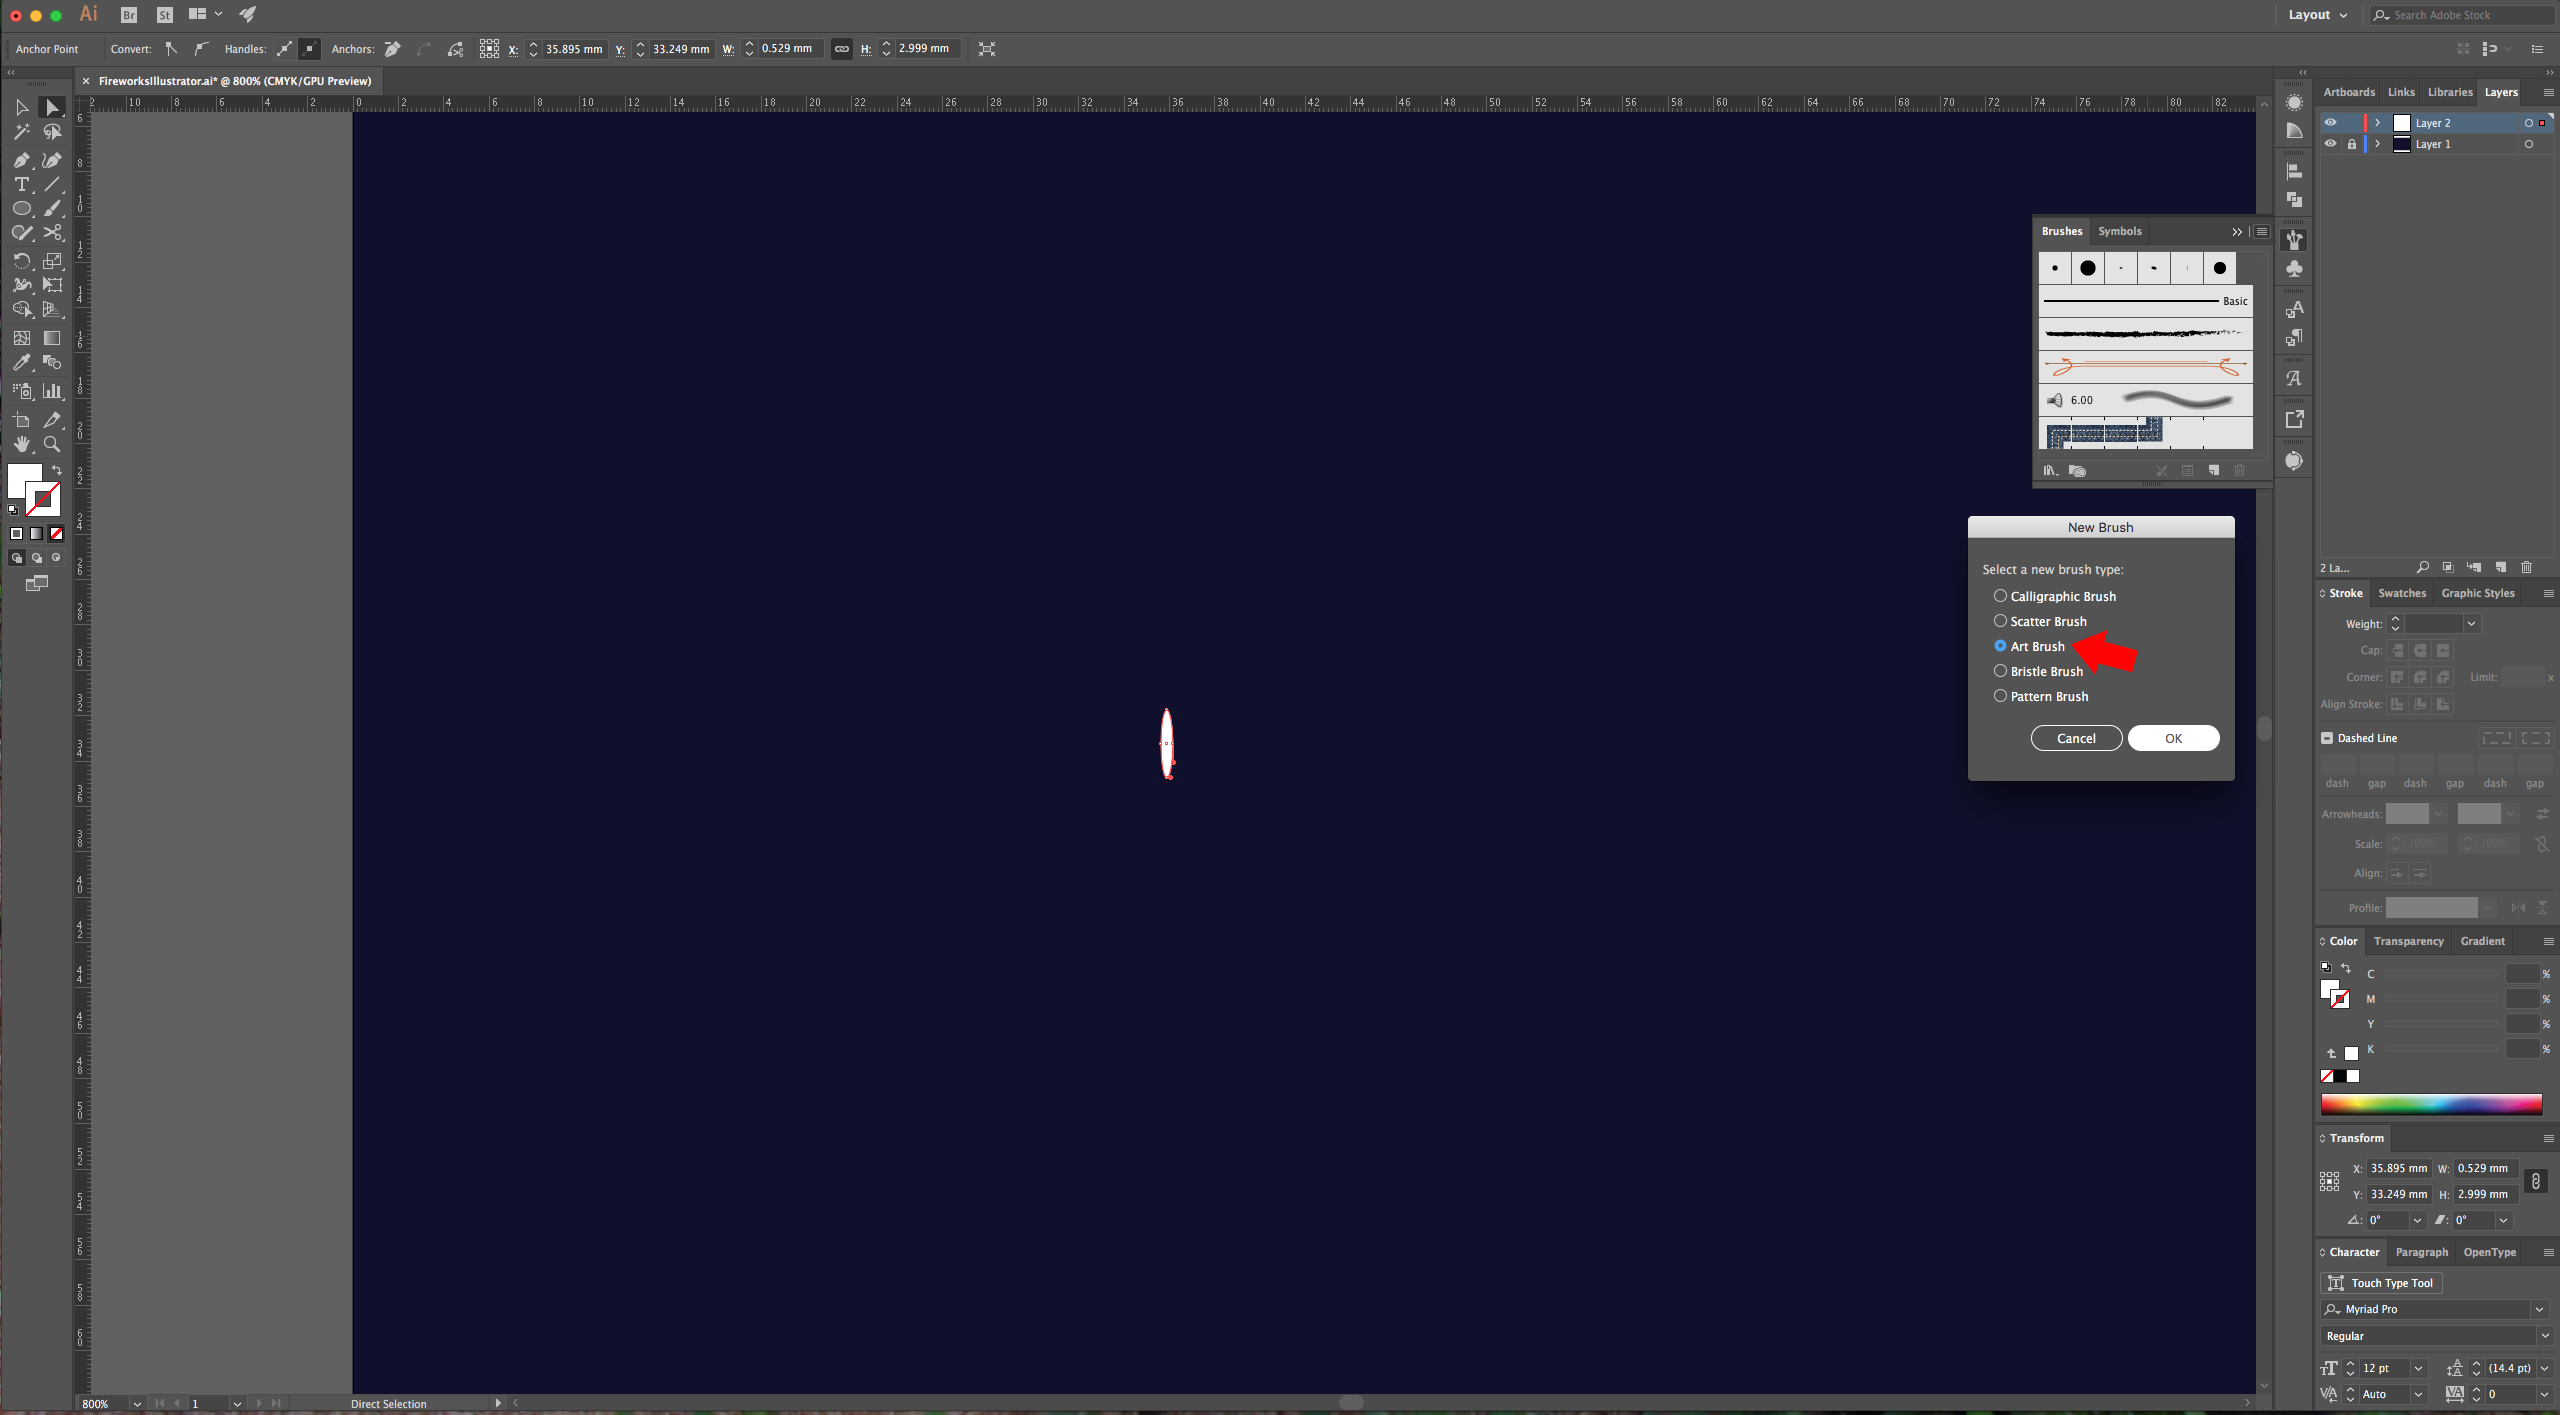
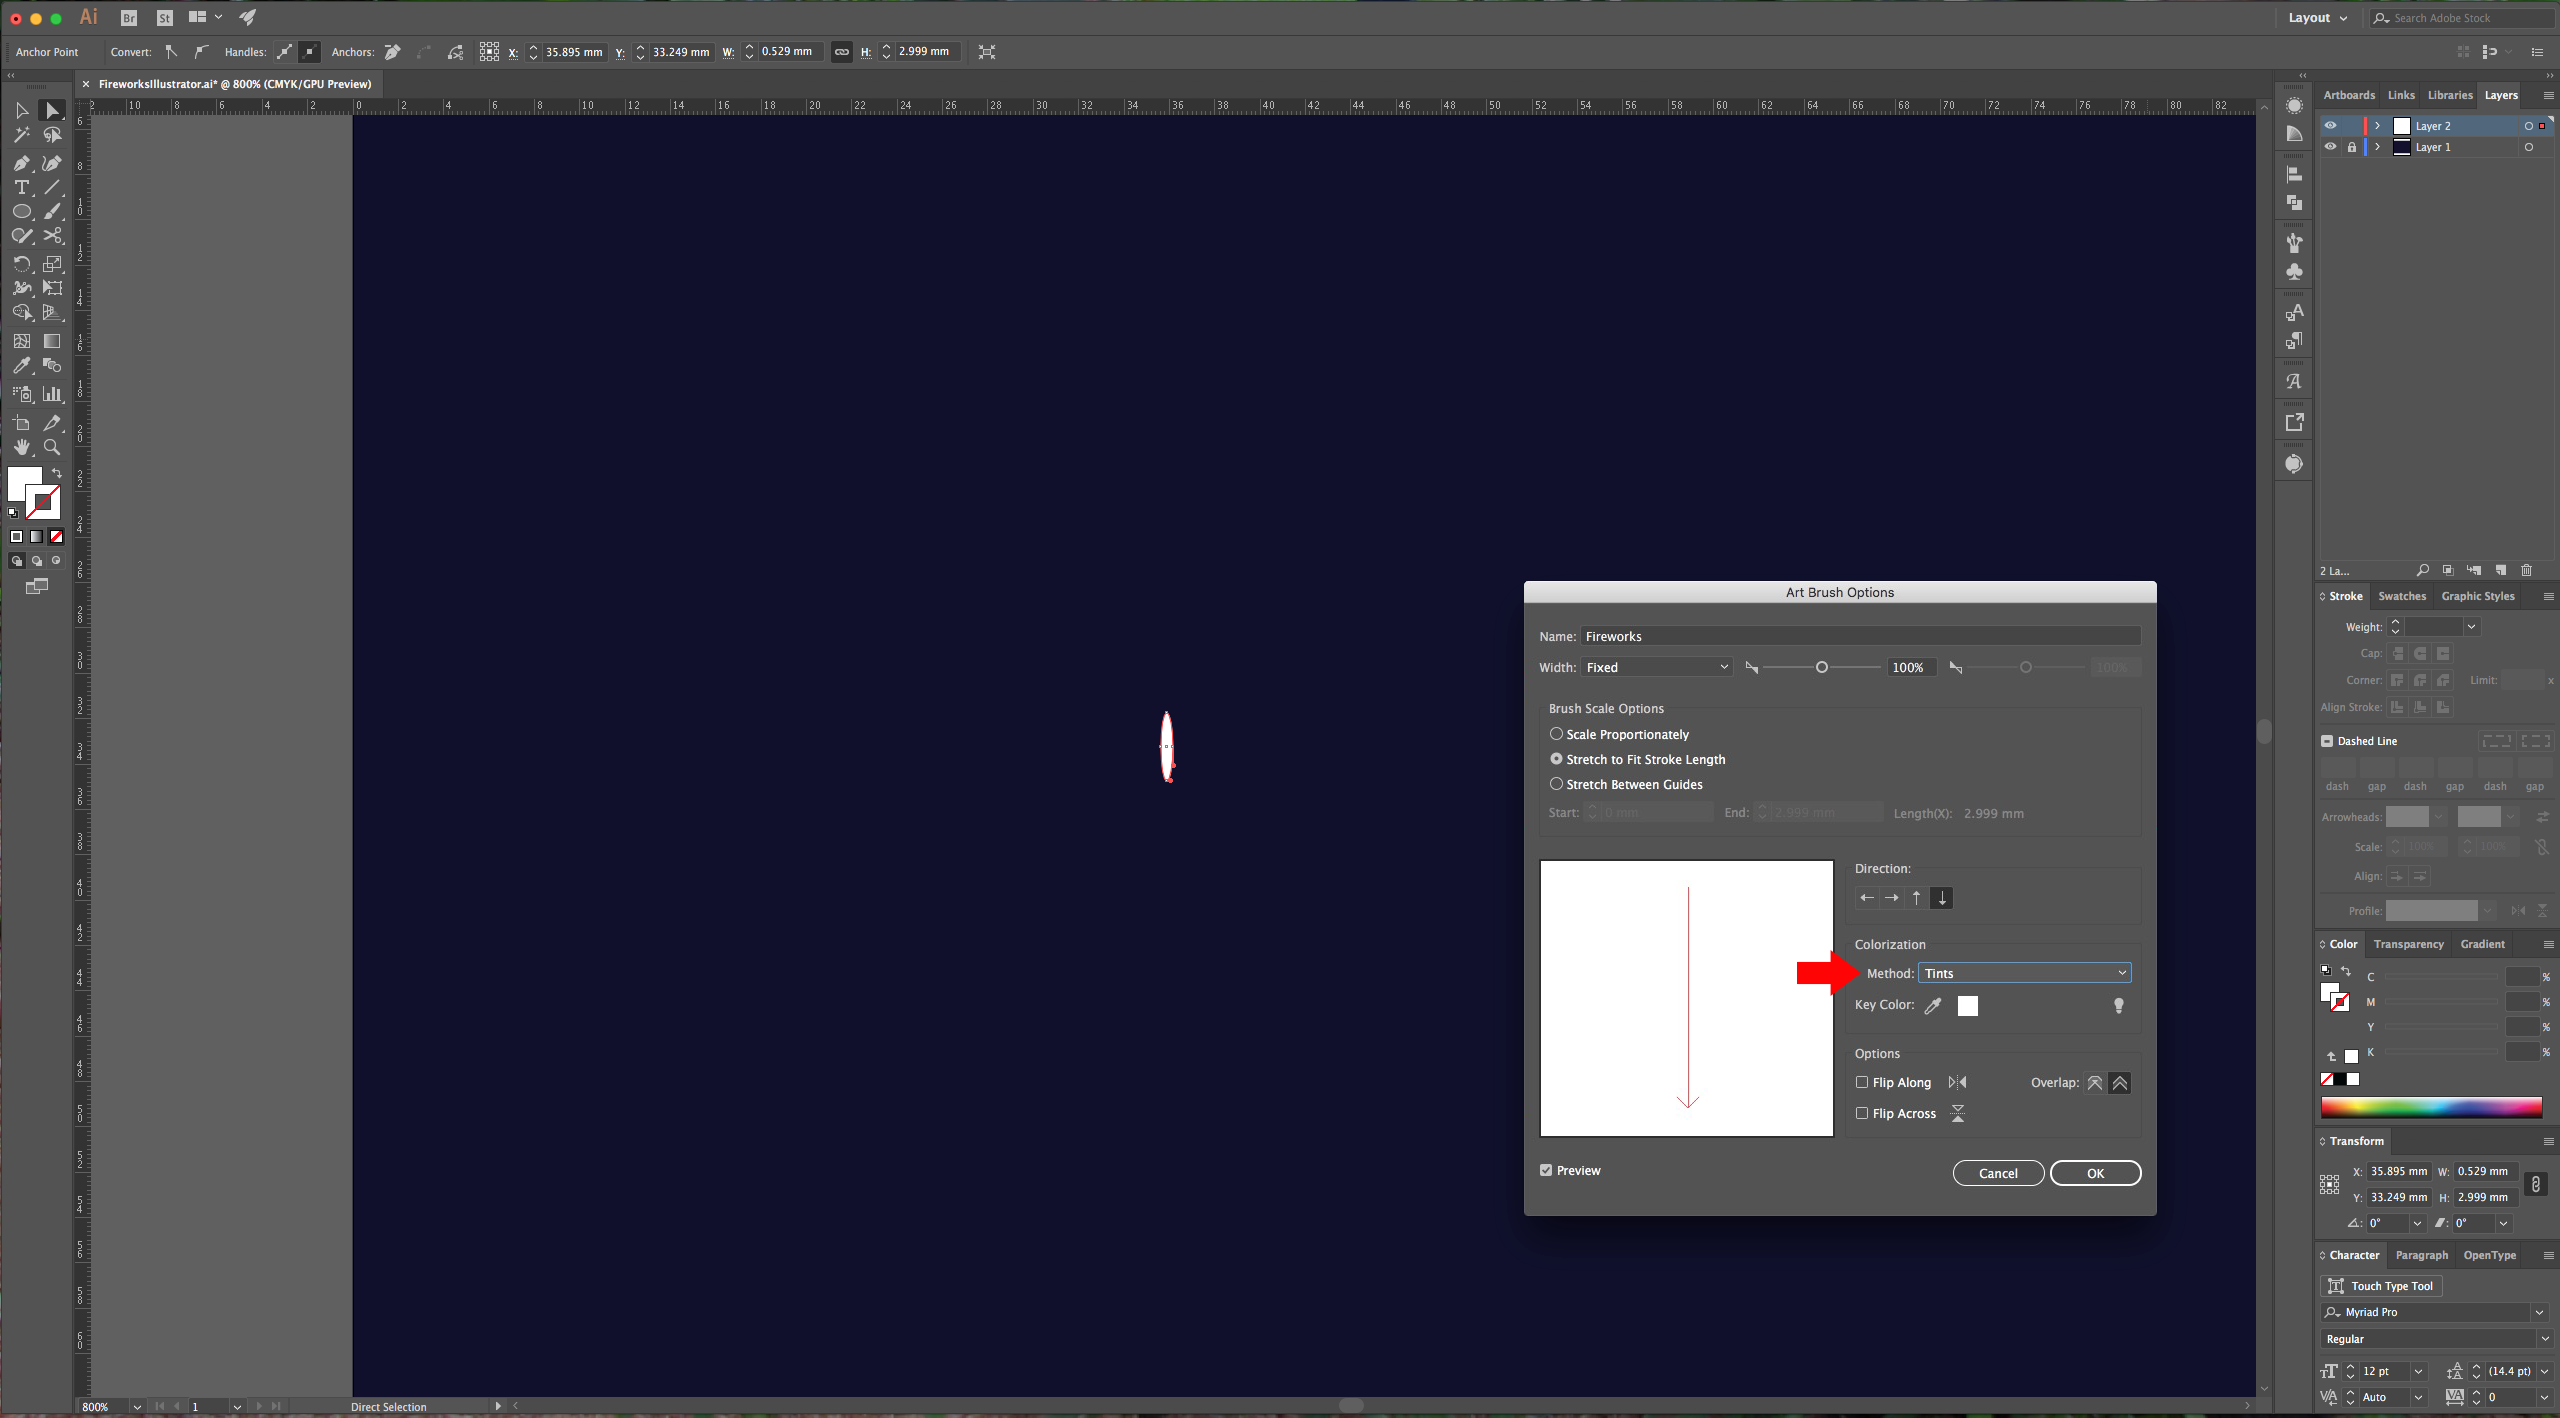
5 - Choose the “Ellipse Tool” (L) and draw a very thin oval (about 3 mm high). Open the “Brushes Palette” and click the “New Brush” icon, then select the “New Art Brush” option.
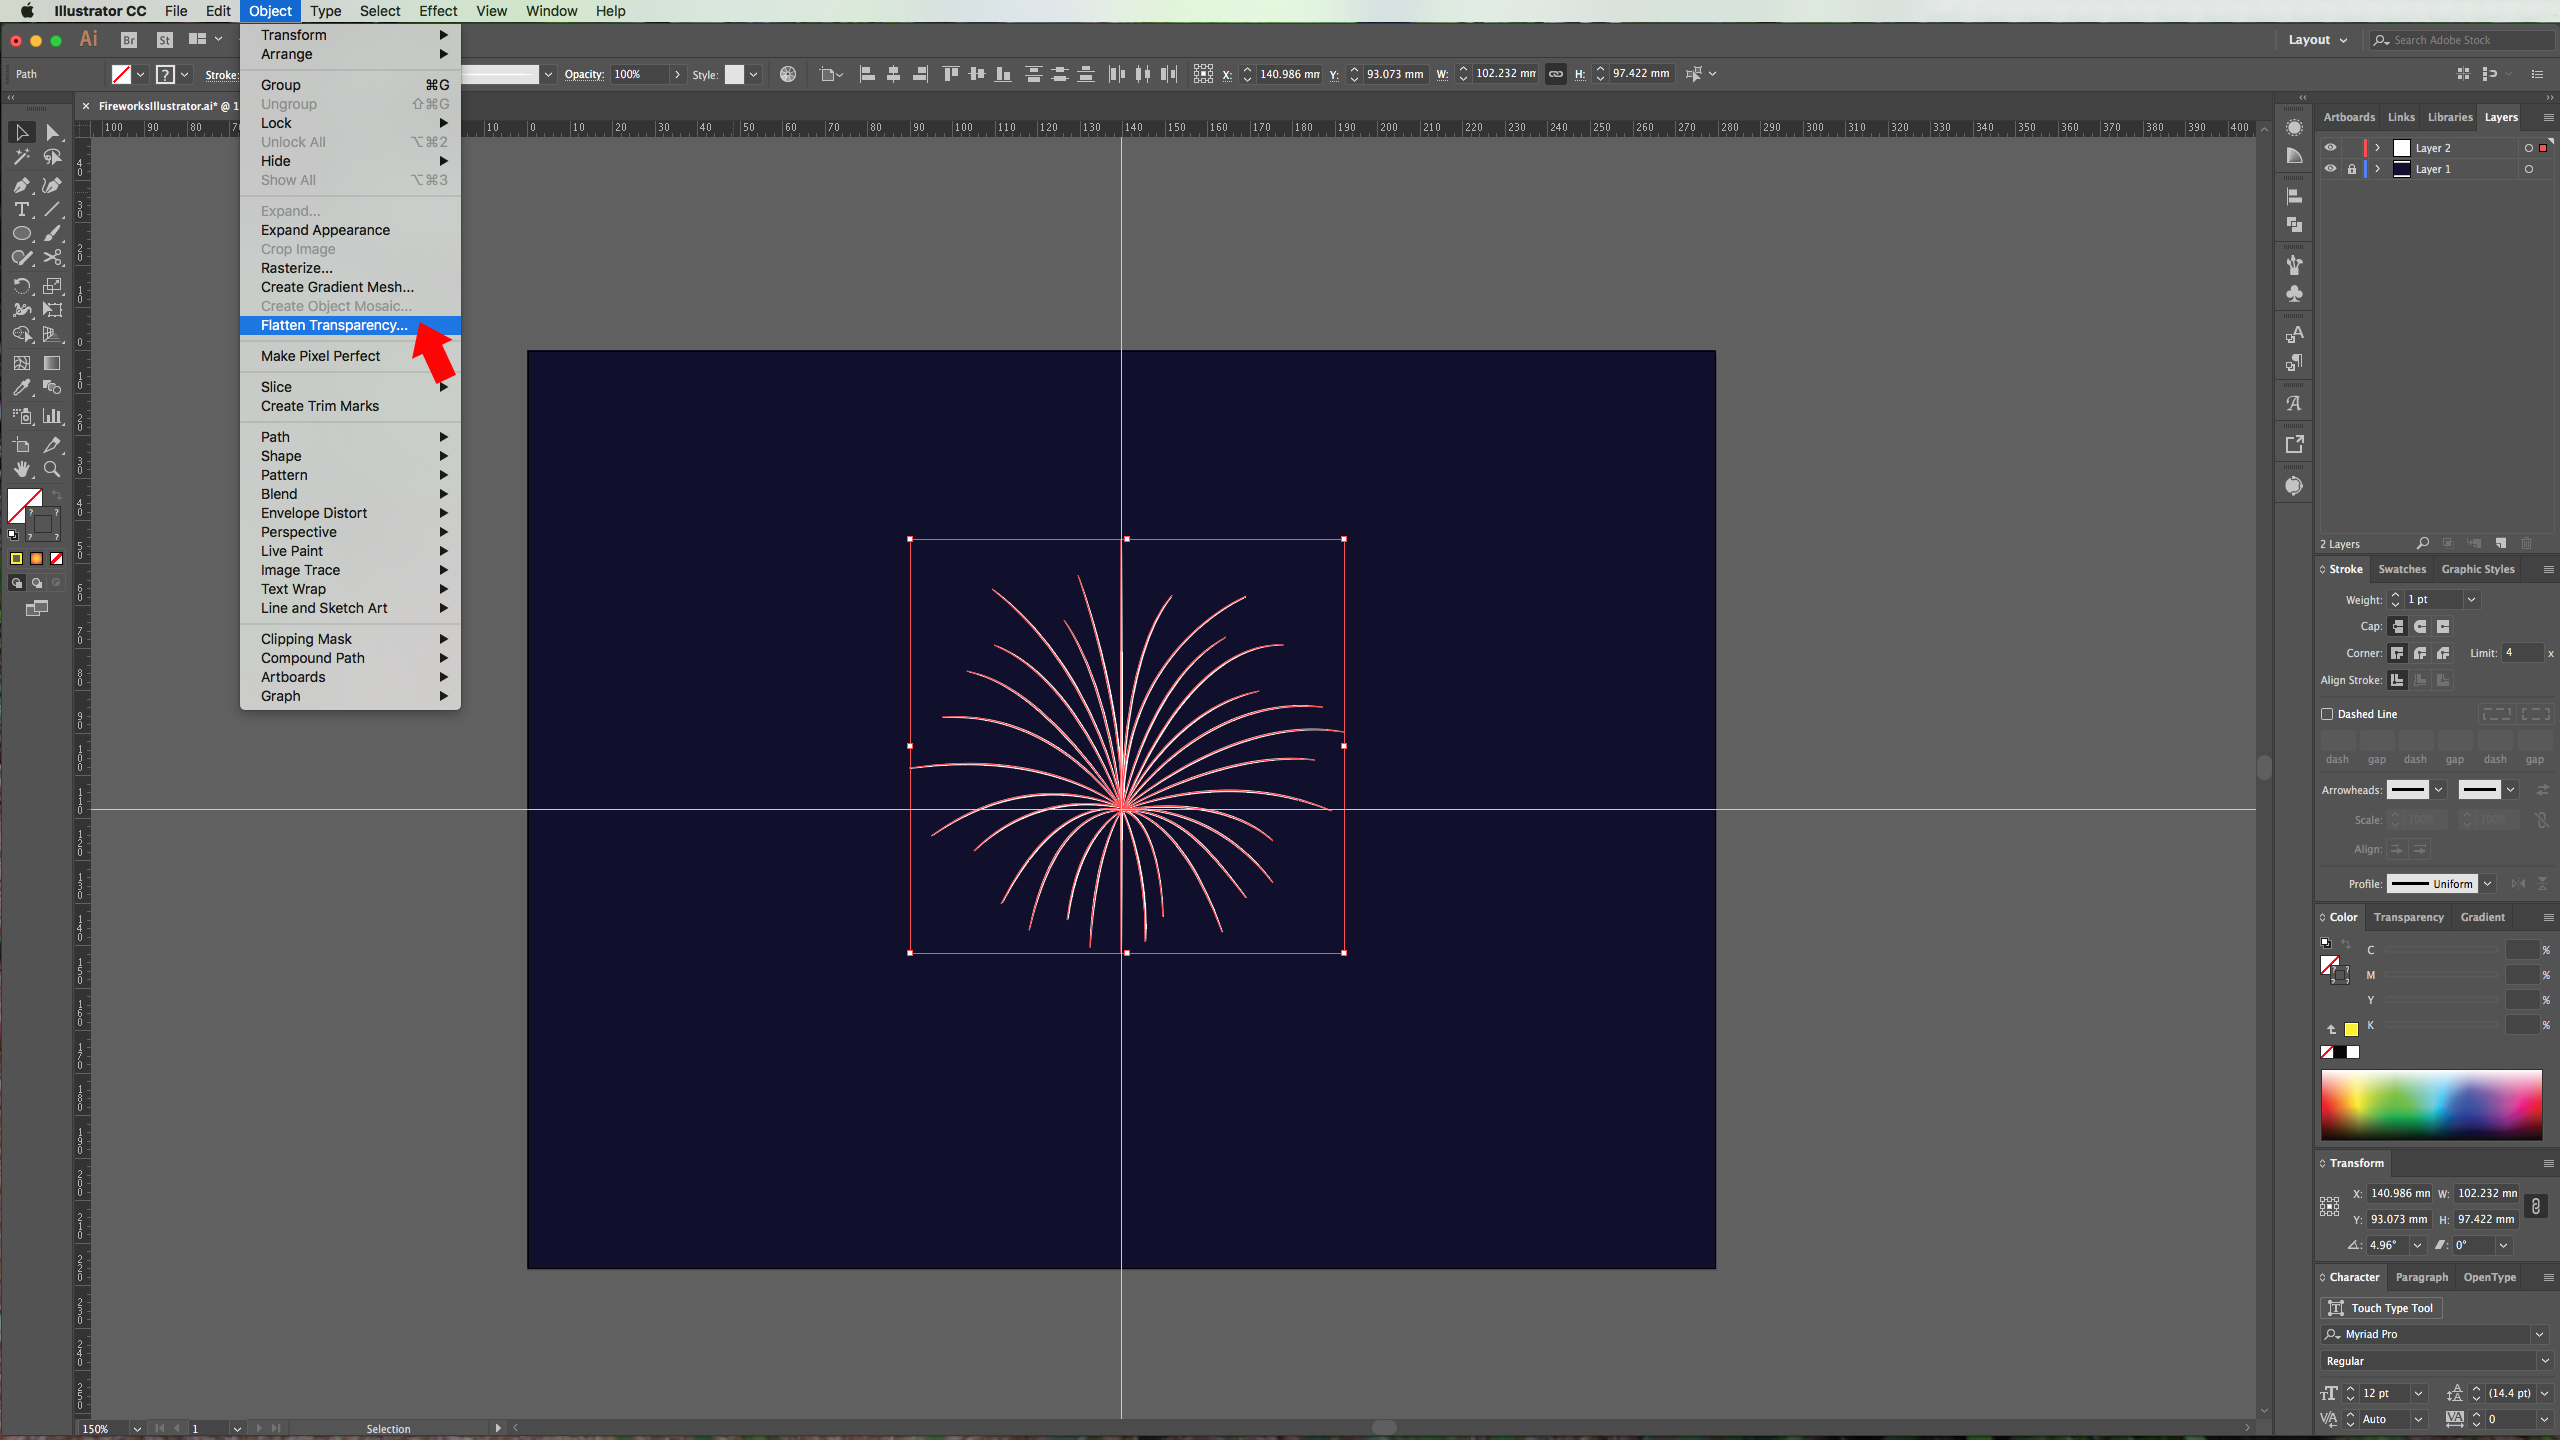
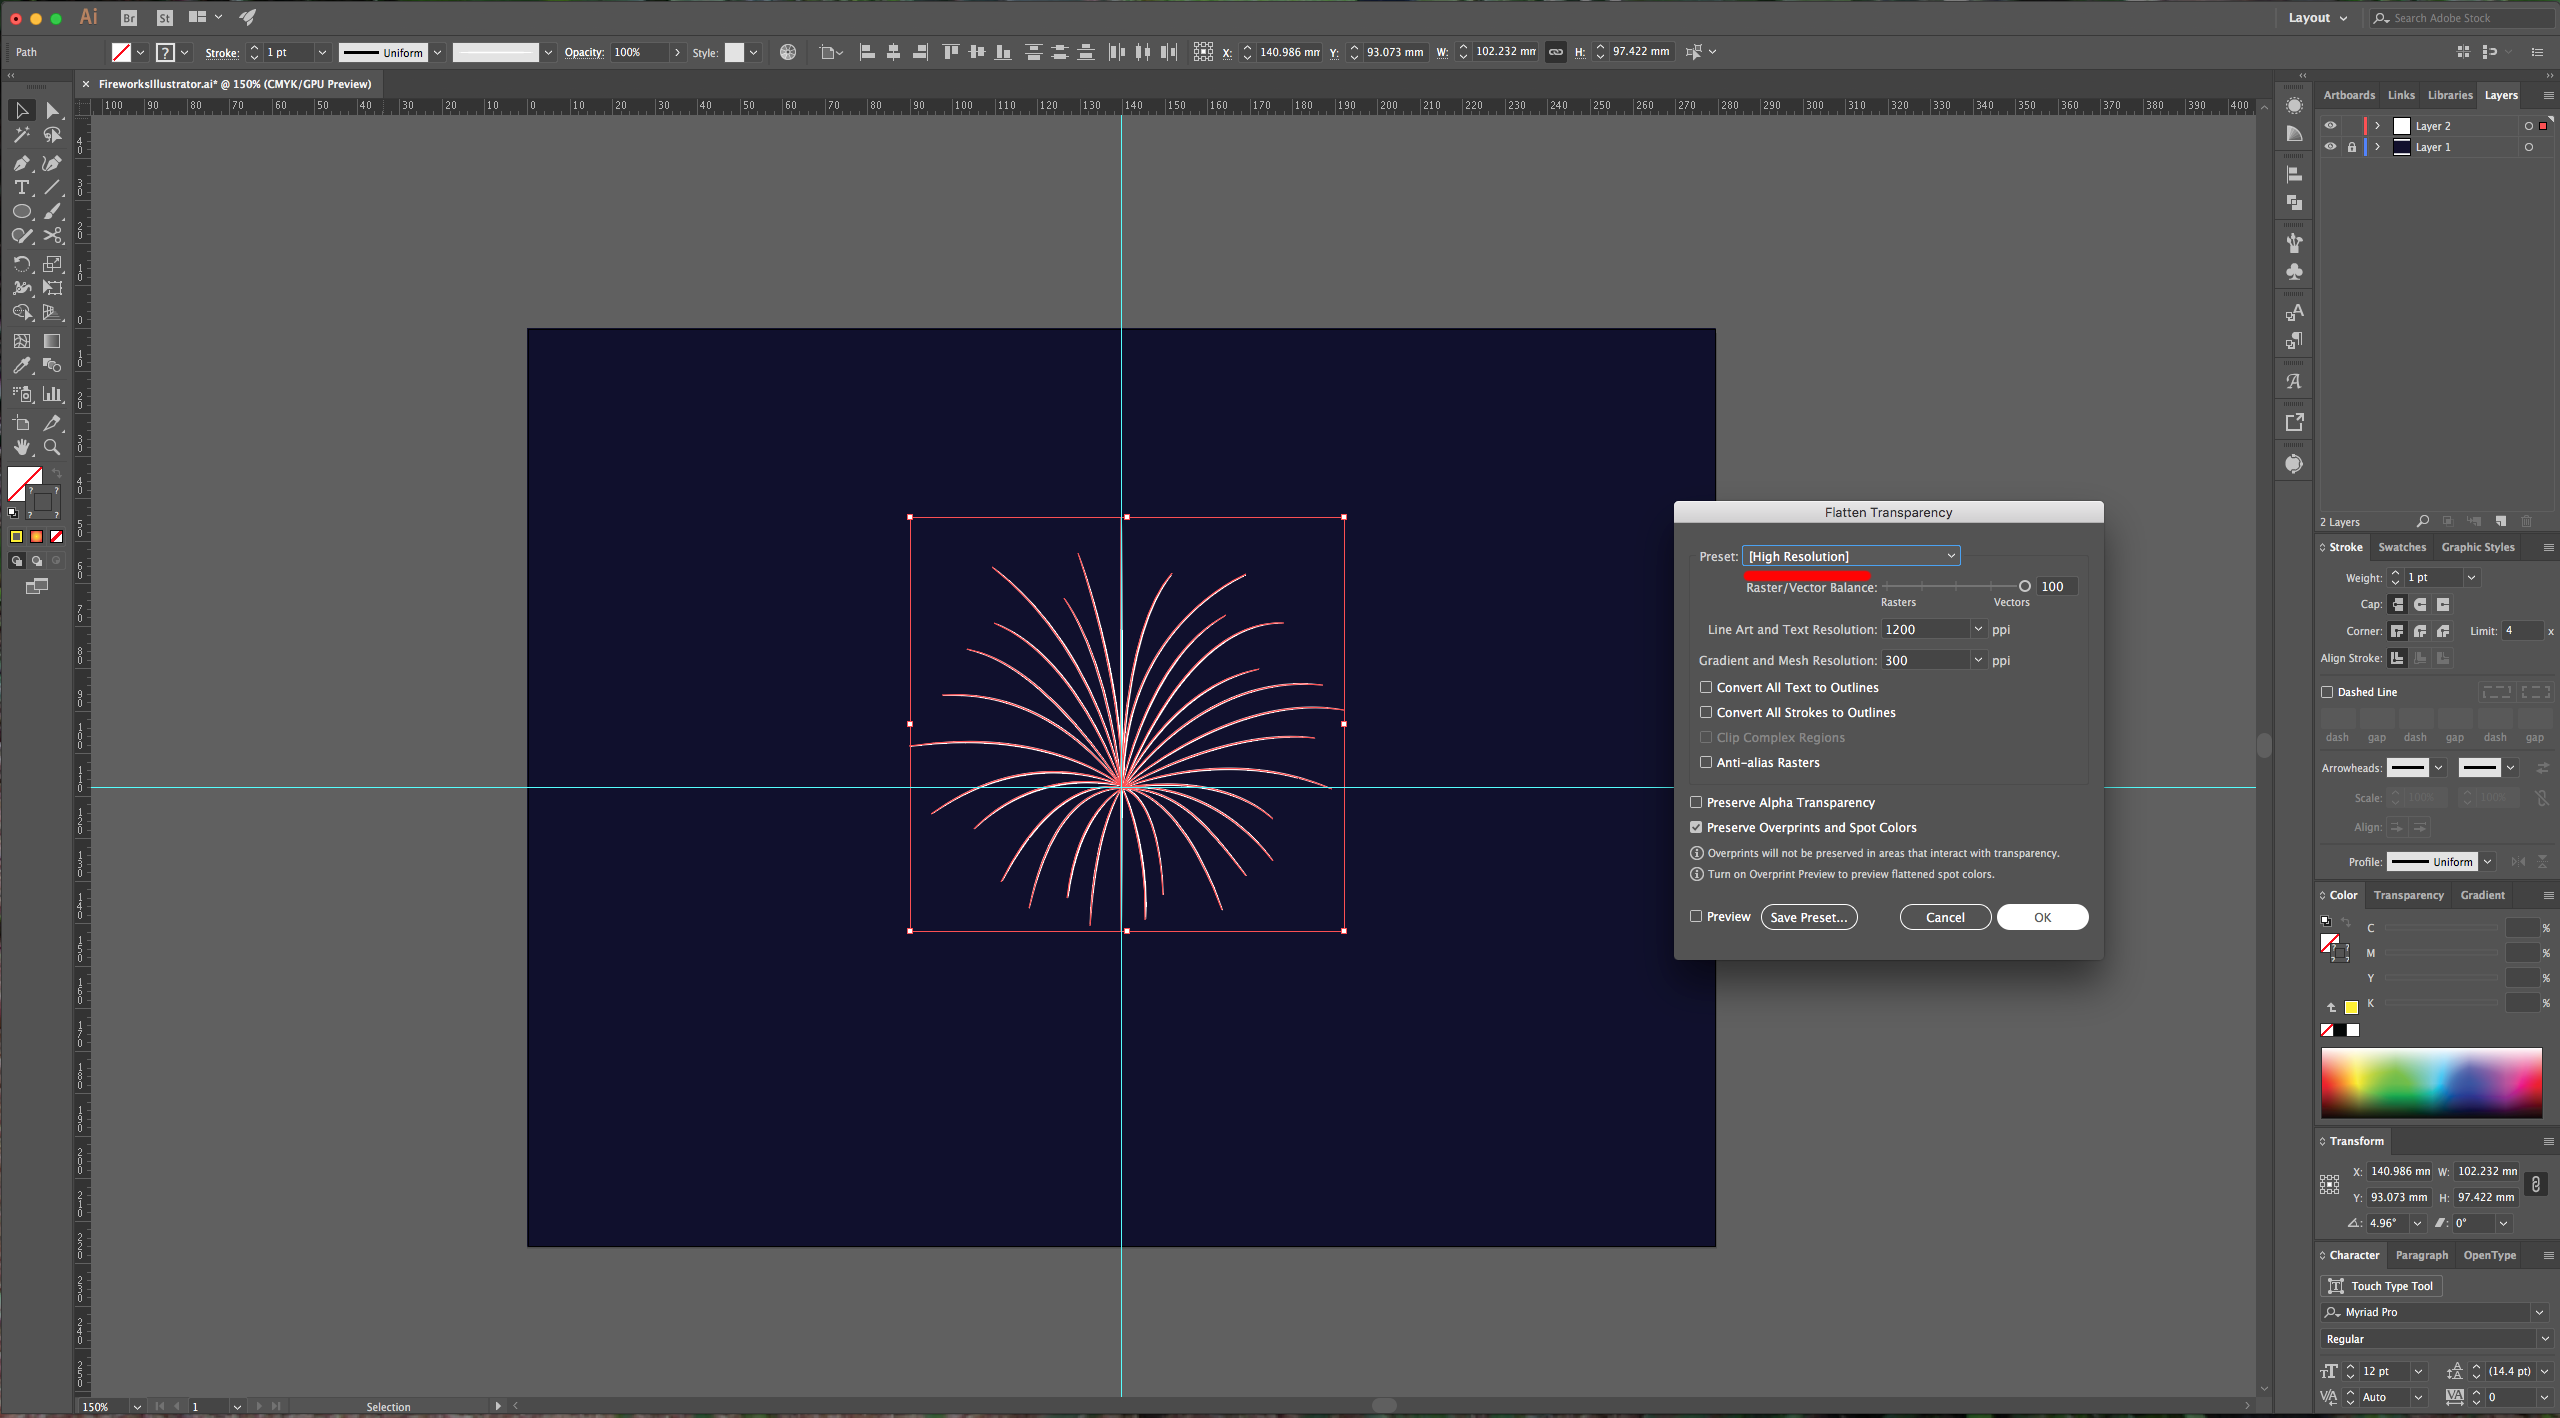
6 - Select your paths and go to Object > Flatten > Transparency. Use the “High Resolution” preset and click “OK”.
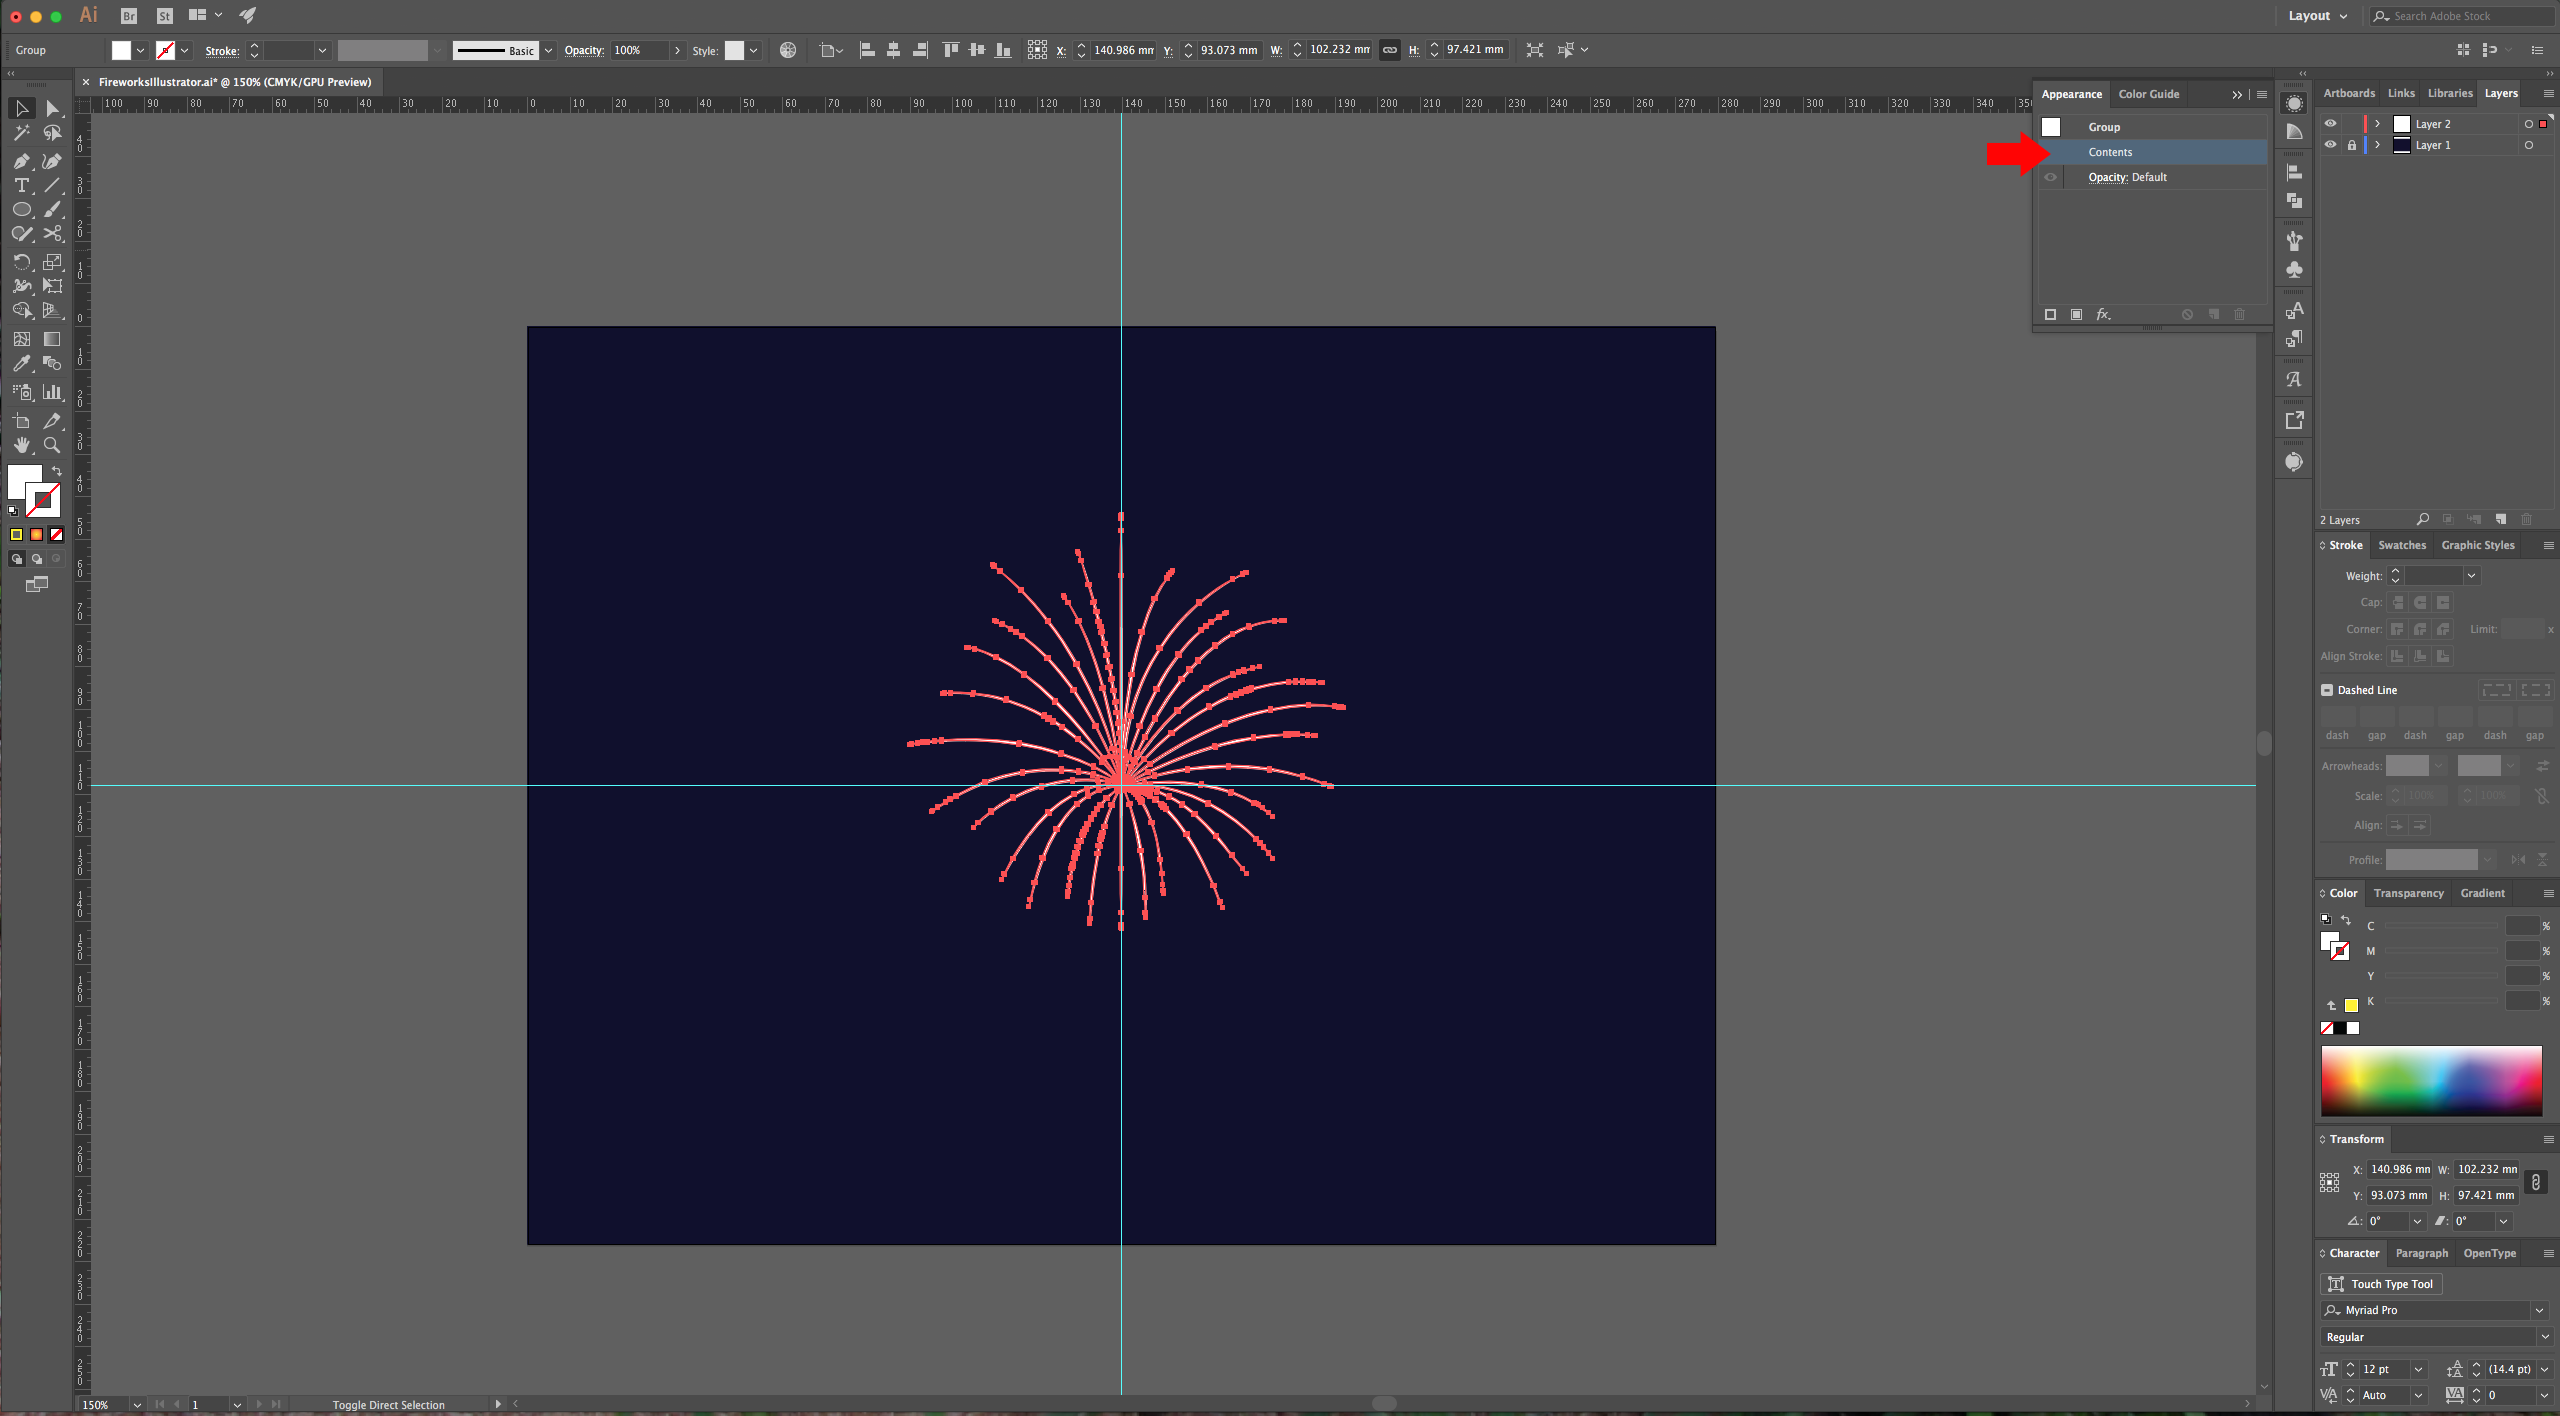
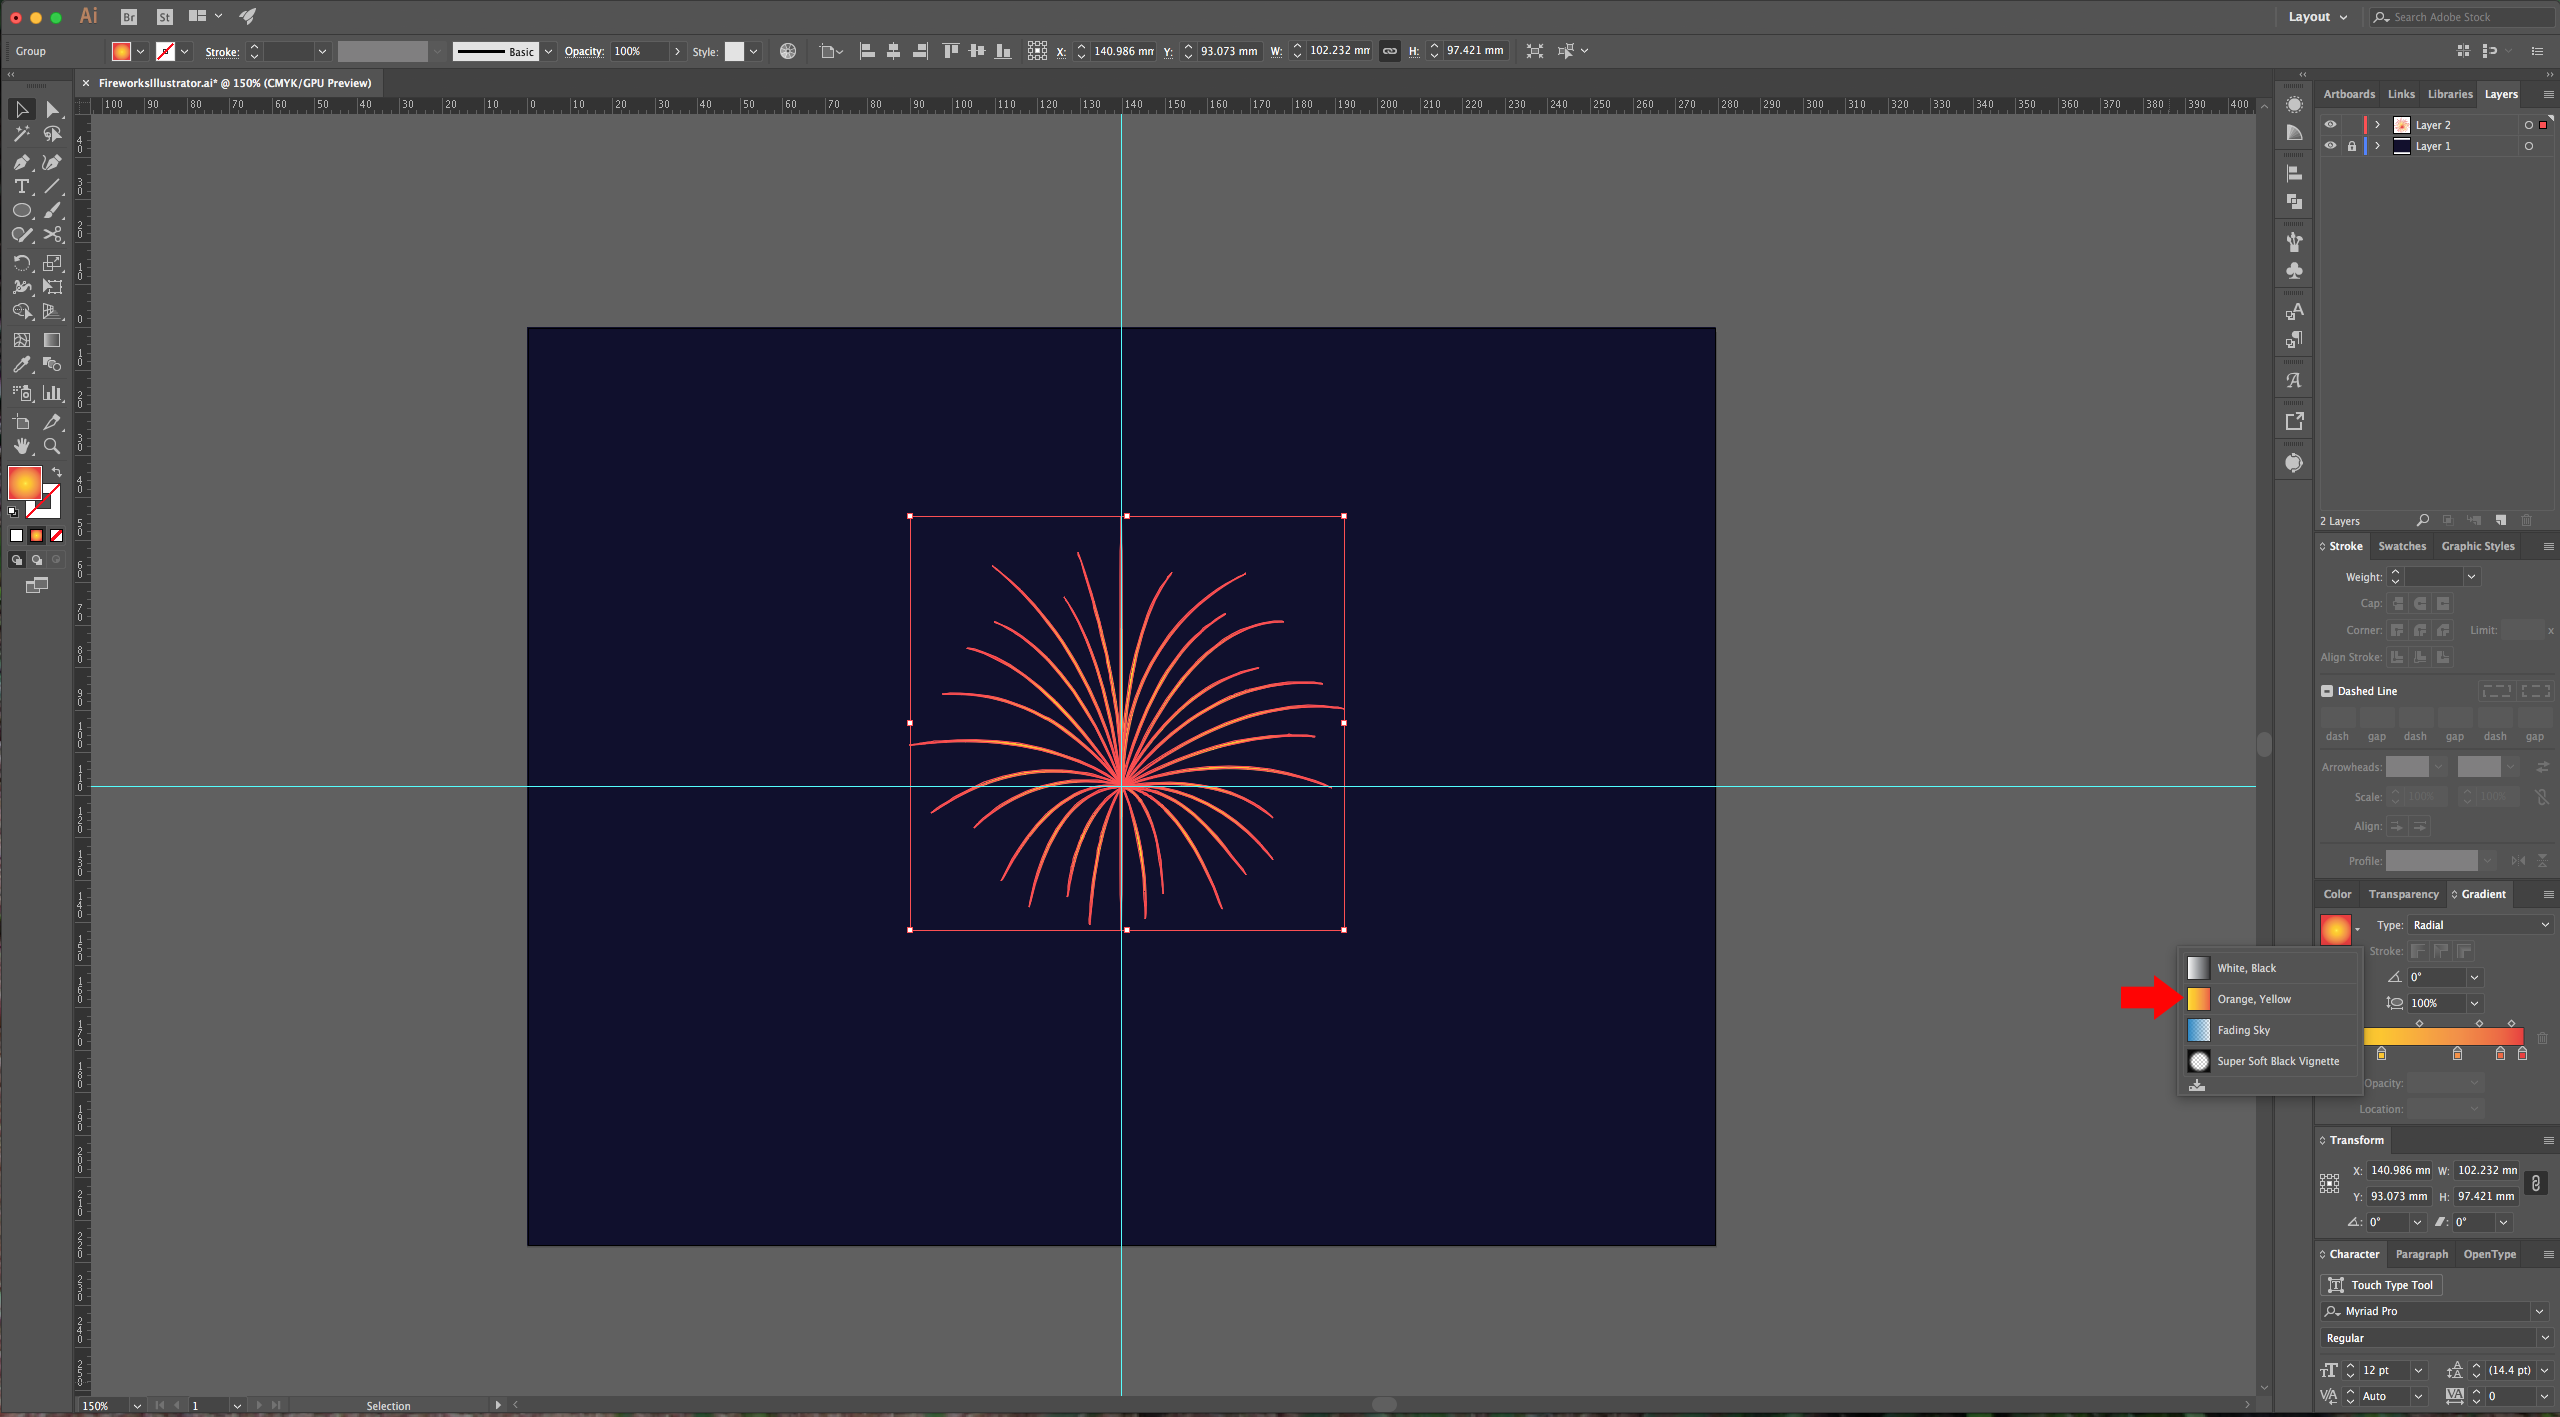
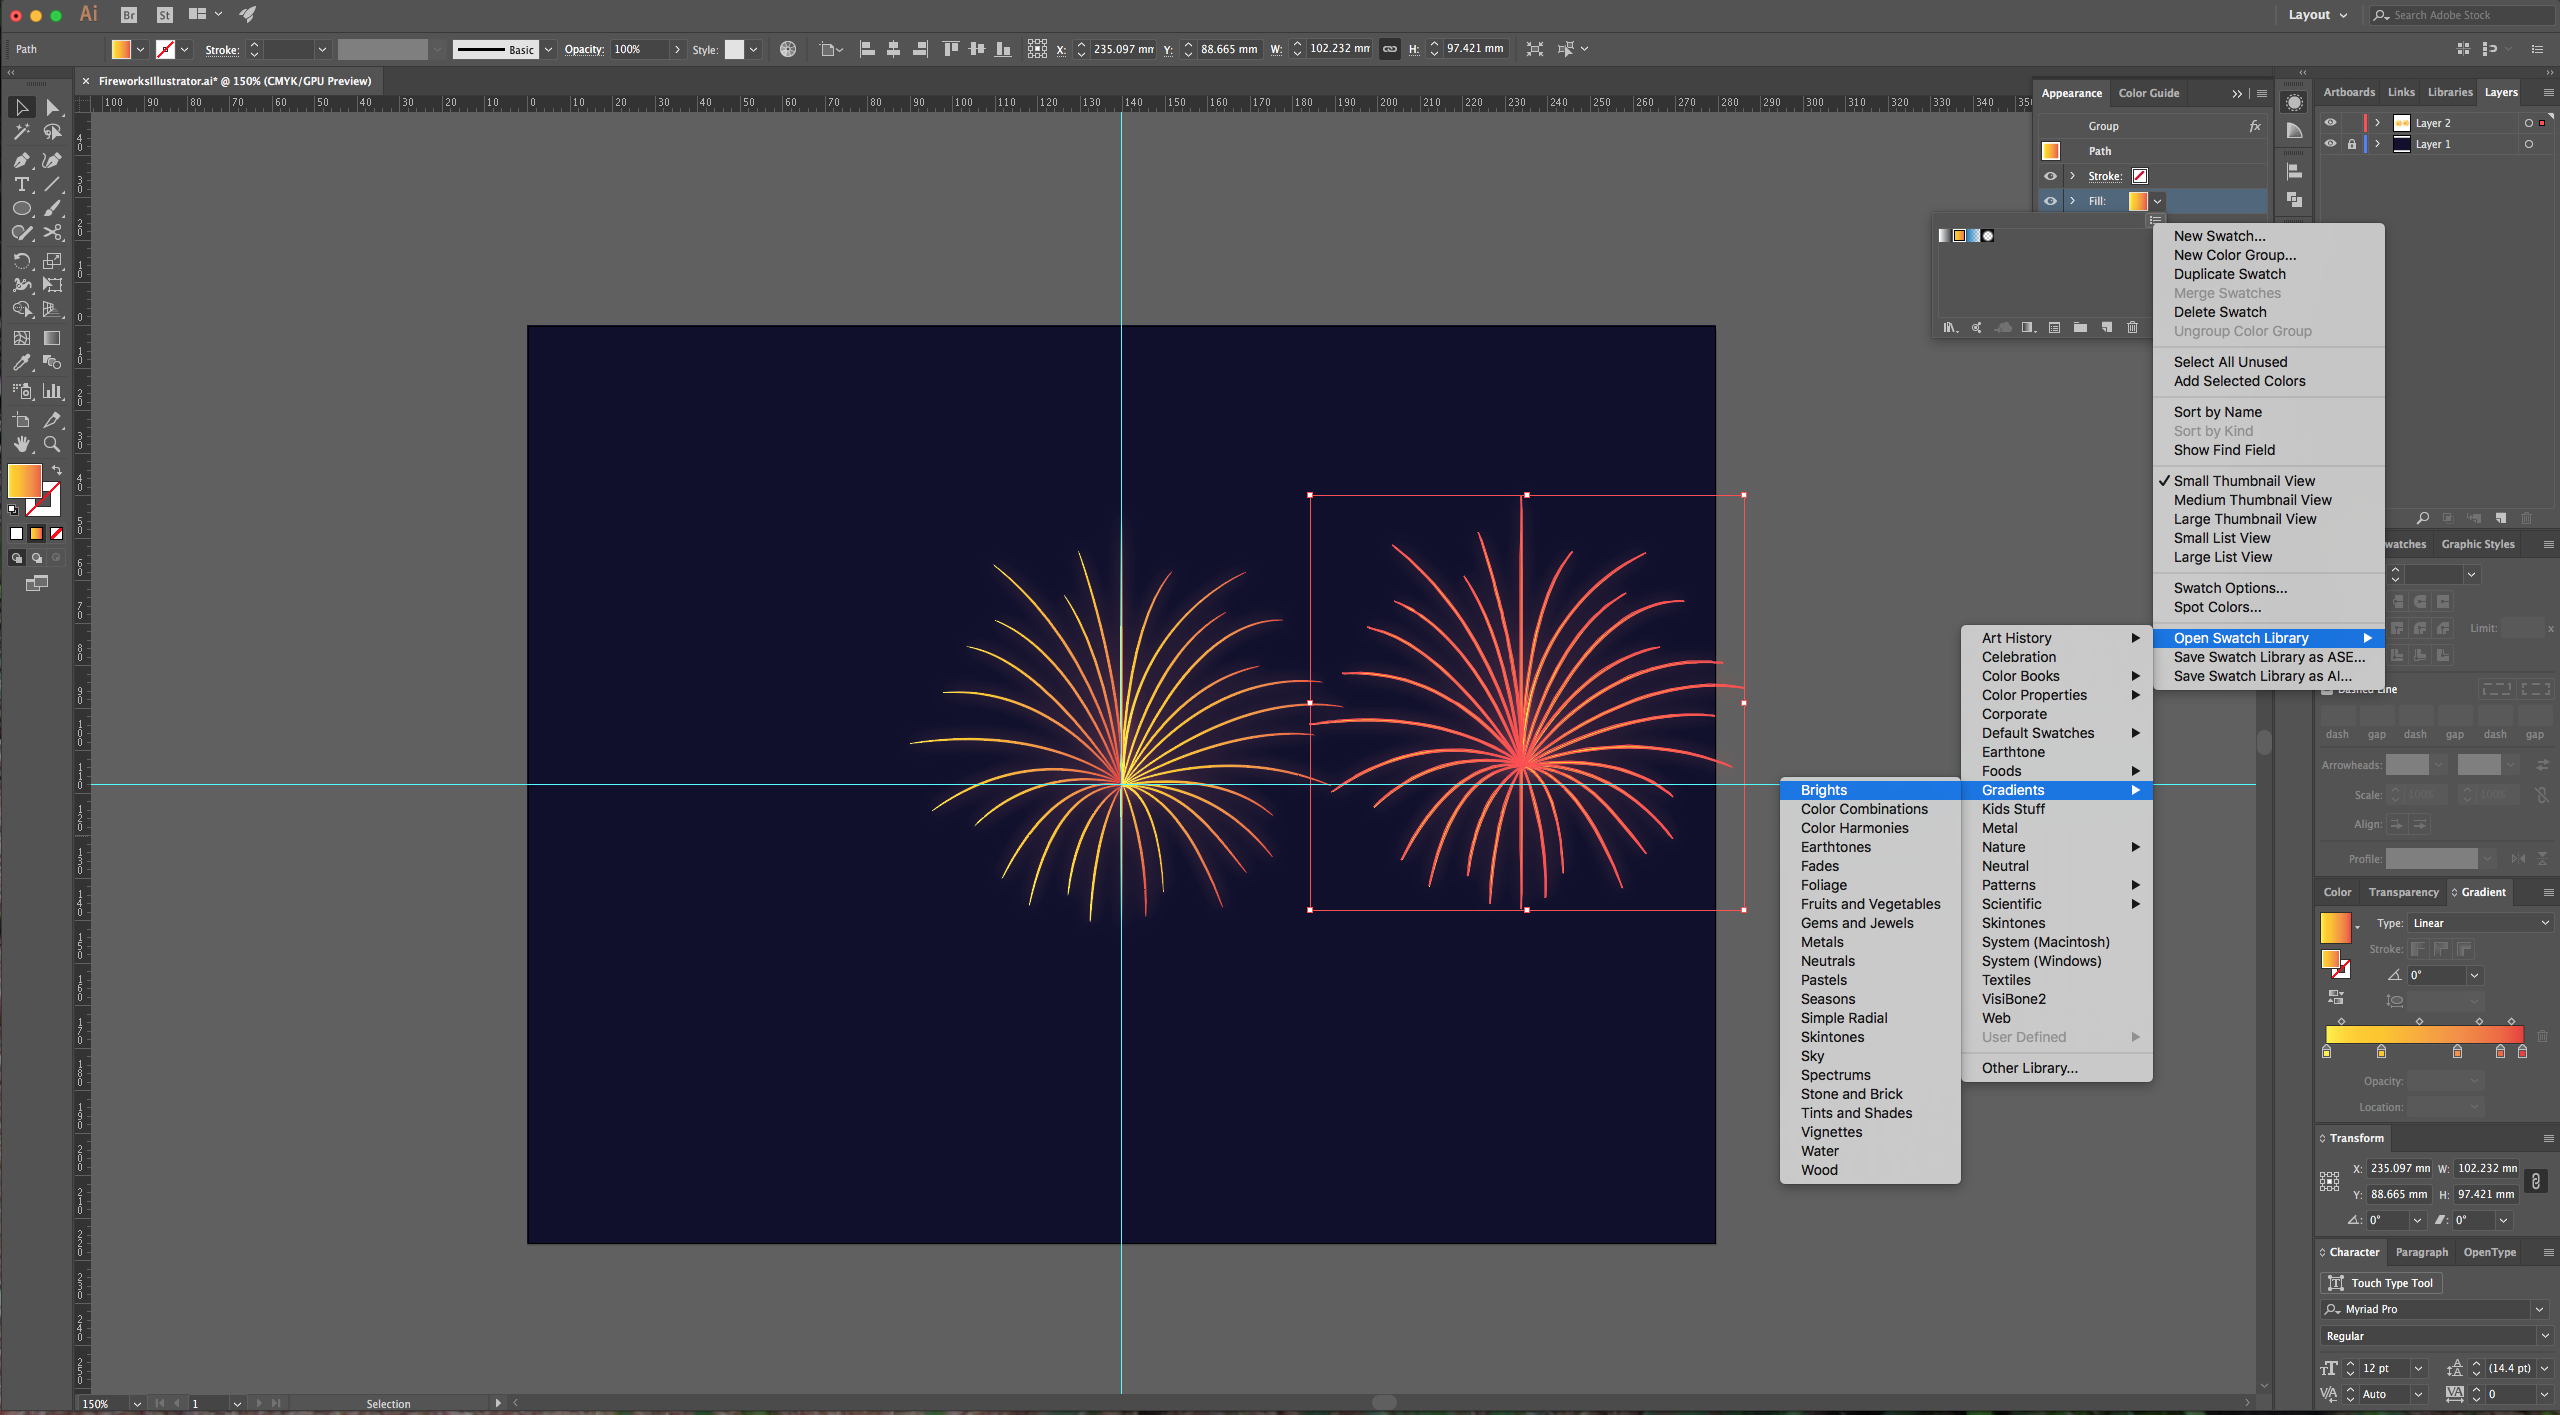
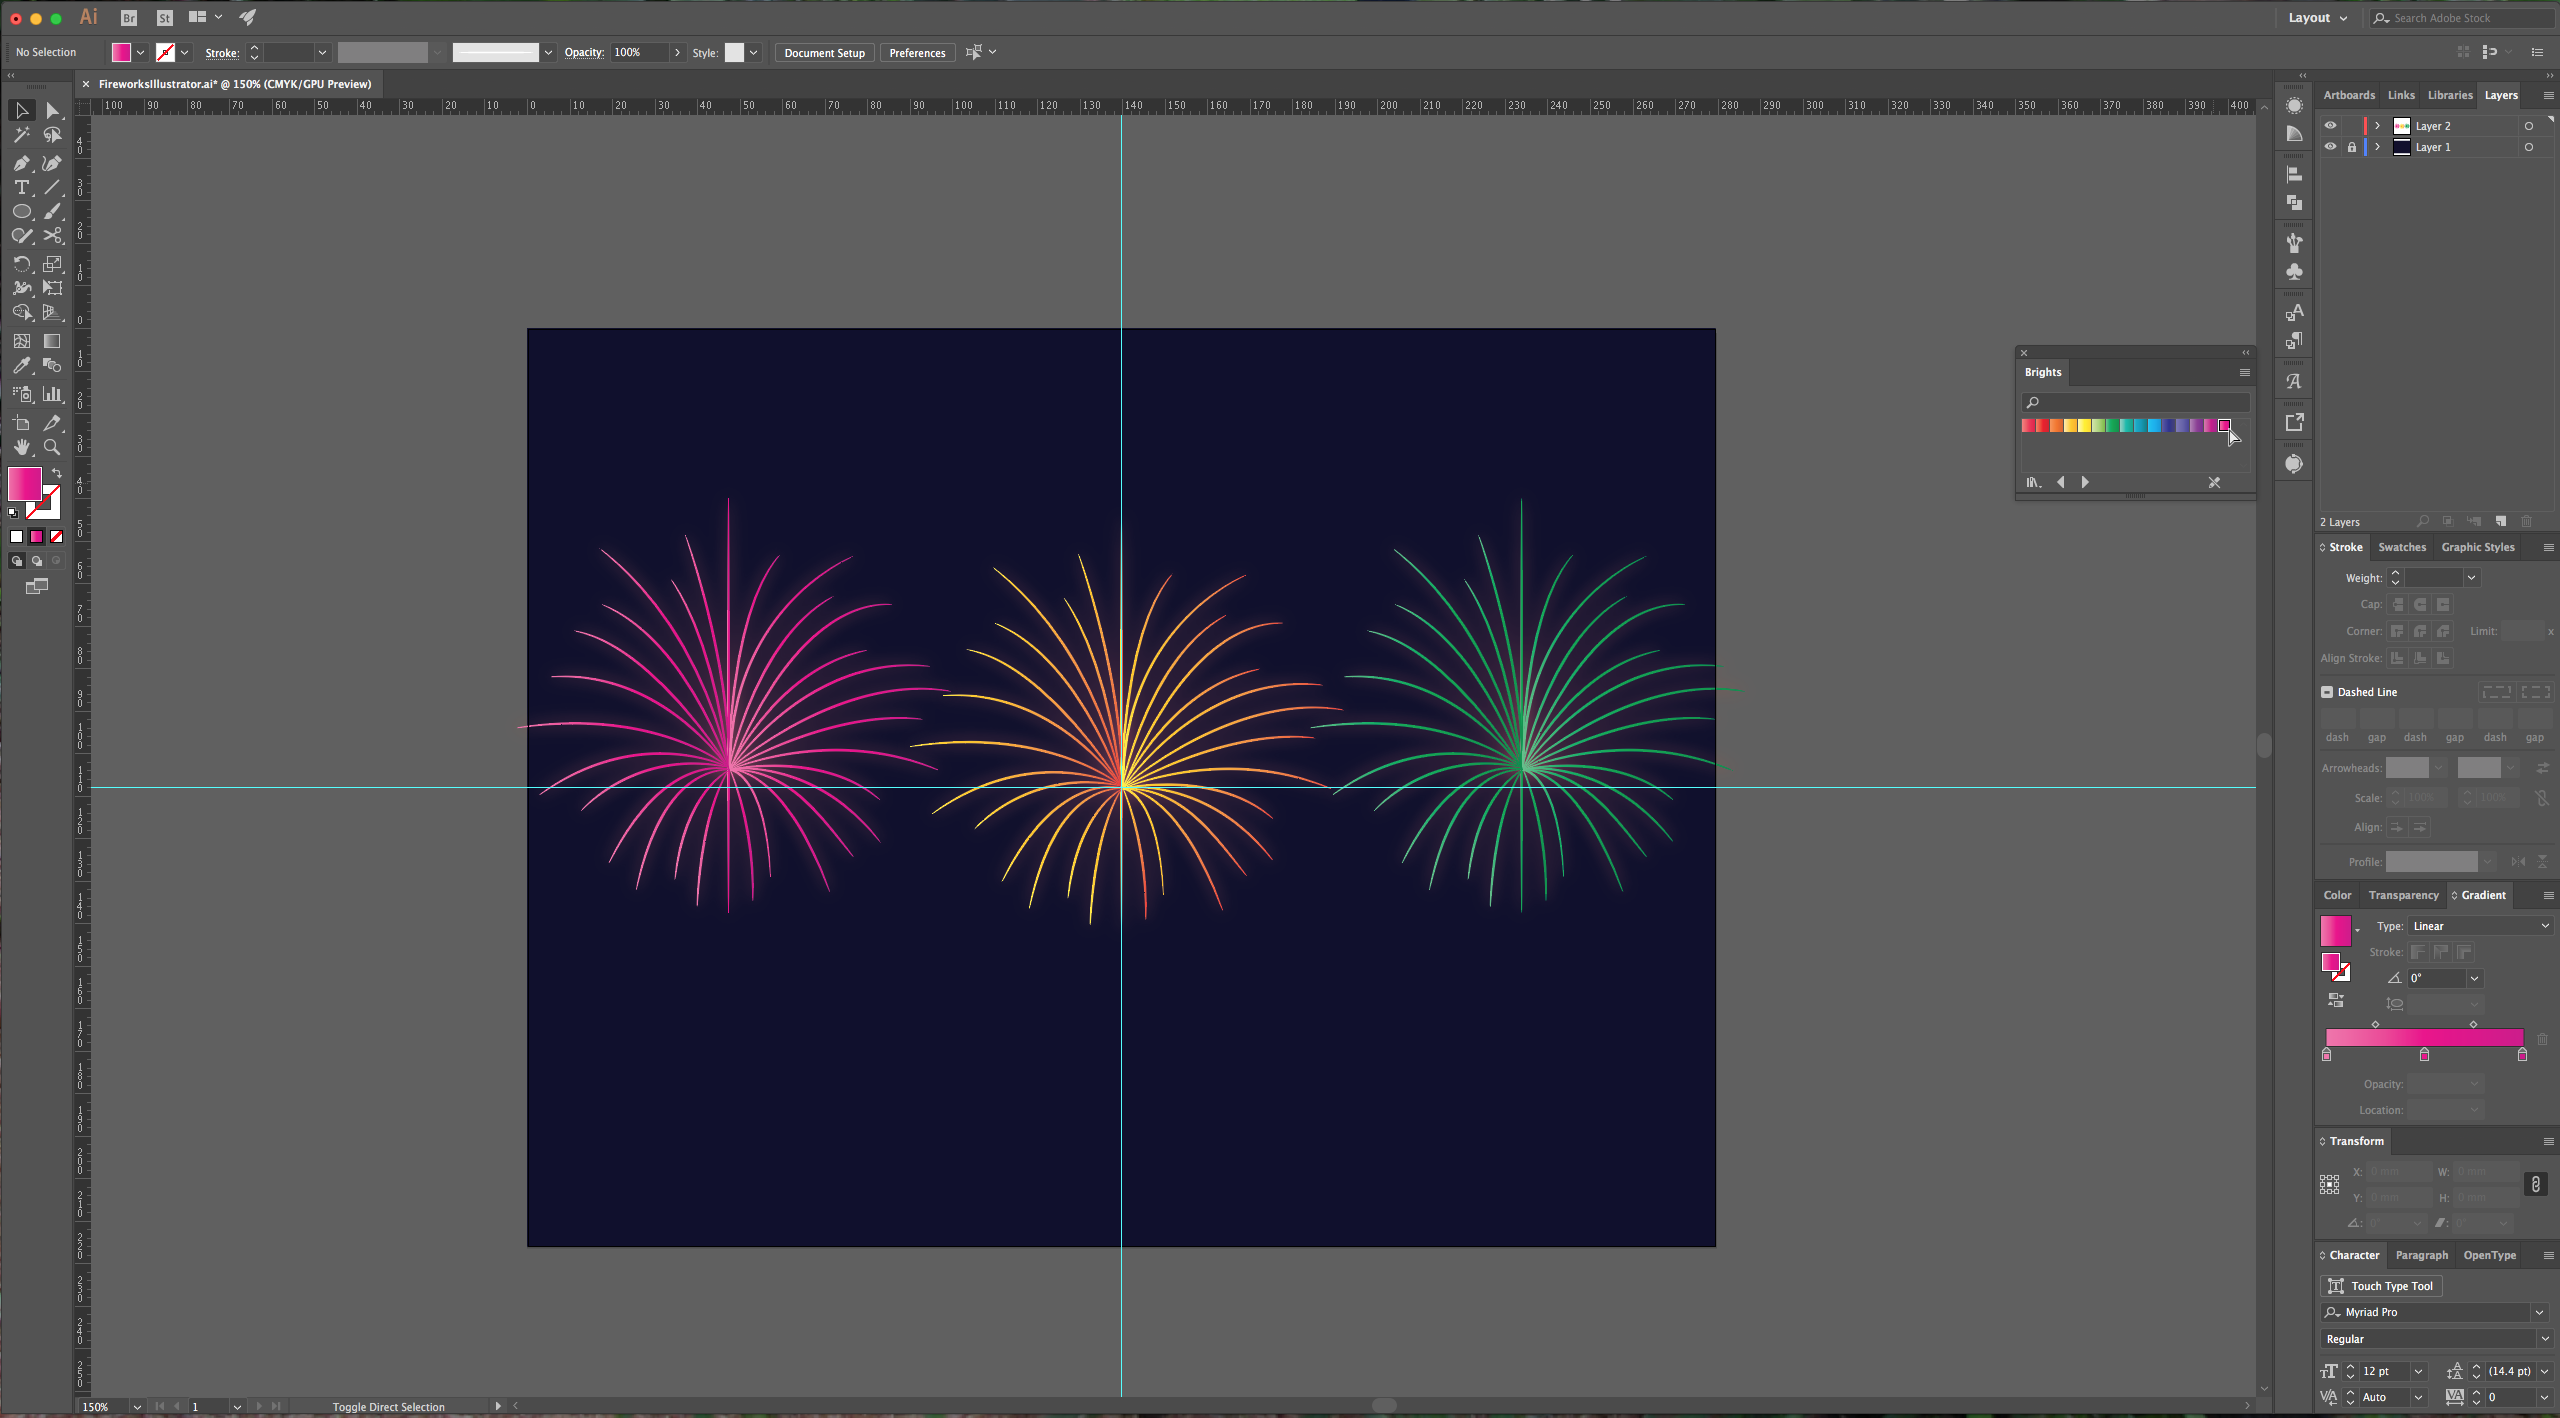
7 - Select your shape and in the “Appearance Panel”, double-click on your Group “Contents” and change the “Fill” to “Radial Gradient”. You can choose one of the “Default” ones, modify it or create your own.
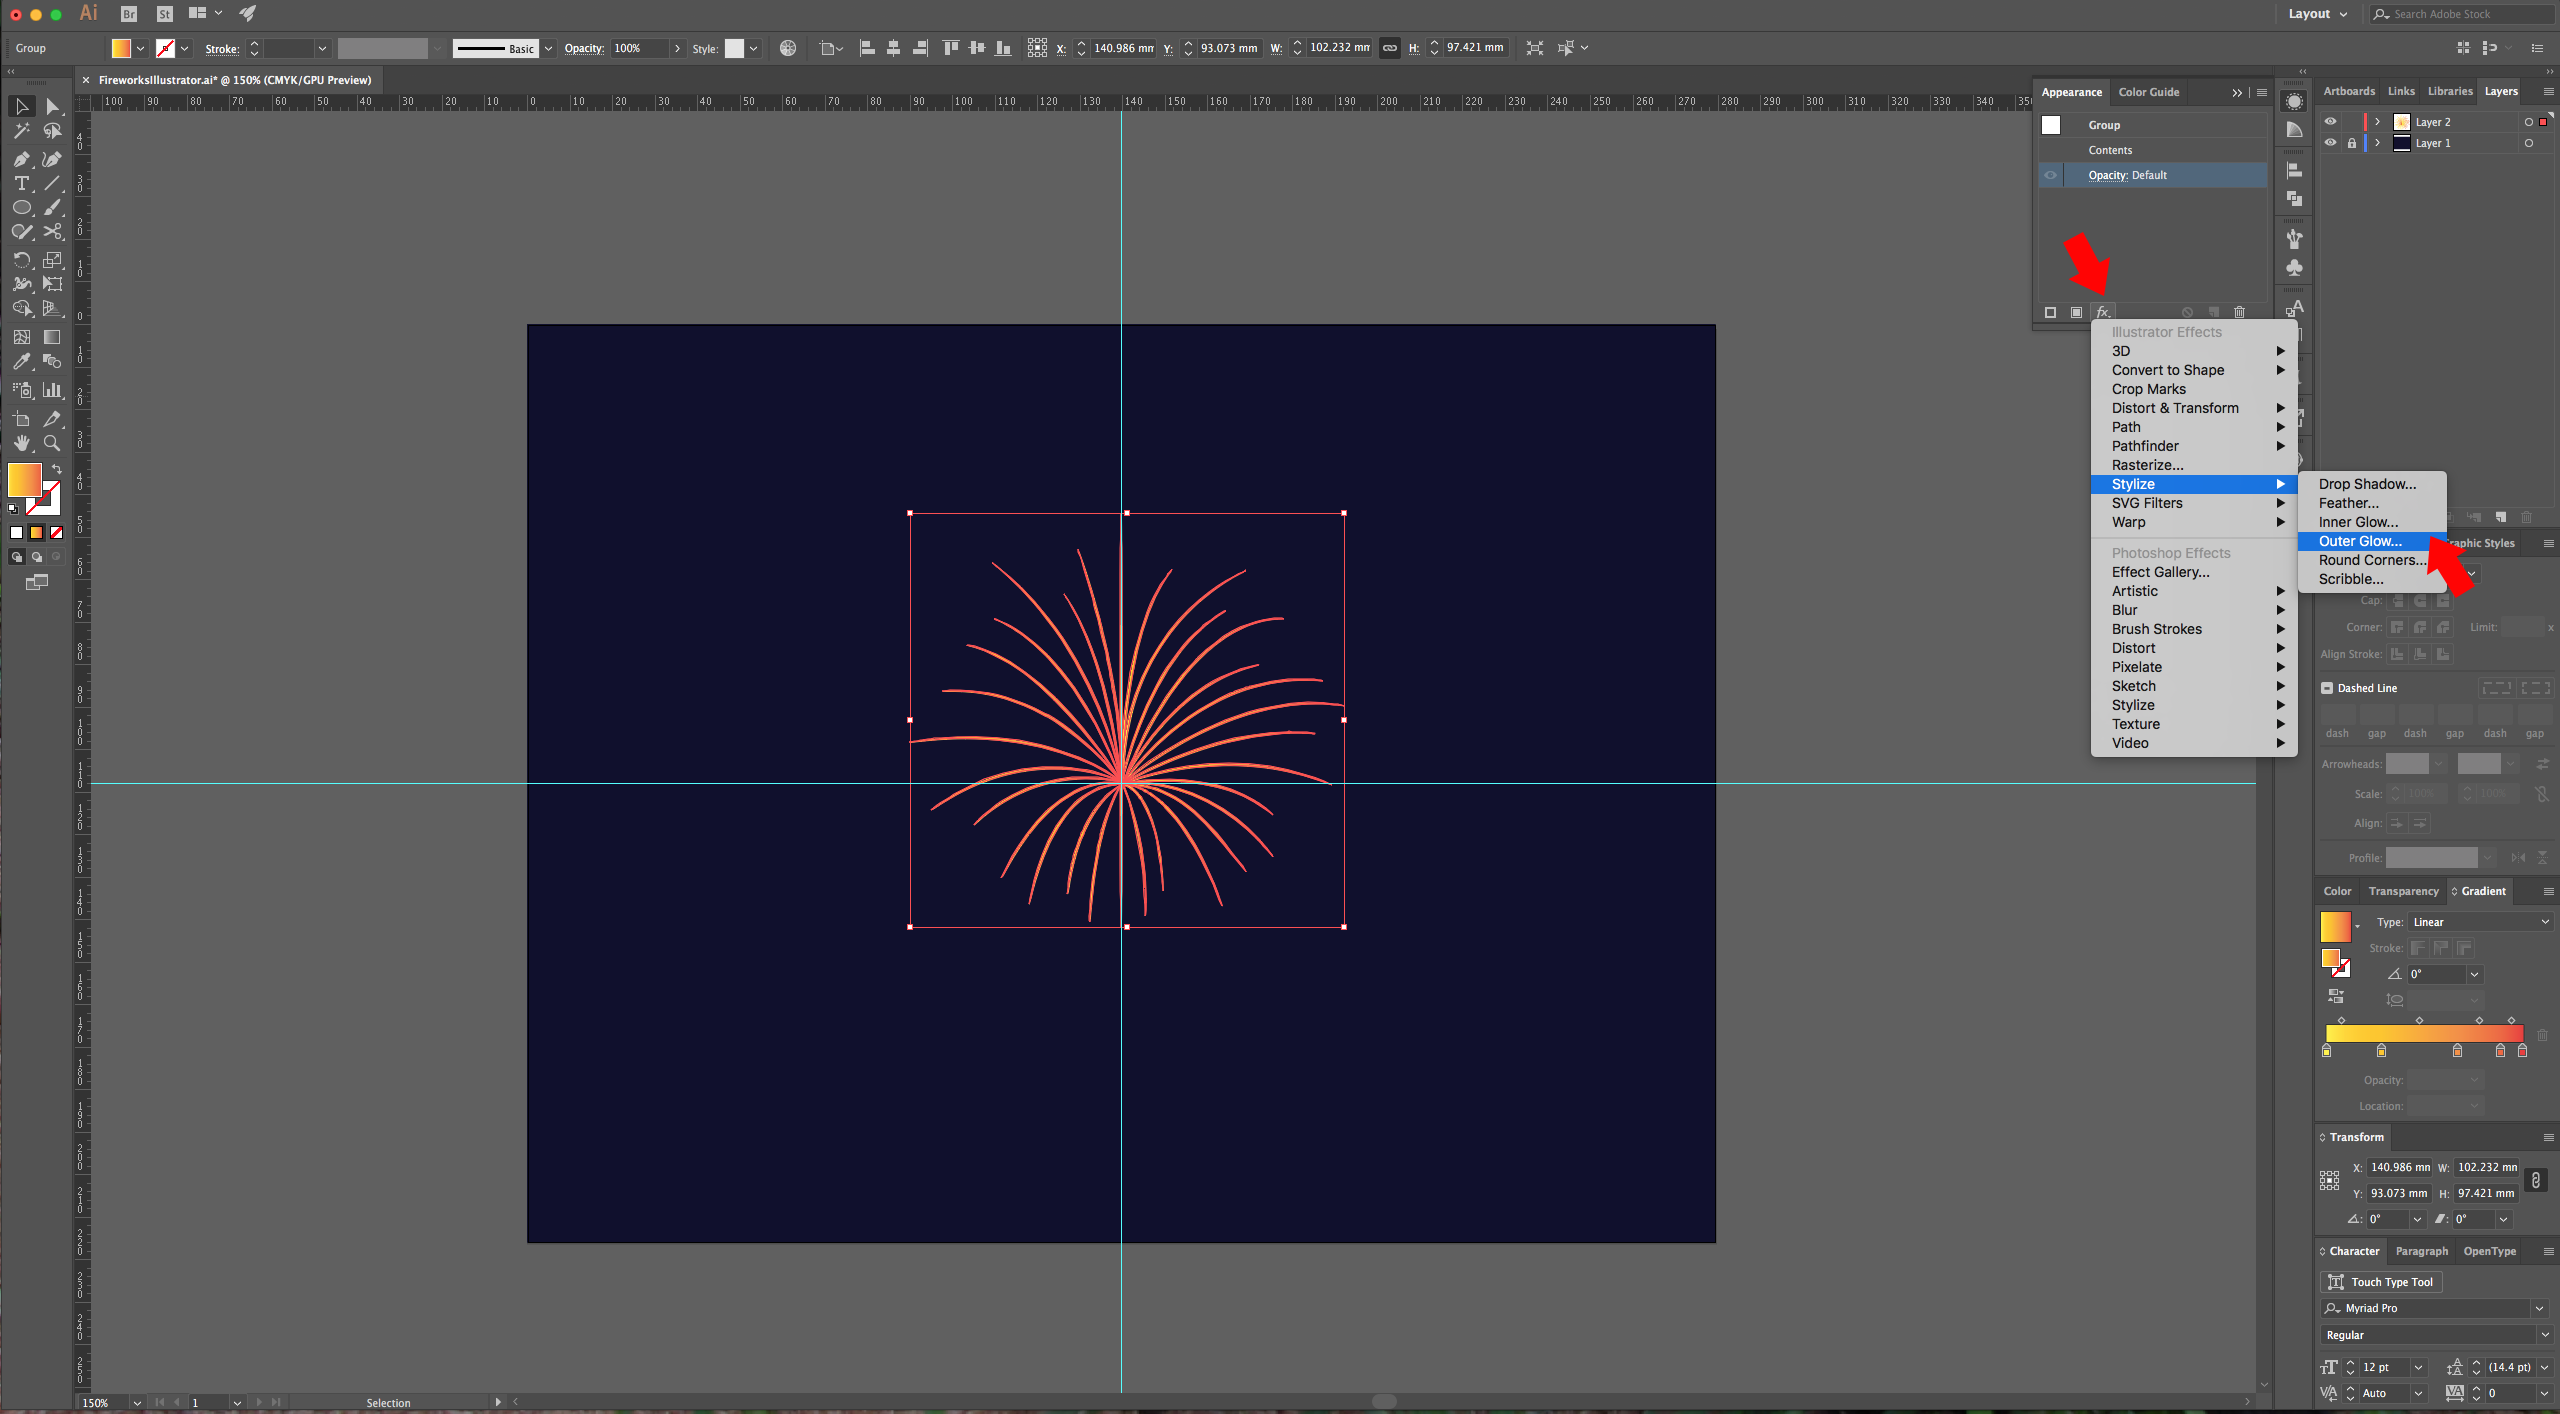
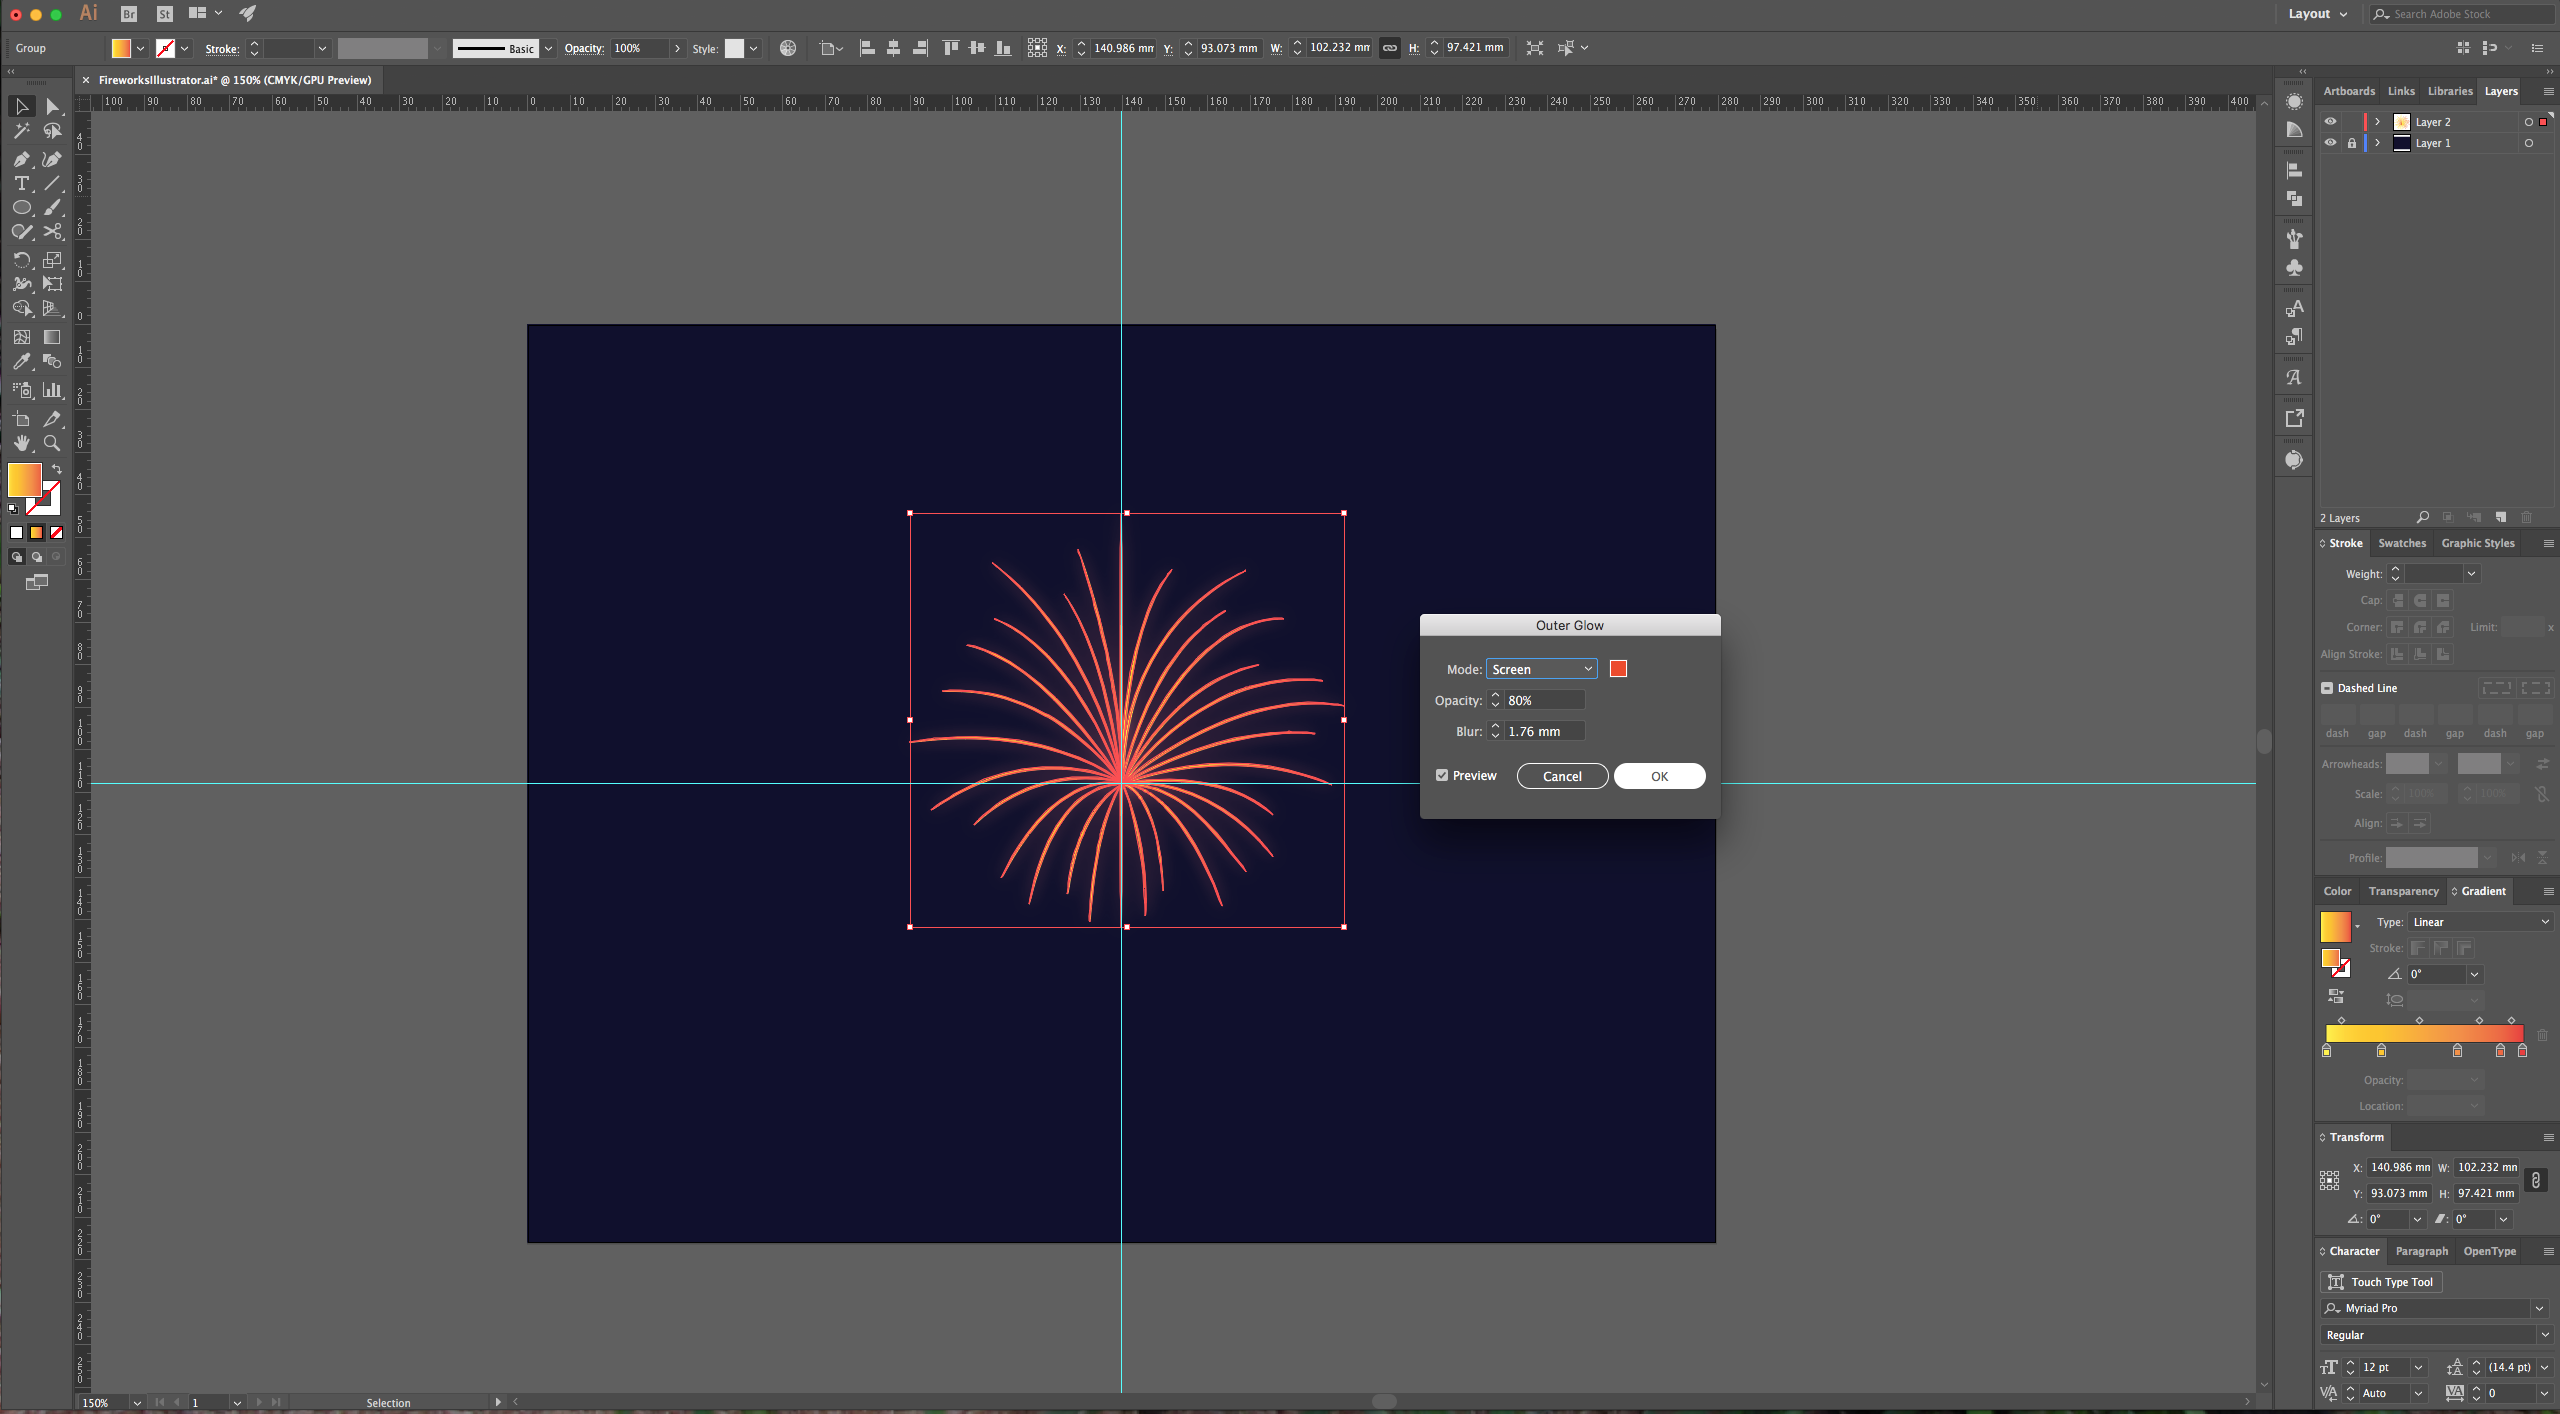
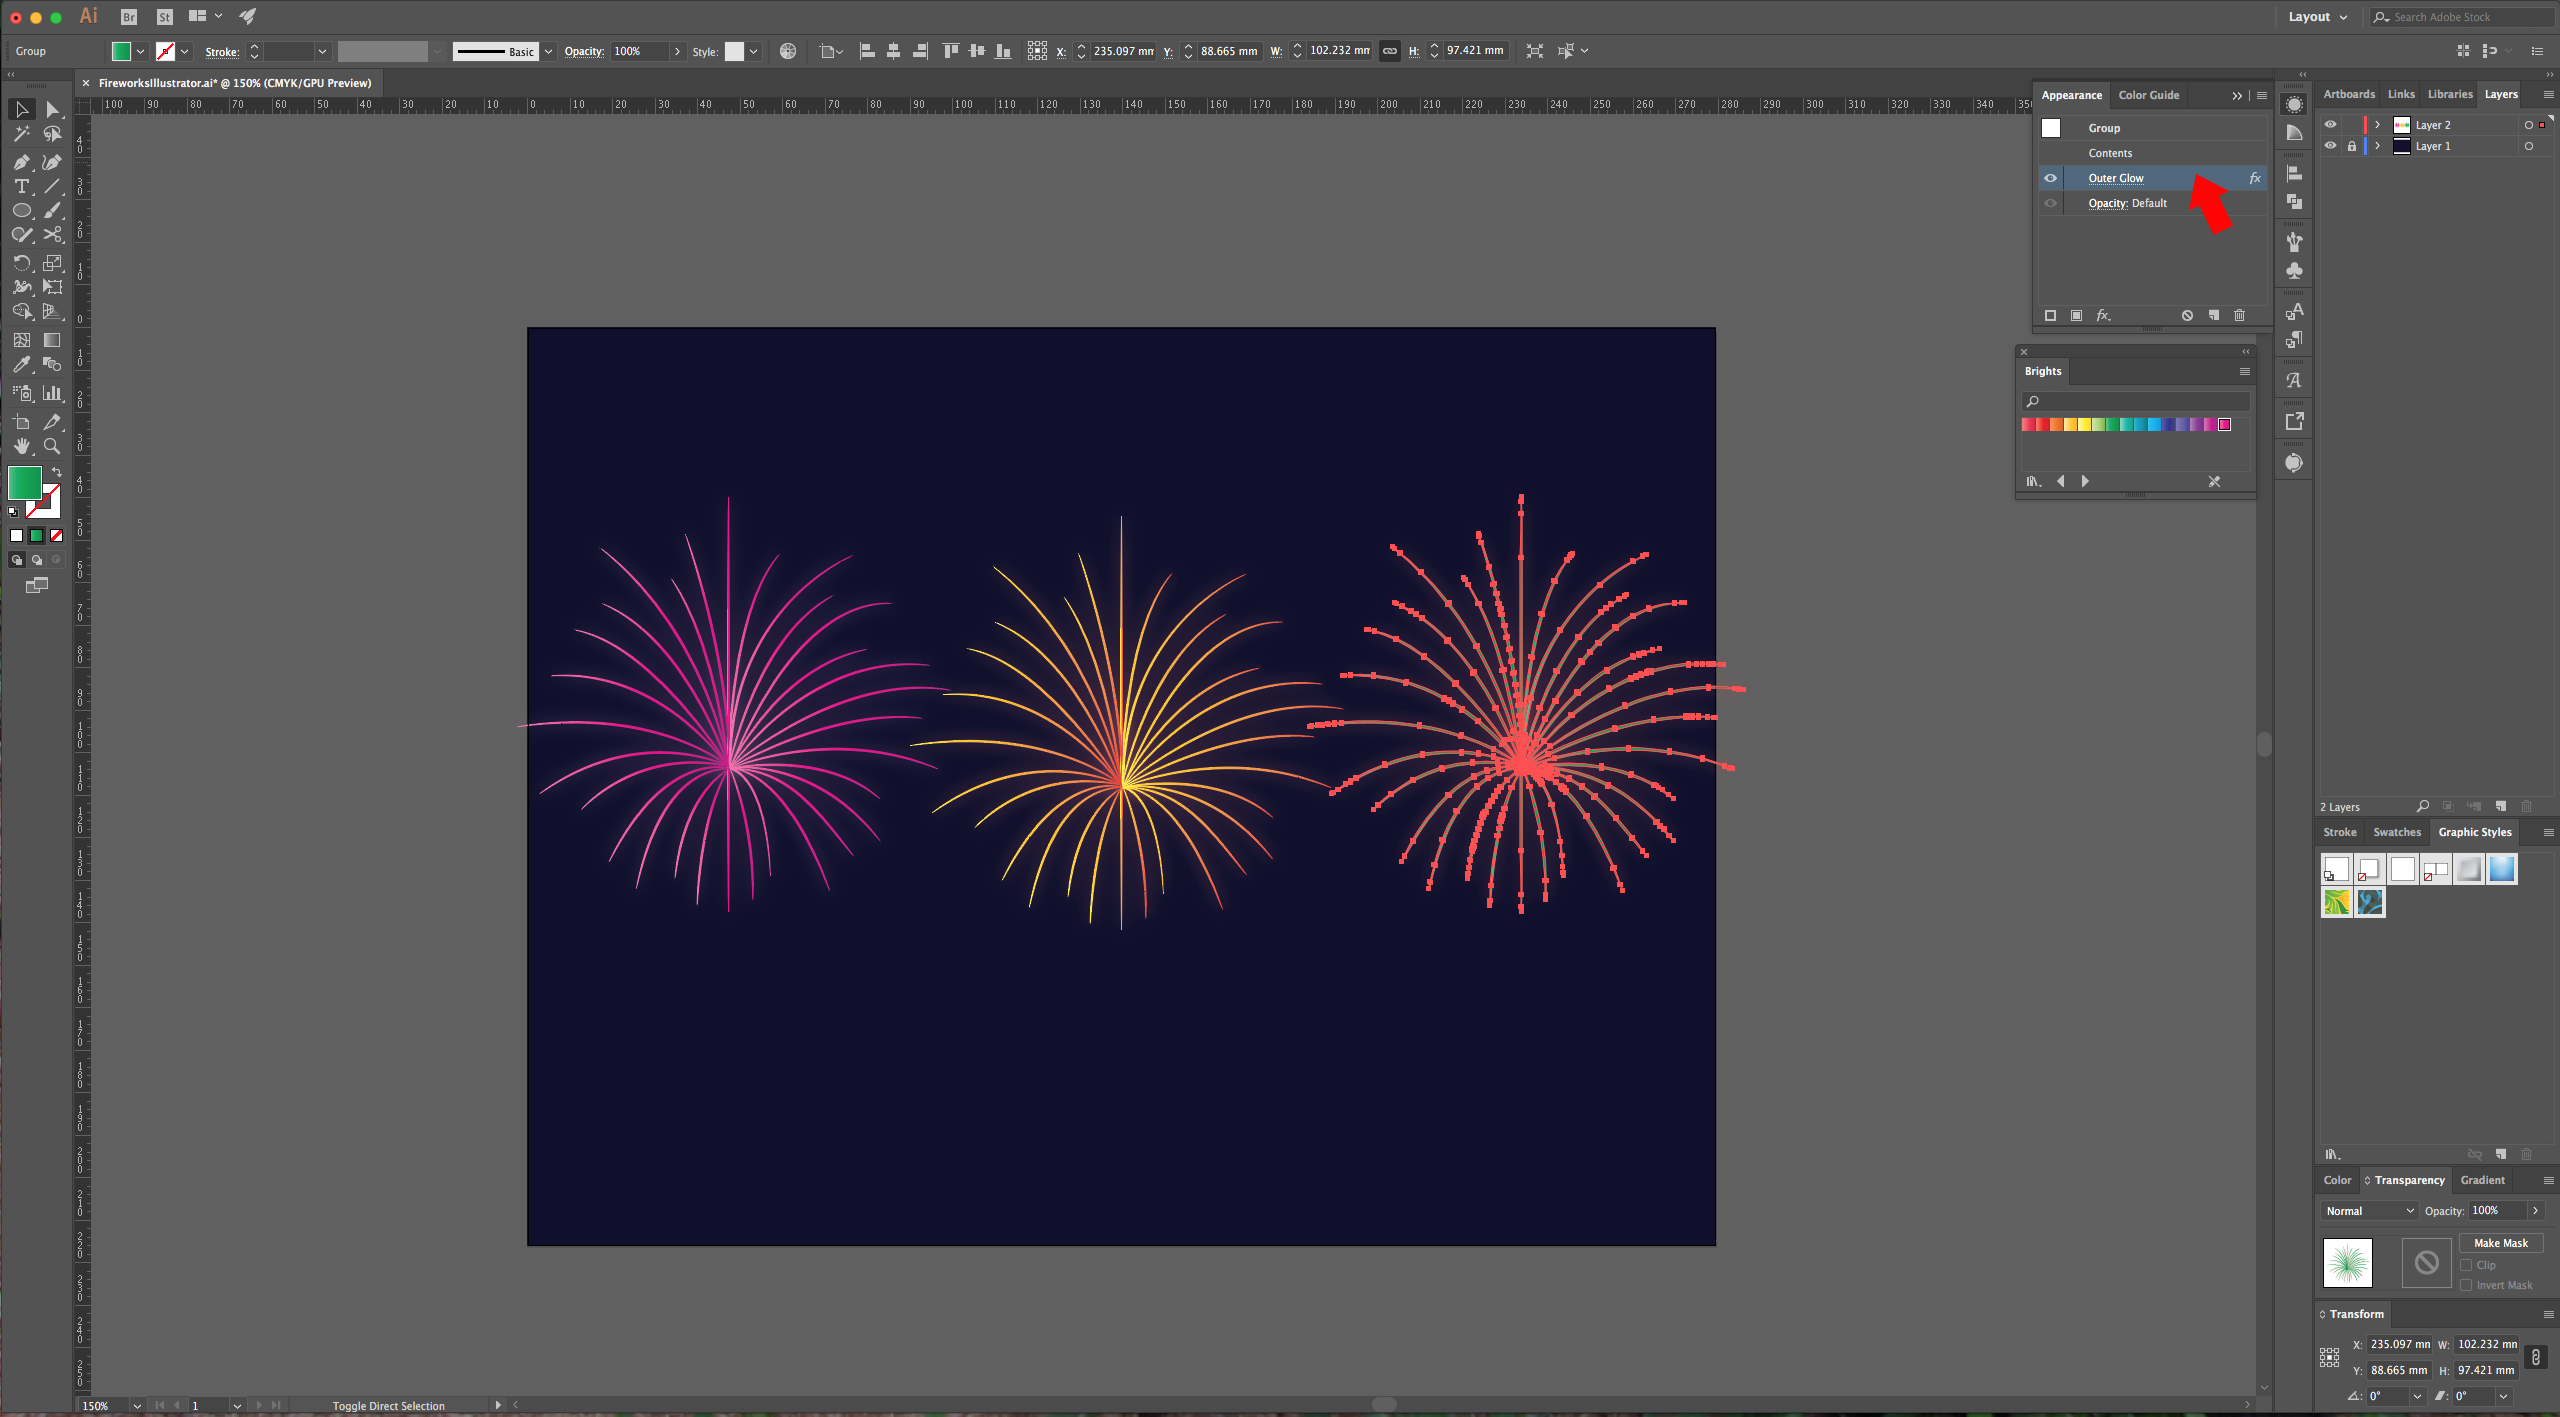
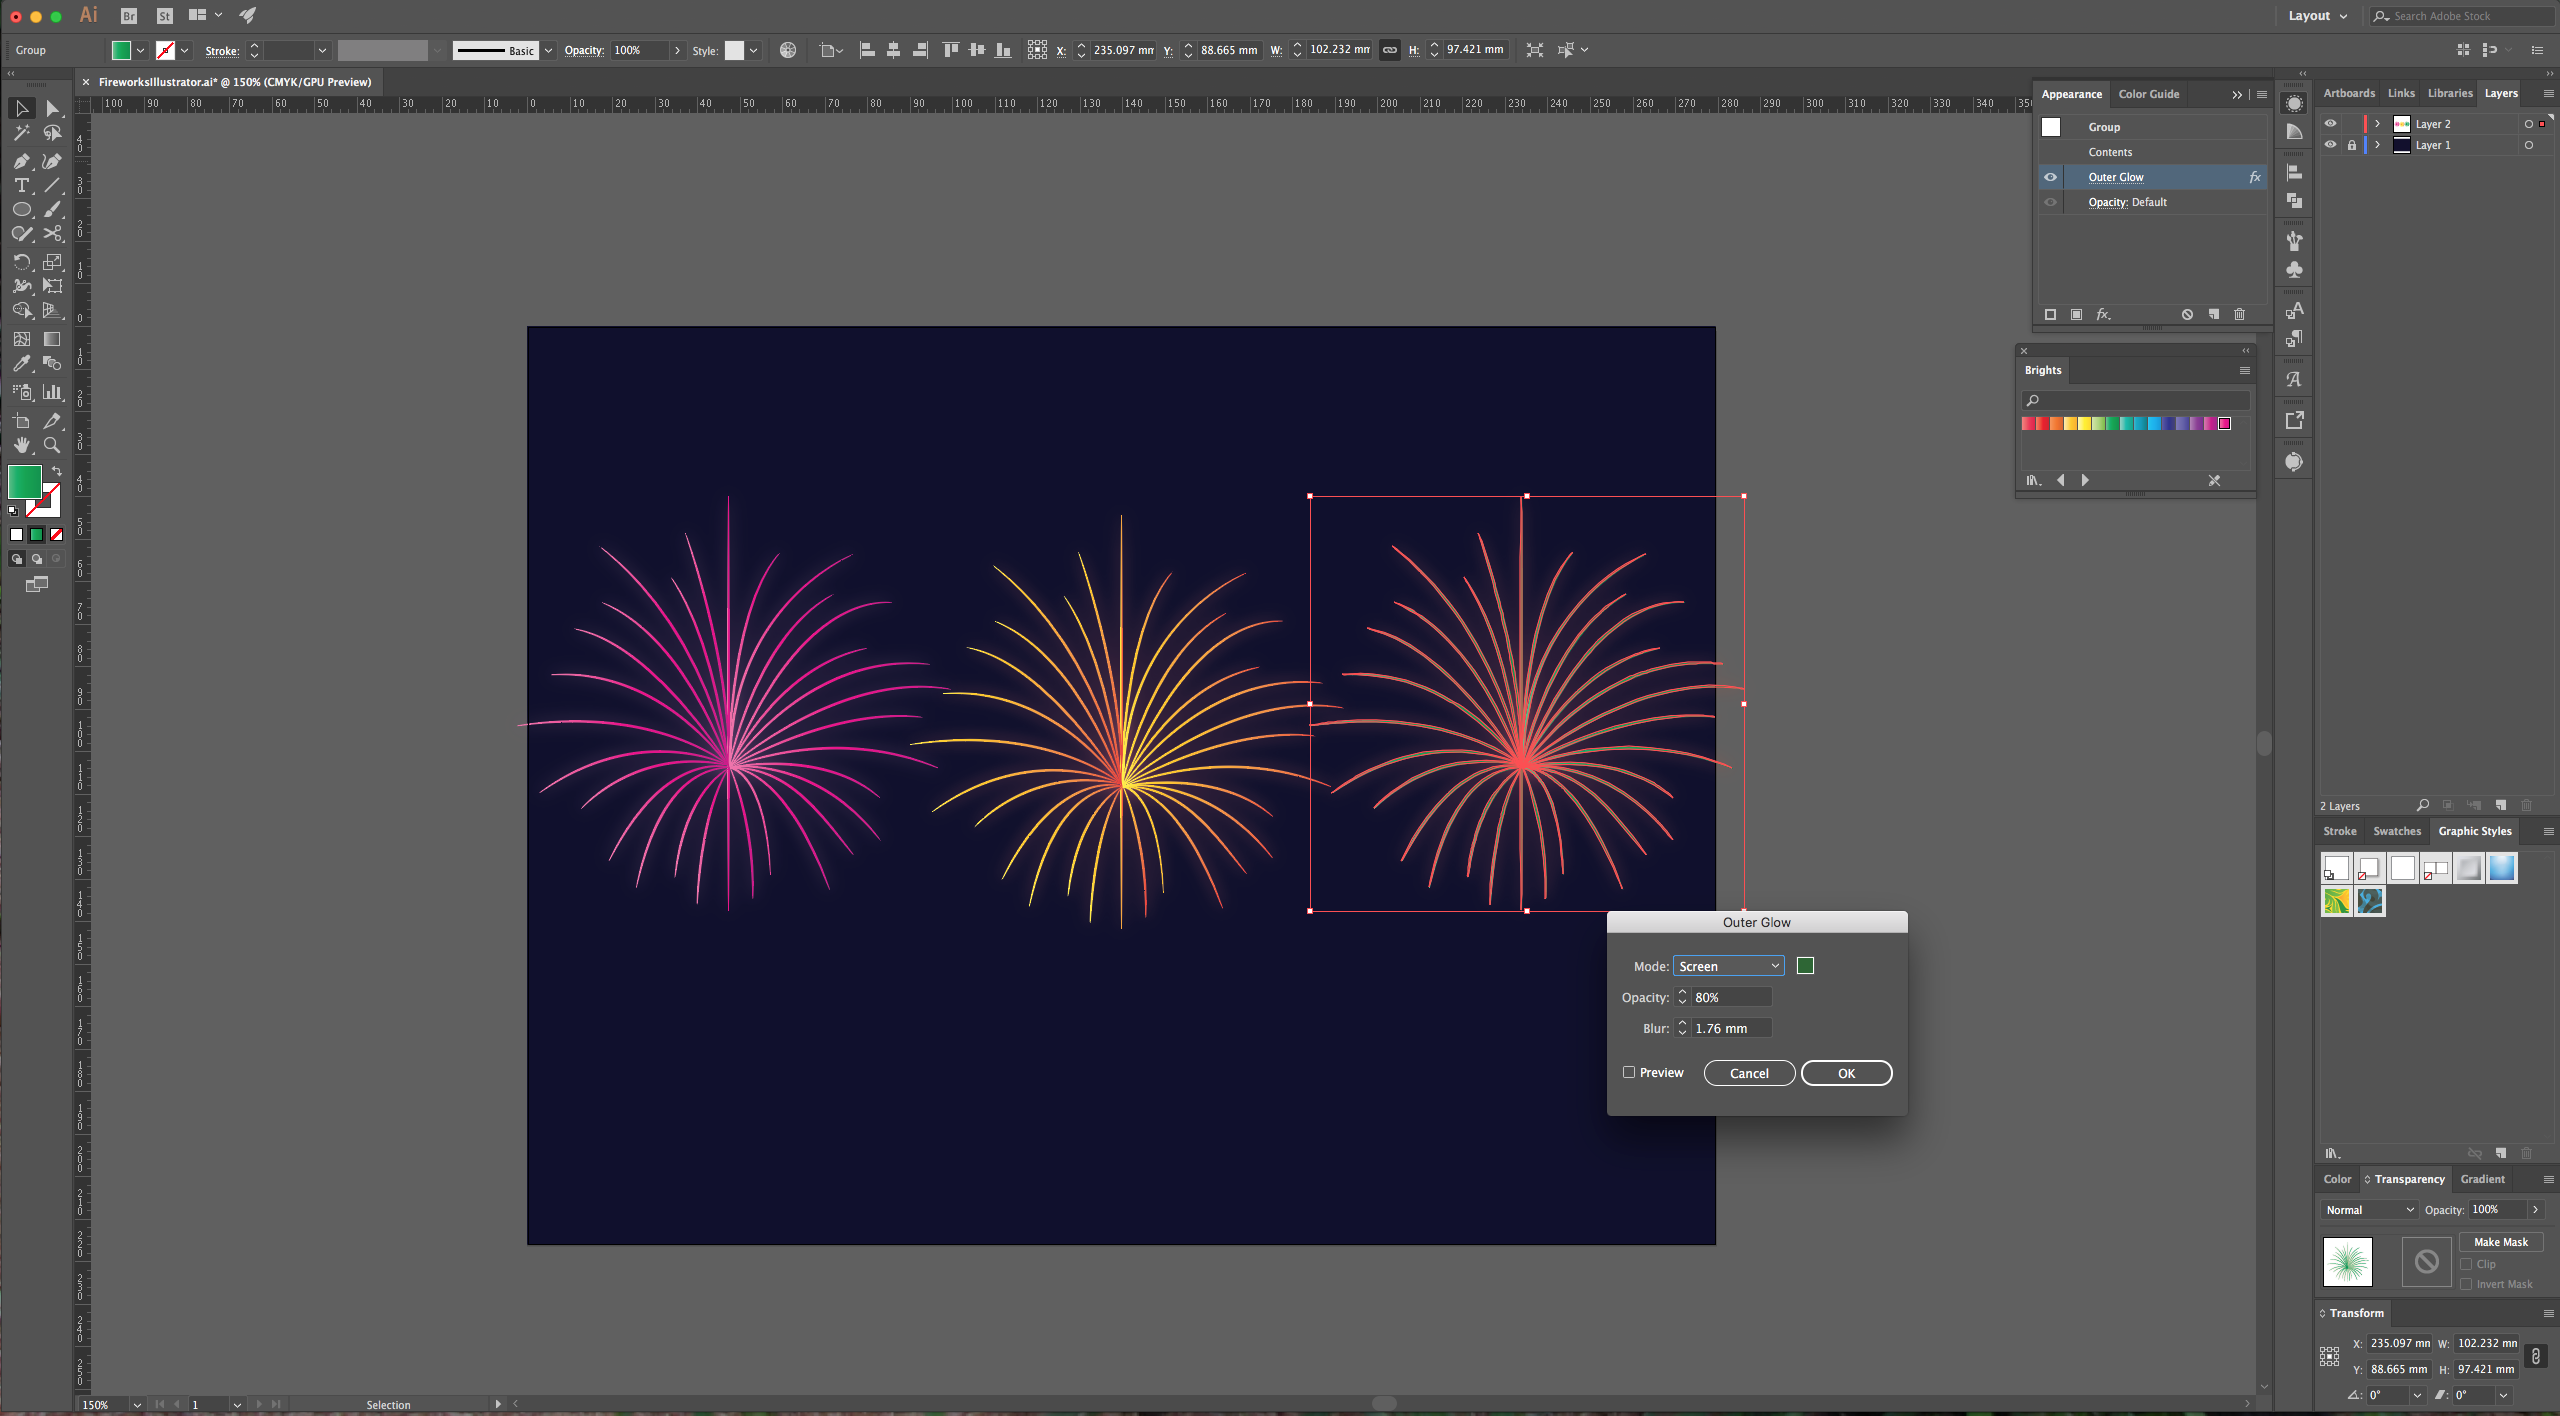
8 - With your shape still selected click on the “Effects” button at the bottom of your “Appearance Panel” and choose Stylize > Outer Glow, apply the following values: (choose a color from your gradient (#EF490F).
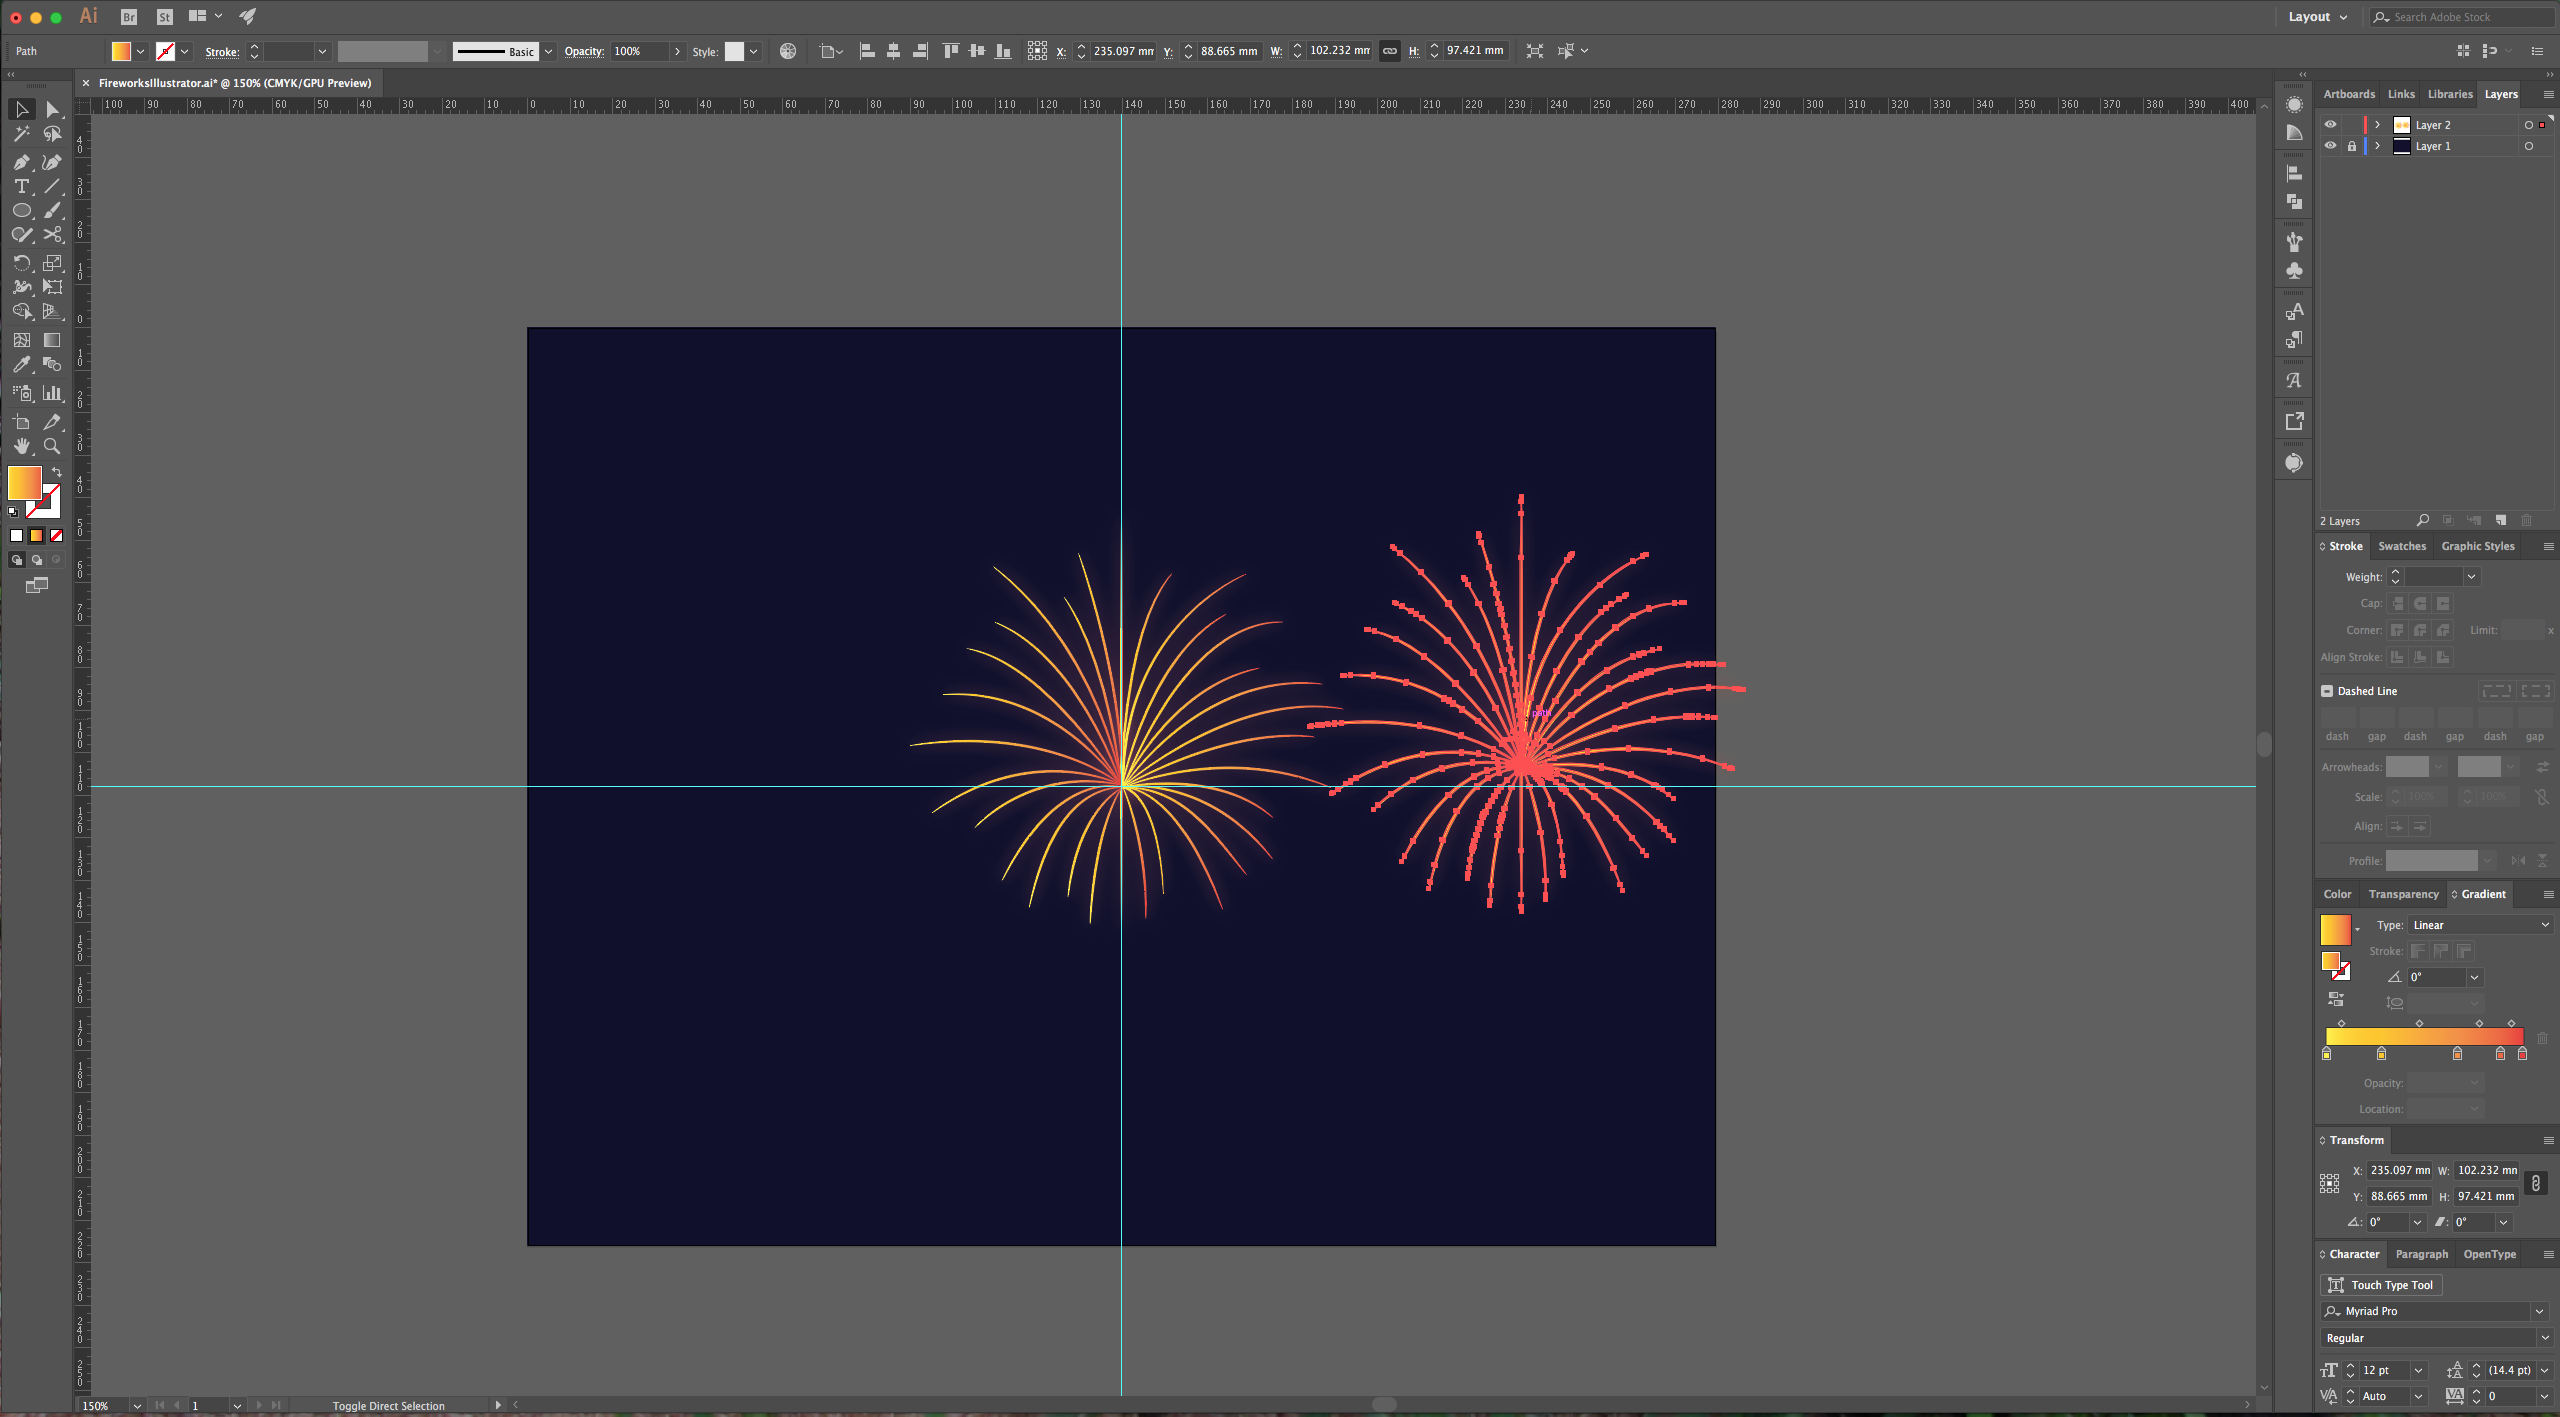
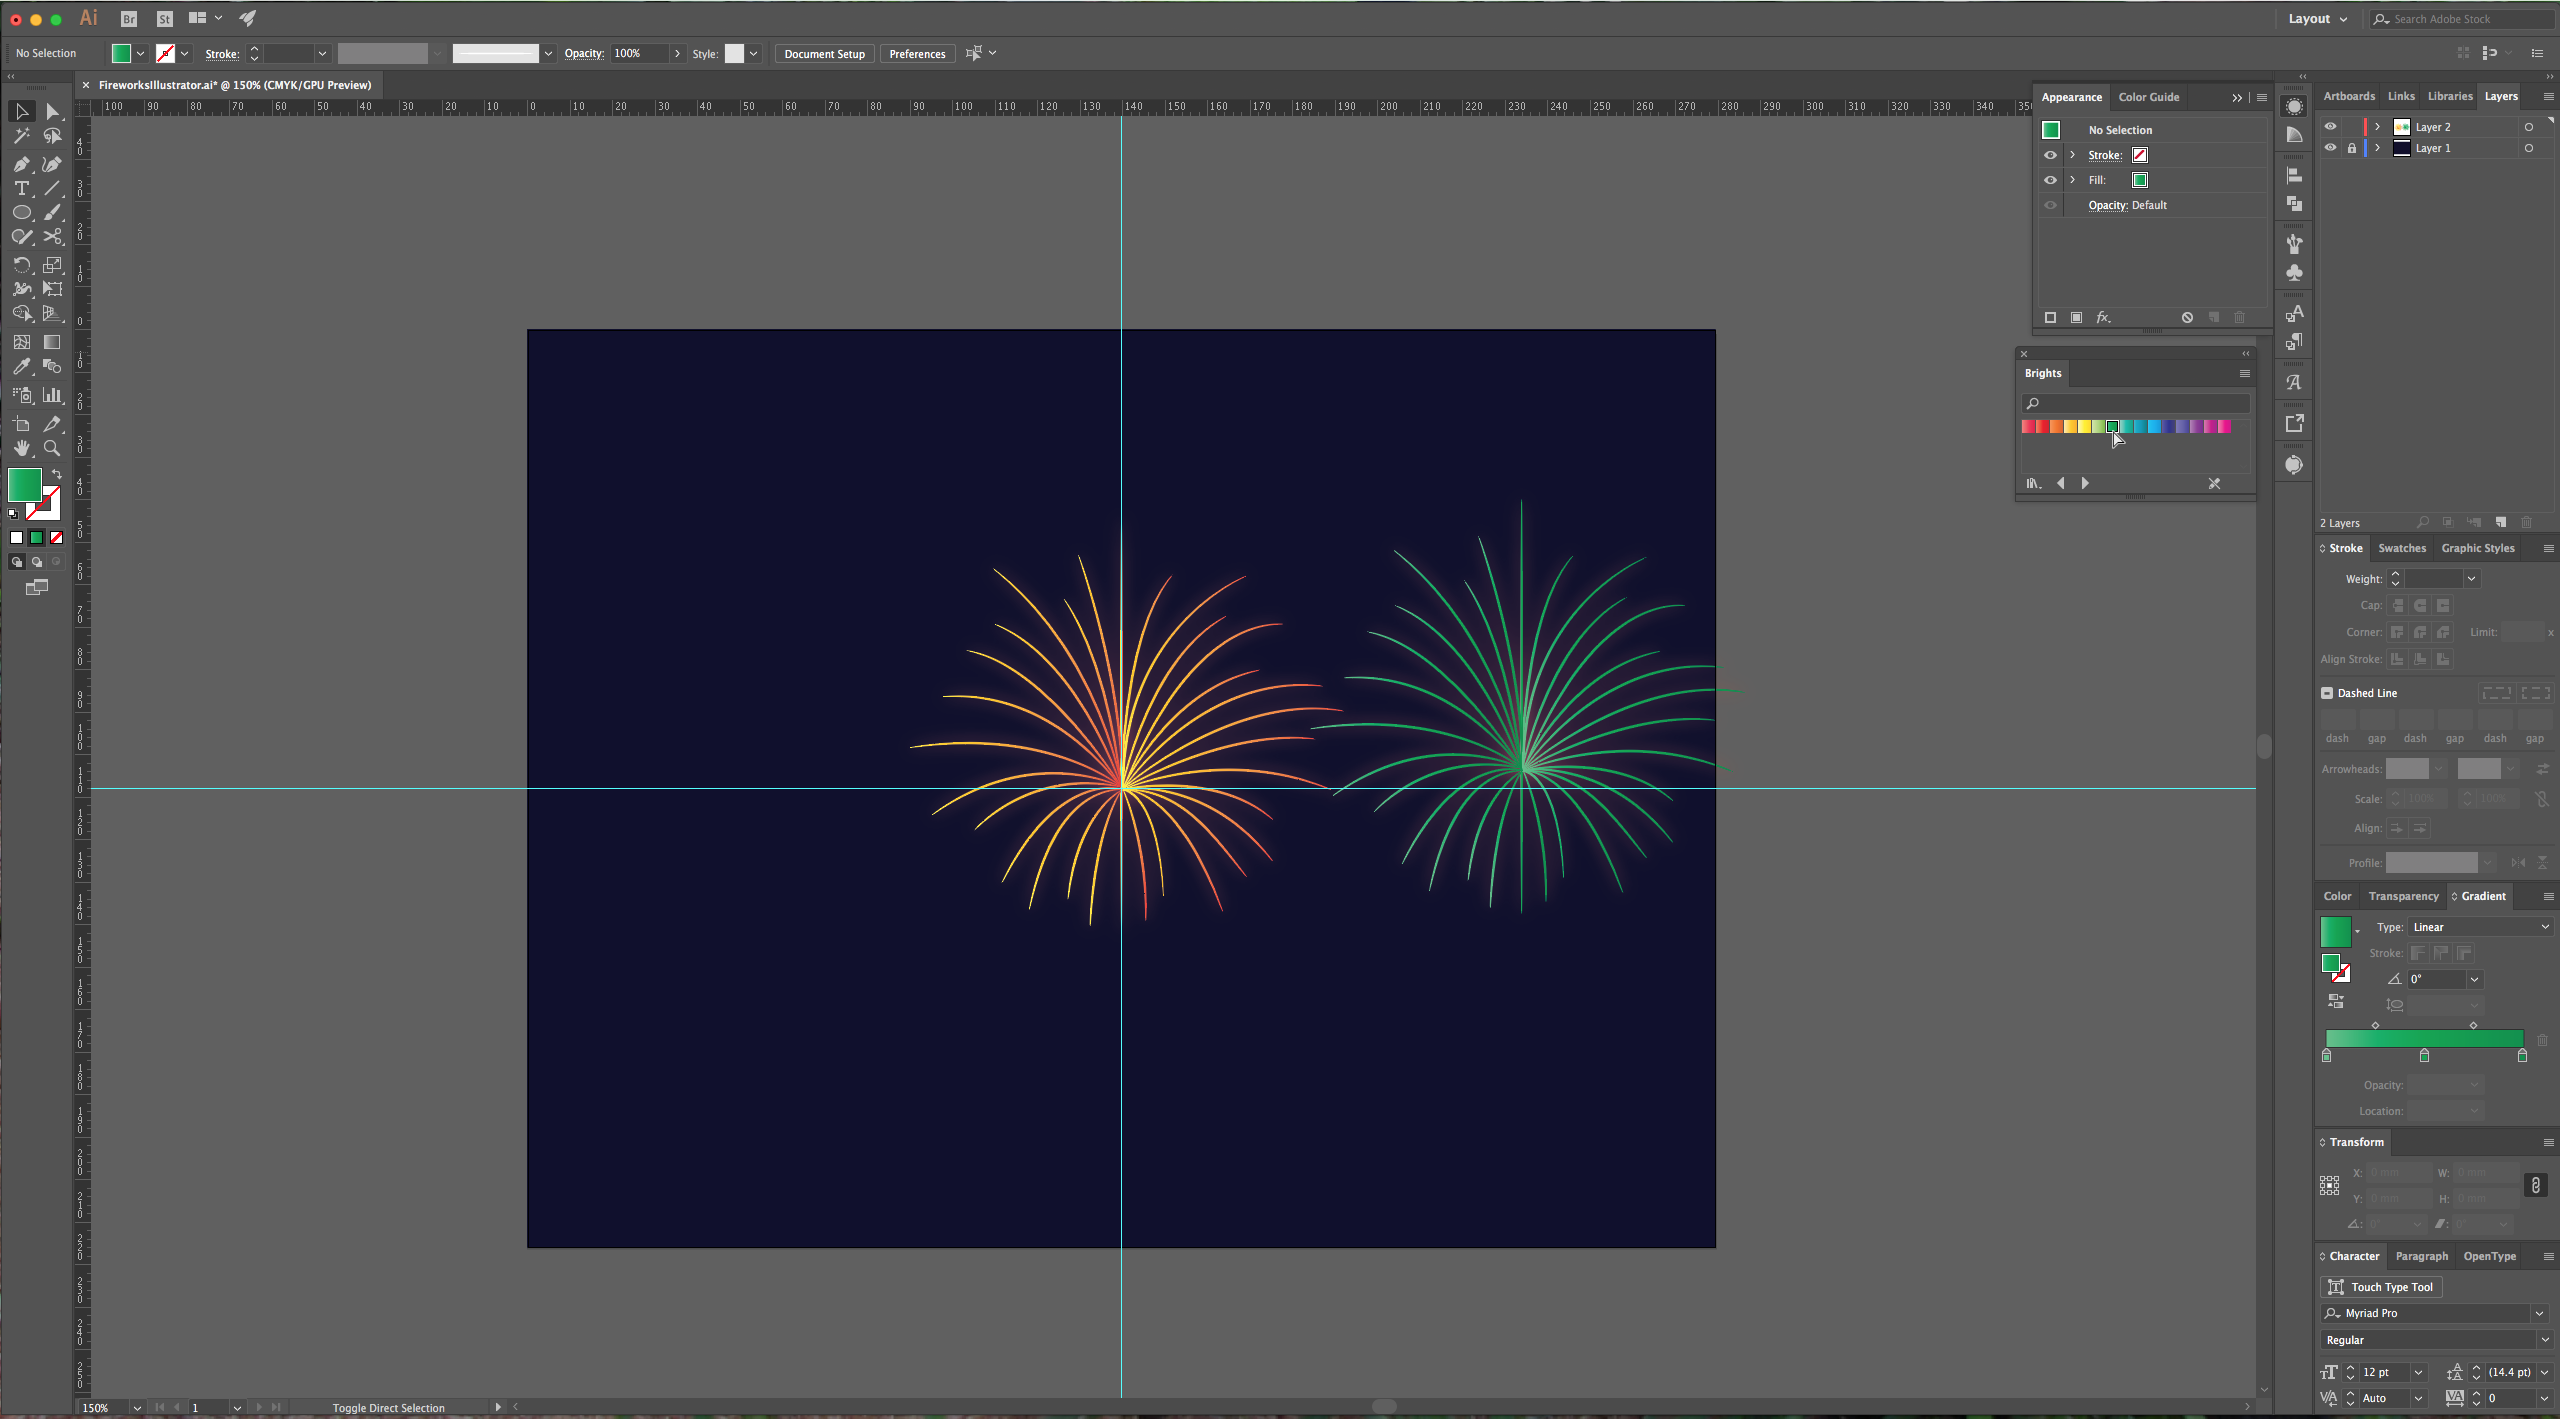
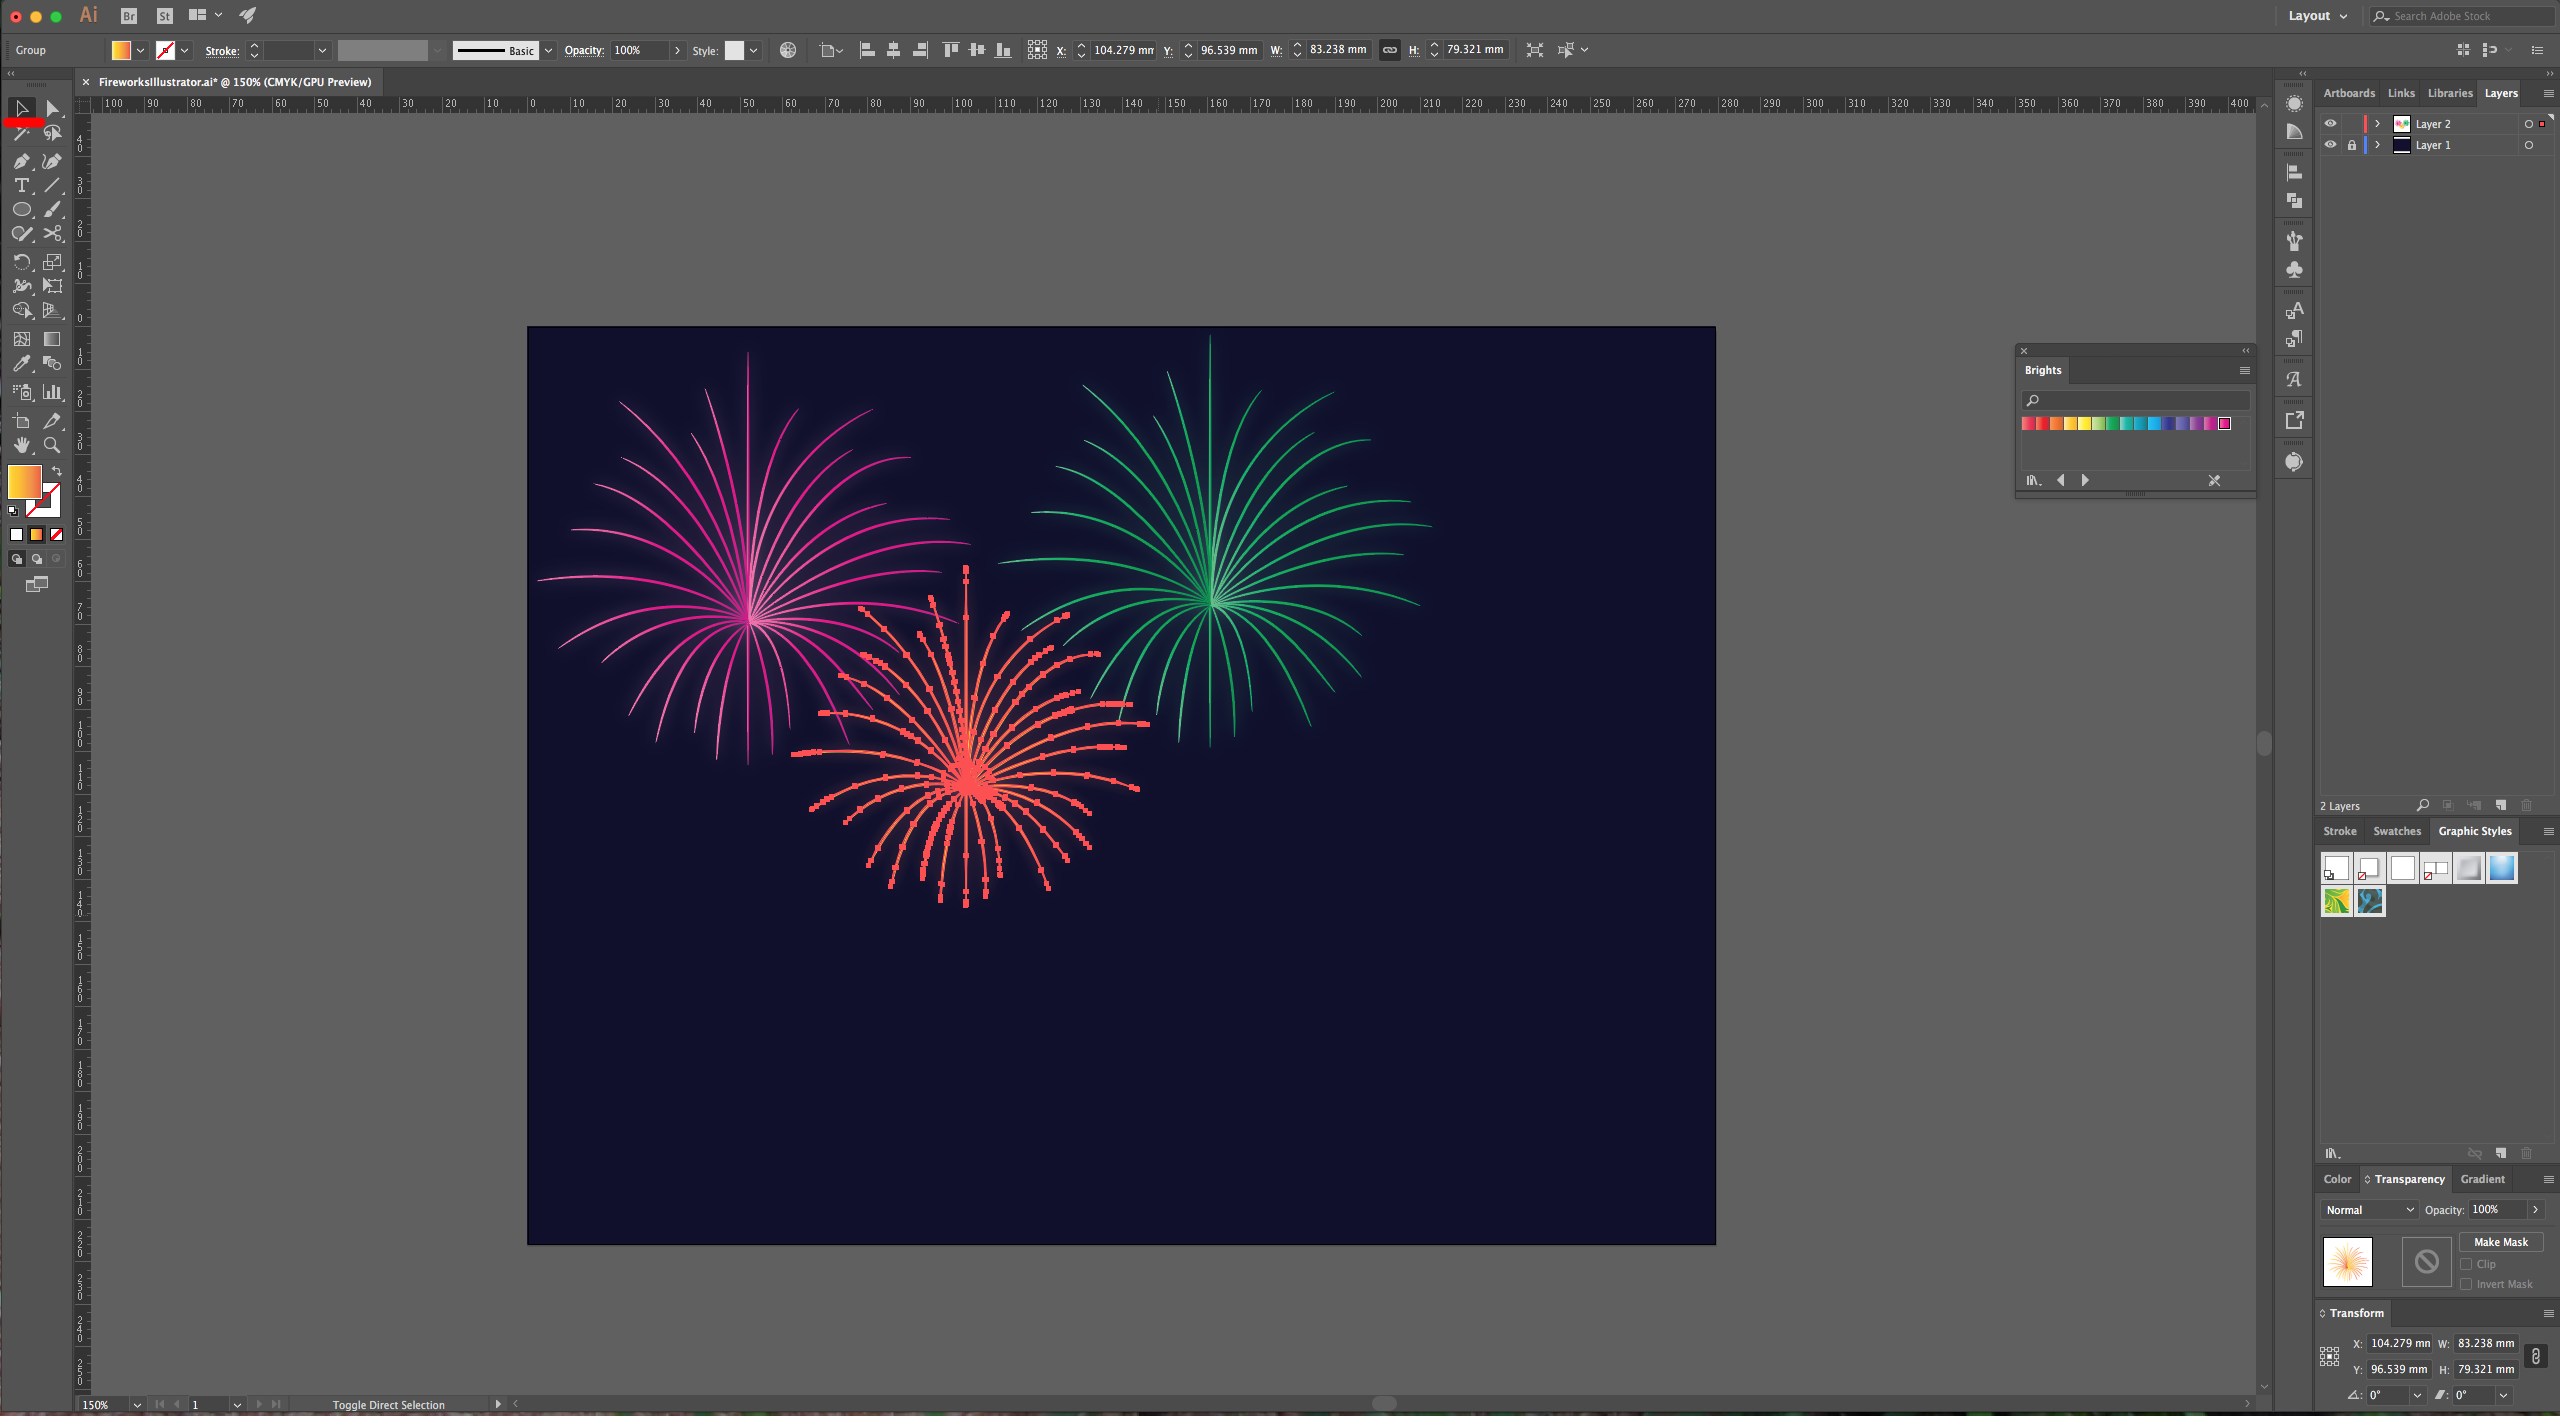
9 - While holding the “Alt/Option” key drag your shape to create a duplicate. Change the gradient preset or colors. Remember to go back to the “Appearance Panel” and double-click on the “Outer Glow” effect to change the color to one more similar to your gradient.
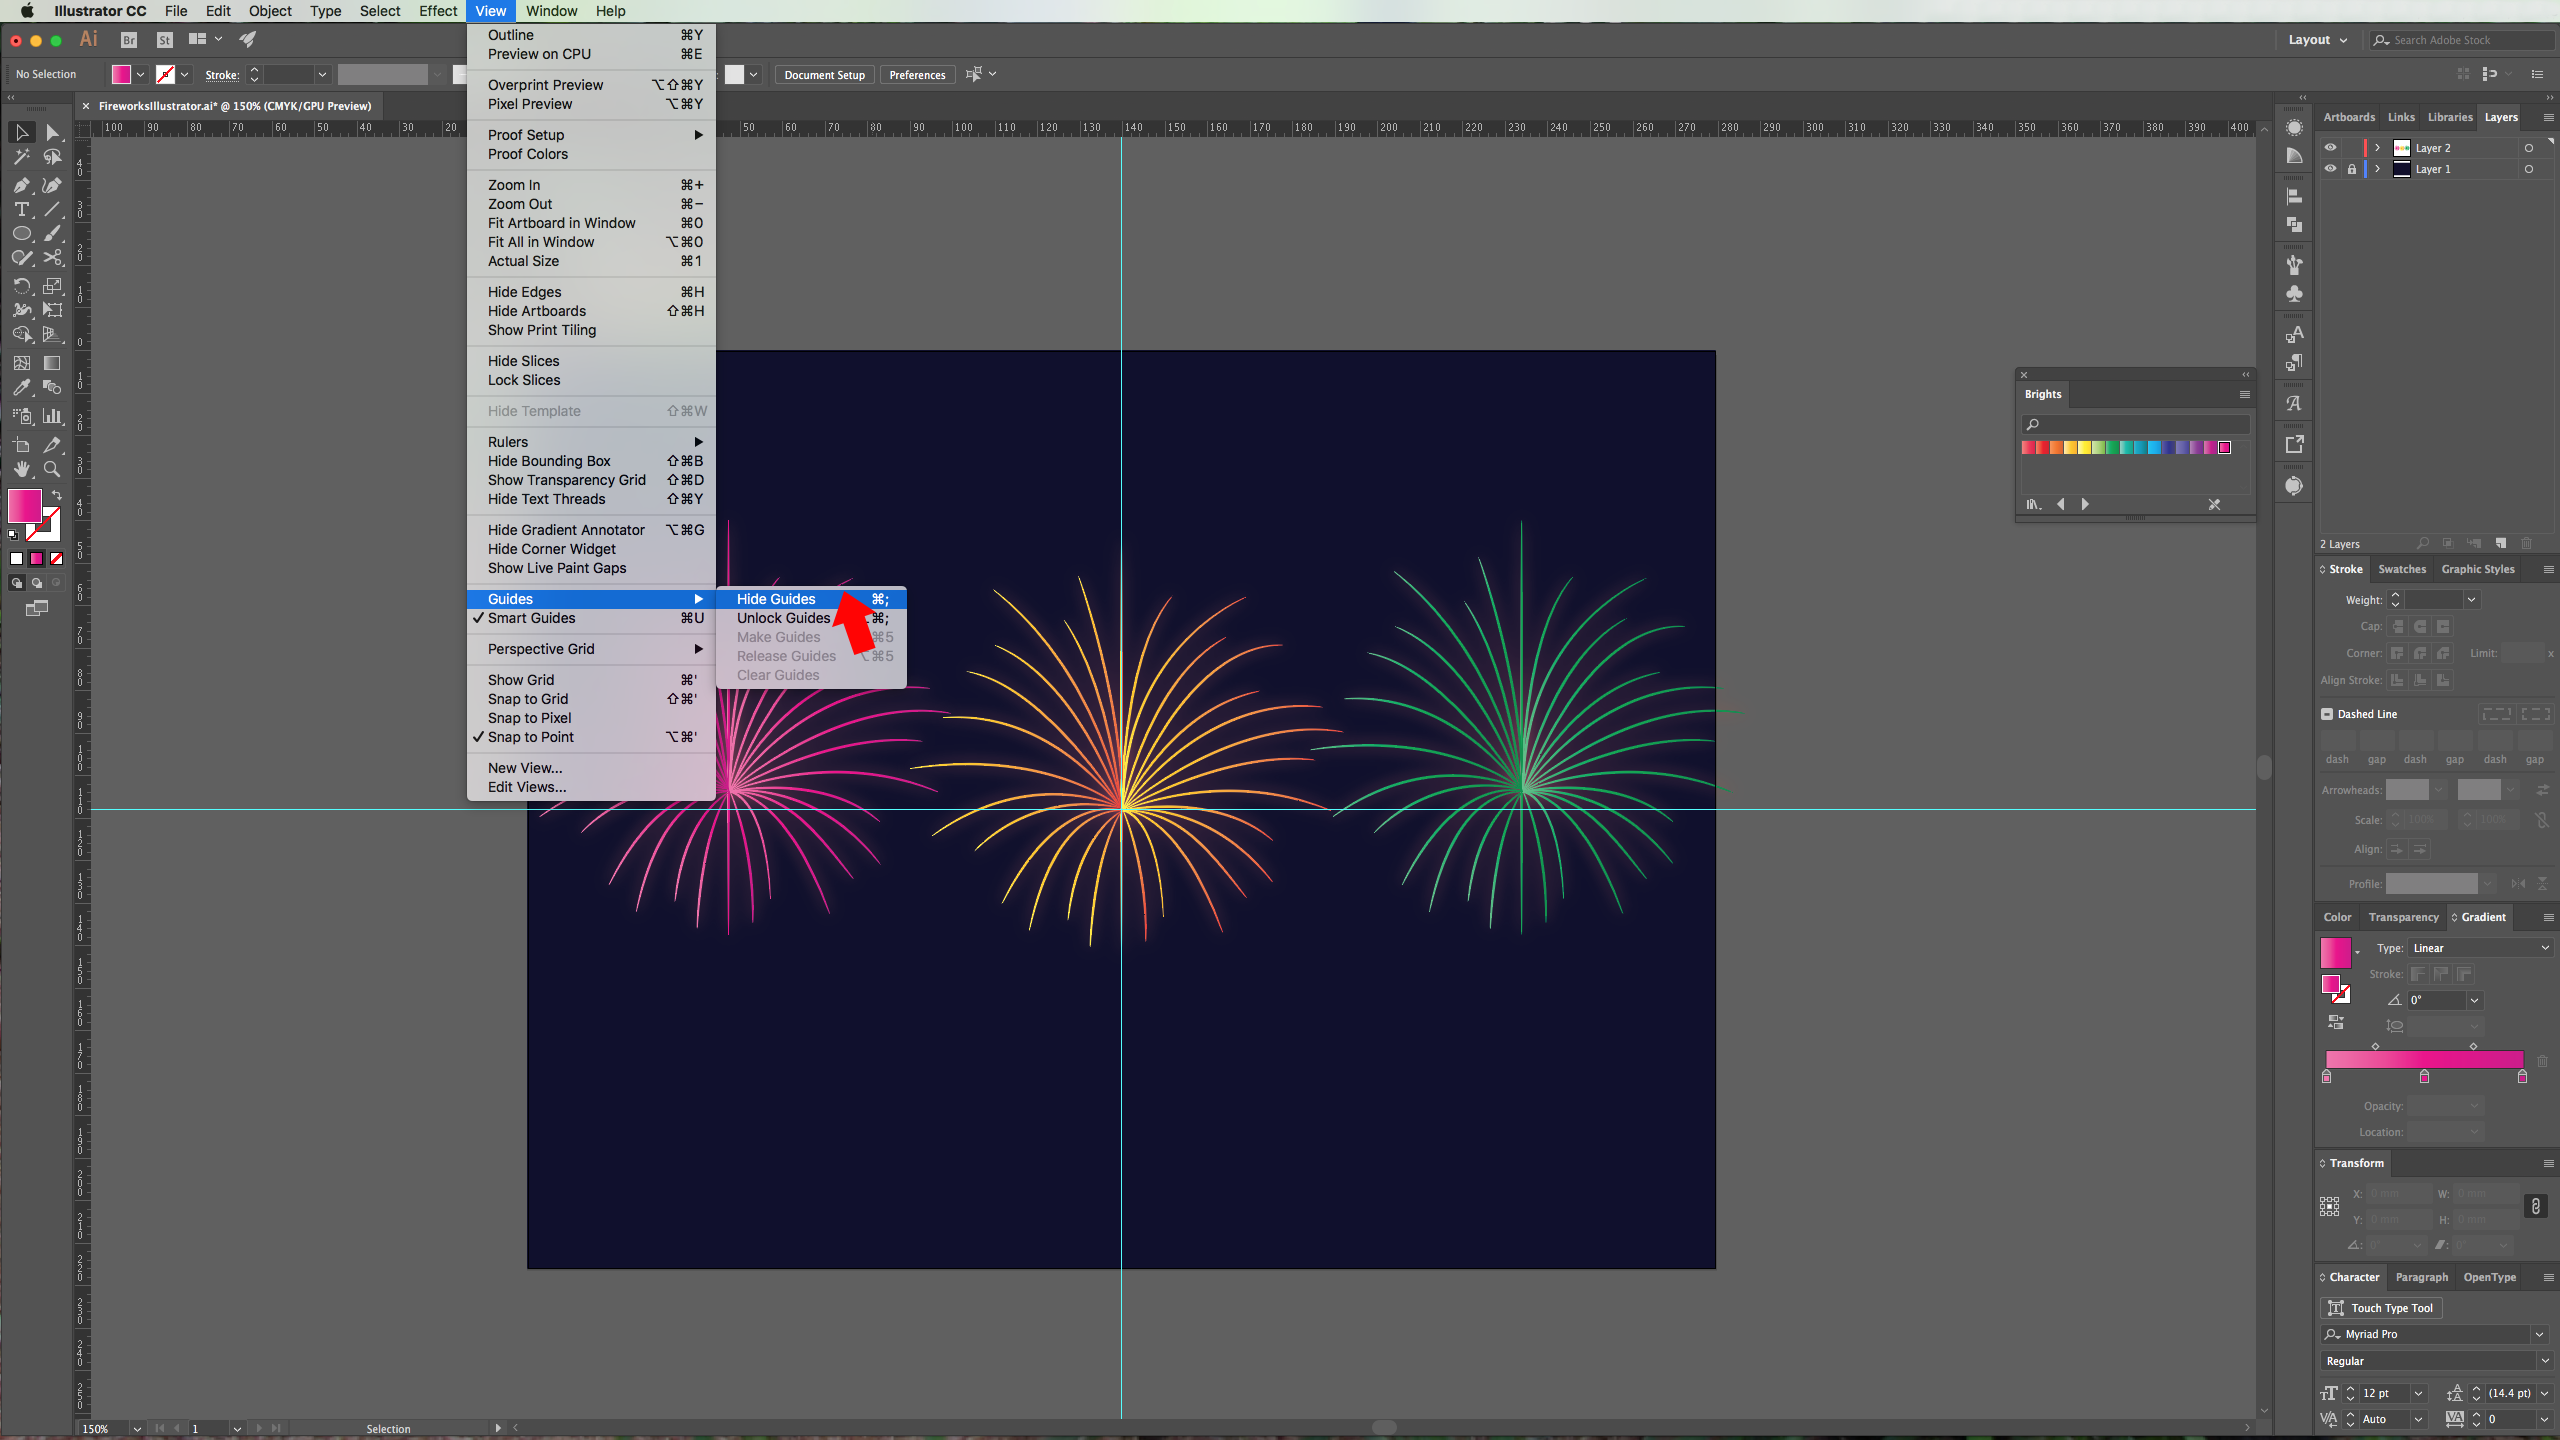
10 - Hide your guides (Command/Control + ;) and arrange your fireworks to your liking. You can resize and/or rotate the using the “Selection Tool”.
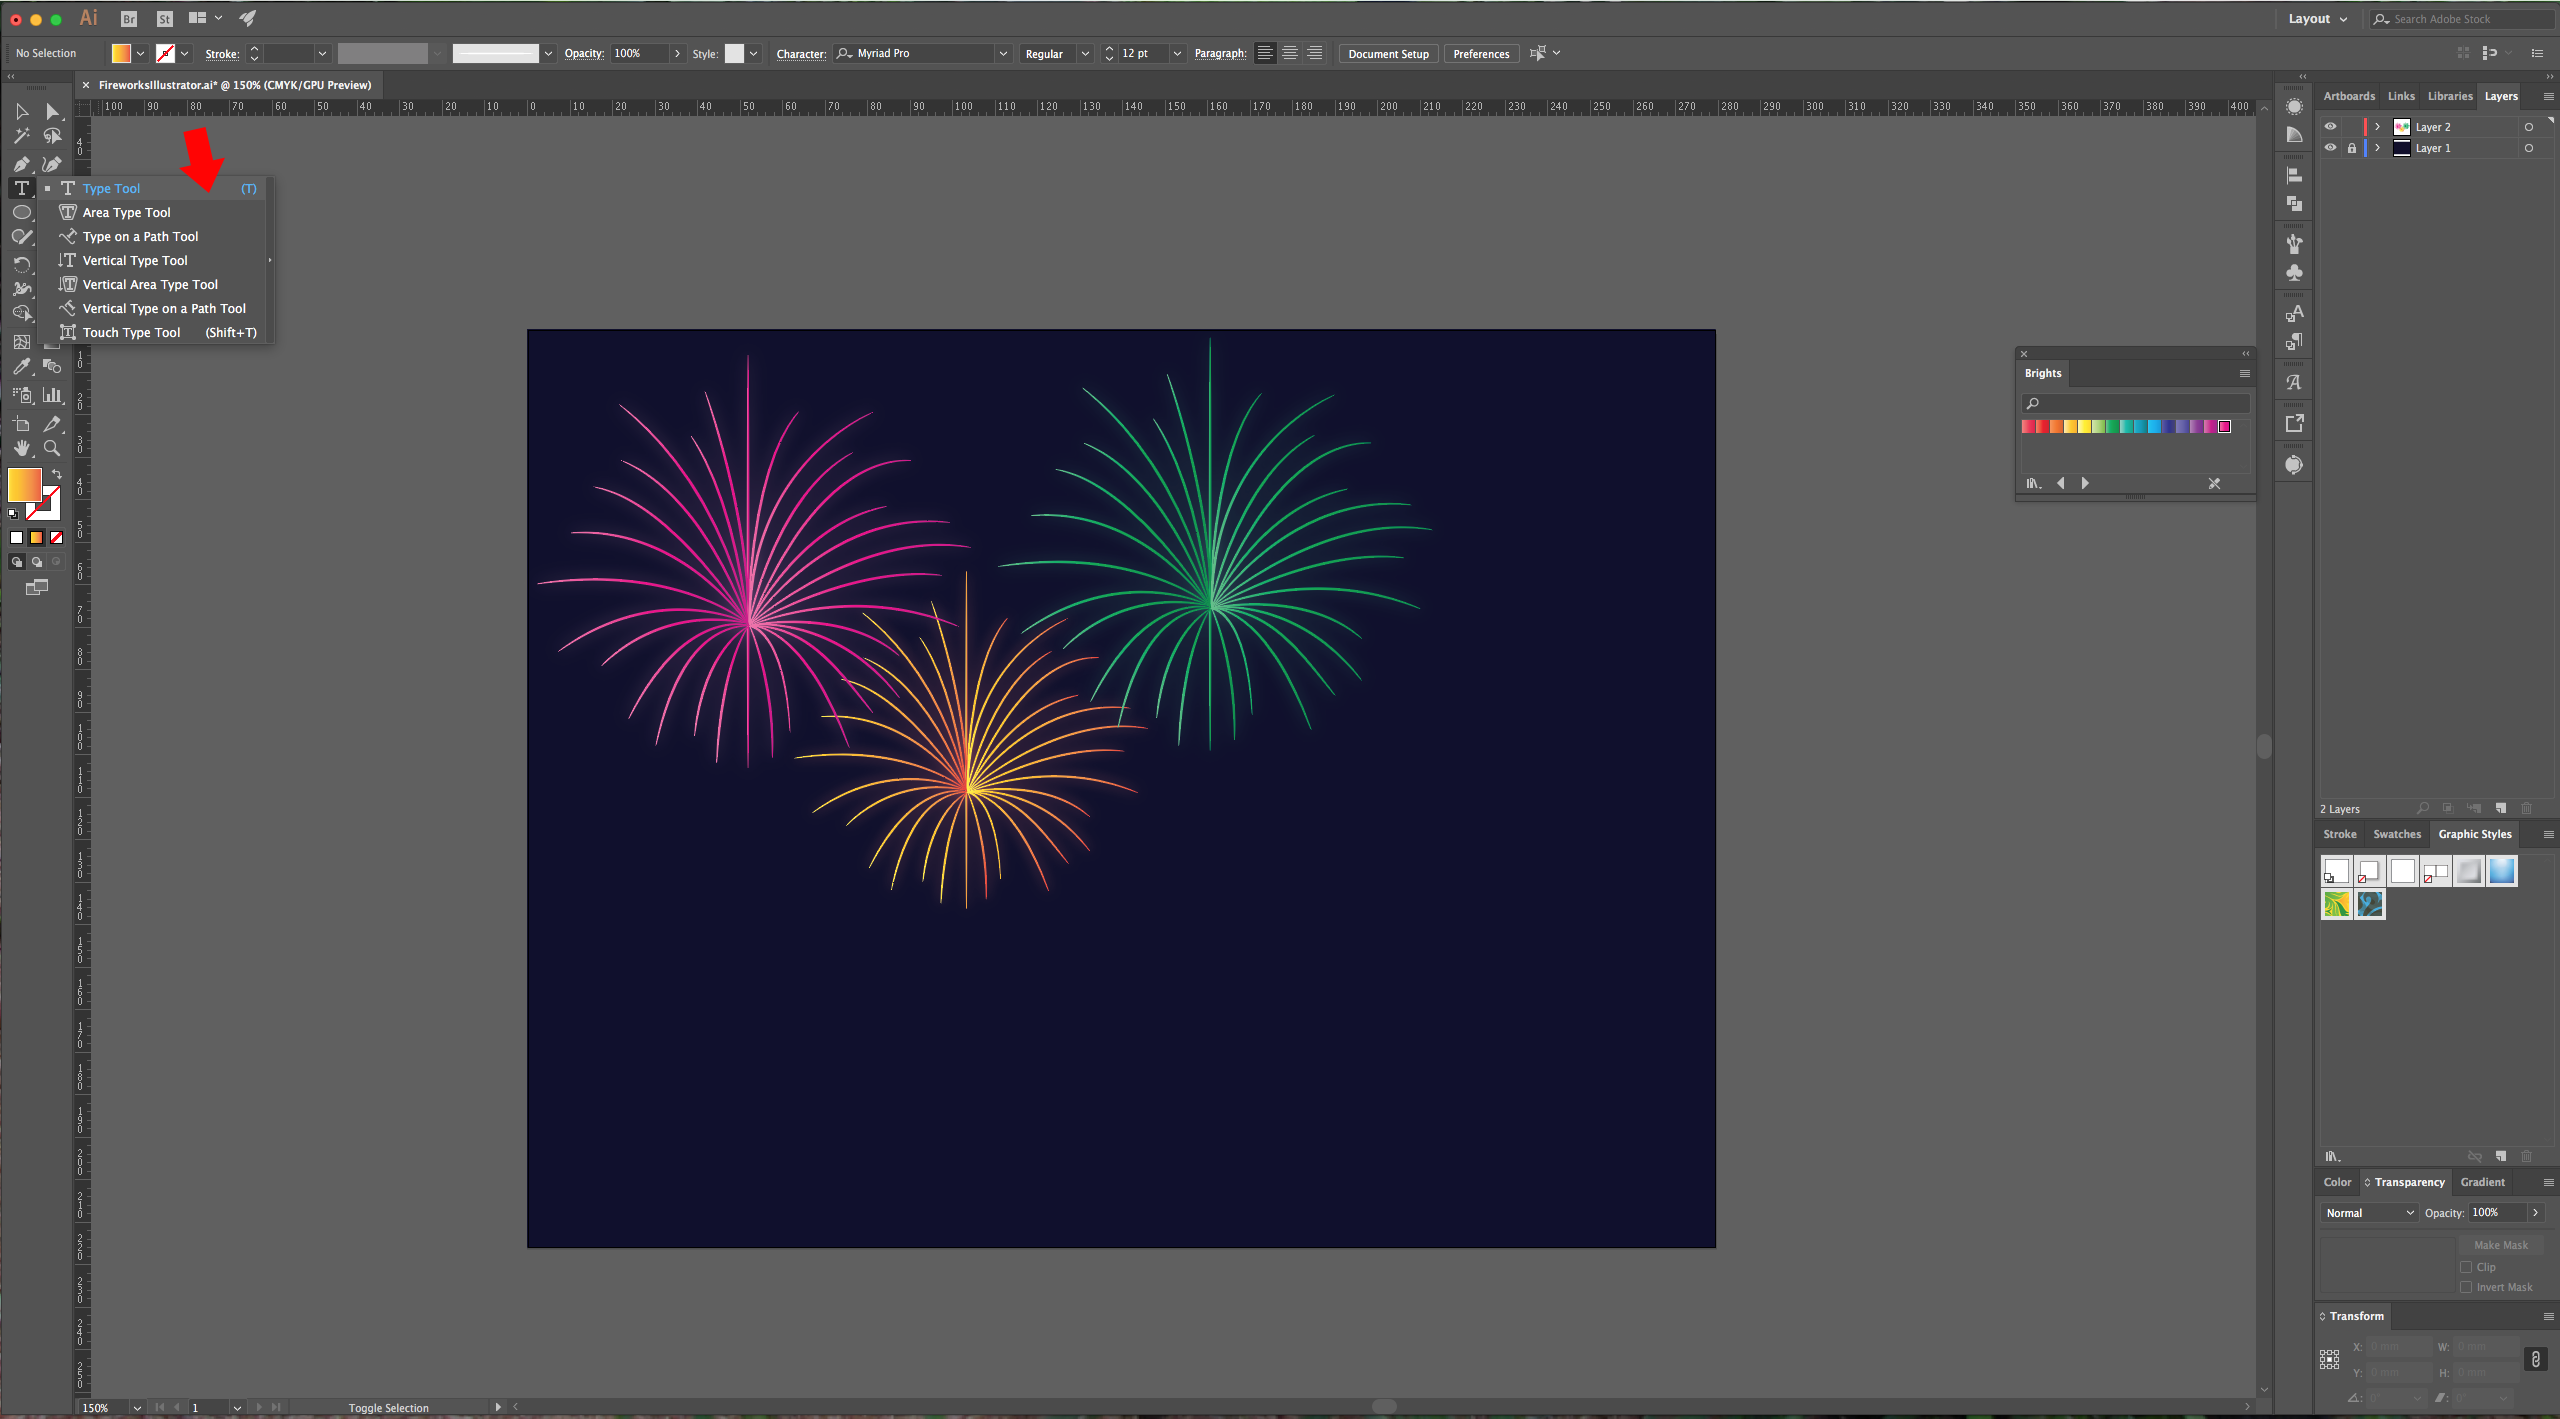
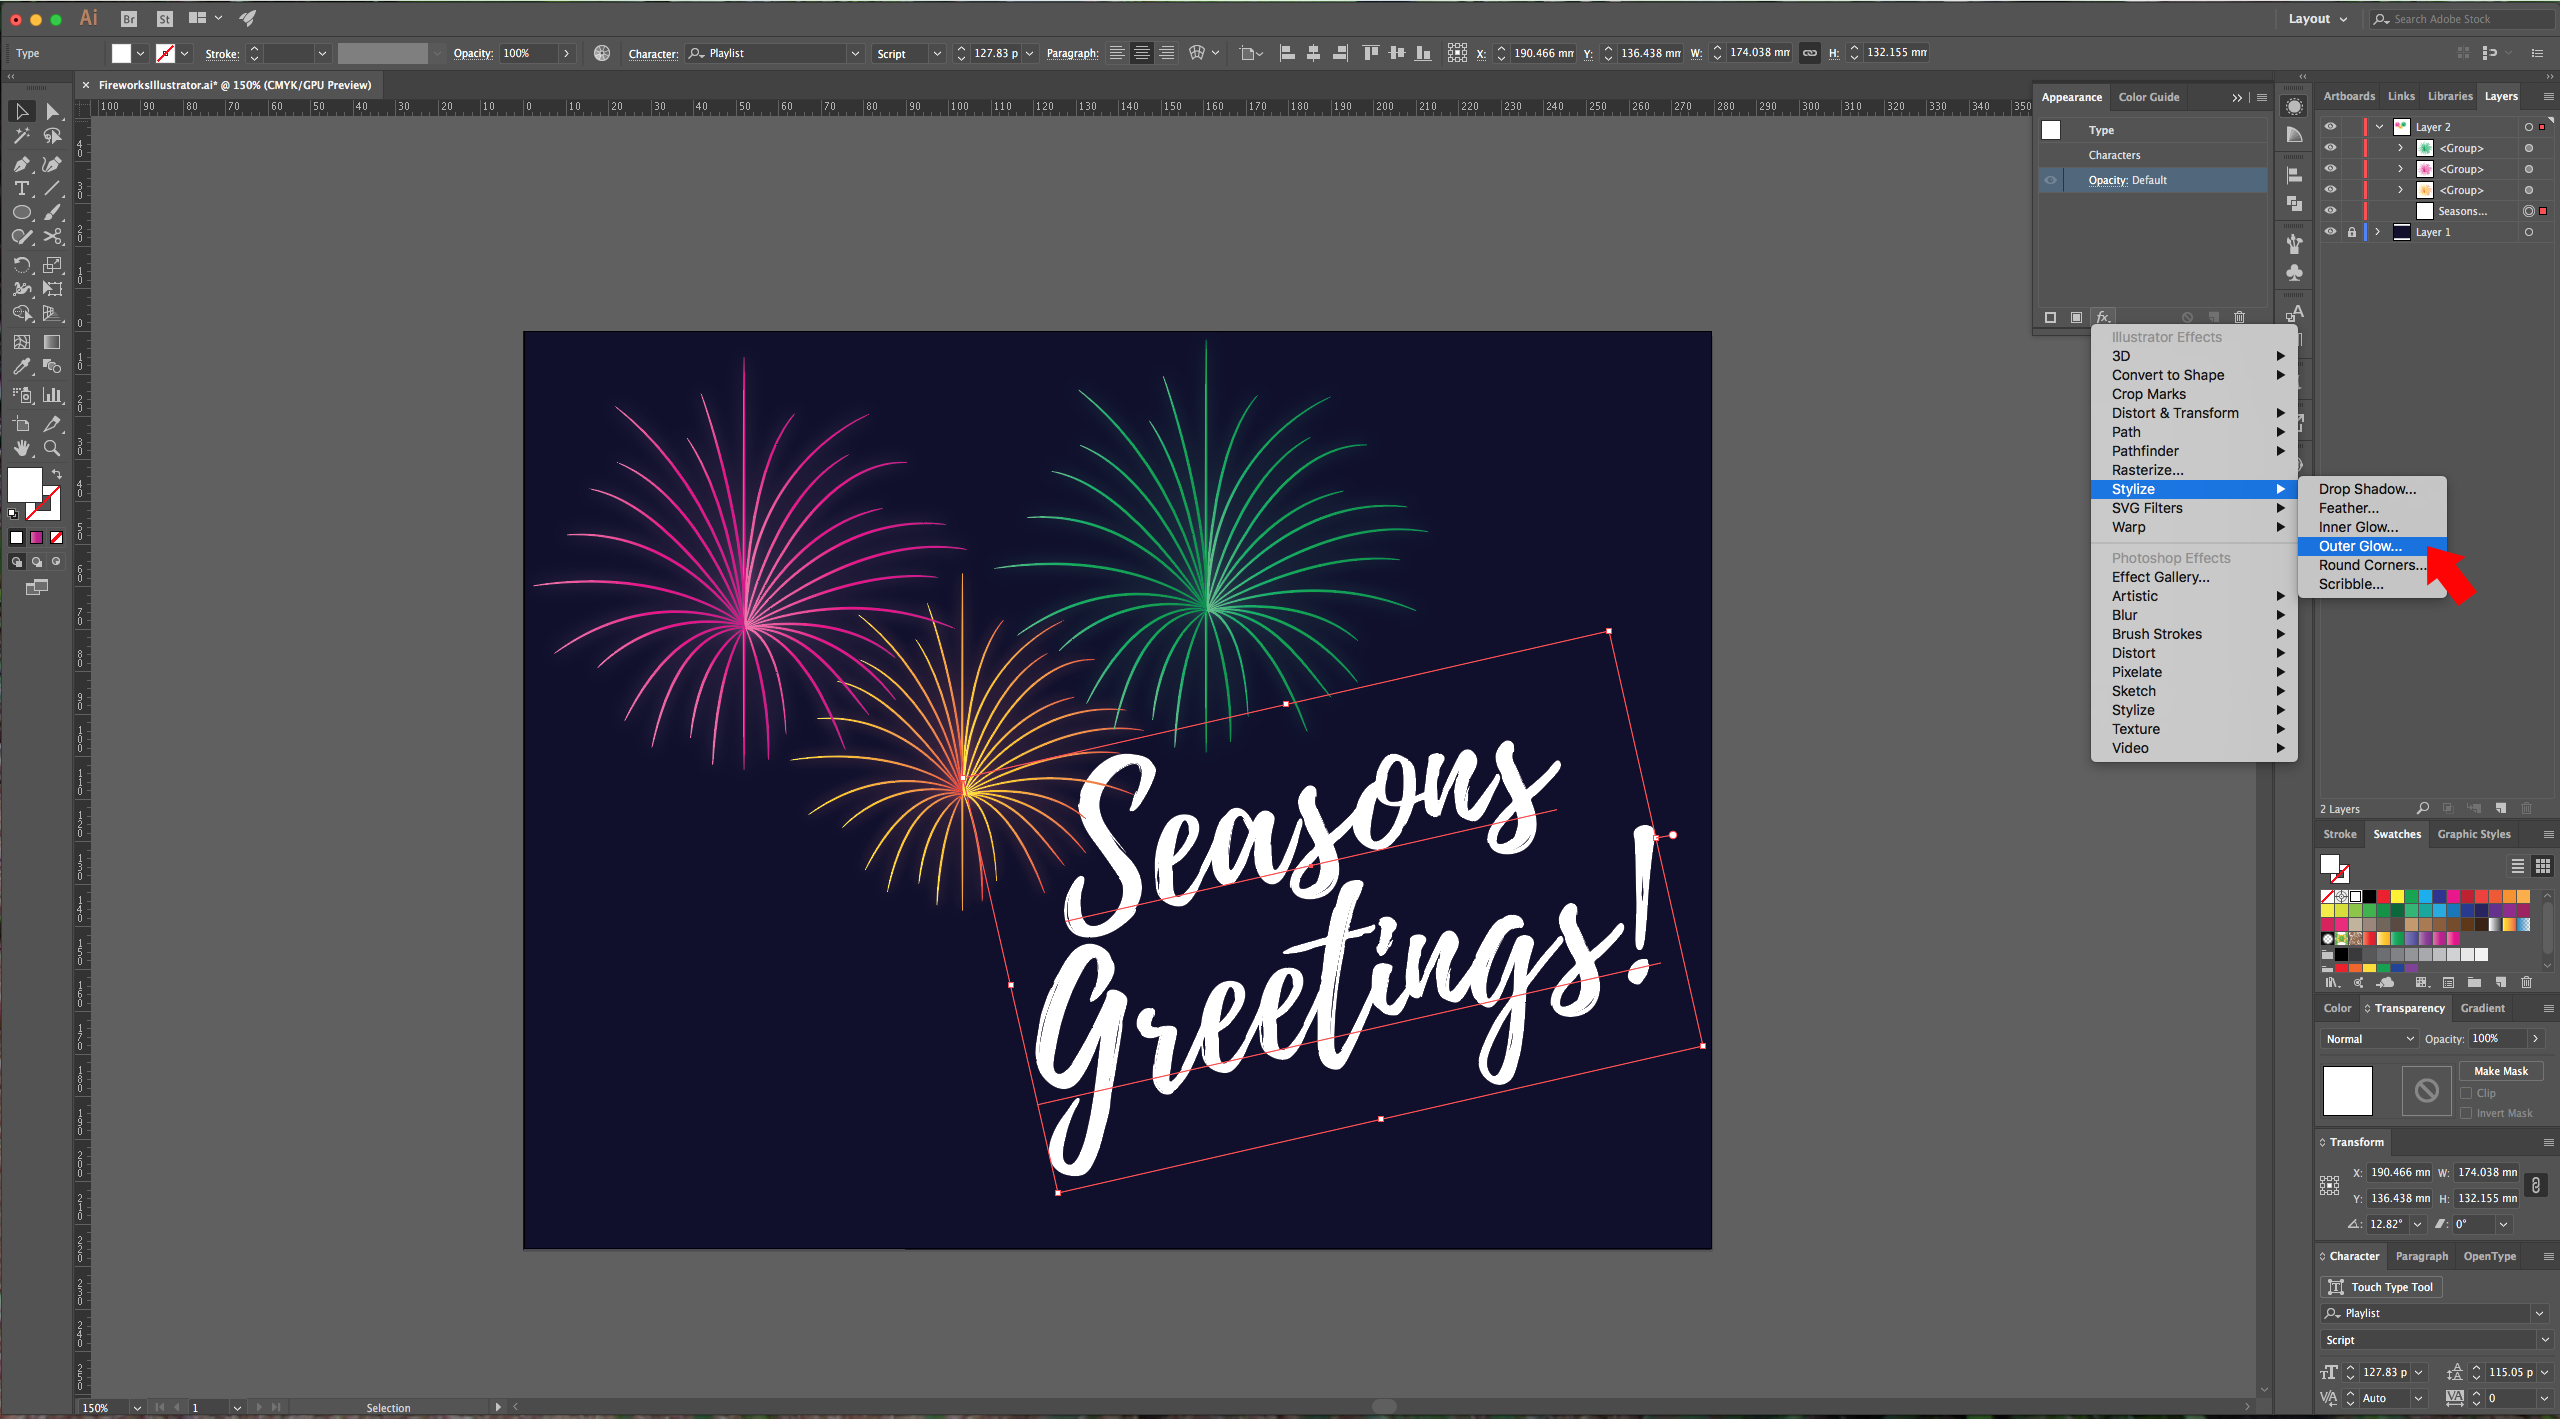
11 - Select the “Type Tool” (T), choose your font, size and “Fill” color and type some text.
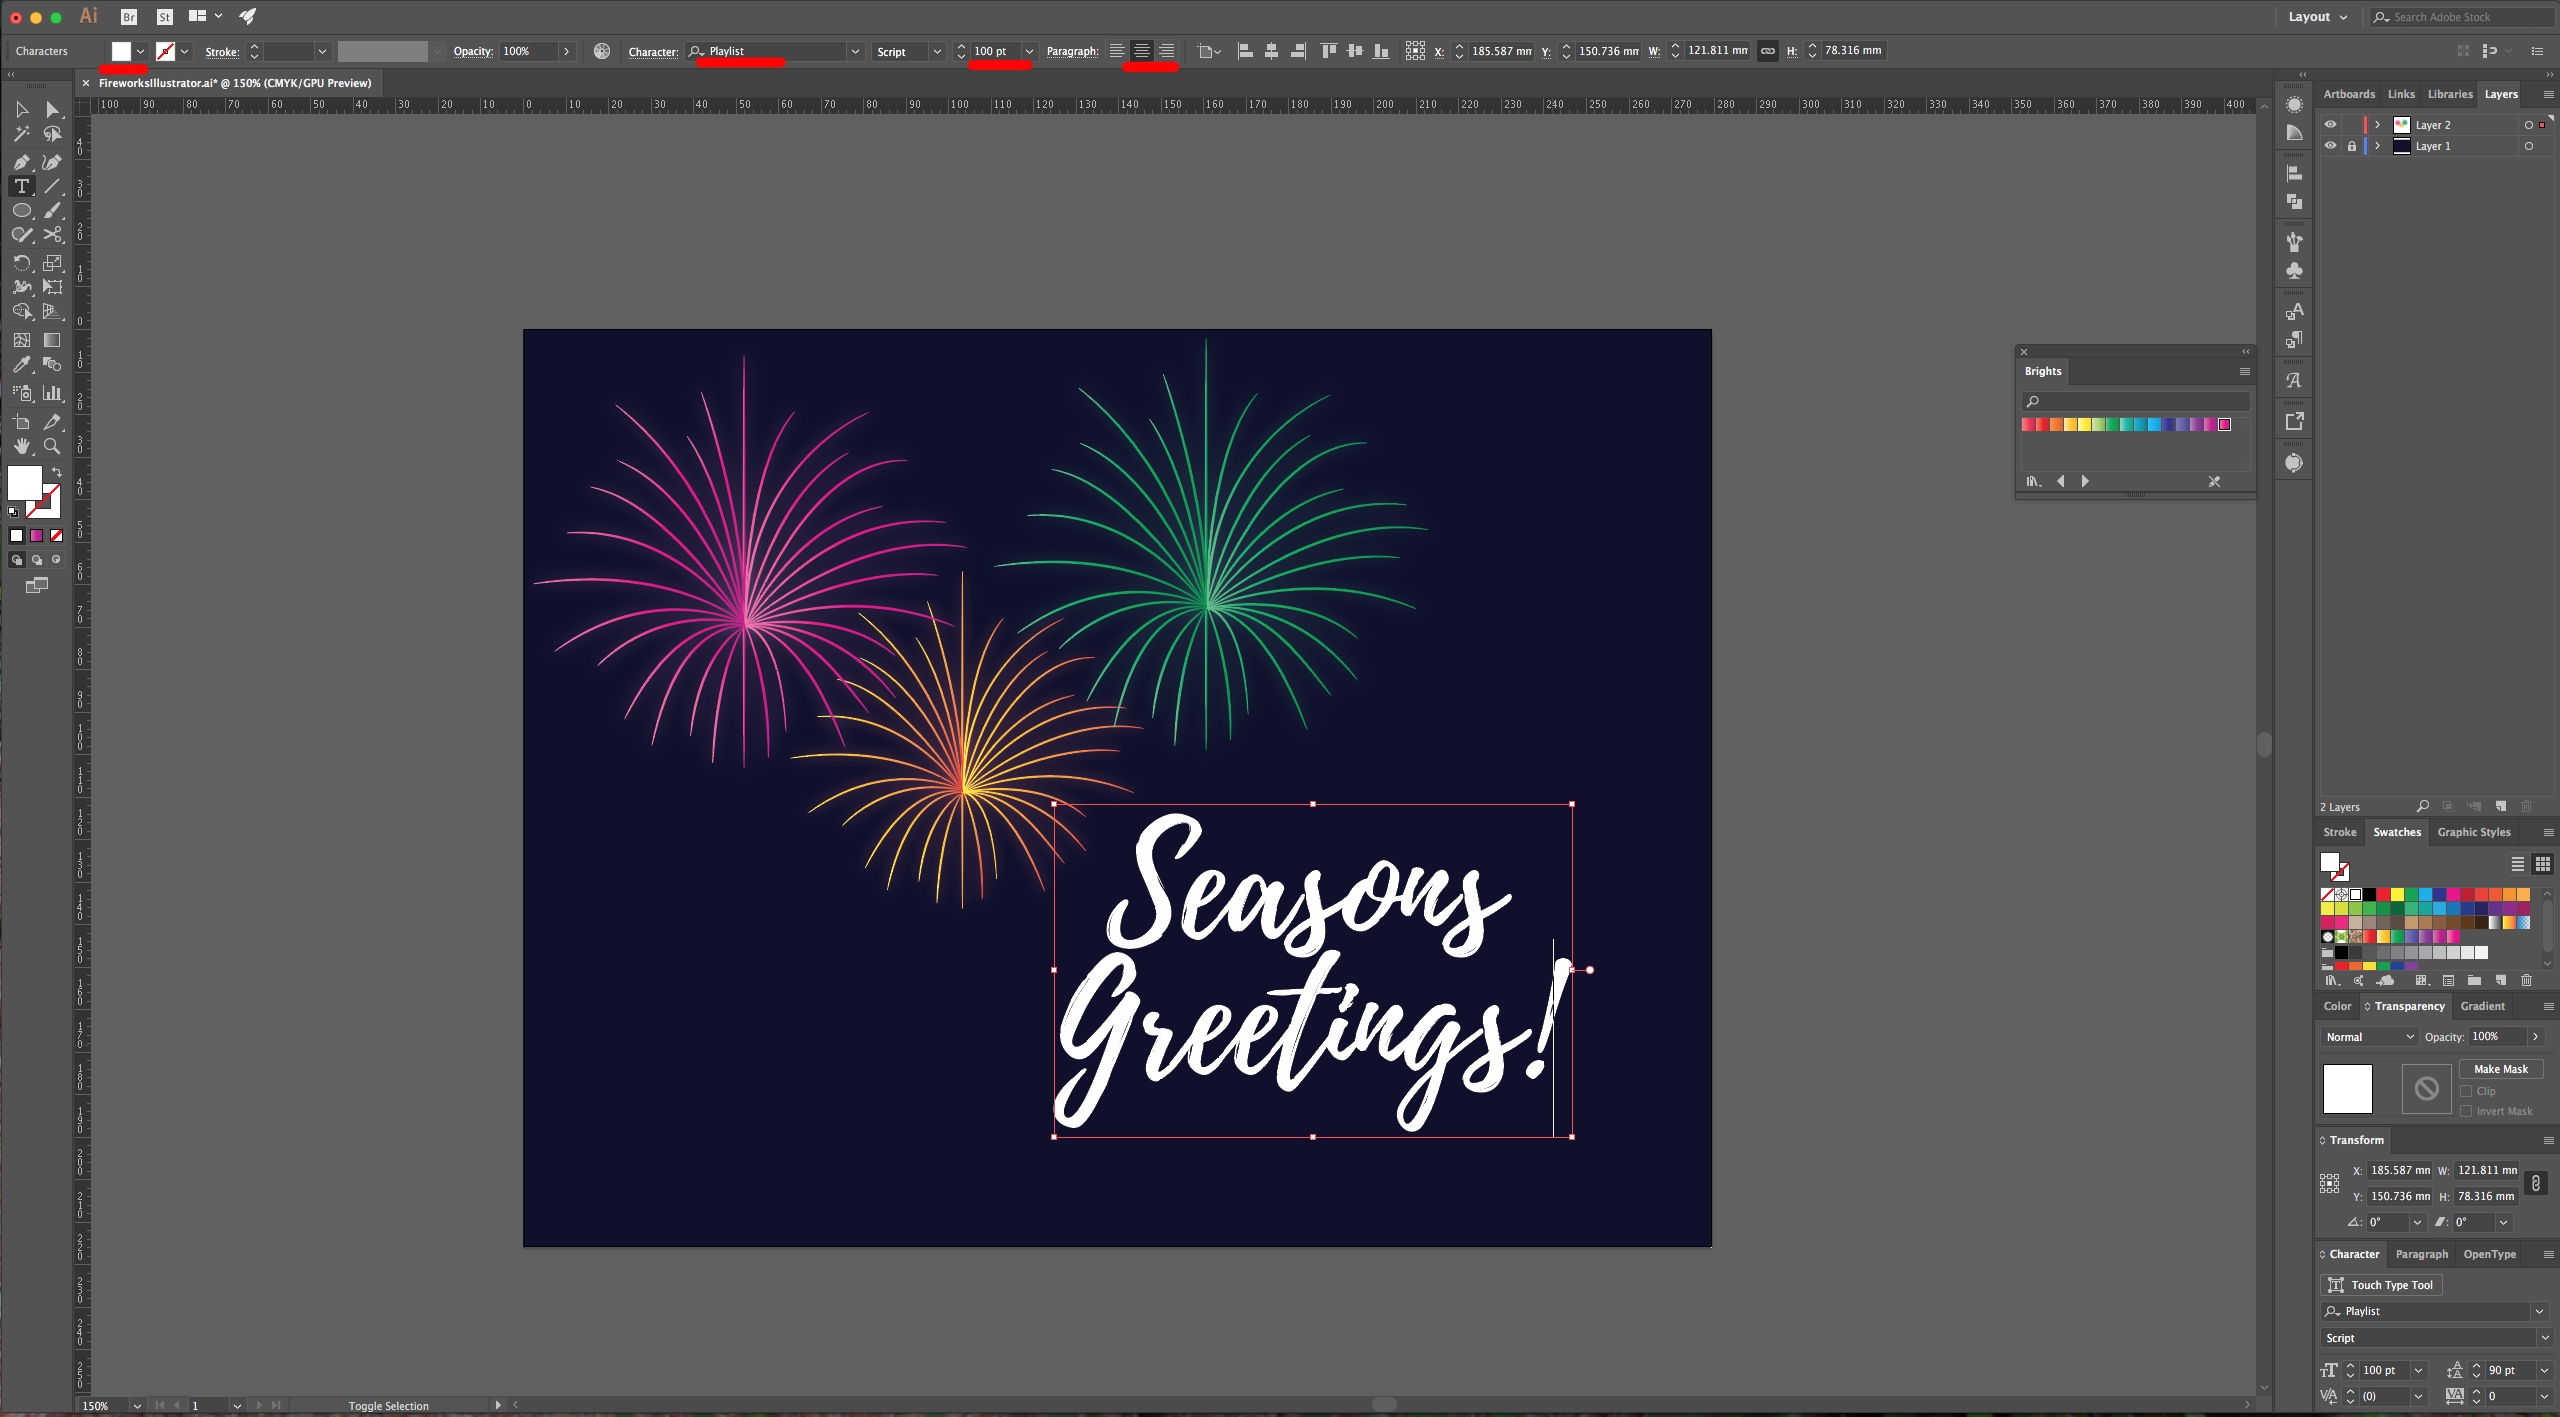
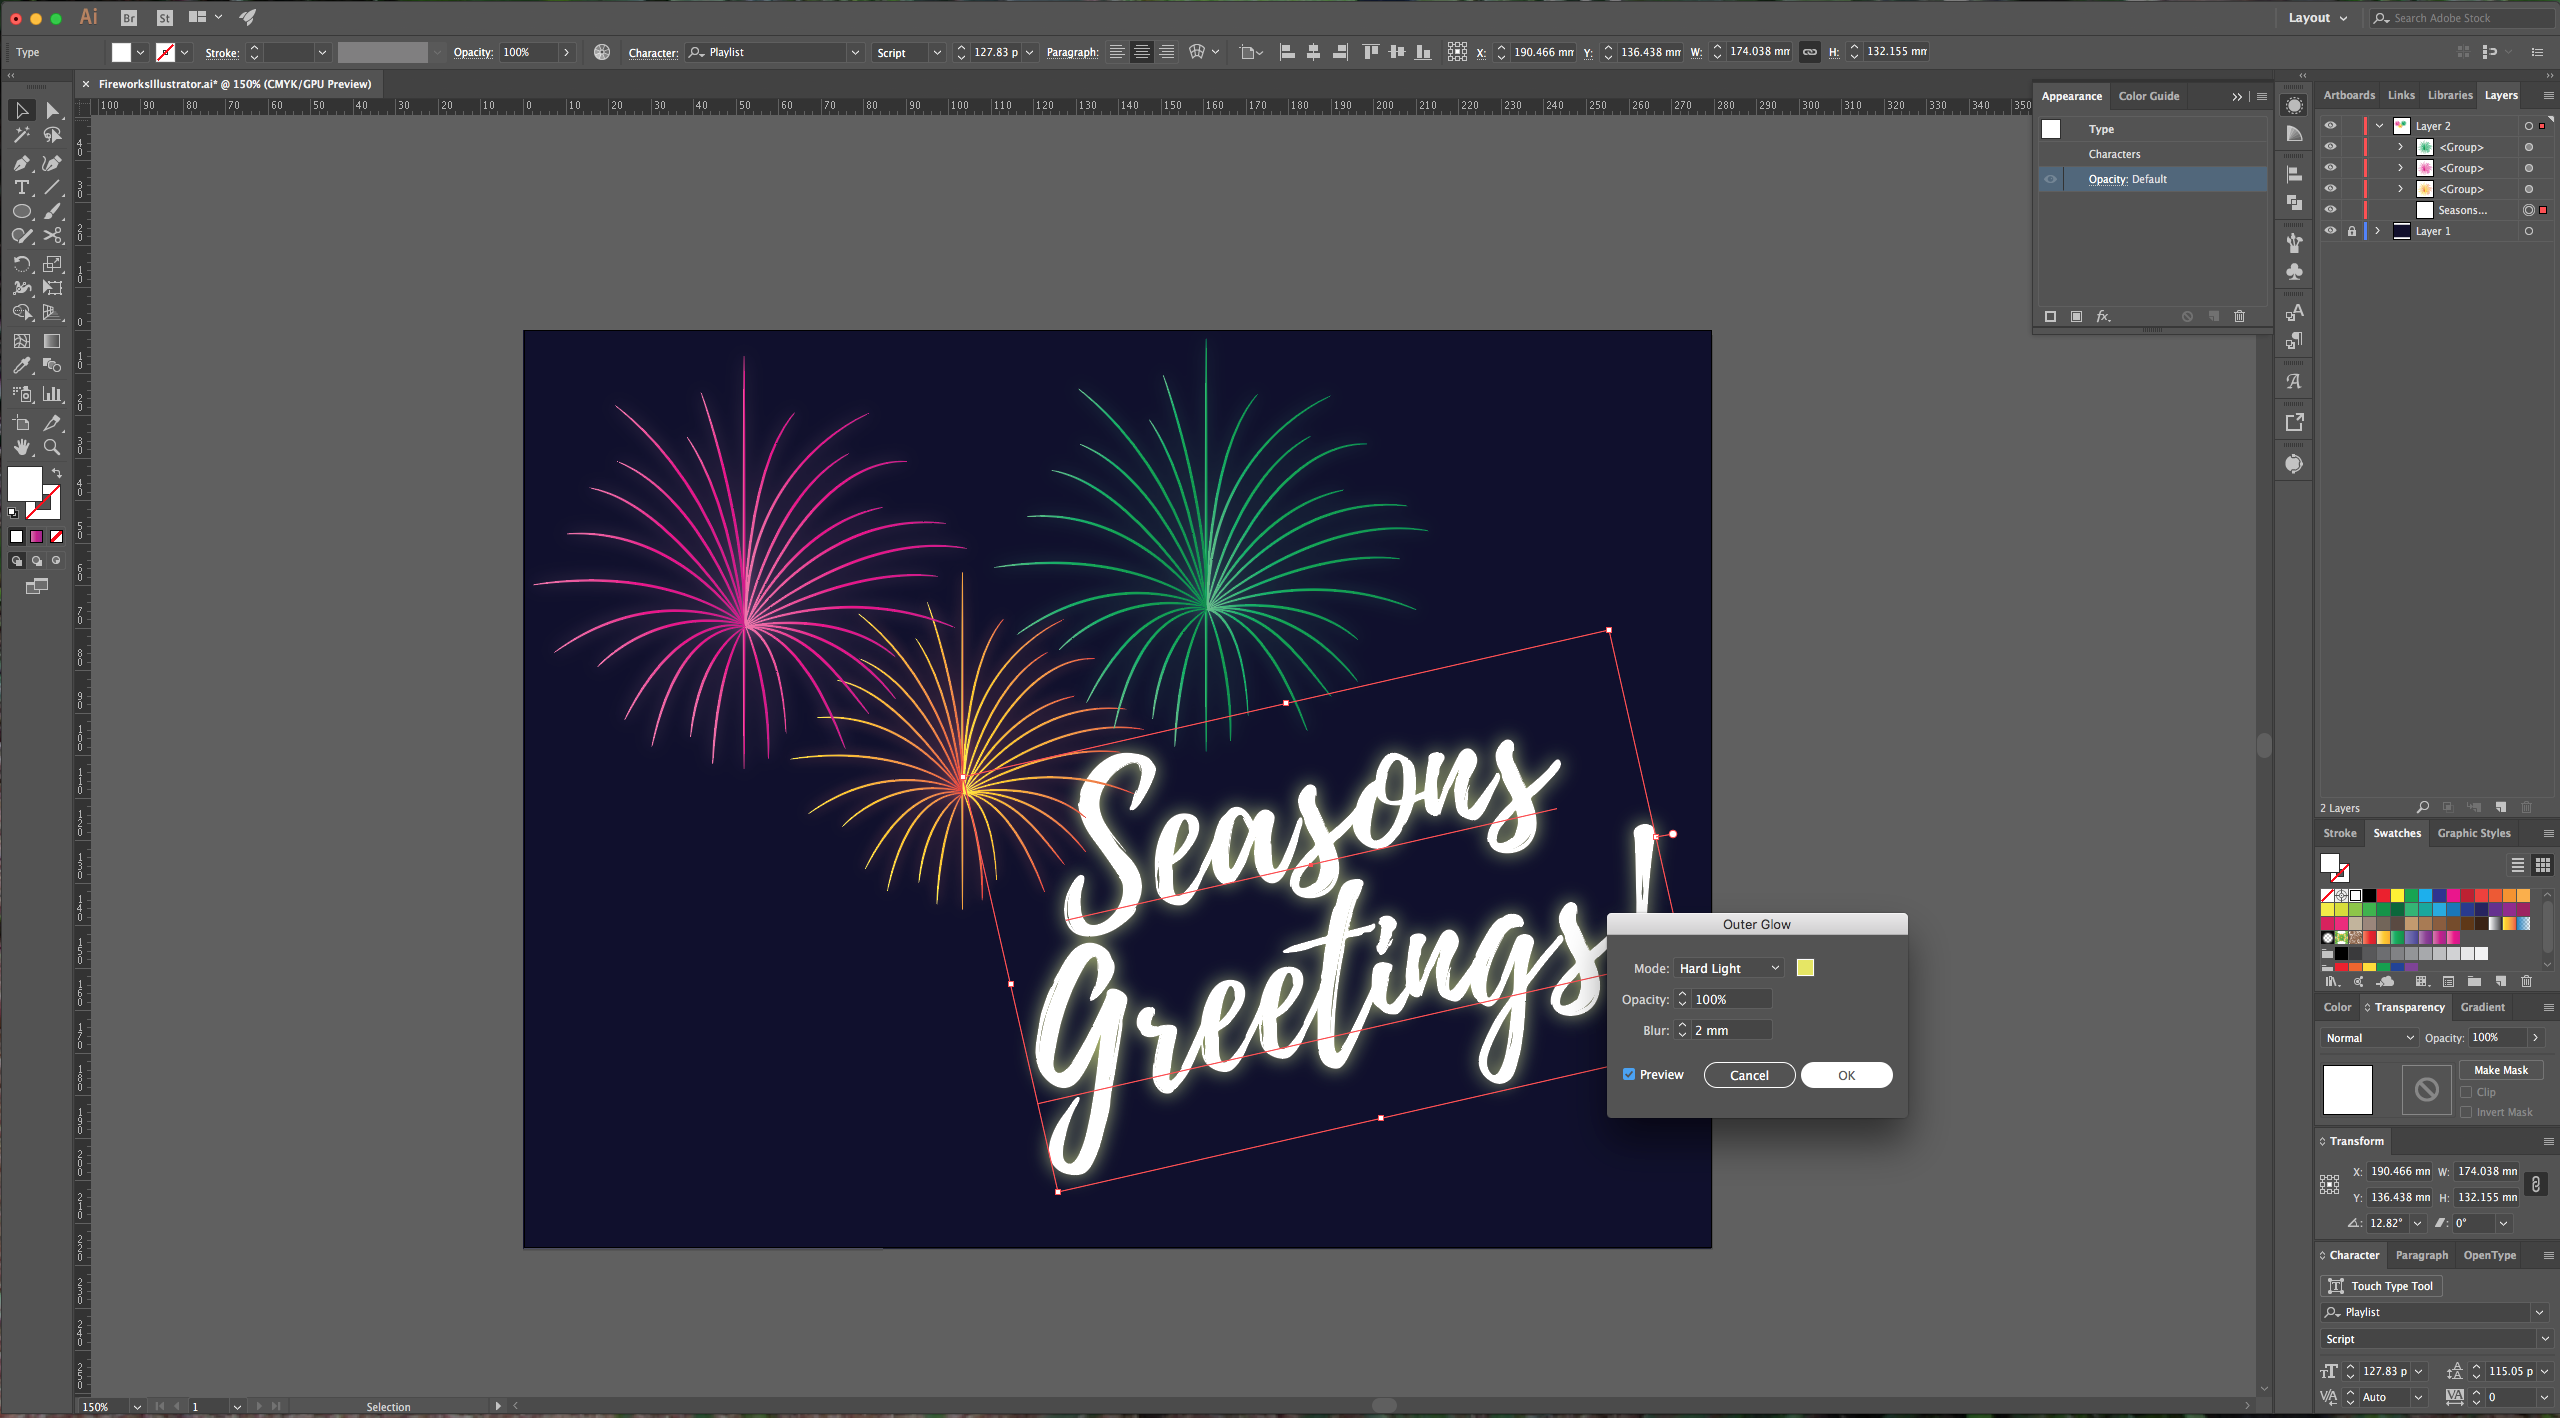
12 - Move the text layer under the fireworks and then rotate it and scale it to your liking. You can add and “Outer Glow” effect to the text too. We used this settings (#EAF253):
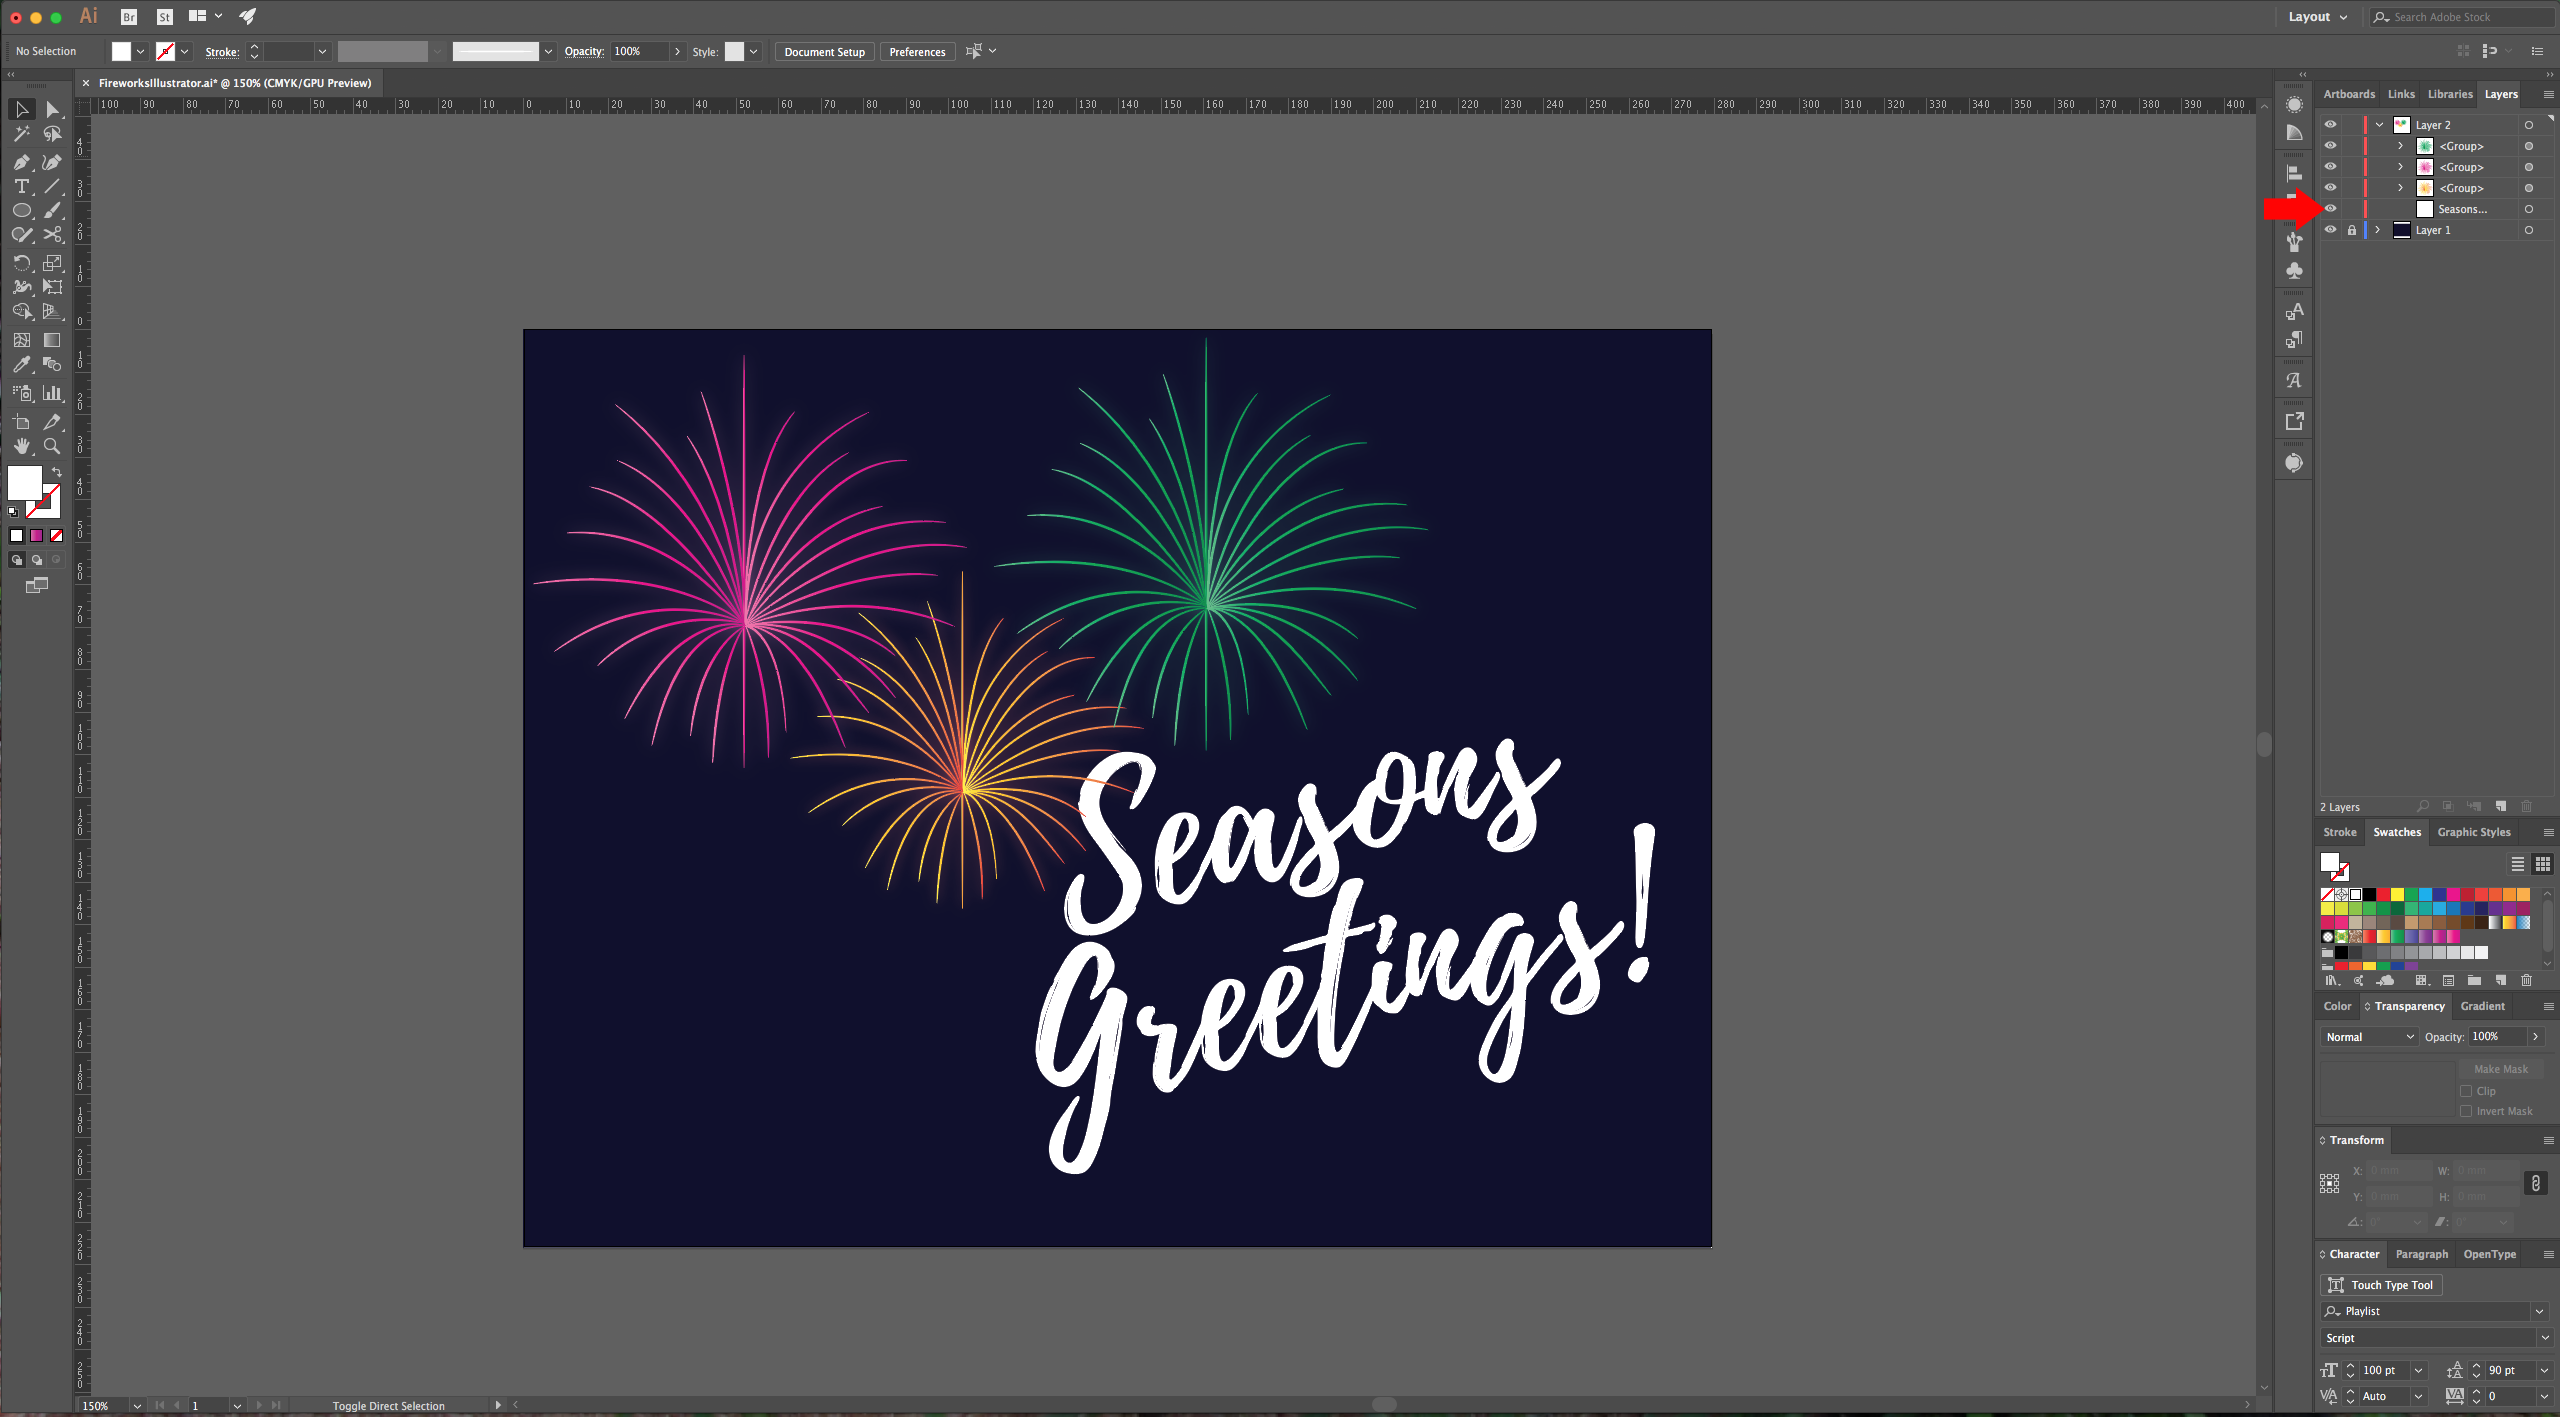
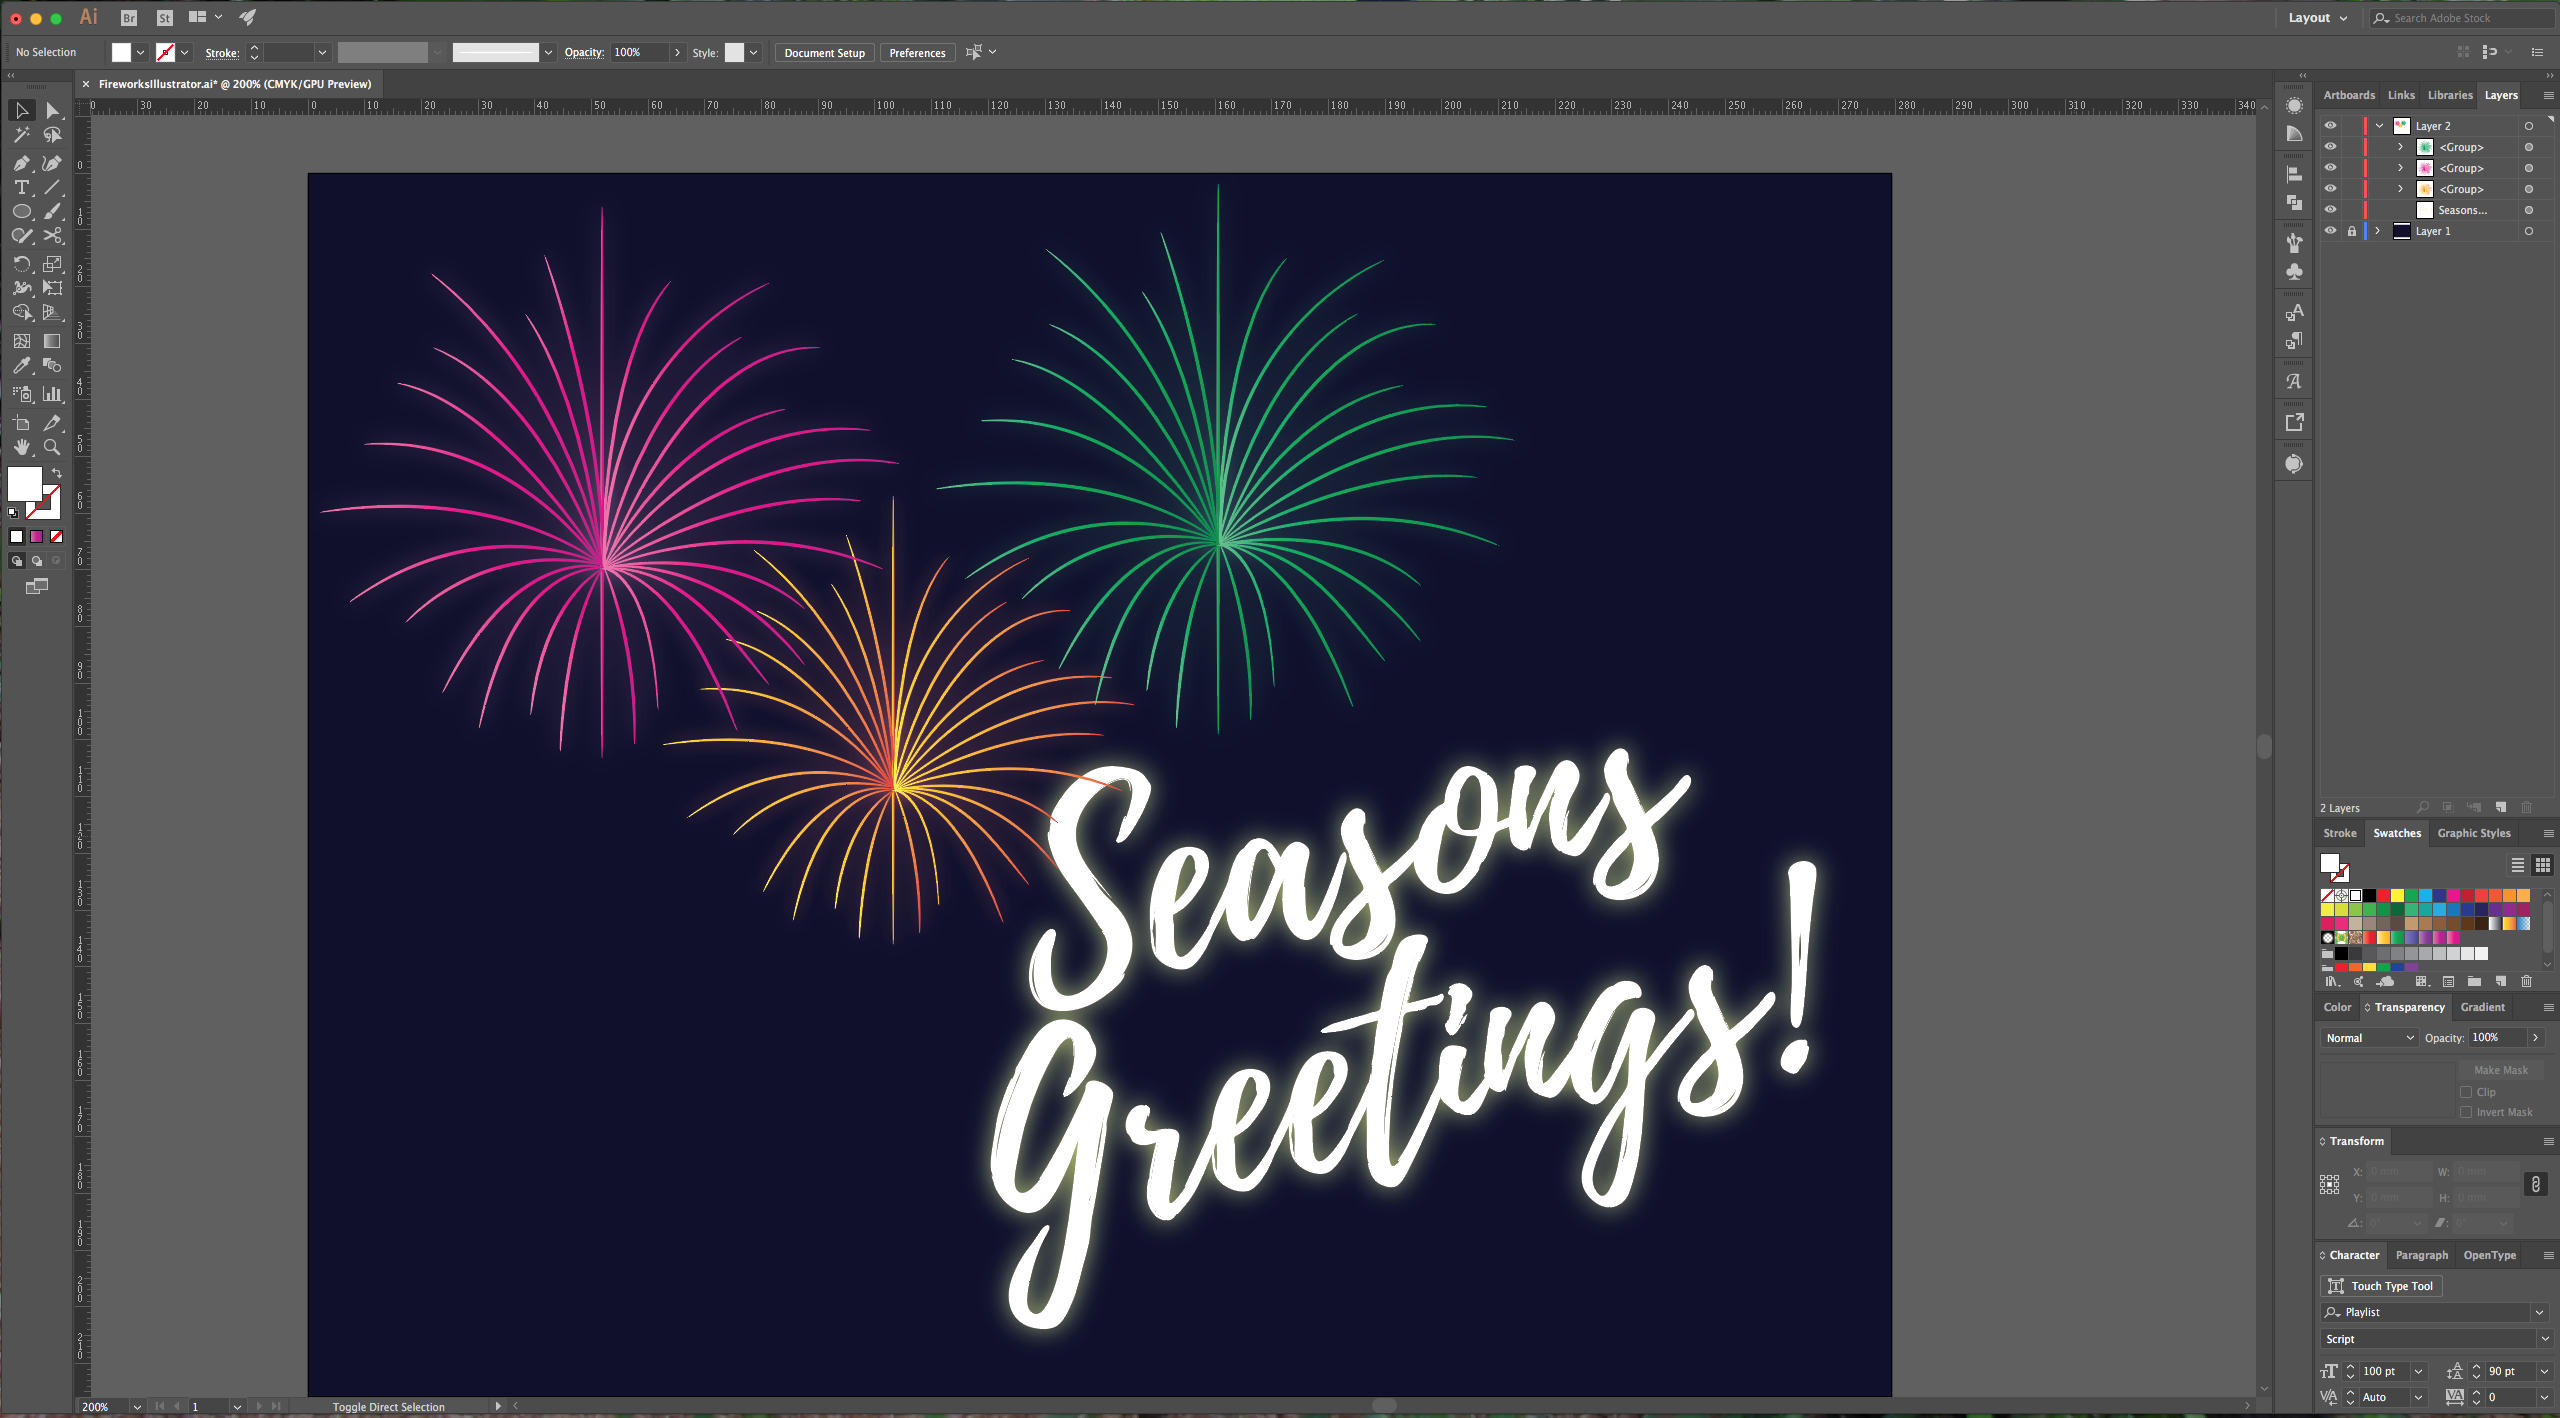
13 - Check your work.
1 - In Illustrator, create a New Document.
2 - Make sure that the “Rulers” are on (Command/Control + R). Drag a “Guide” from your top ruler to the center of the document, then, drag another one from the left to form an intersection.
3 - Select the “Rectangle Tool” (M) and draw a rectangle that covers your whole page. Fill it with a dark blue color (we used #020130) and “Lock” the layer by turning on the little lock icon to the left of your layer in the “Layers Panel”.
4 - Create a “New Layer” by clicking on the button at the bottom of the “Layers Panel. Select your “Pen Tool” (P) and draw the “Fireworks” (use a 1 point brush, and white as “Stroke” color). Make sure to draw each line as an individual path (hit “Enter” to stop creating more points). To curve your “Path”, drag your cursor. The final shape should look like a flower of sorts.
5 - Choose the “Ellipse Tool” (L) and draw a very thin oval (about 3 mm high). Open the “Brushes Palette” and click the “New Brush” icon, then select the “New Art Brush” option.
6 - Select your paths and go to Object > Flatten > Transparency. Use the “High Resolution” preset and click “OK”.
7 - Select your shape and in the “Appearance Panel”, double-click on your Group “Contents” and change the “Fill” to “Radial Gradient”. You can choose one of the “Default” ones, modify it or create your own.
8 - With your shape still selected click on the “Effects” button at the bottom of your “Appearance Panel” and choose Stylize > Outer Glow, apply the following values: (choose a color from your gradient (#EF490F).
9 - While holding the “Alt/Option” key drag your shape to create a duplicate. Change the gradient preset or colors. Remember to go back to the “Appearance Panel” and double-click on the “Outer Glow” effect to change the color to one more similar to your gradient.
10 - Hide your guides (Command/Control + ;) and arrange your fireworks to your liking. You can resize and/or rotate the using the “Selection Tool”.
11 - Select the “Type Tool” (T), choose your font, size and “Fill” color and type some text.
12 - Move the text layer under the fireworks and then rotate it and scale it to your liking. You can add and “Outer Glow” effect to the text too. We used this settings (#EAF253):
13 - Check your work.
by @lornacane


