Impossible Letters in Illustrator
For this tutorial, we will use the Free Font “Zeichen Sans” by habibotang96.
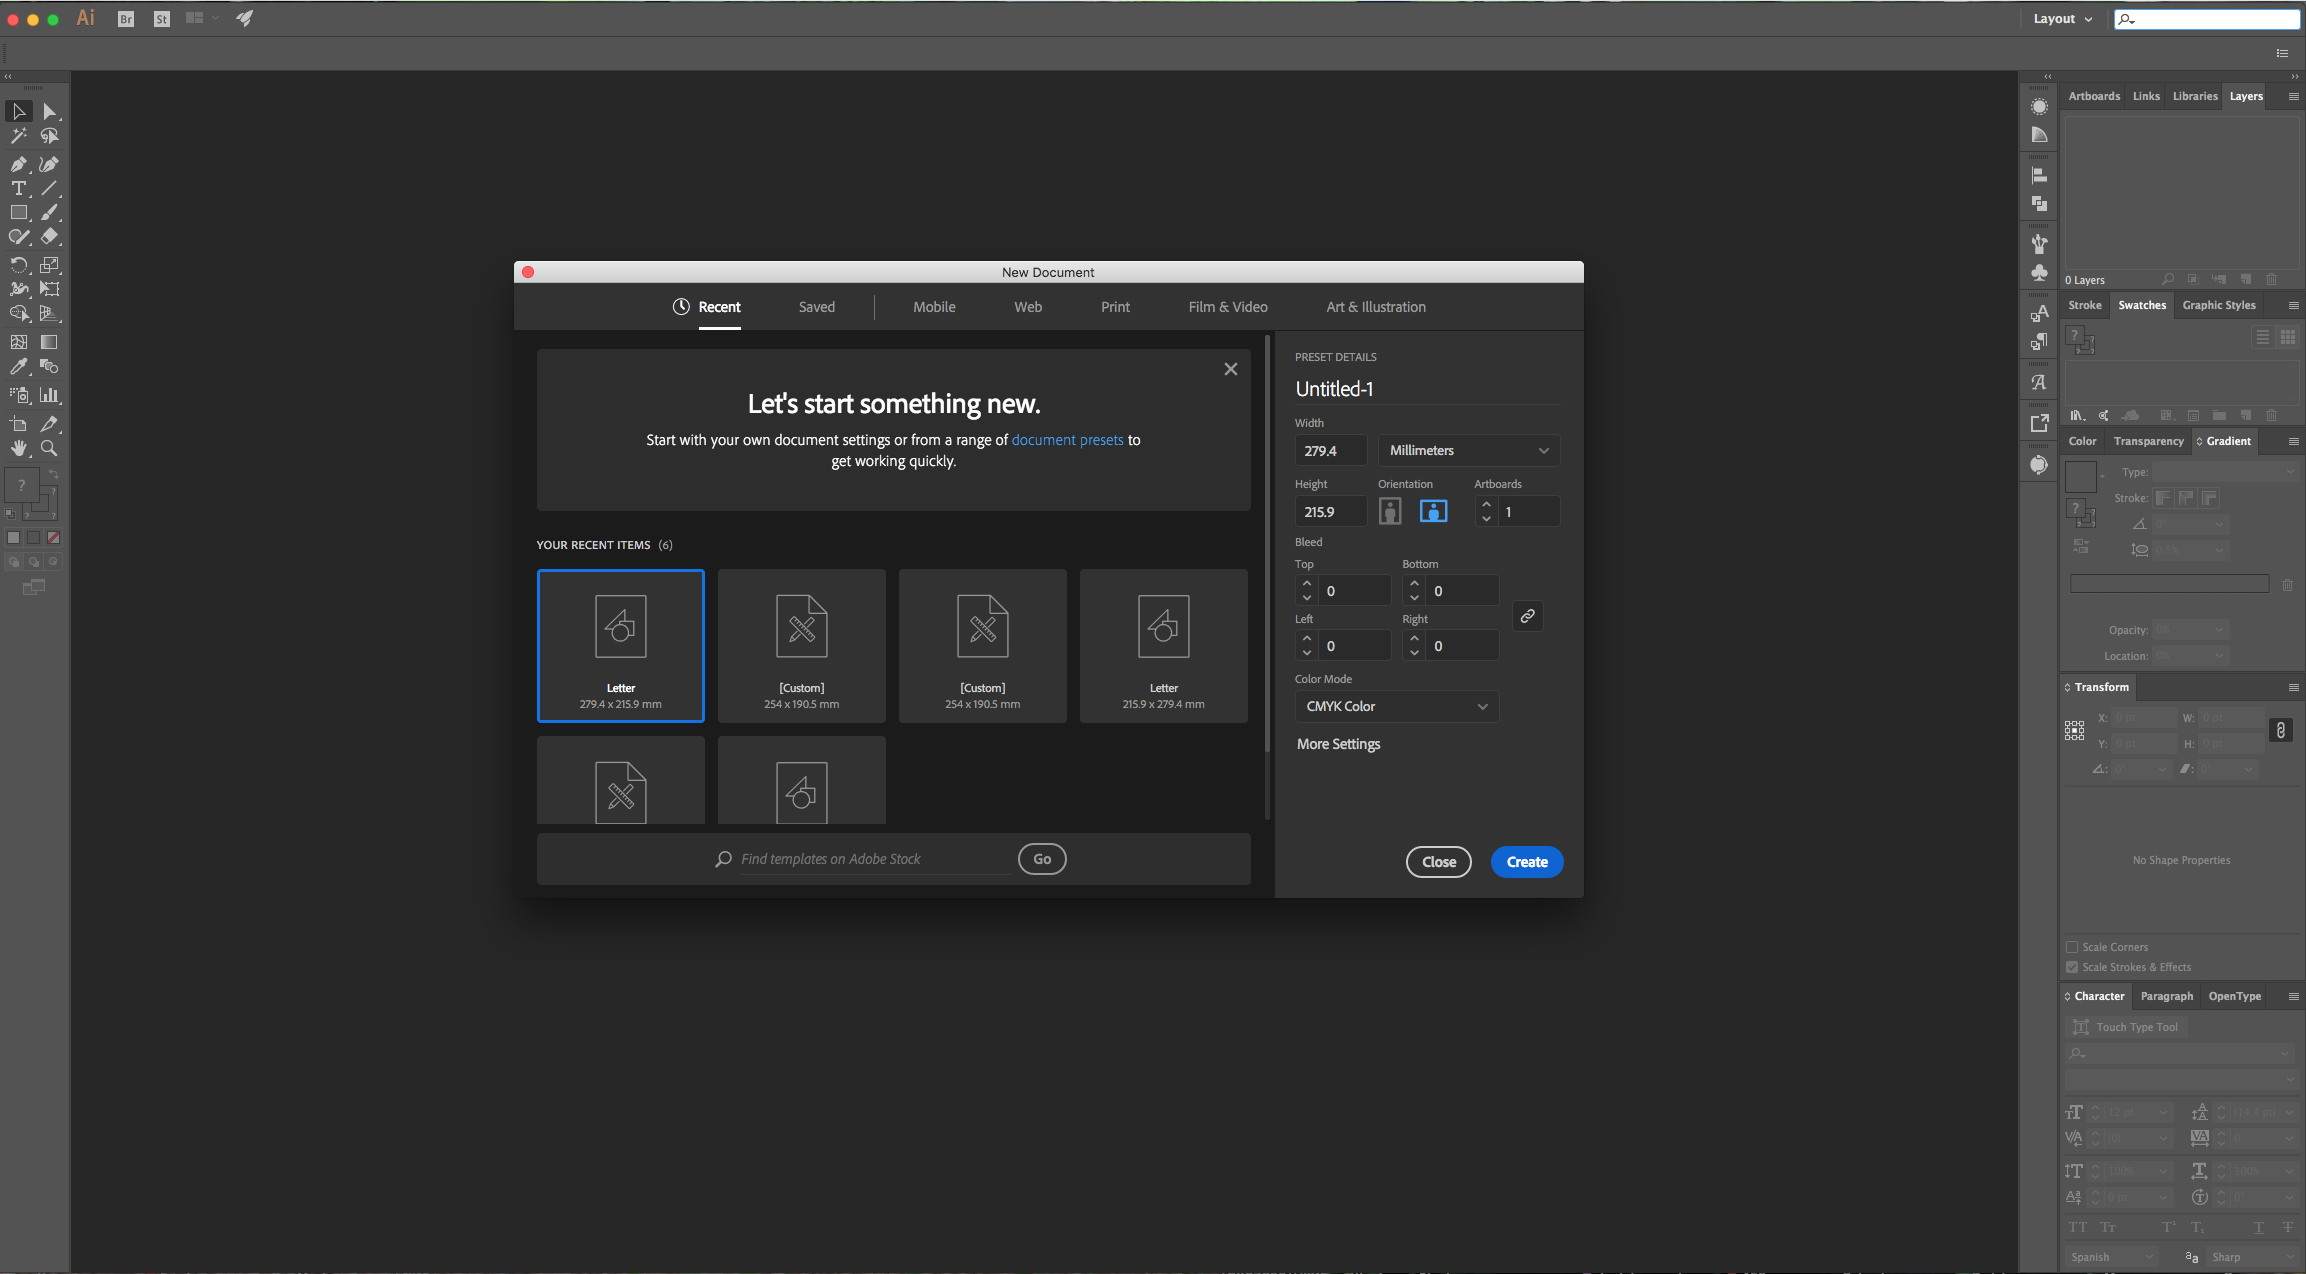
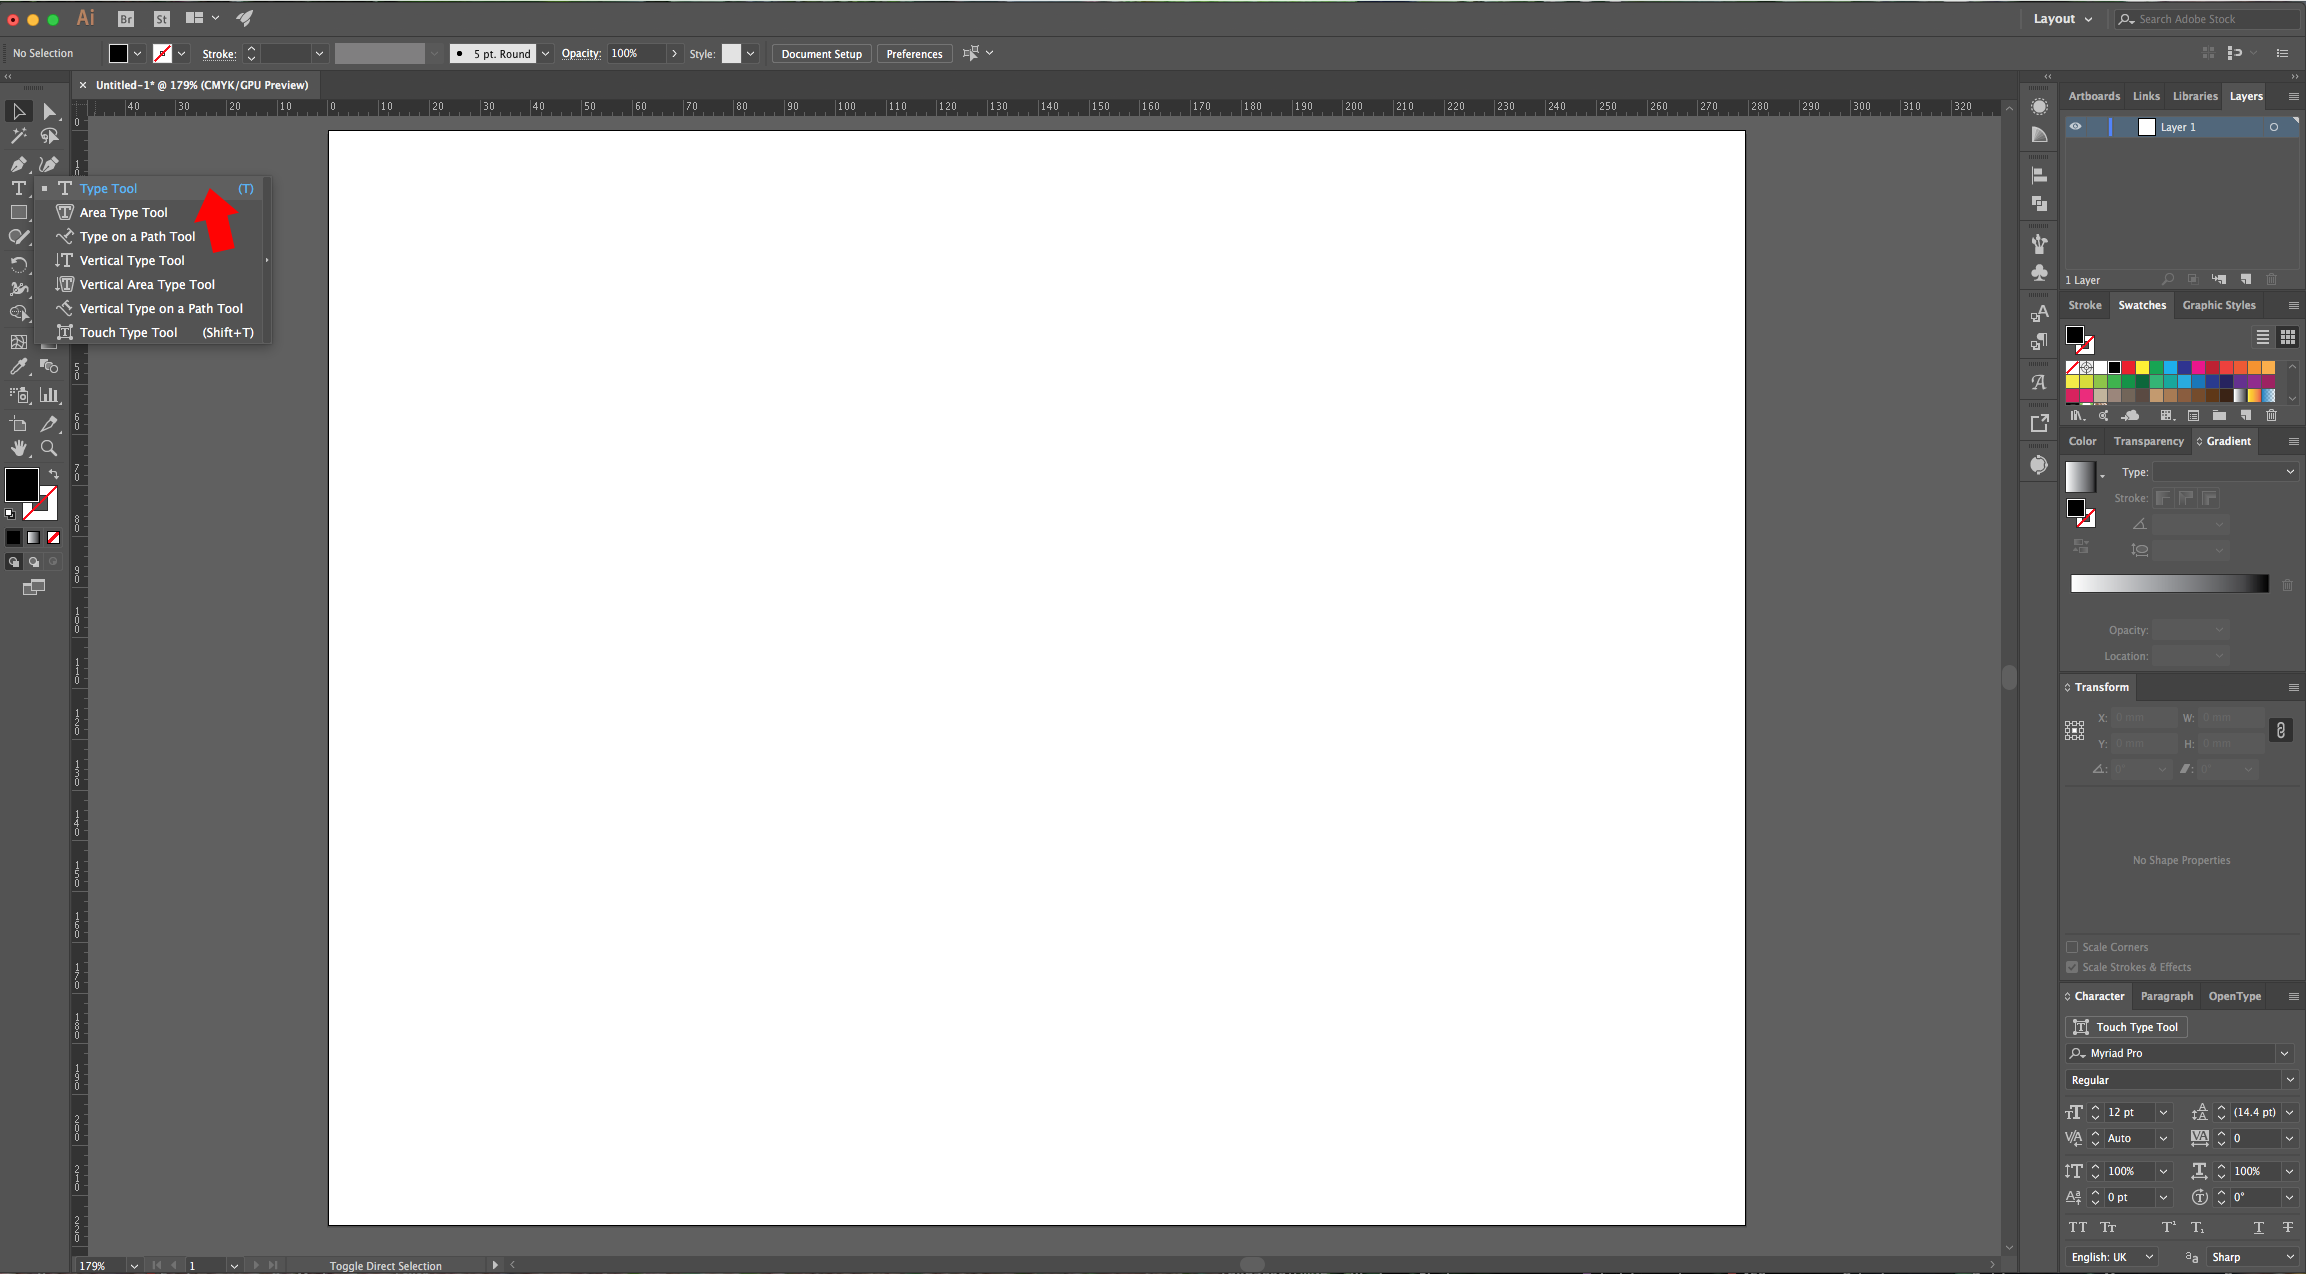
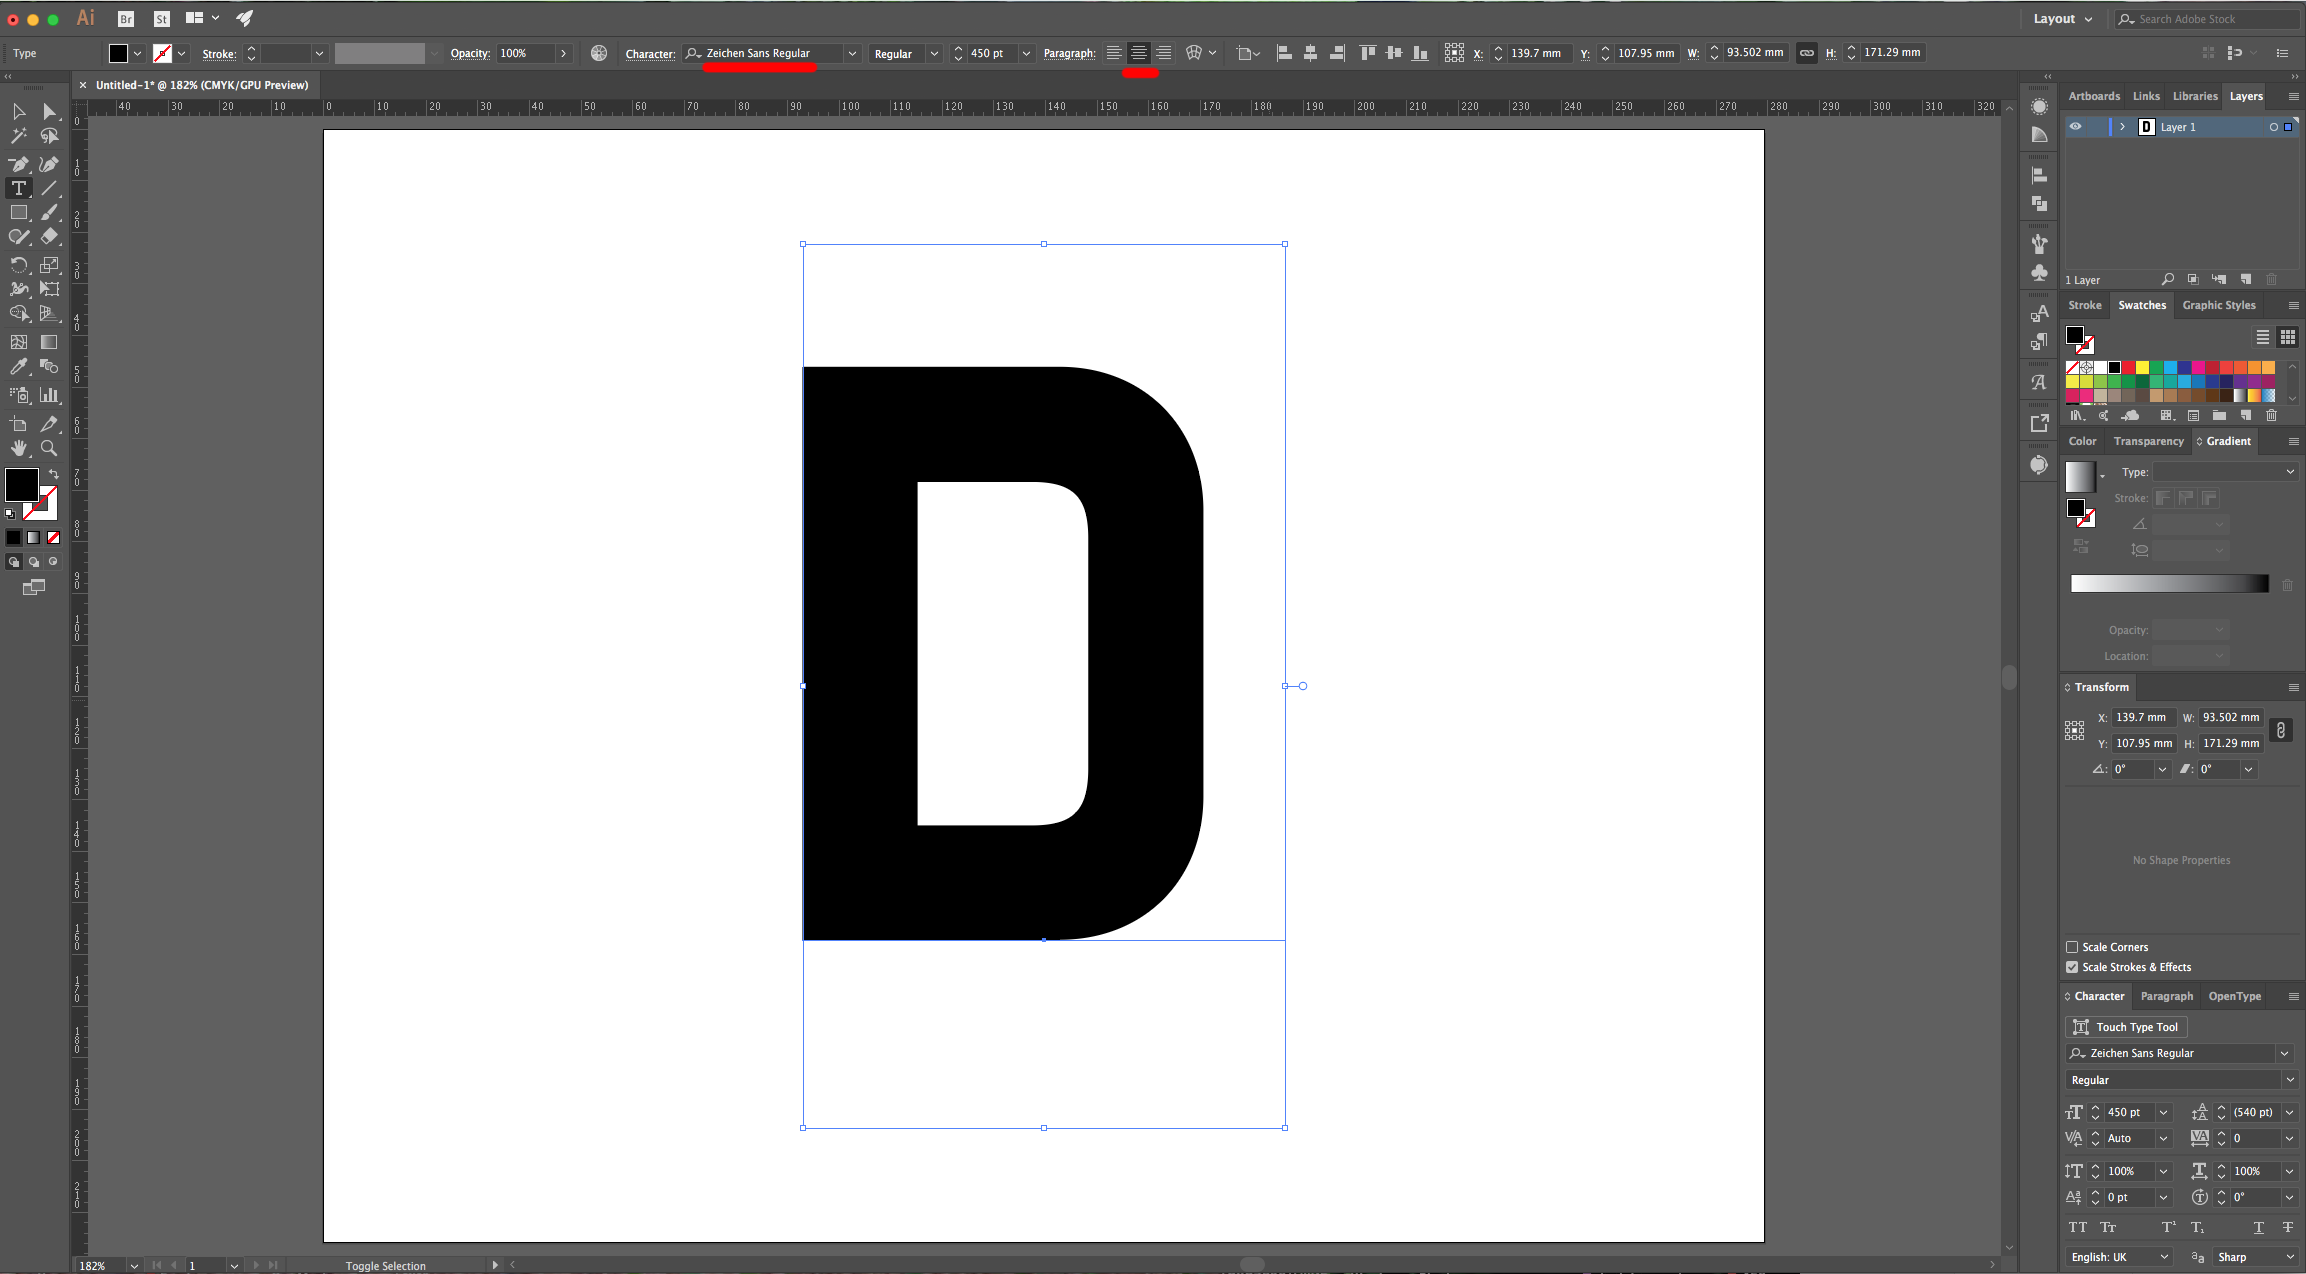
1 - In Illustrator, create a “New Document”. Select the “Type Tool” (T), choose your font and type your text (we used “Zeichen Sans”).
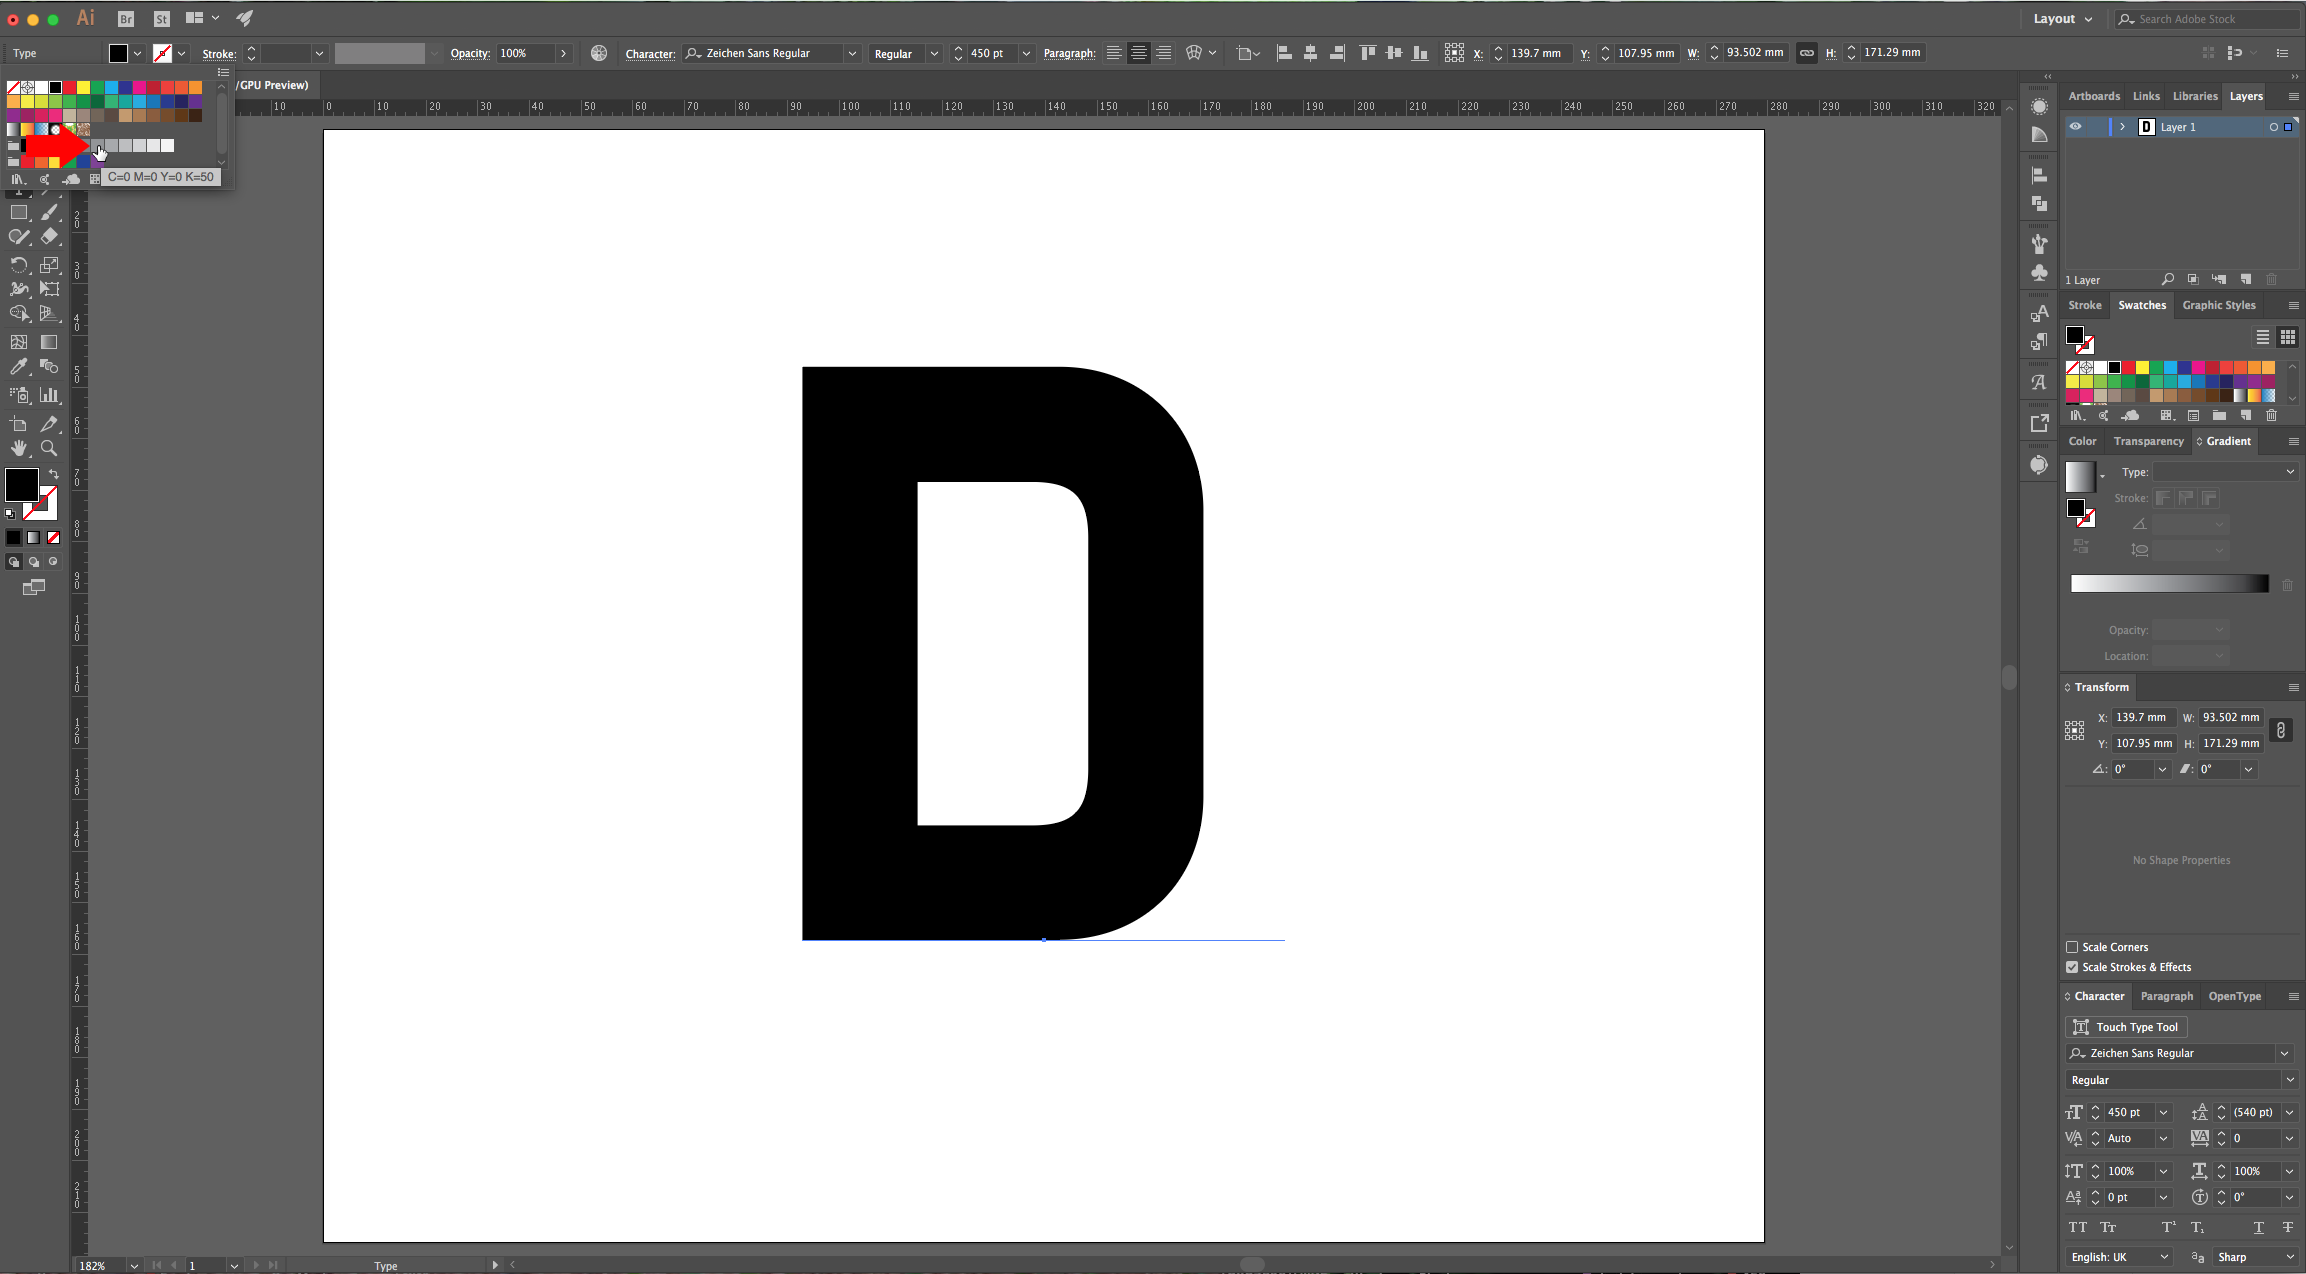
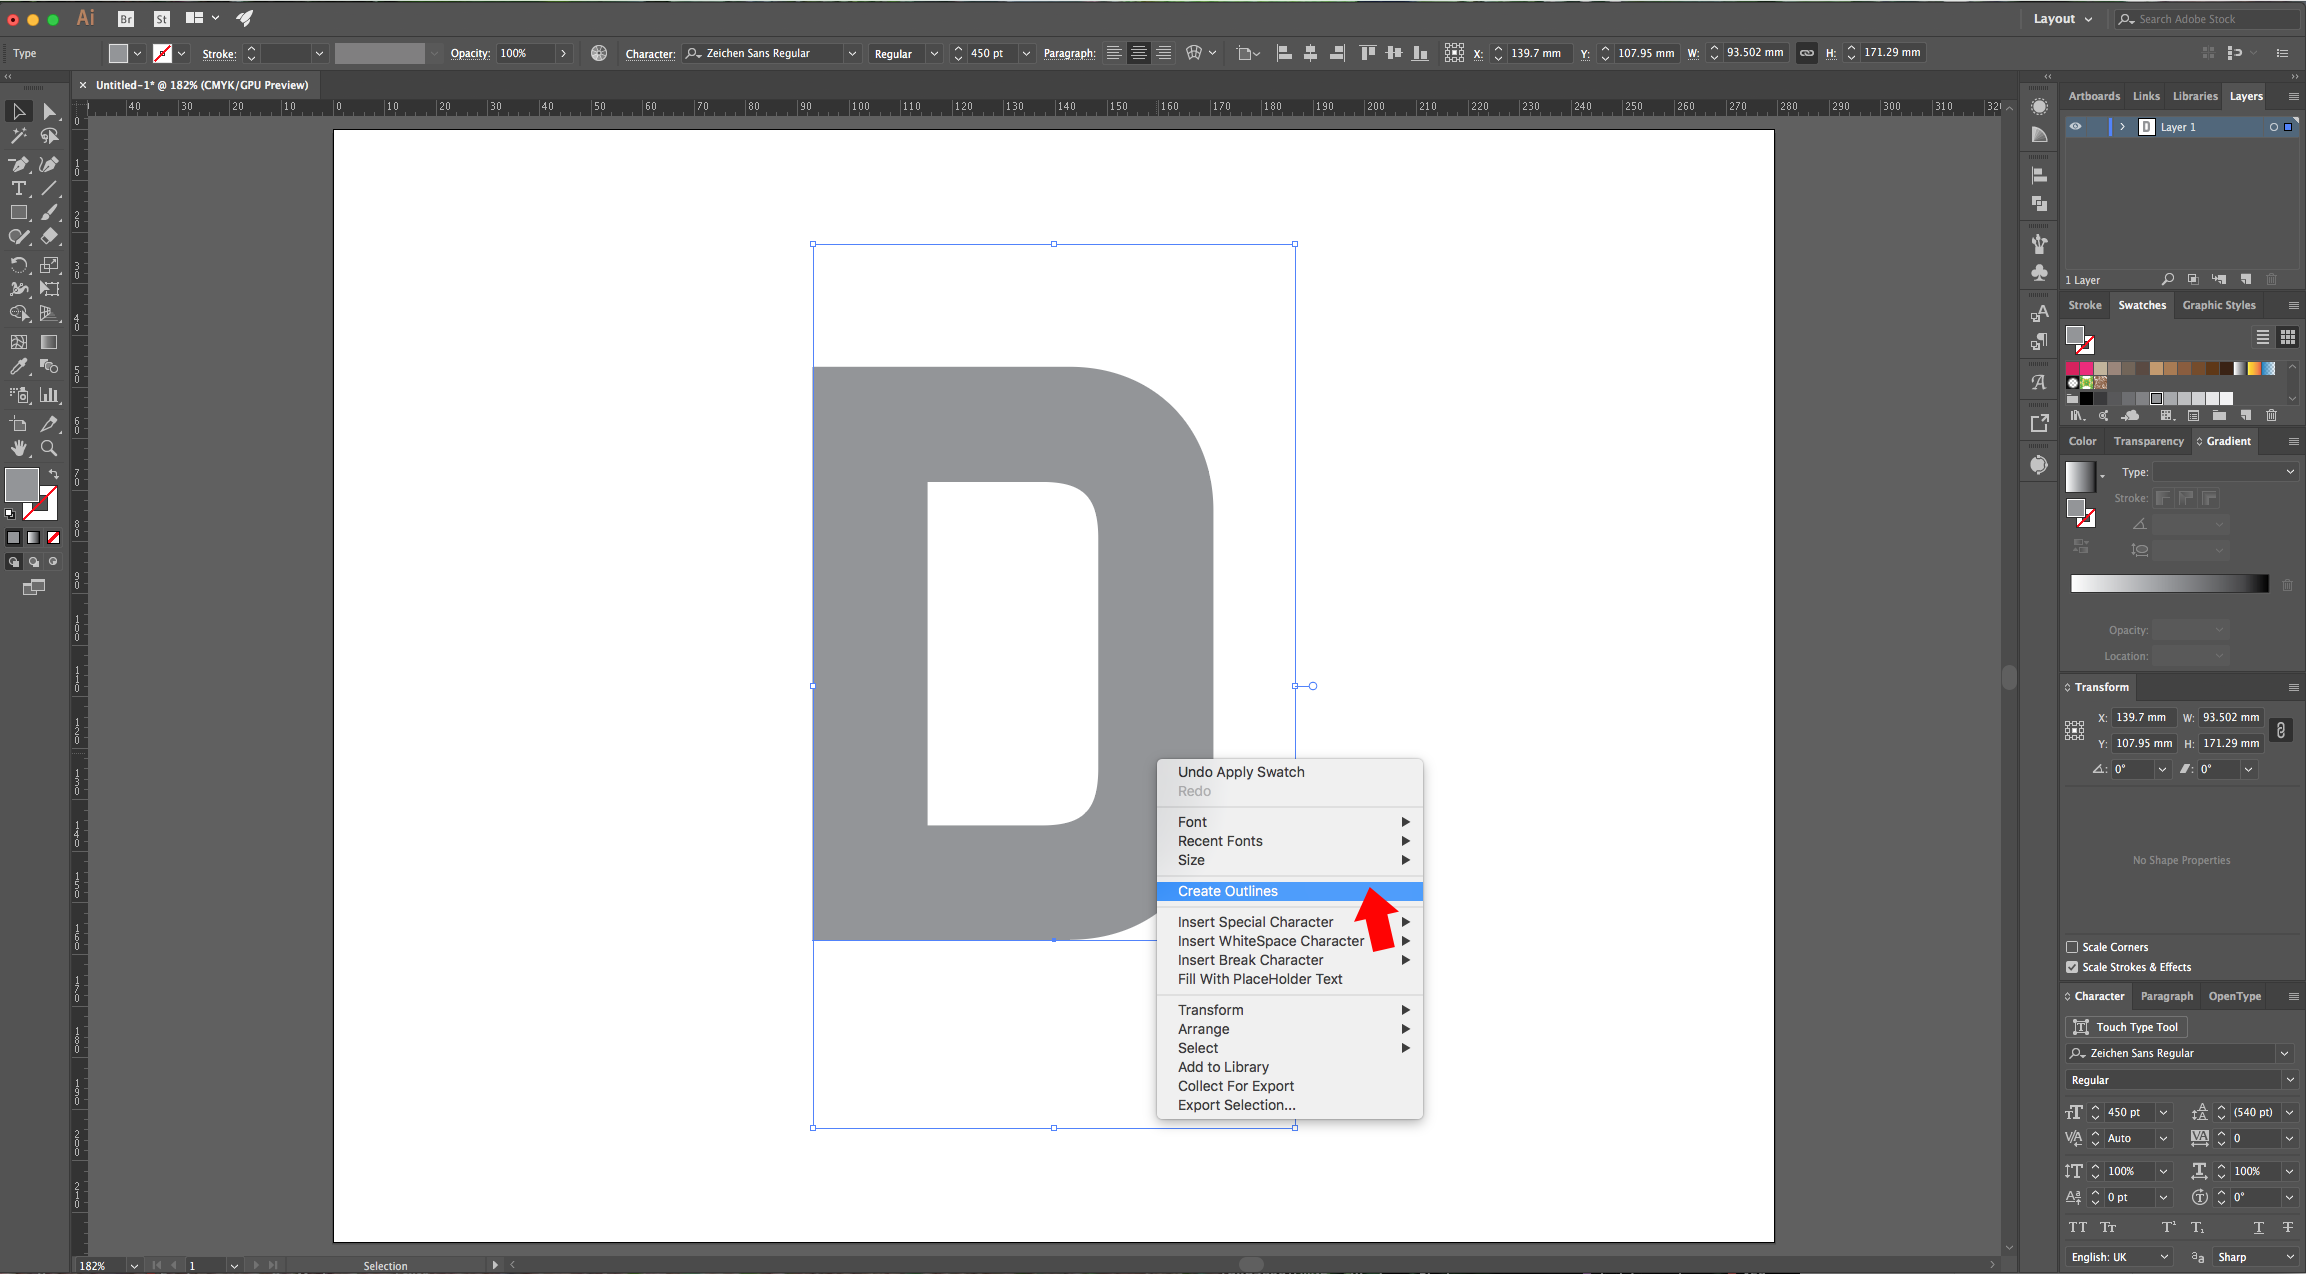
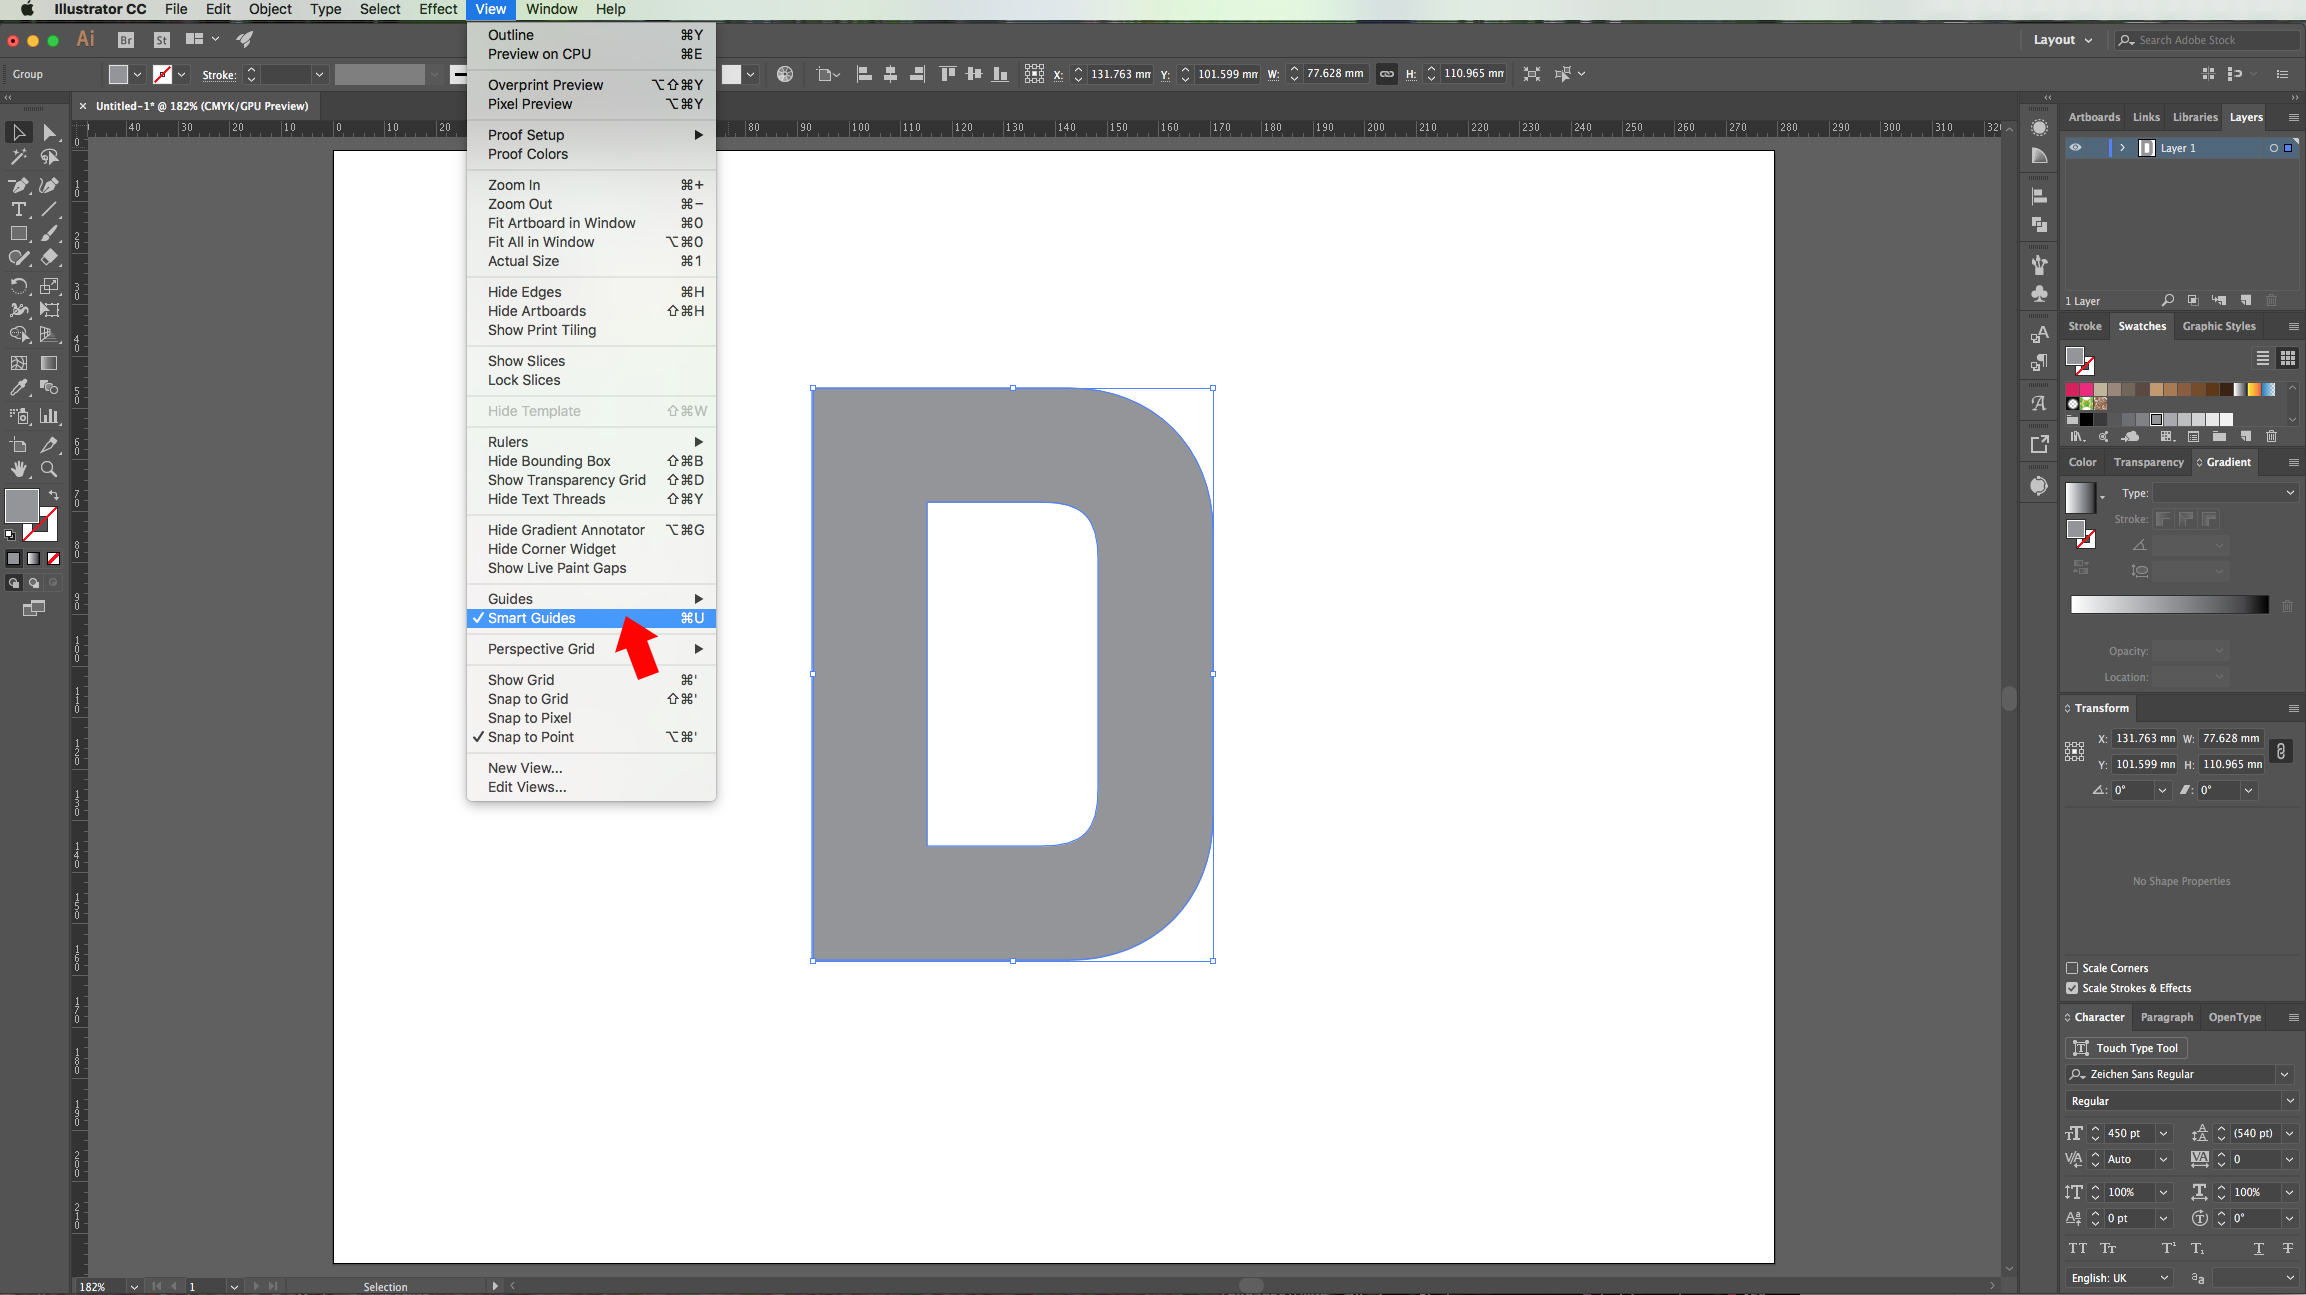
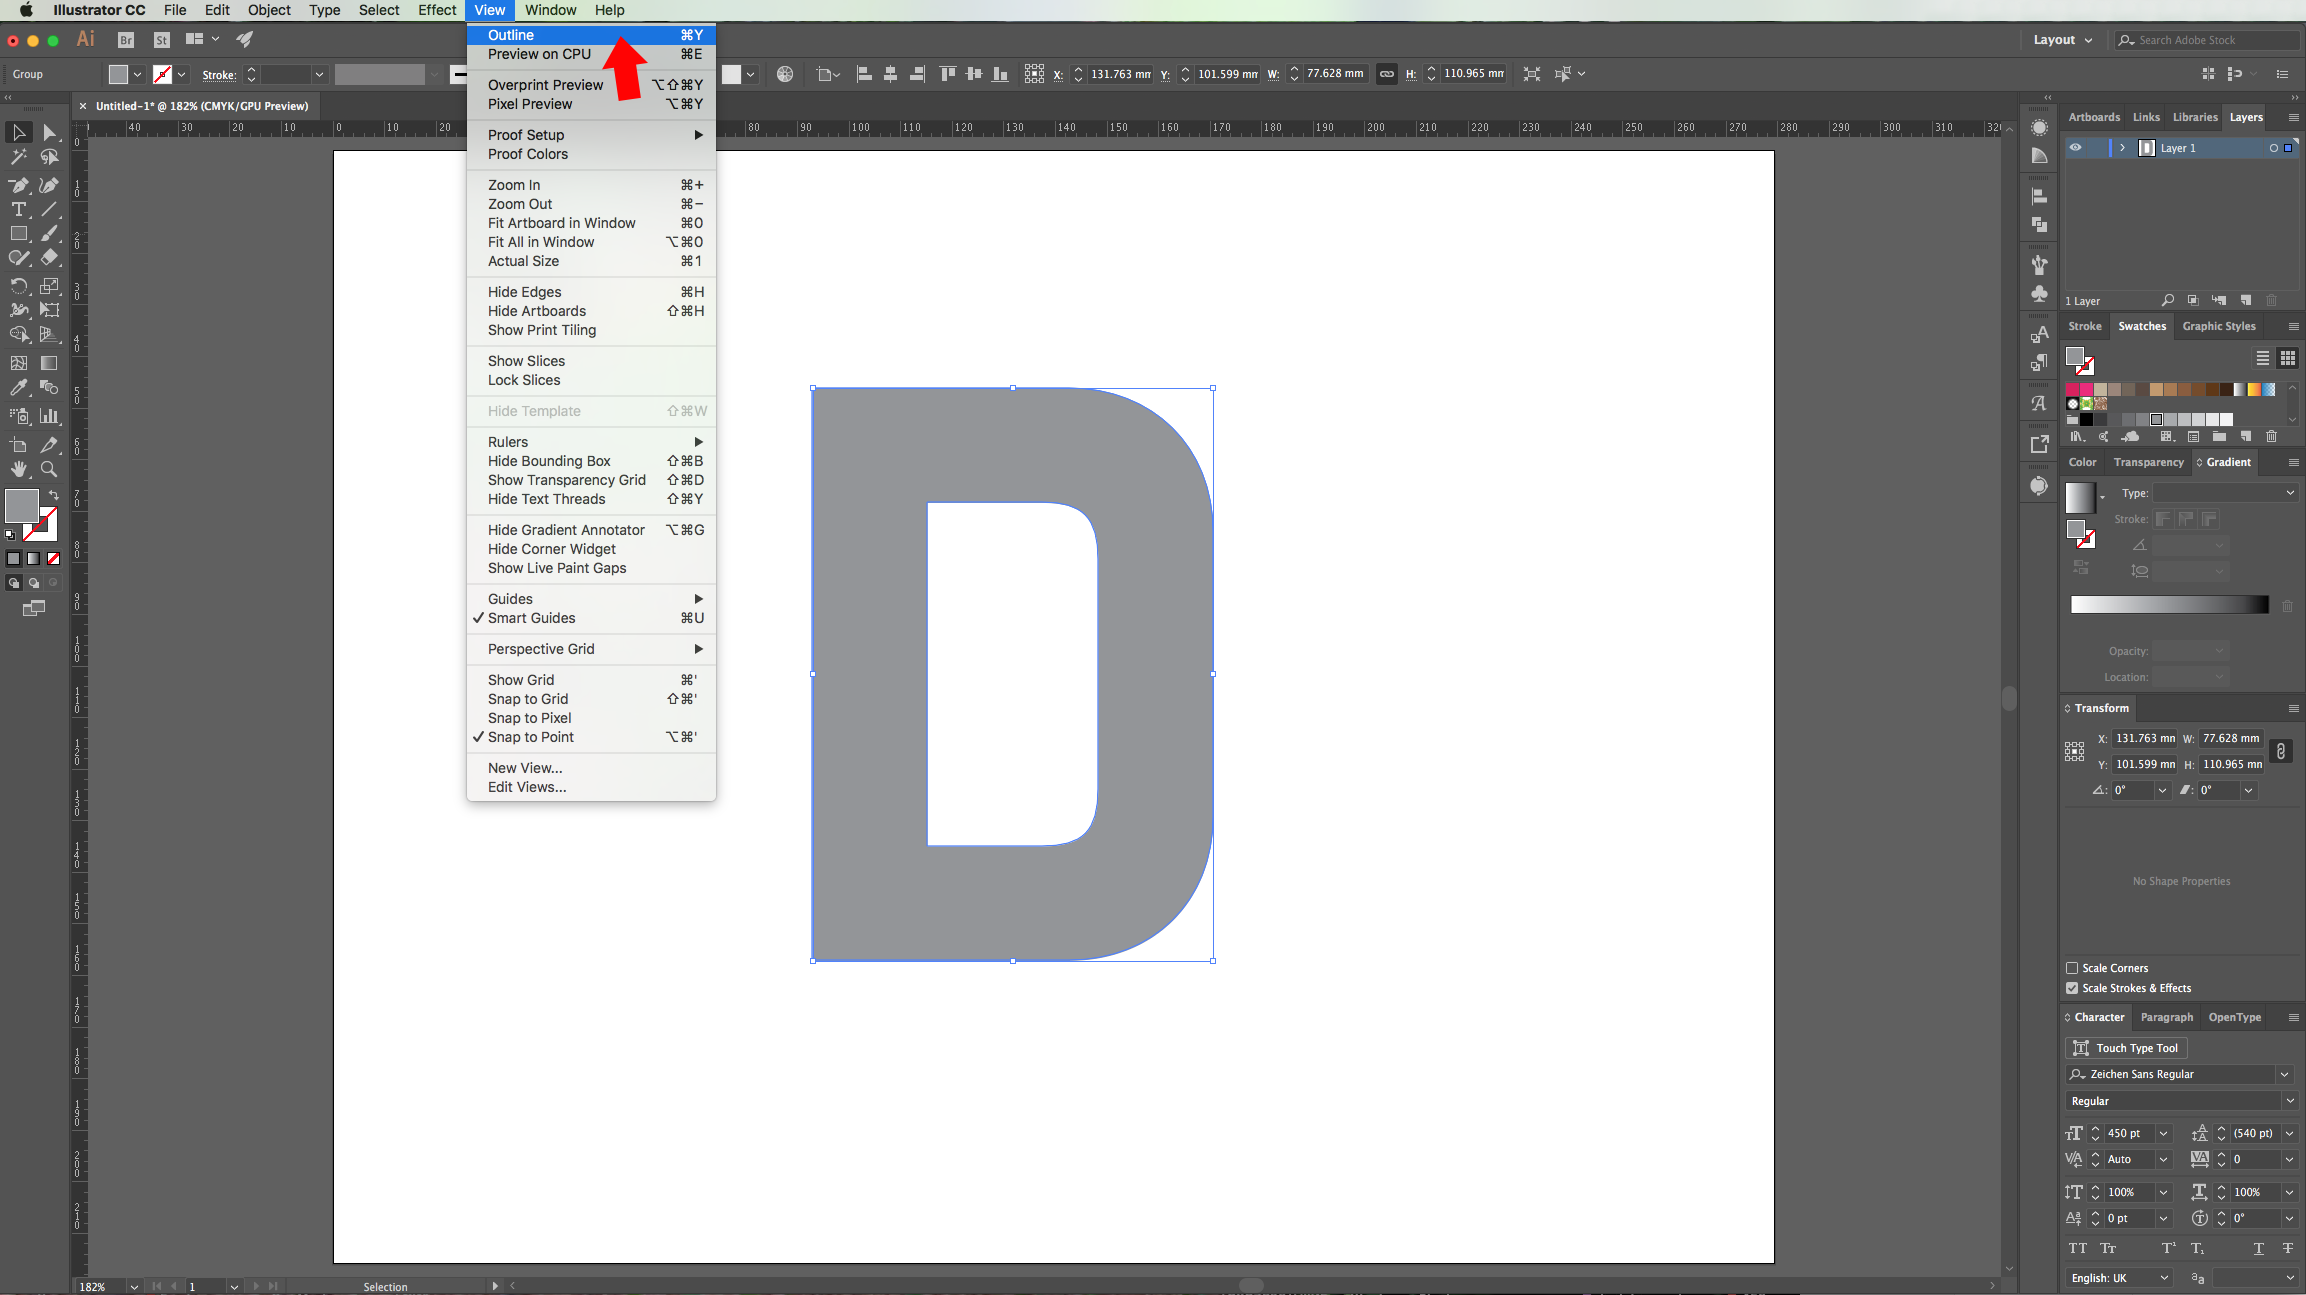
2 - Fill it with a medium grey, right-click on top of it and choose “Create Outlines”. Make sure that the “Smart Guides” are selected (Command/Control + U) and enter “Outline View” (Command/Control + Y). Both are located in the “View” Menu.
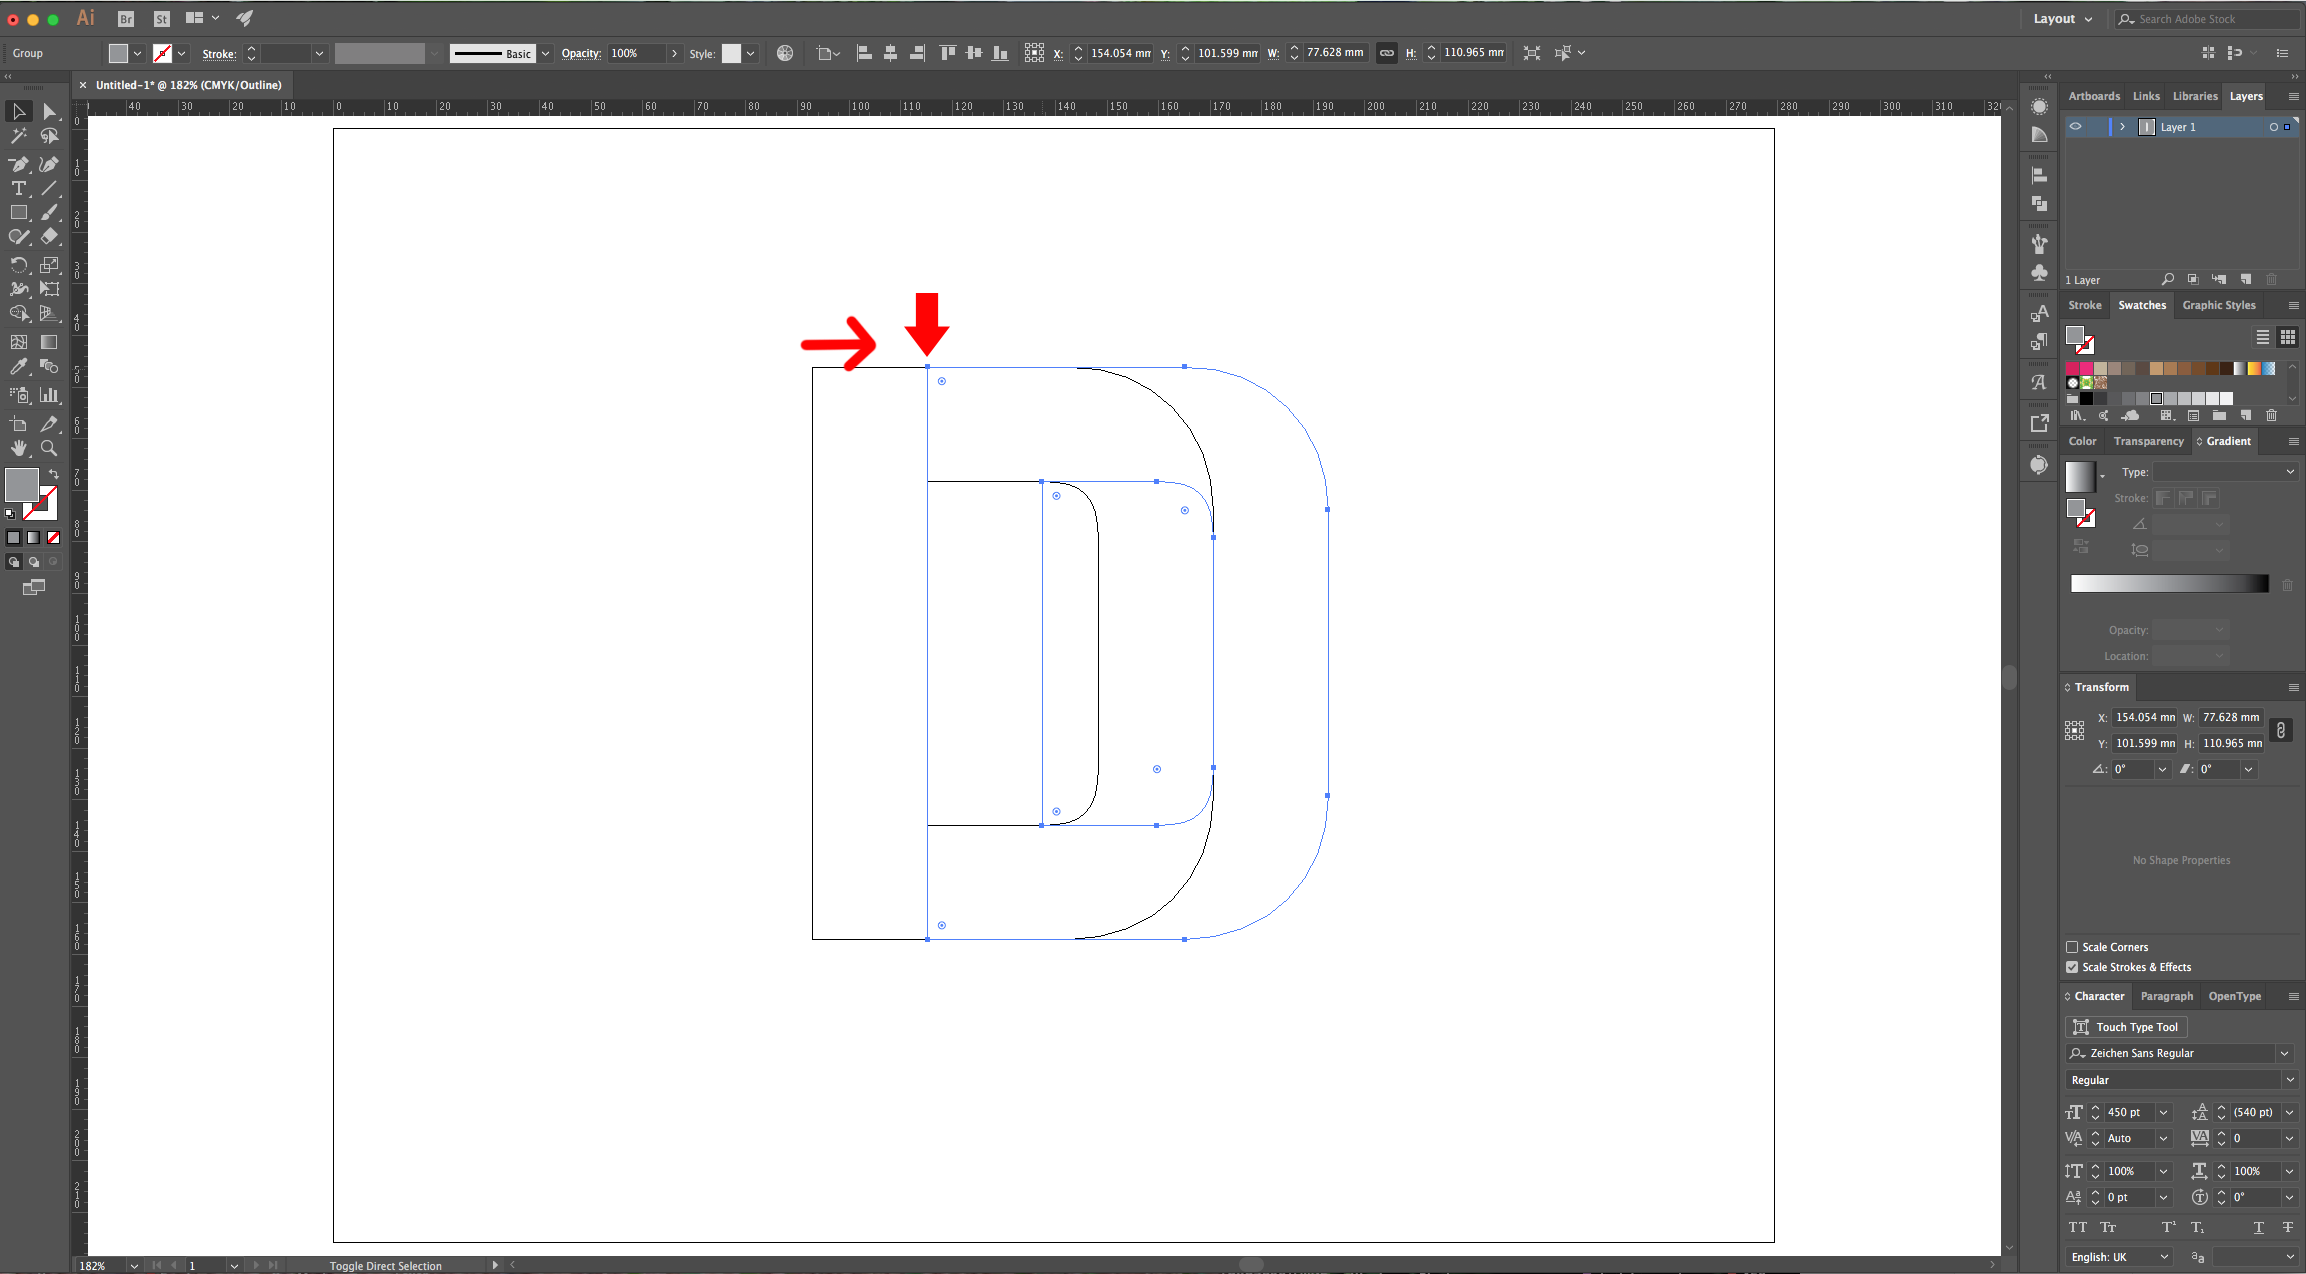
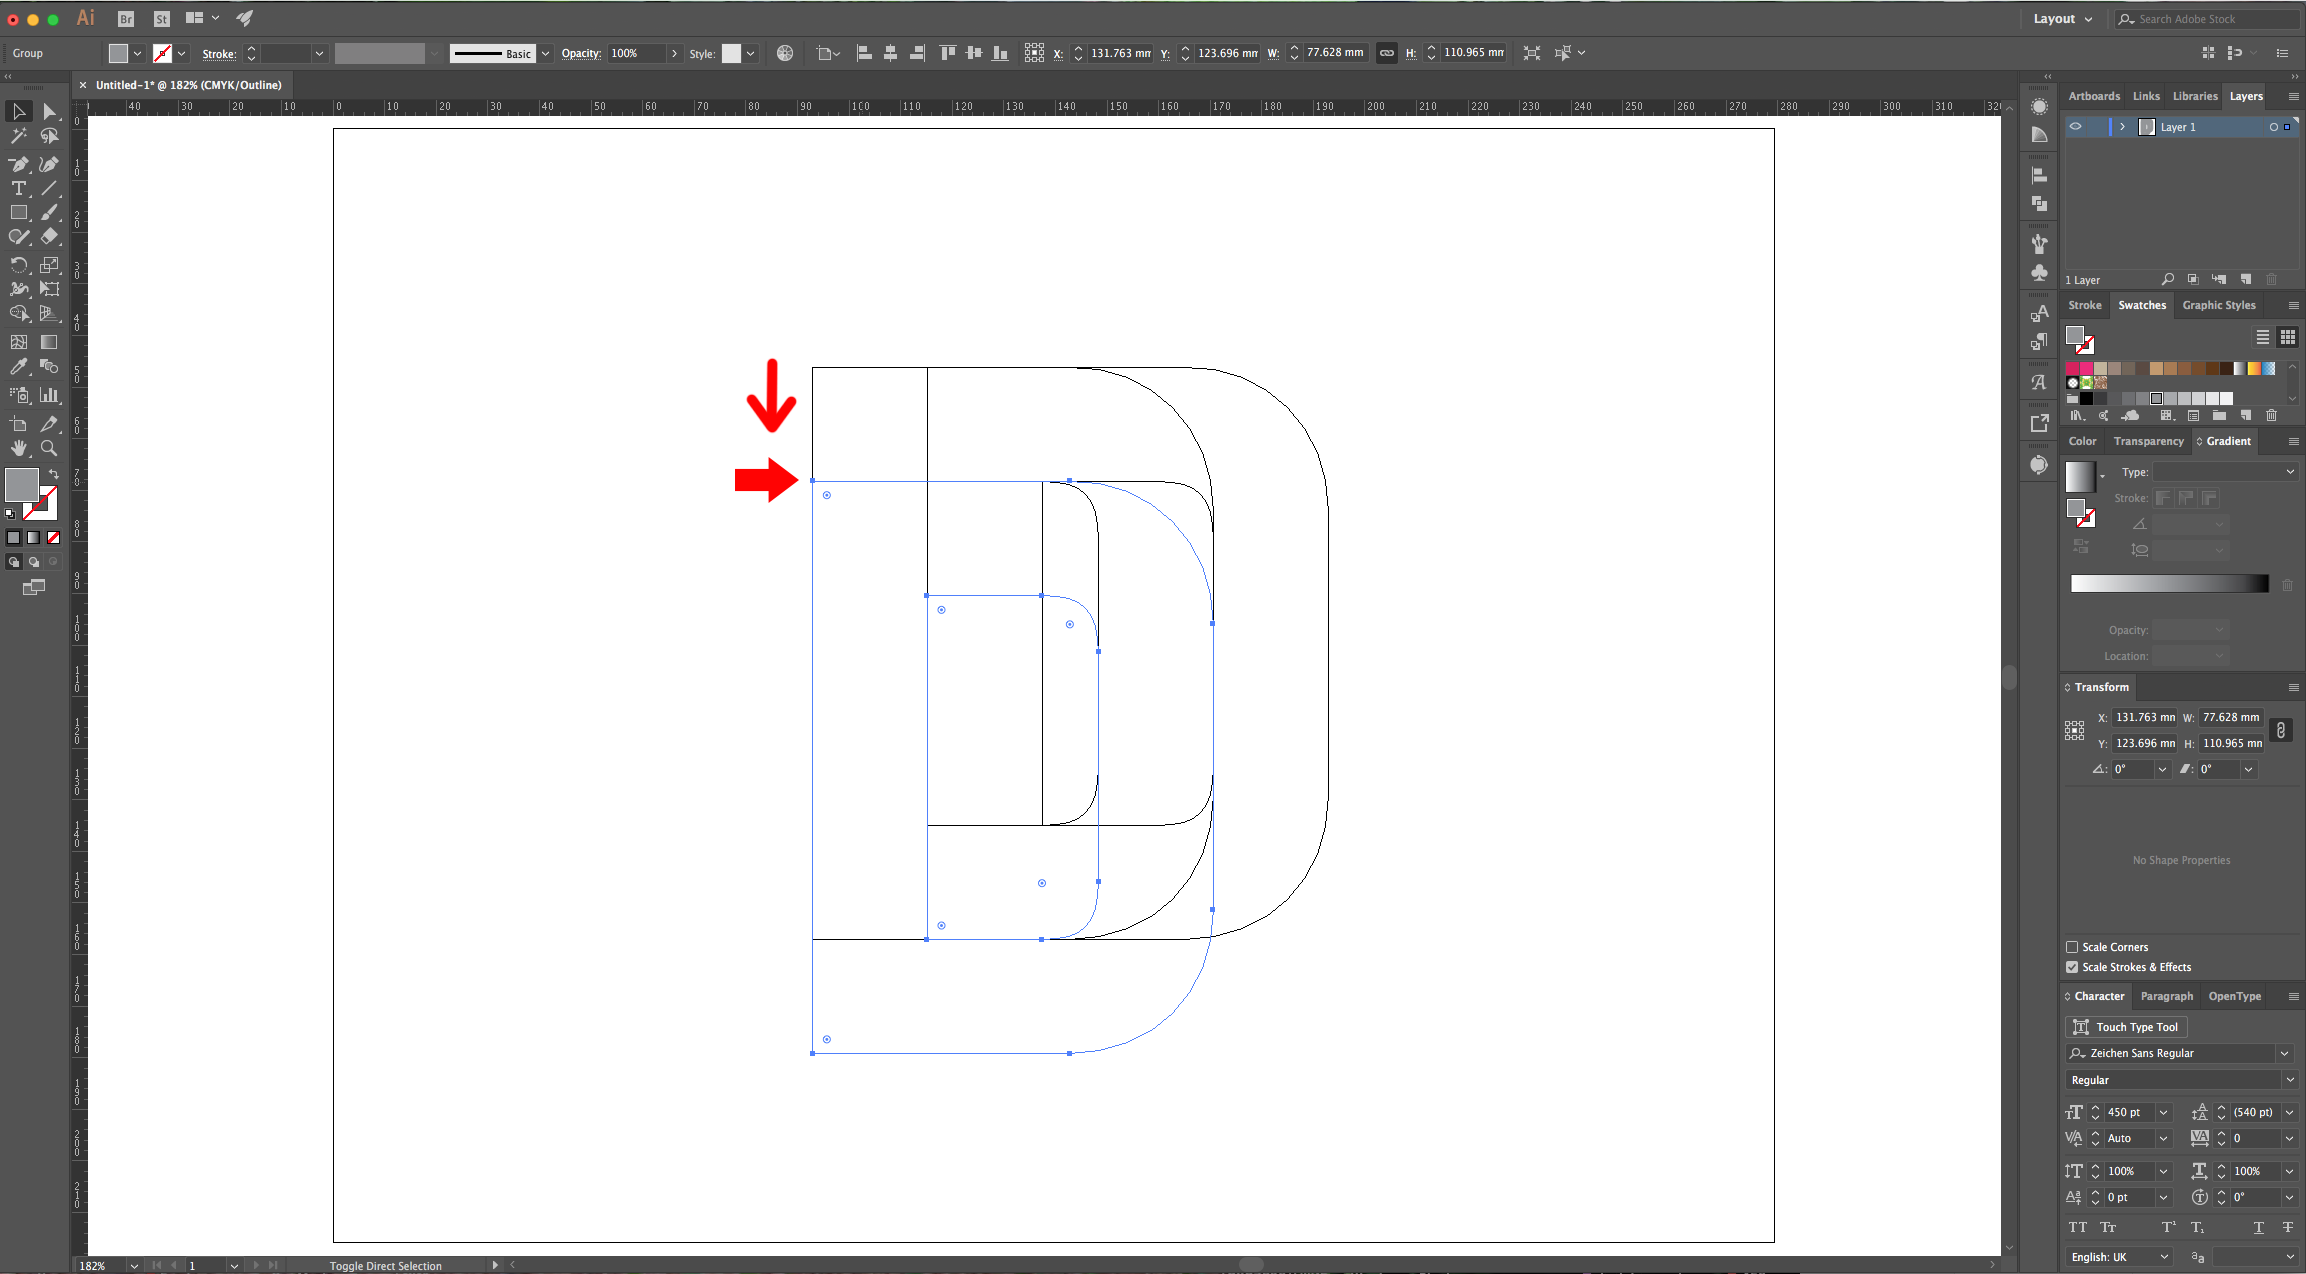
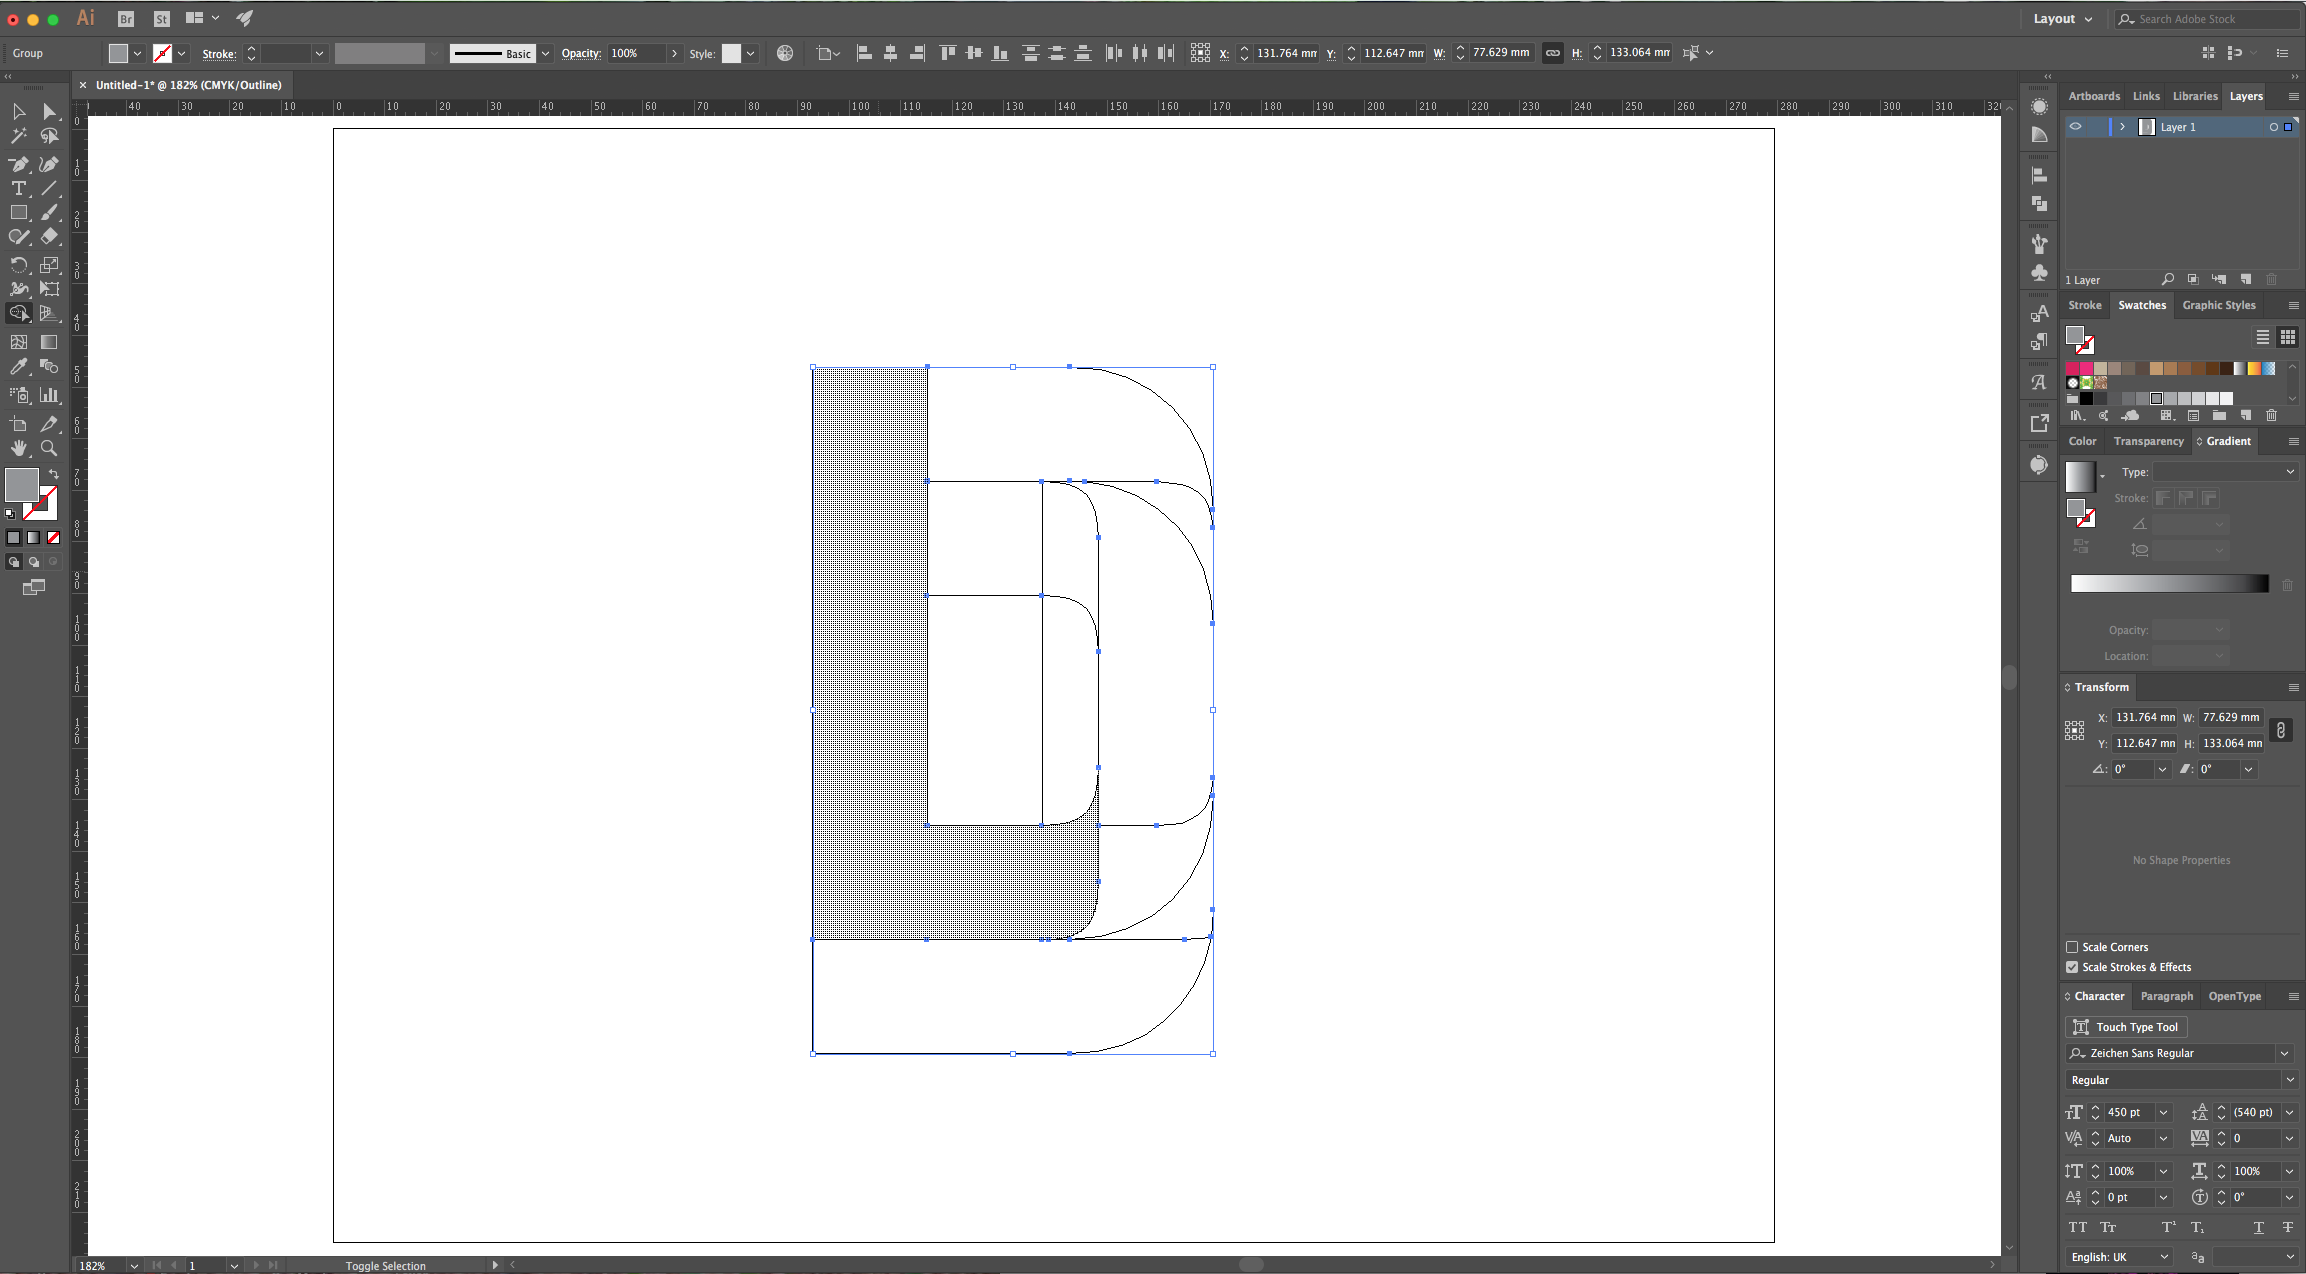
3 - Using the “Move Tool” click and drag your letter to the “Right” while holding the “Alt/Option + Shift” keys to duplicate it and move it in a straight line. Make the Leftmost Line of your duplicate coincide with the Inner Line of the Left Arm of your letter. Create another duplicate, but, click and drag your letter down this time (while holding the “Alt/Option + Shift” keys). Make the Top of this duplicate coincide with the Bottom Line of the Top Arm of your letter. If “Smart Guides” are on they should snap to it easily.
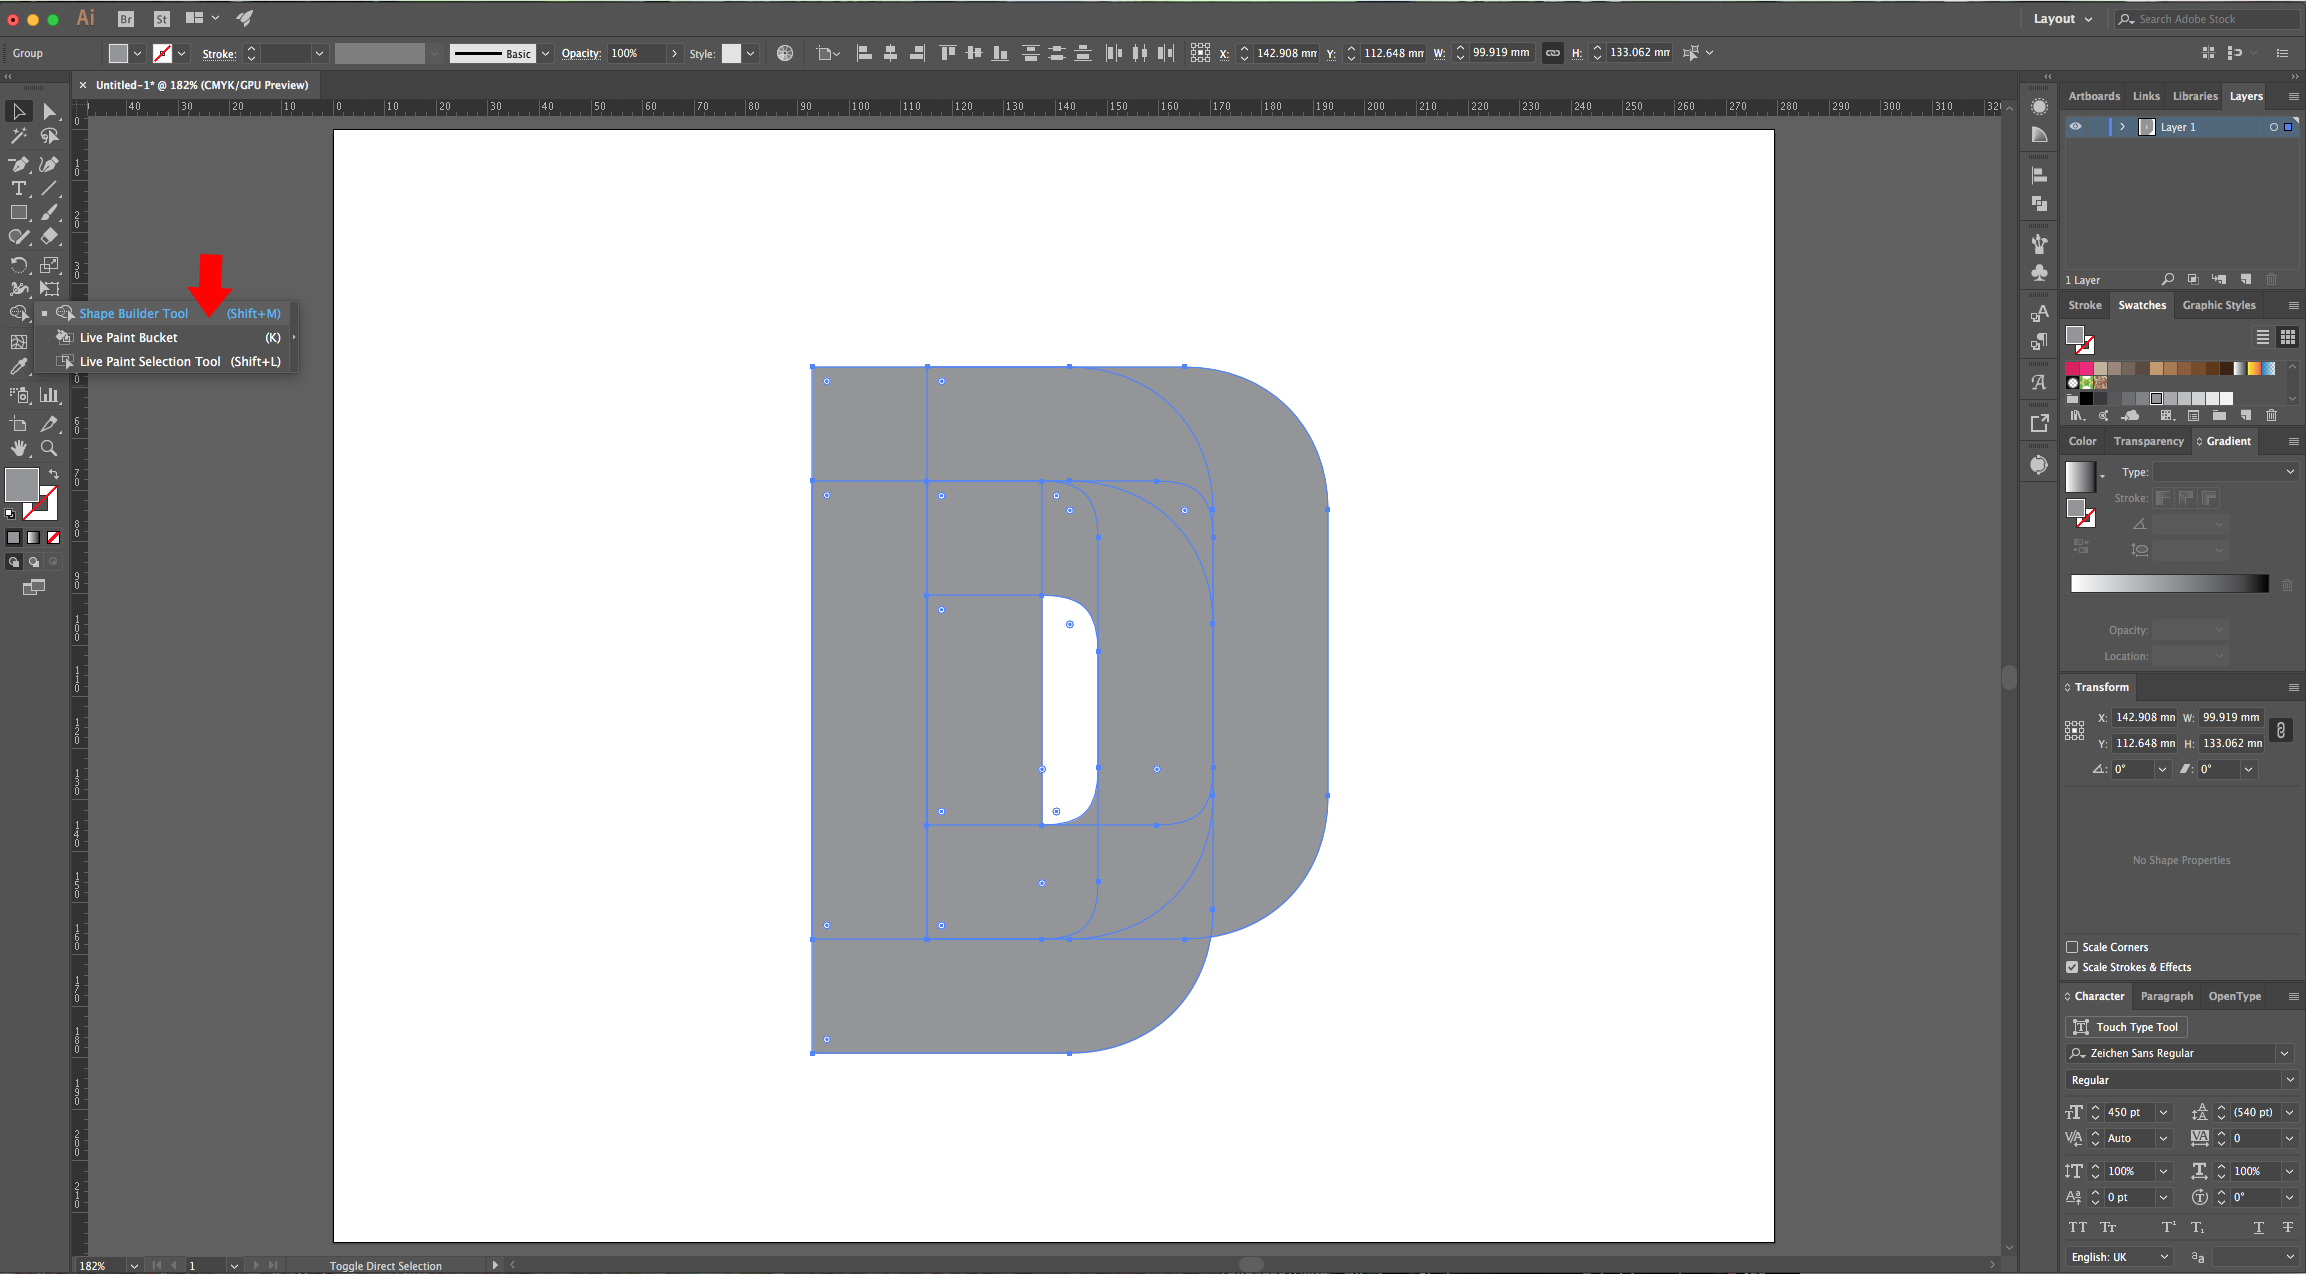
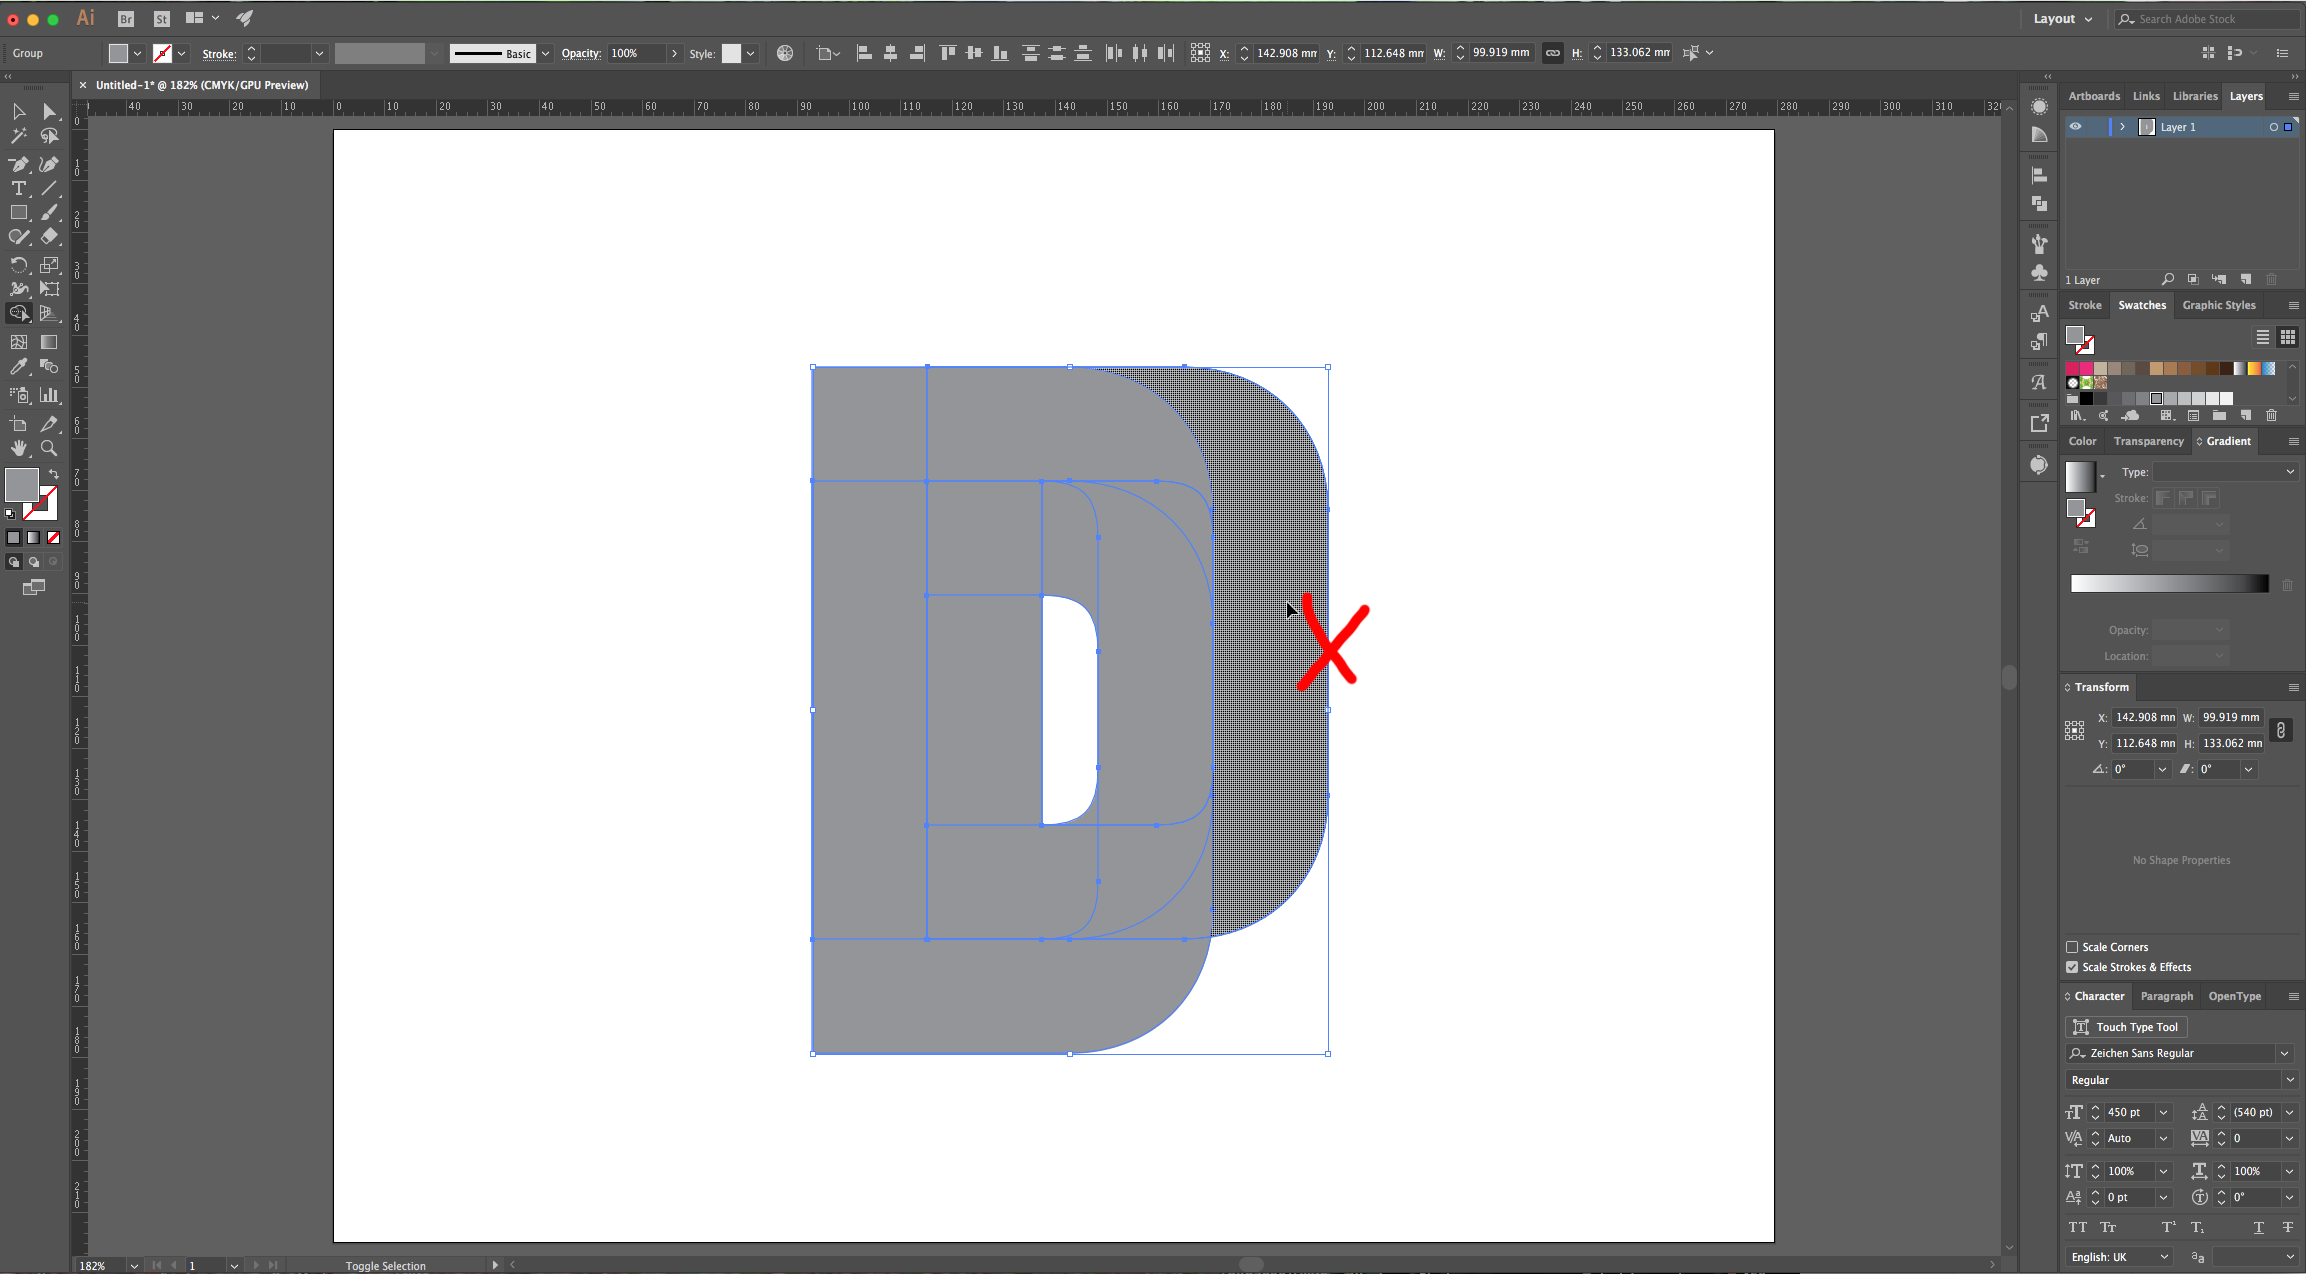
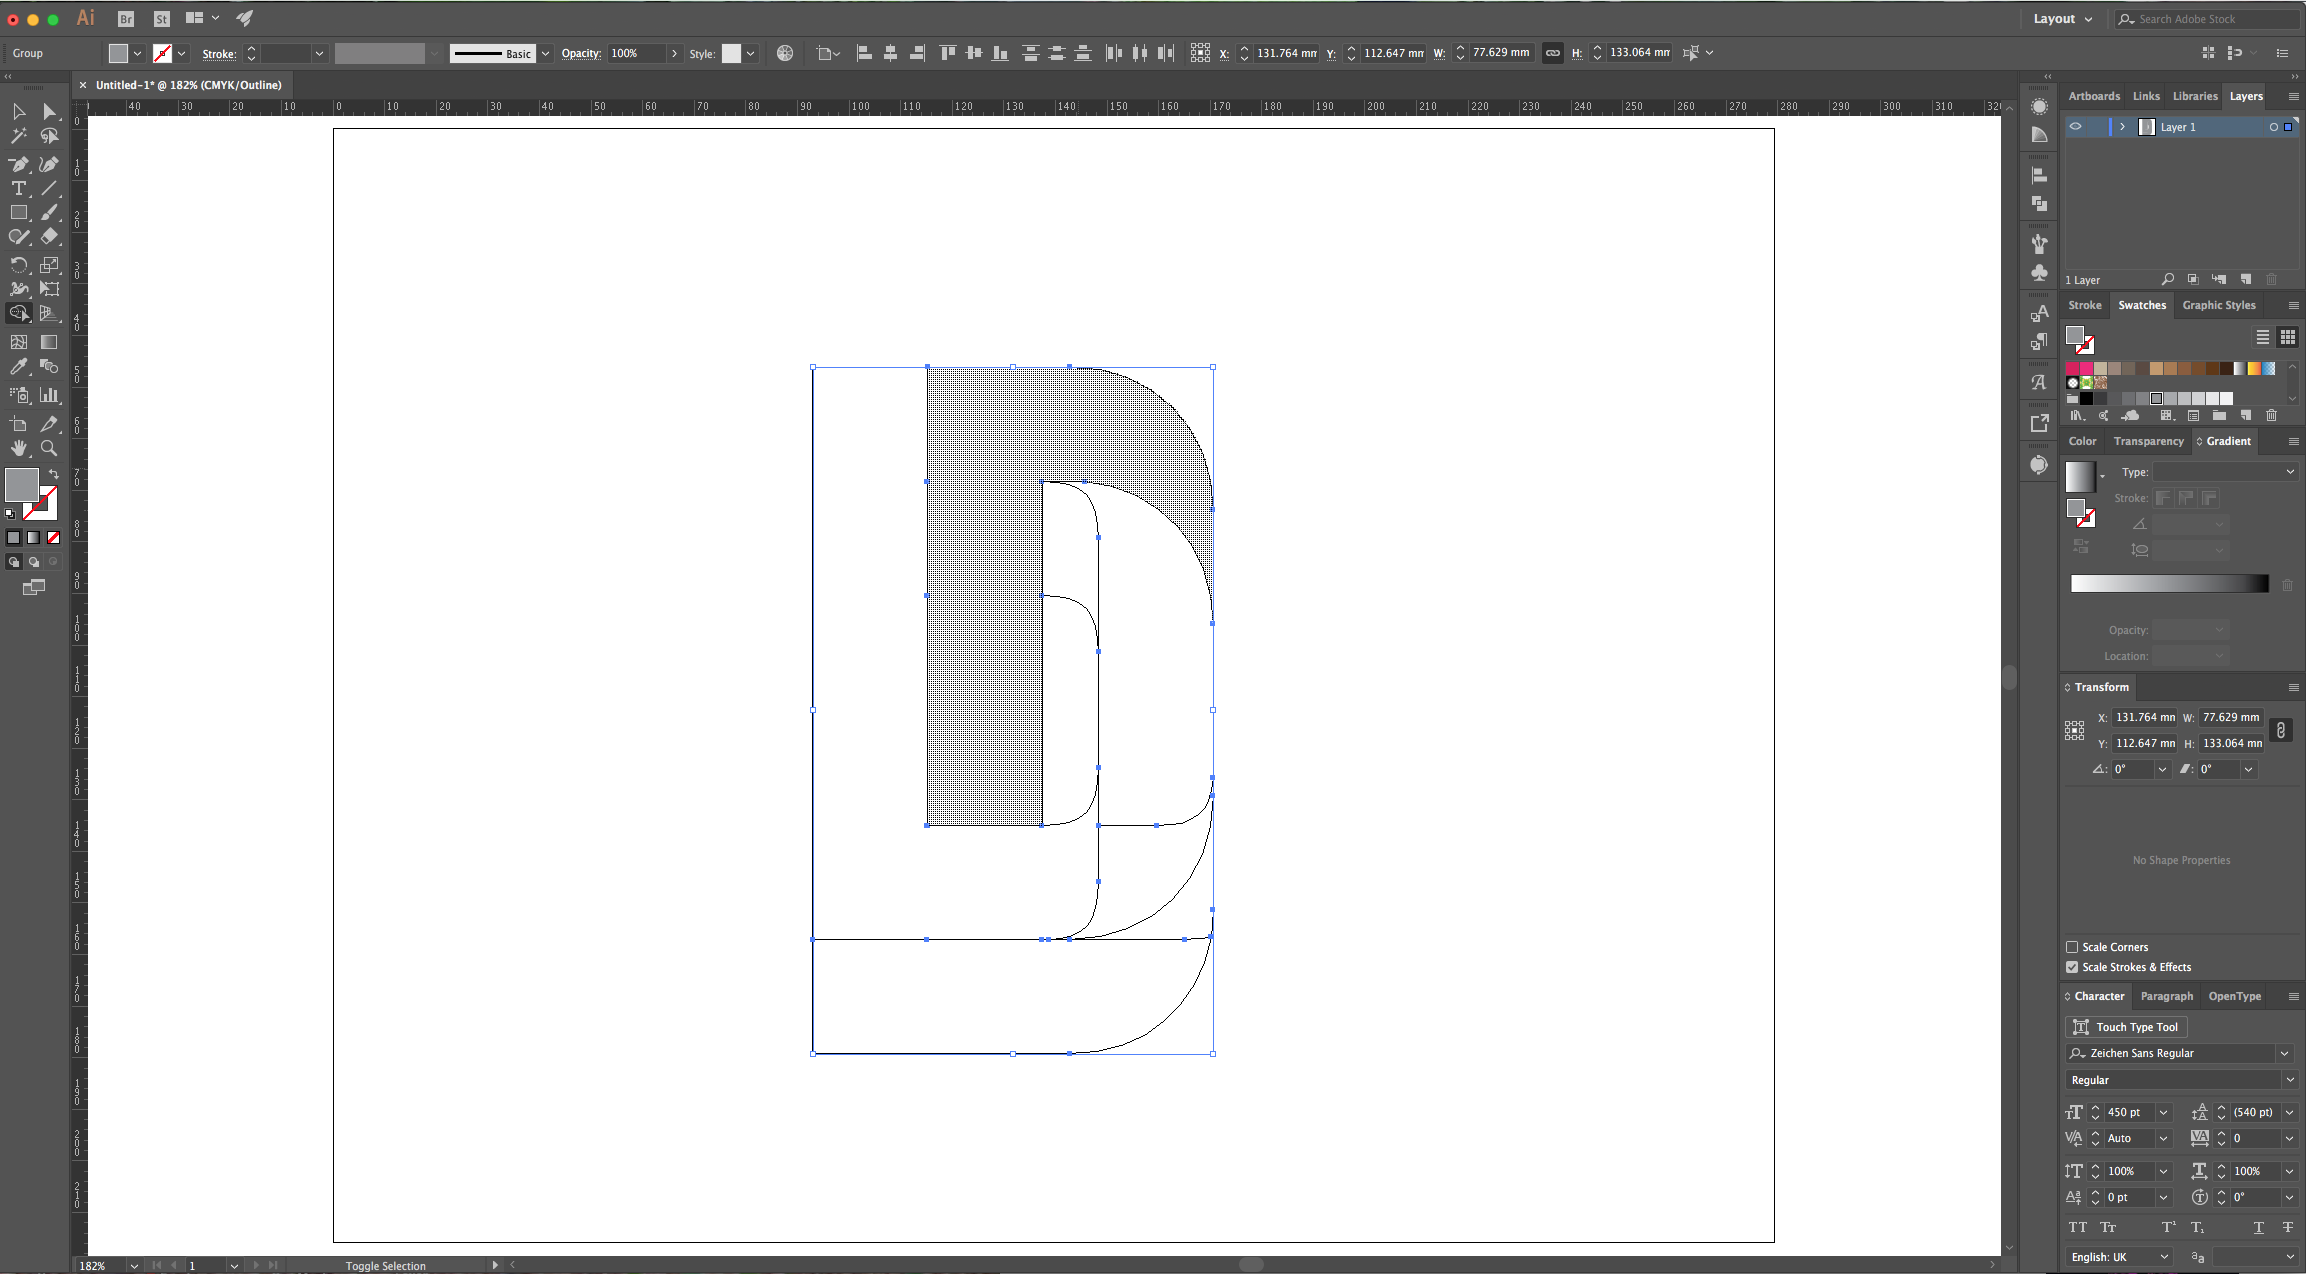
4 - For these steps, you can go in and out of “Outline View” (Command/Control + Y). Select all your paths and use the “Shape Builder Tool” (Shift + M) to unite some of the paths. First, select the Rightmost Path while holding the “Alt/Option” Key to “Delete” it. (If you are working with a different letter you need to figure out which portions should be deleted).
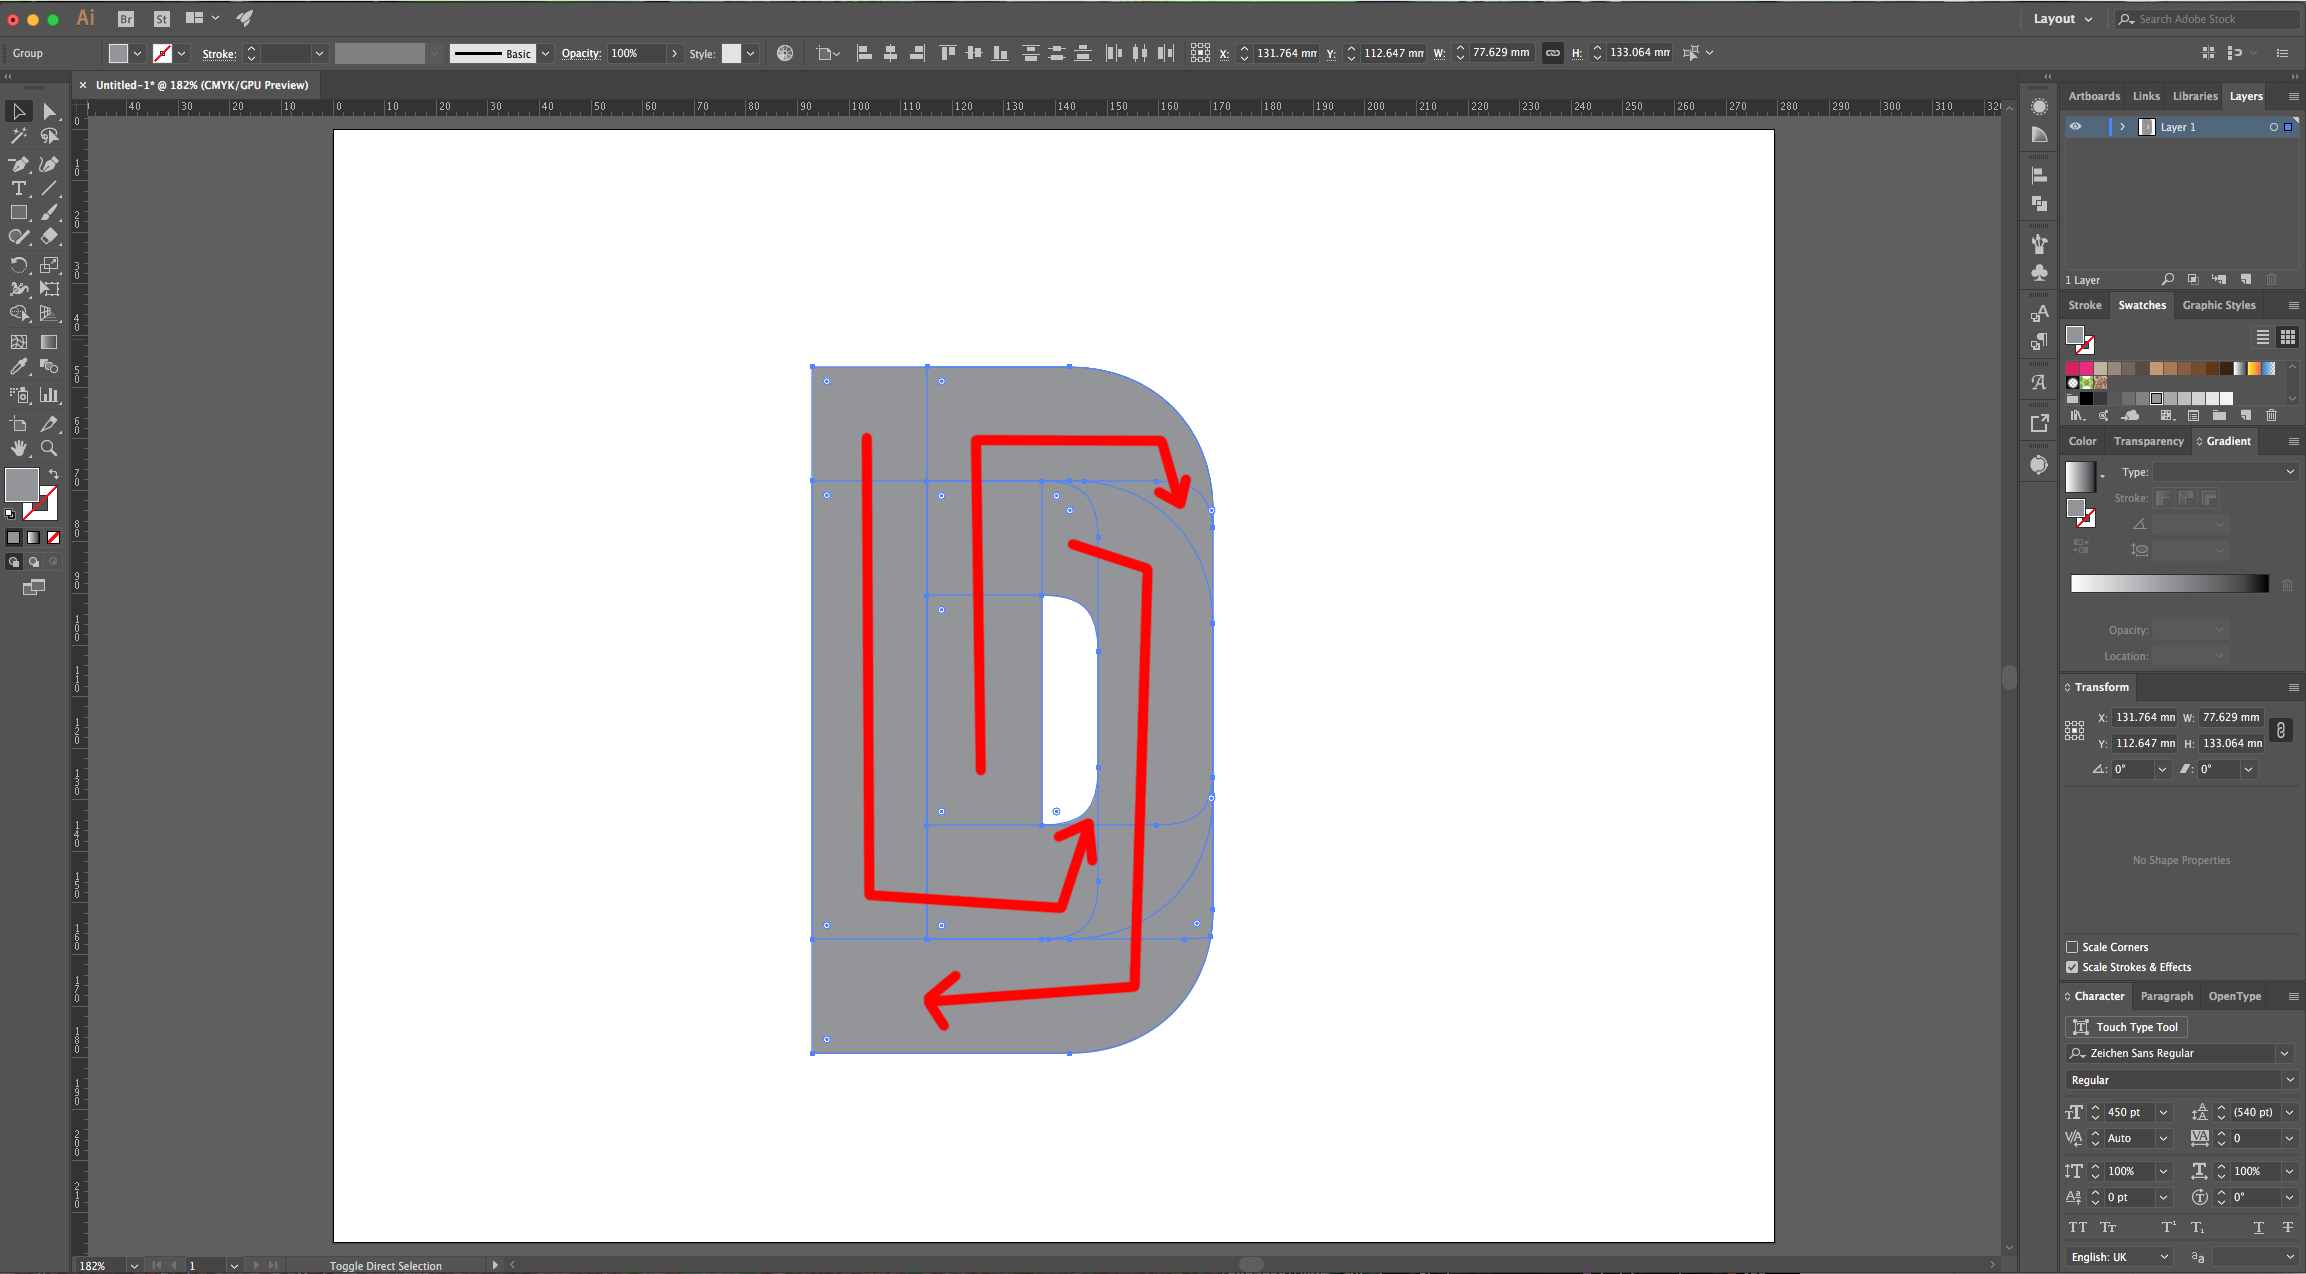
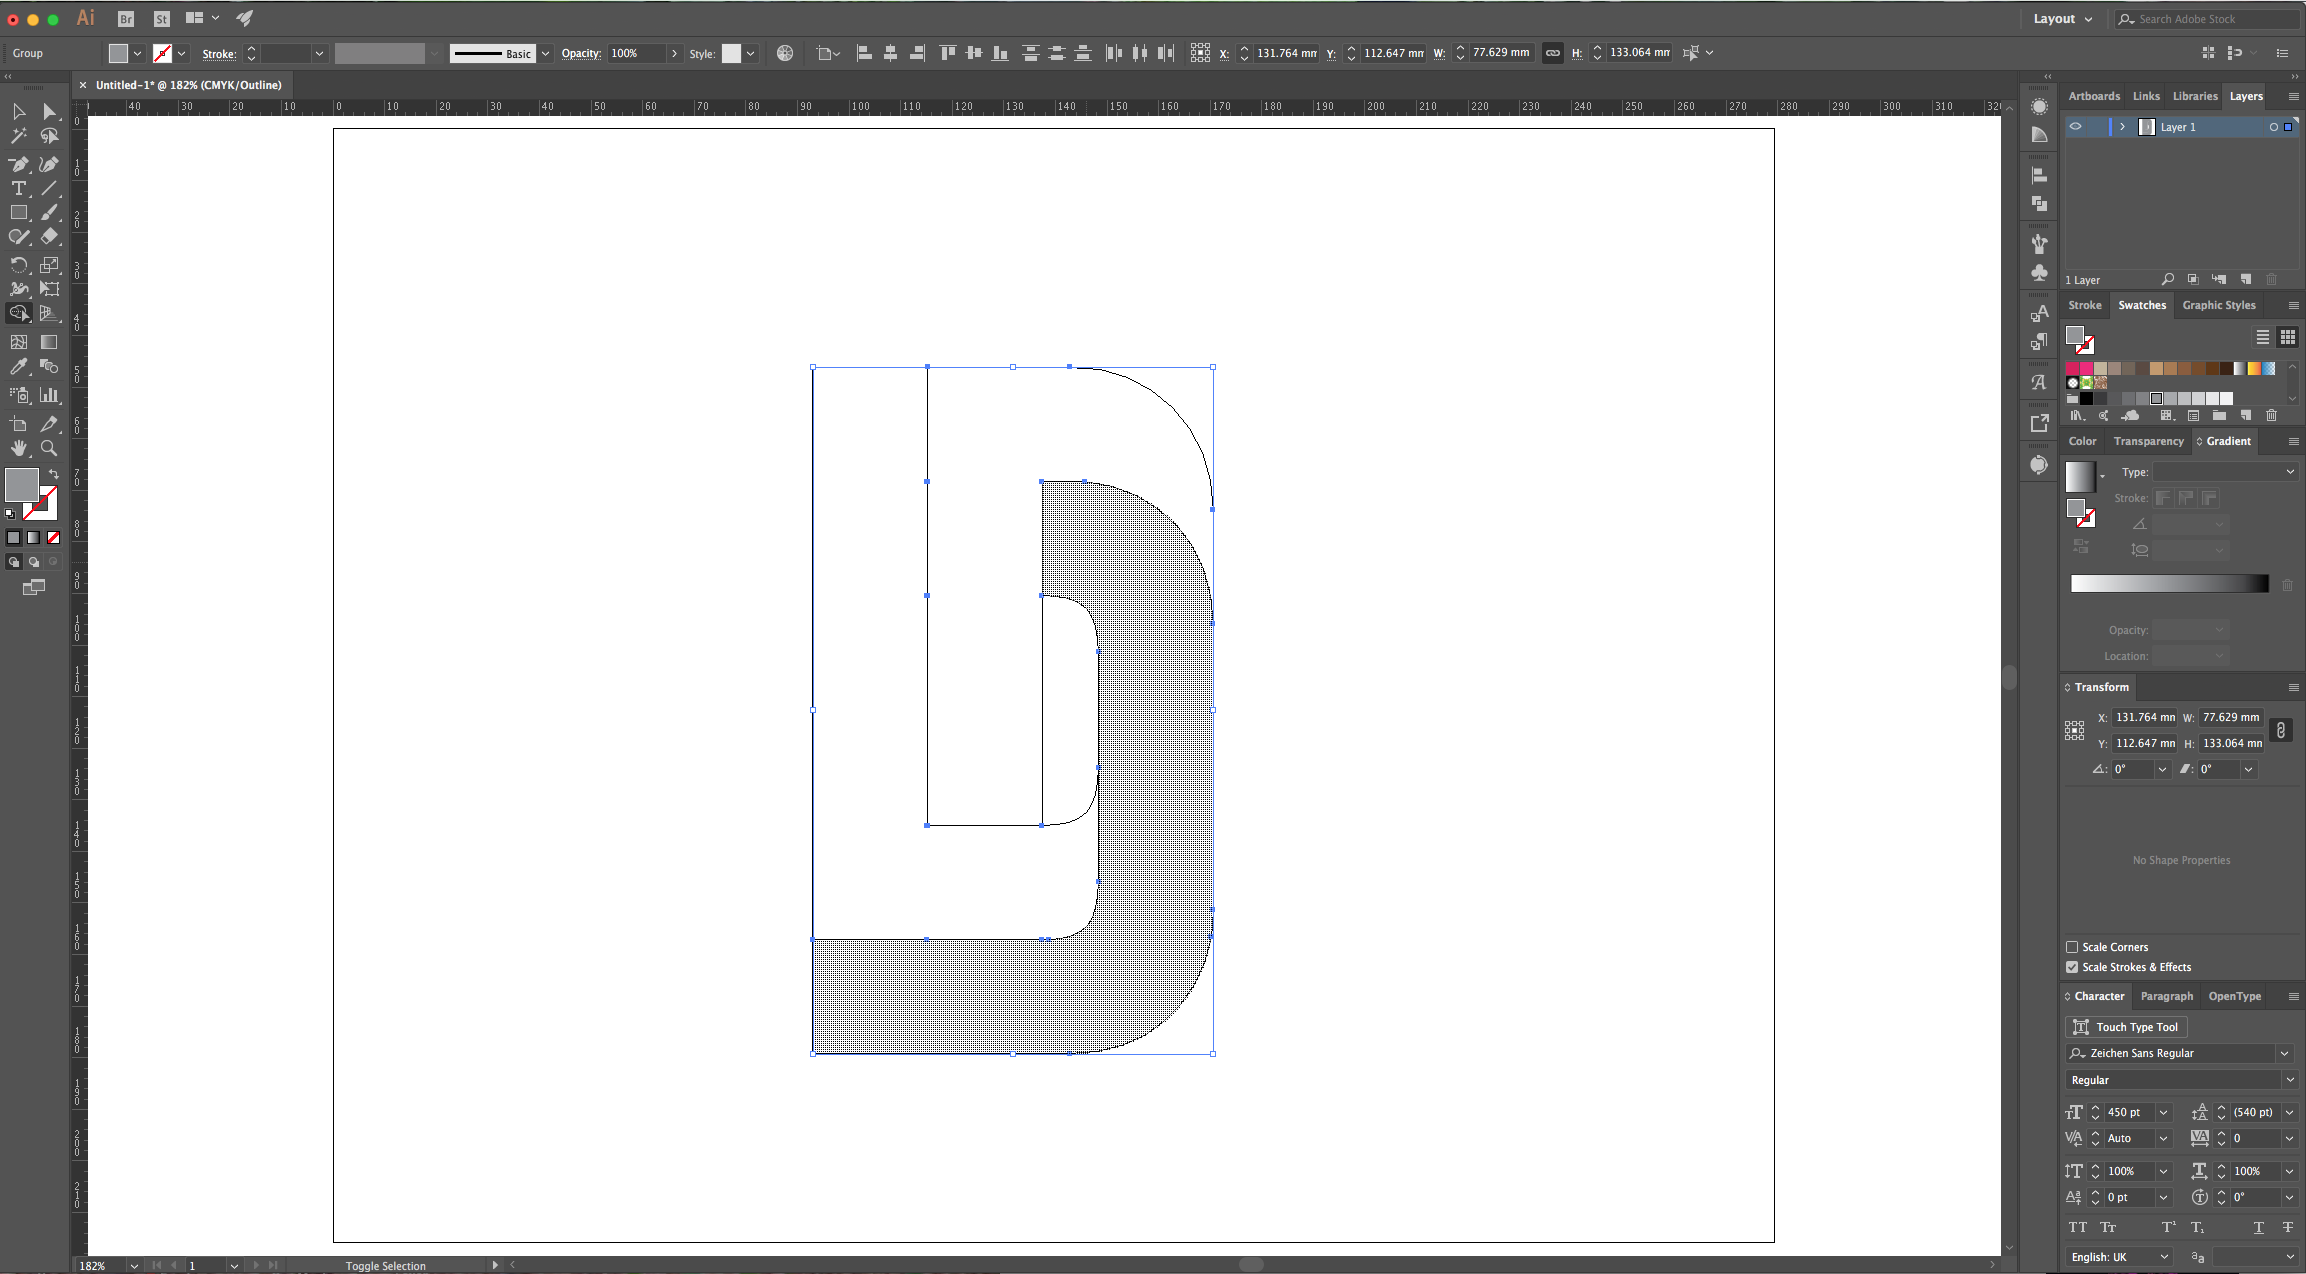
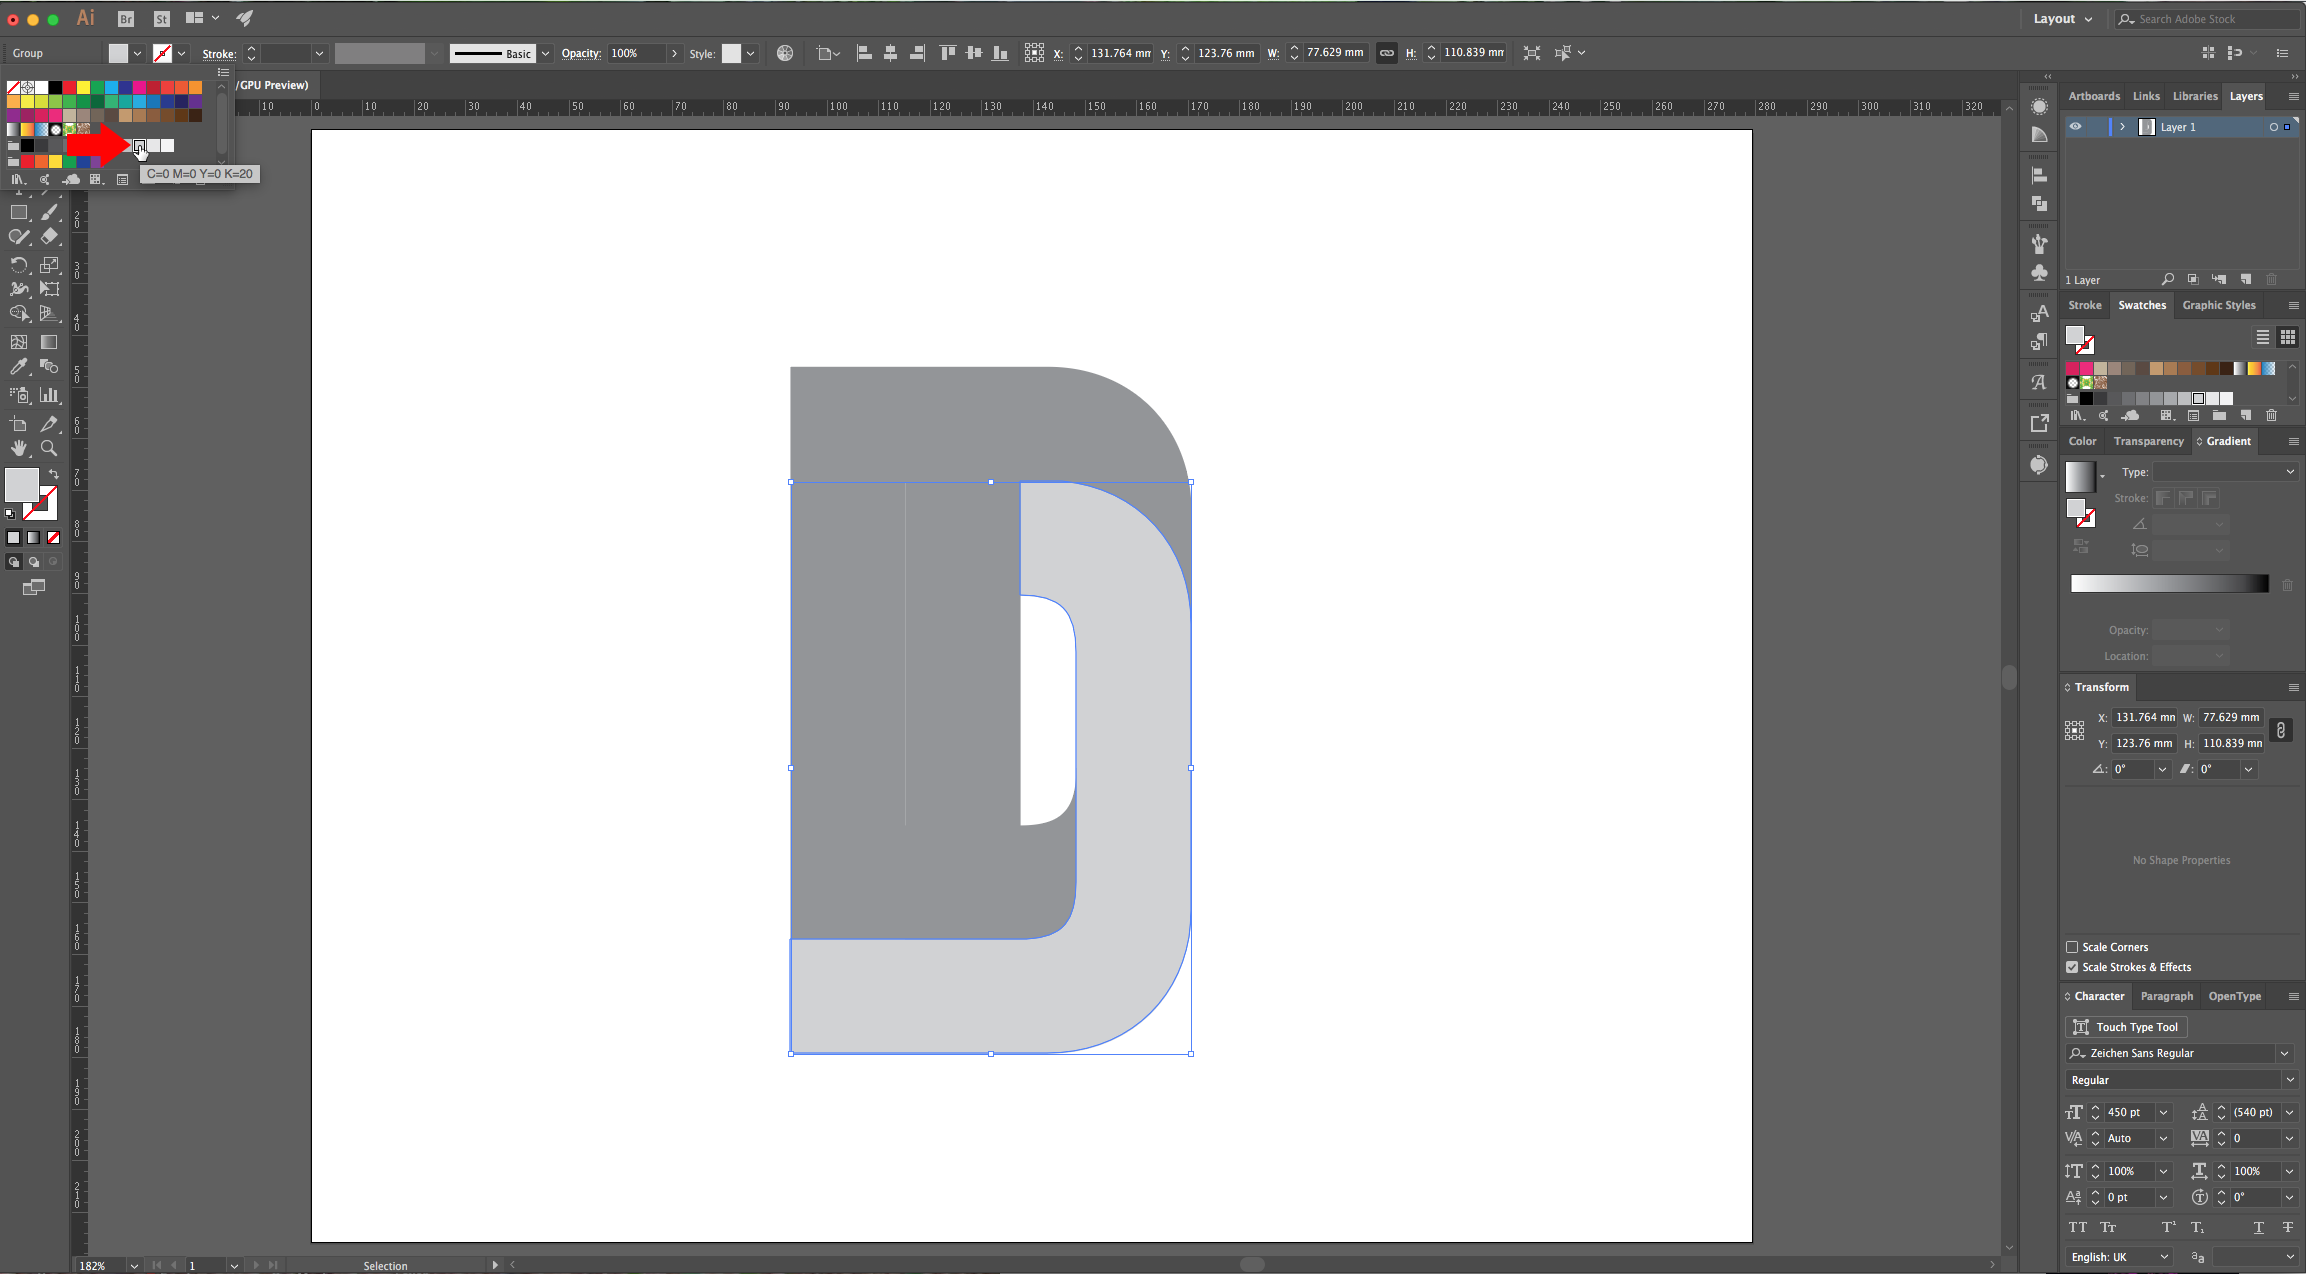
5 - Now, drag your cursor from the Top-left path down through the left part of the letter without getting to the Bottom path, before that, turn Right and Up to merge those paths together and create something similar to an “L” with a hook at the end. Create an “Inverted L” with the Middle and Top-right Paths. And a curved Path joining the remaining of the Paths (Bottom-left to right, then Up, then Left again). You should have three Paths now.
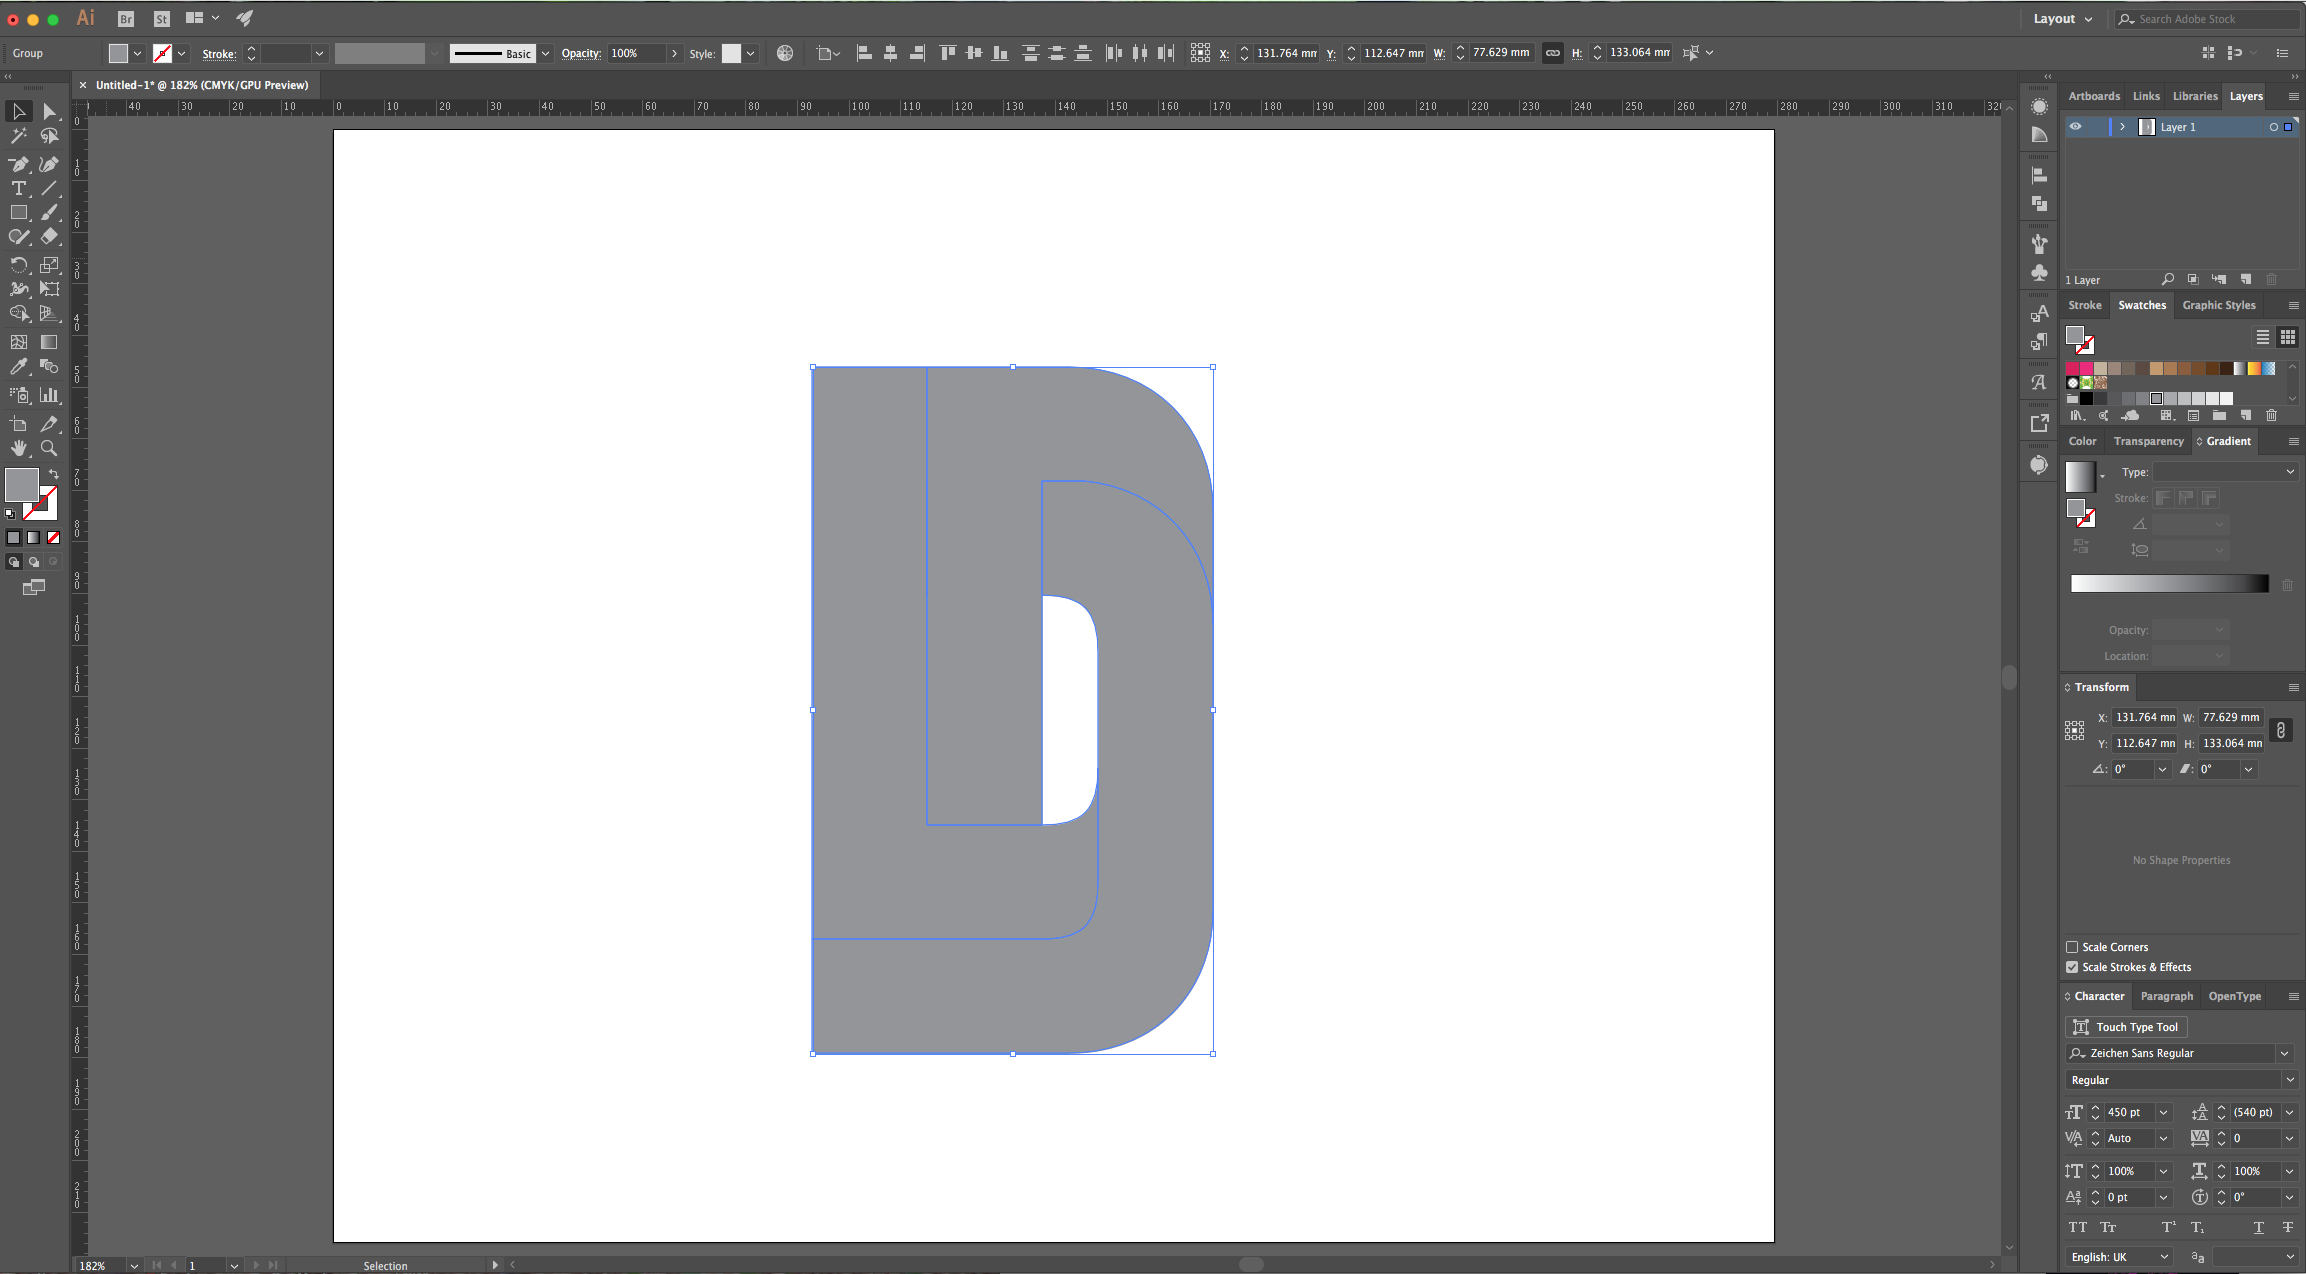
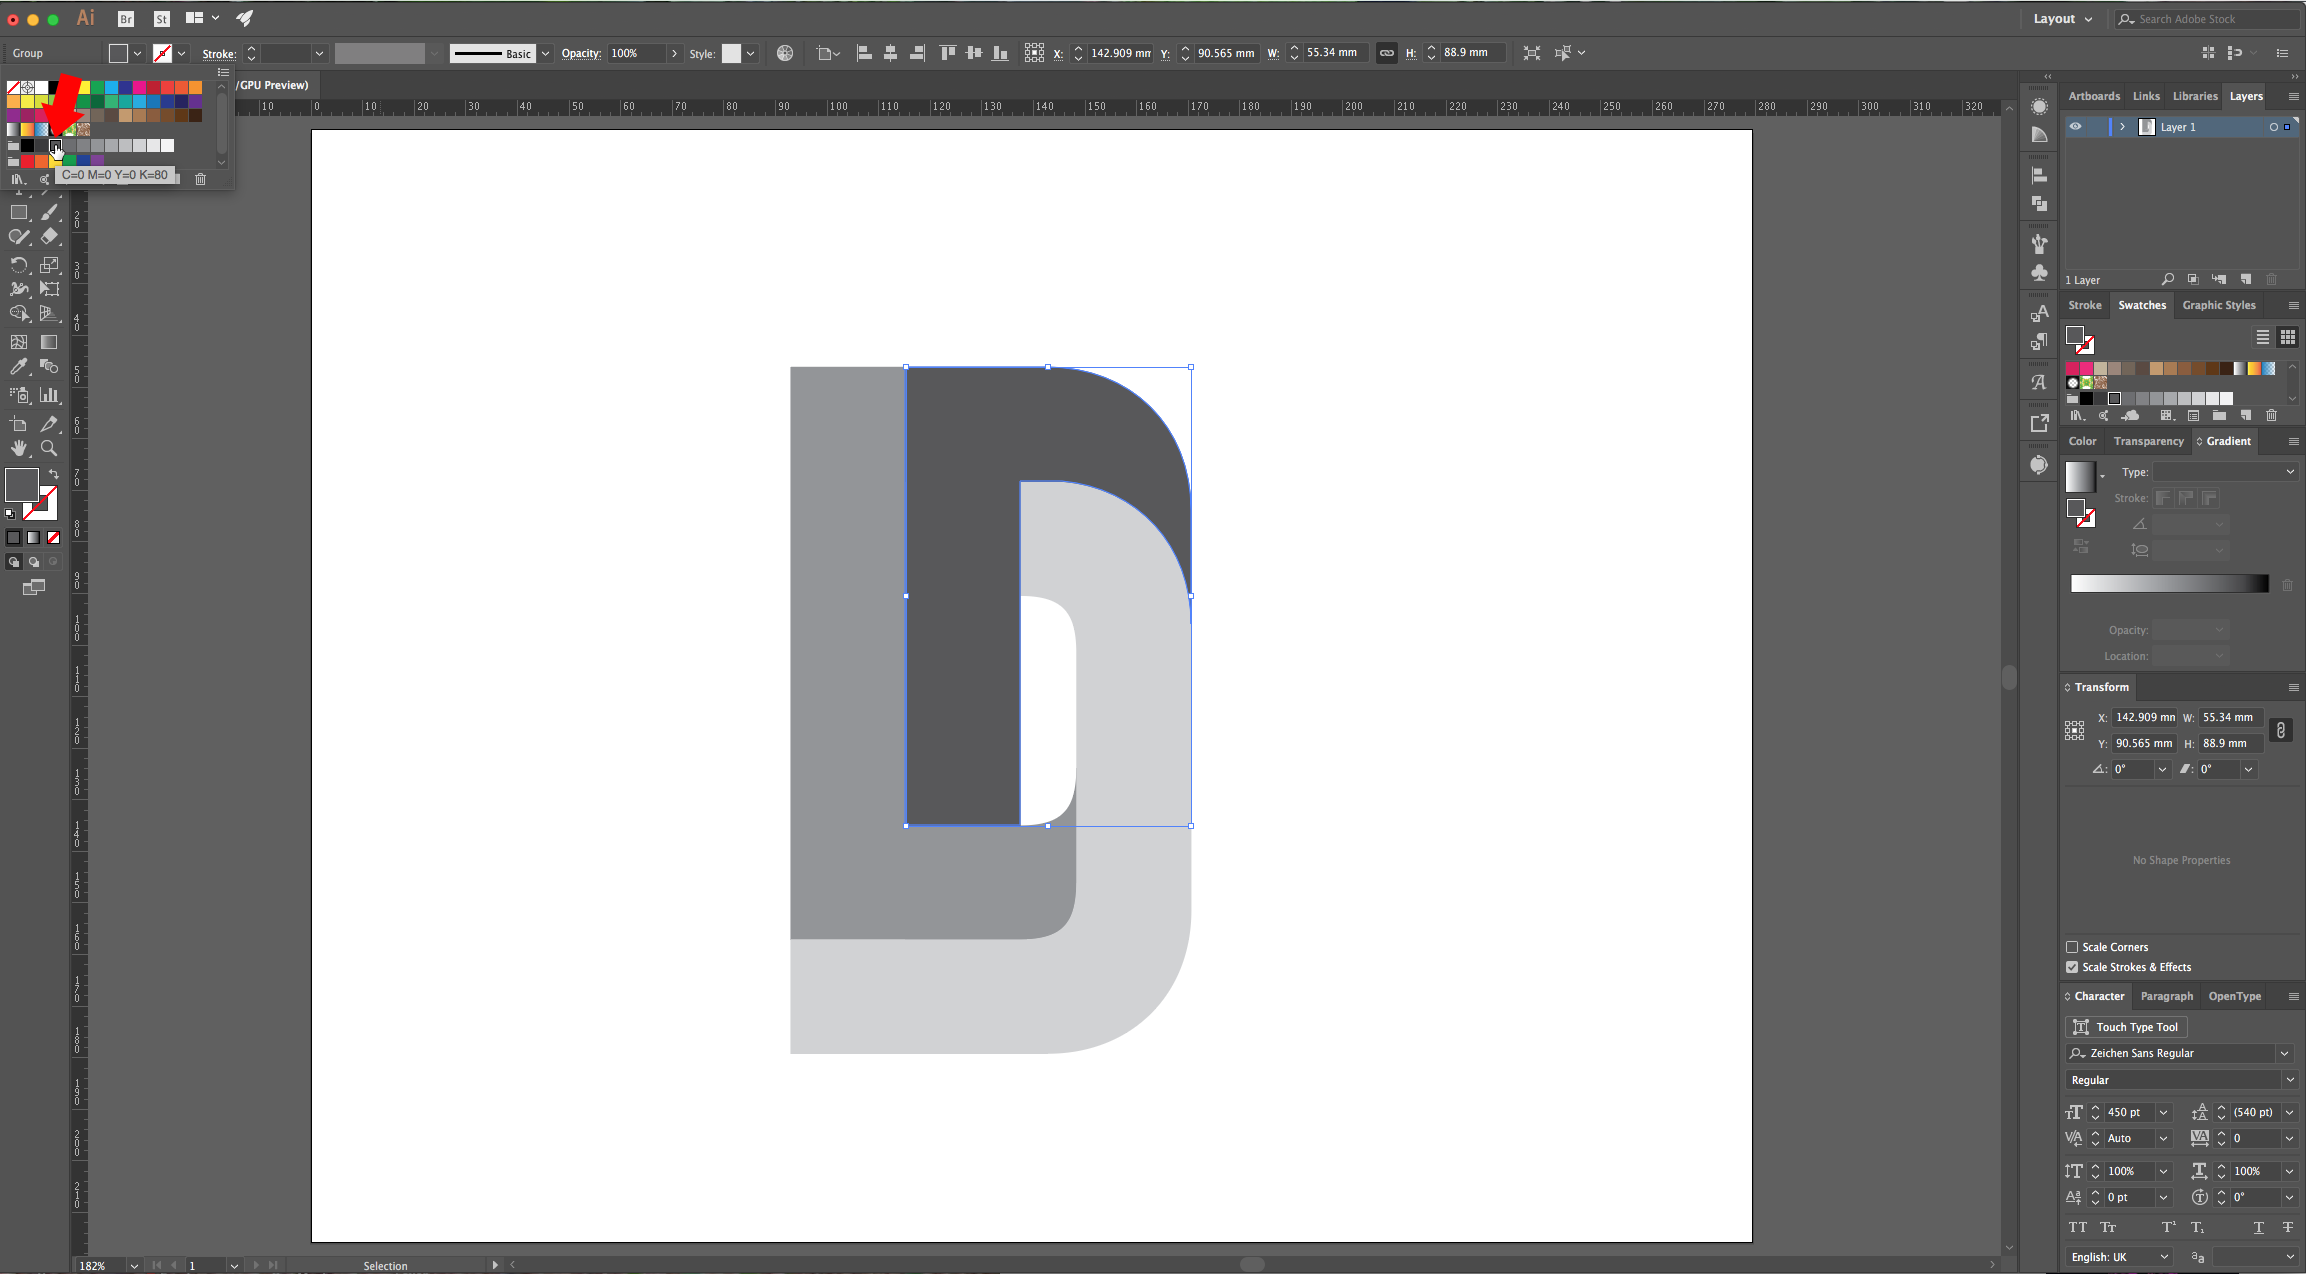
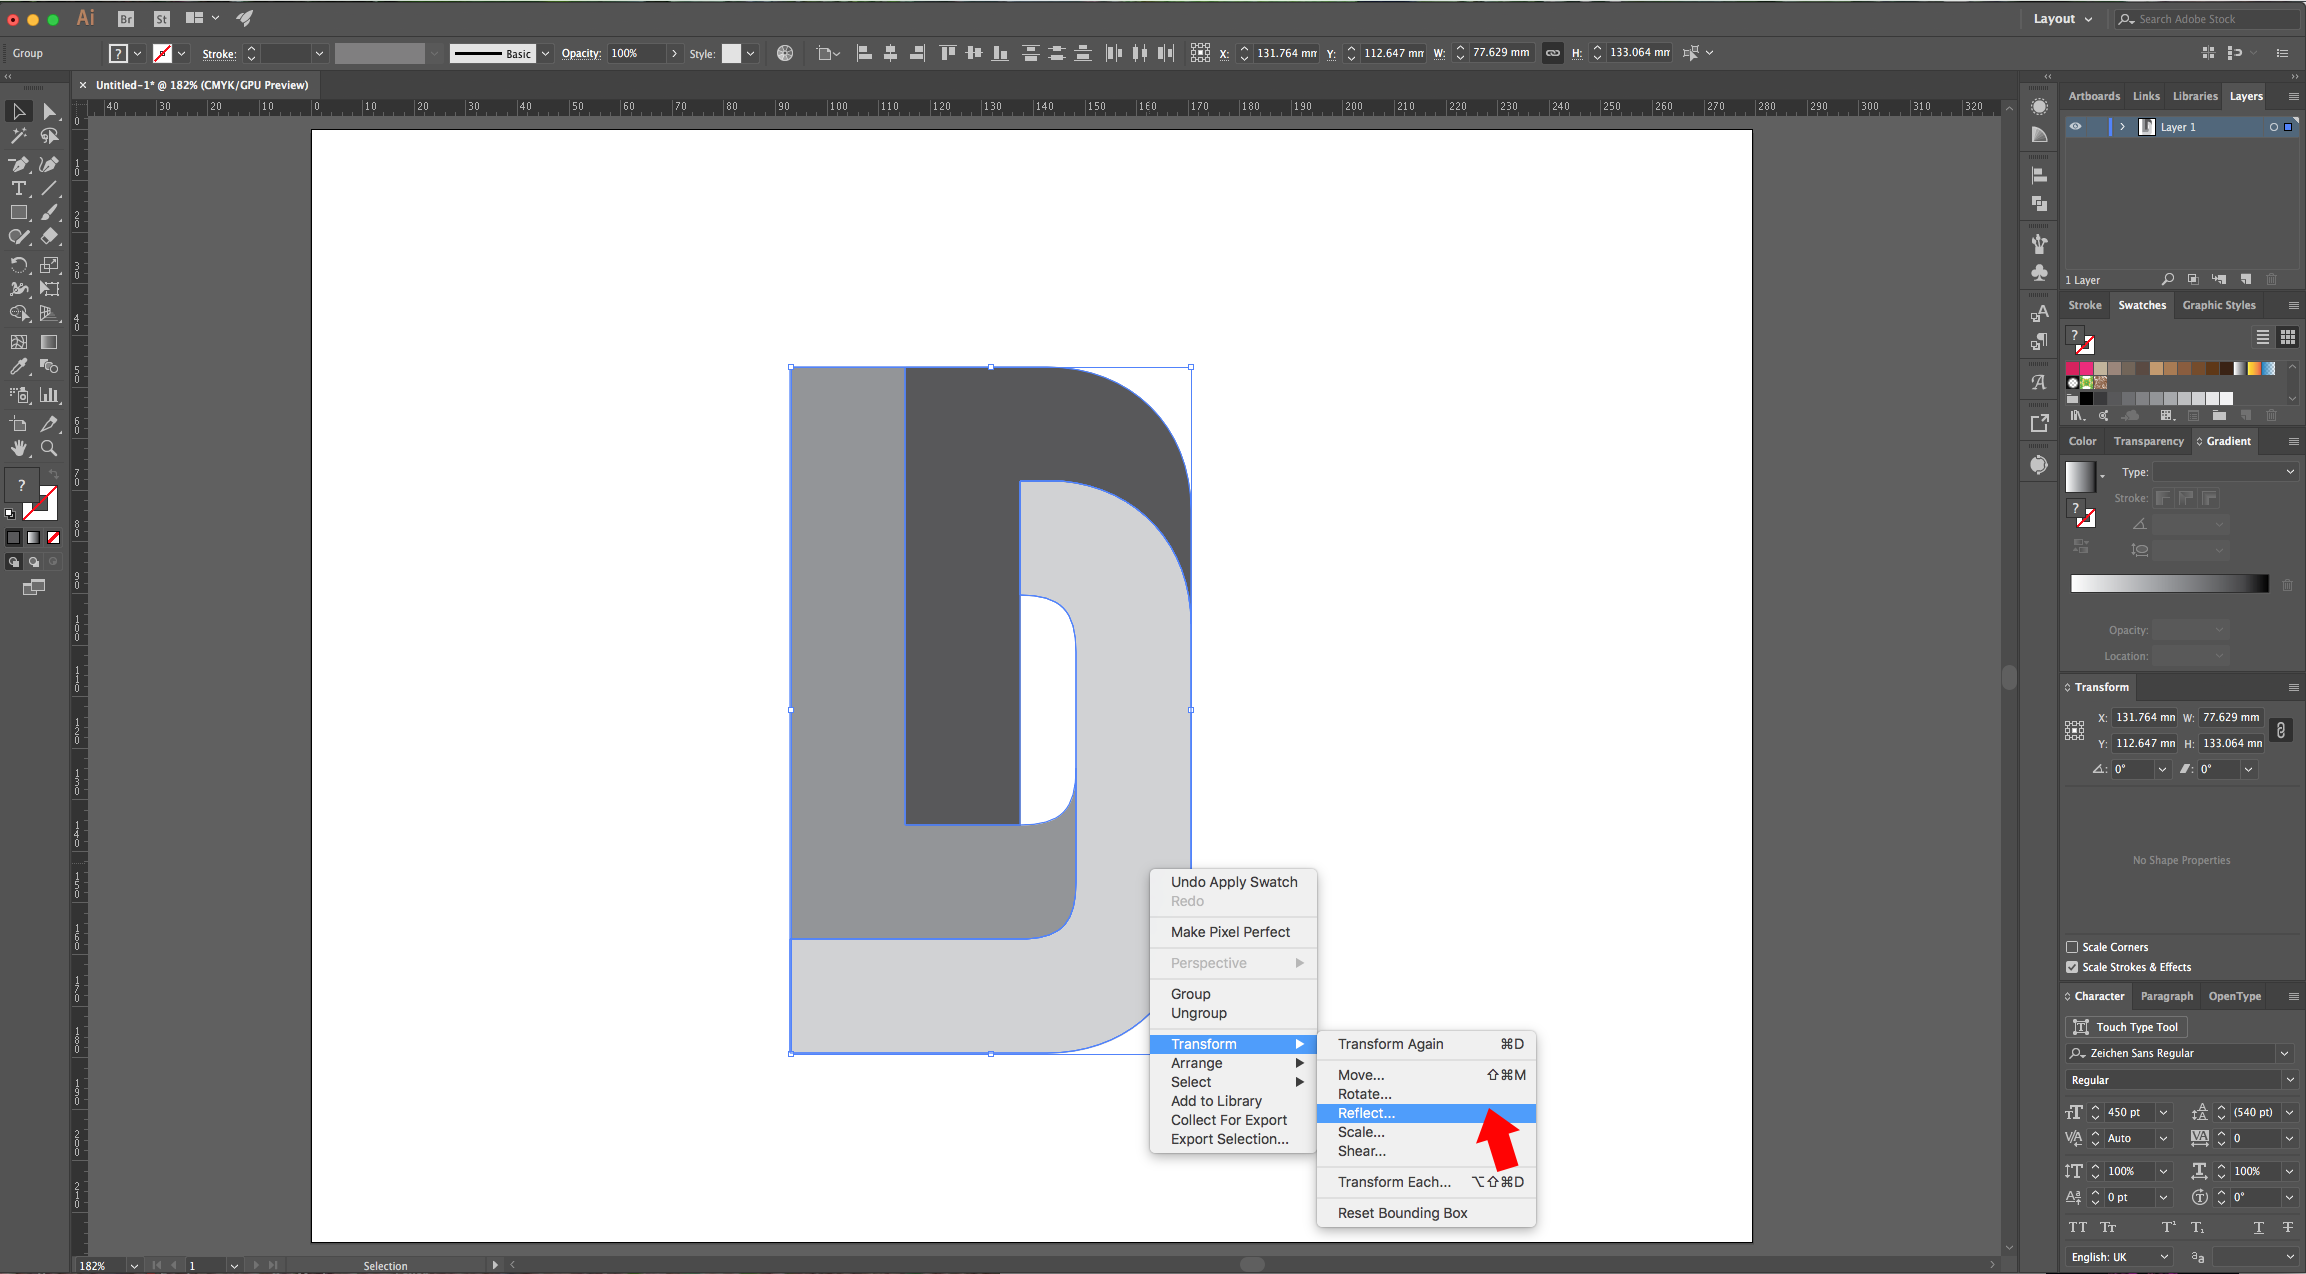
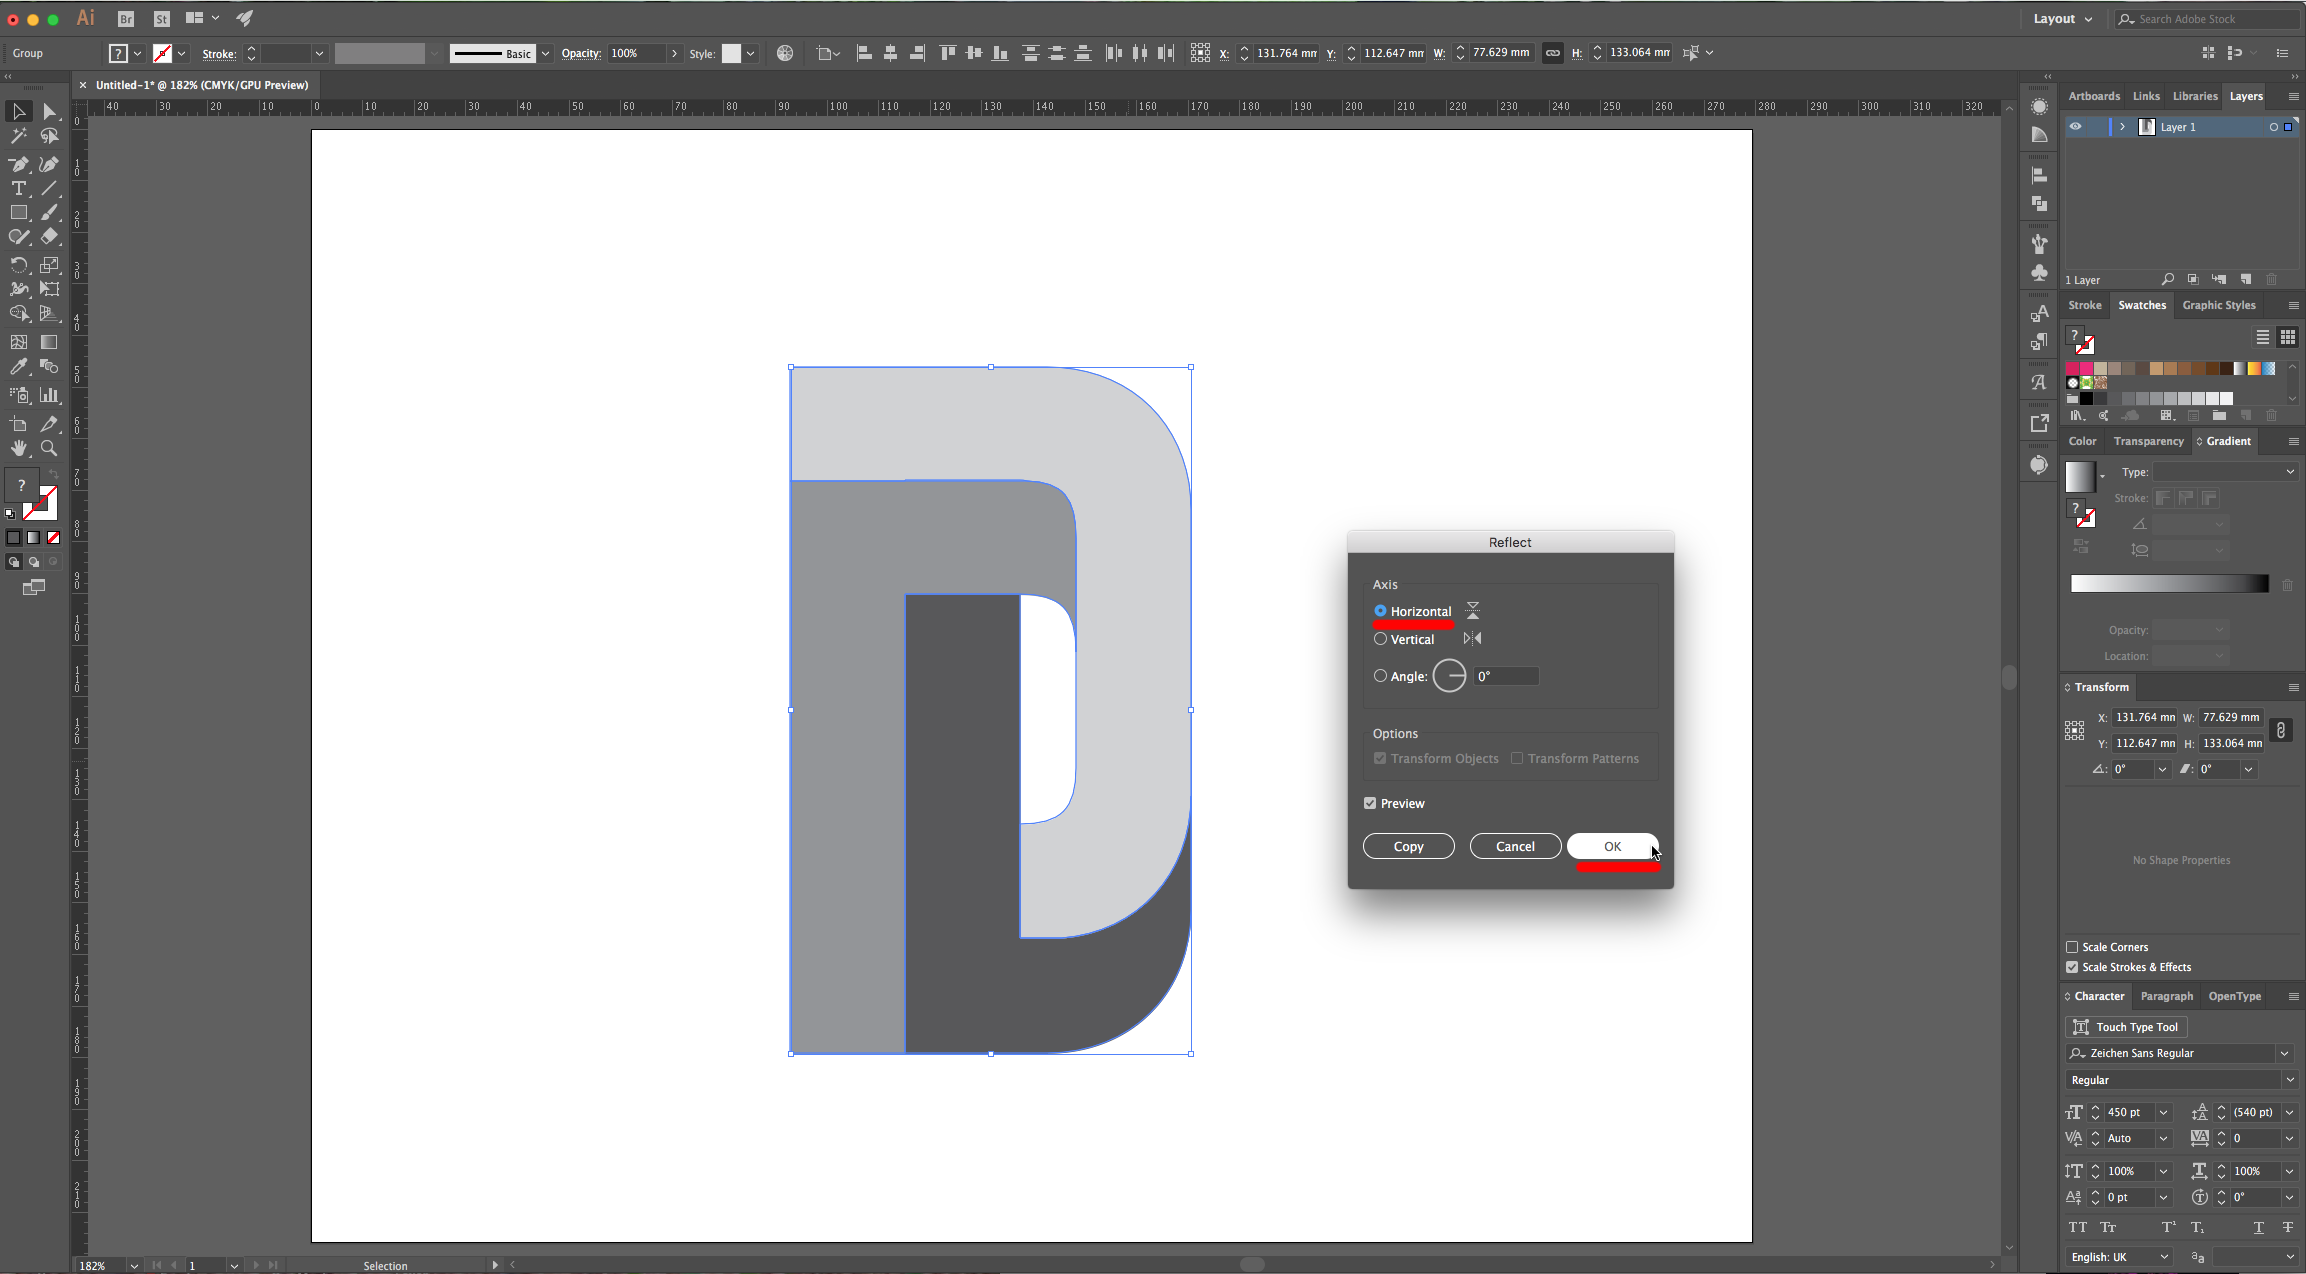
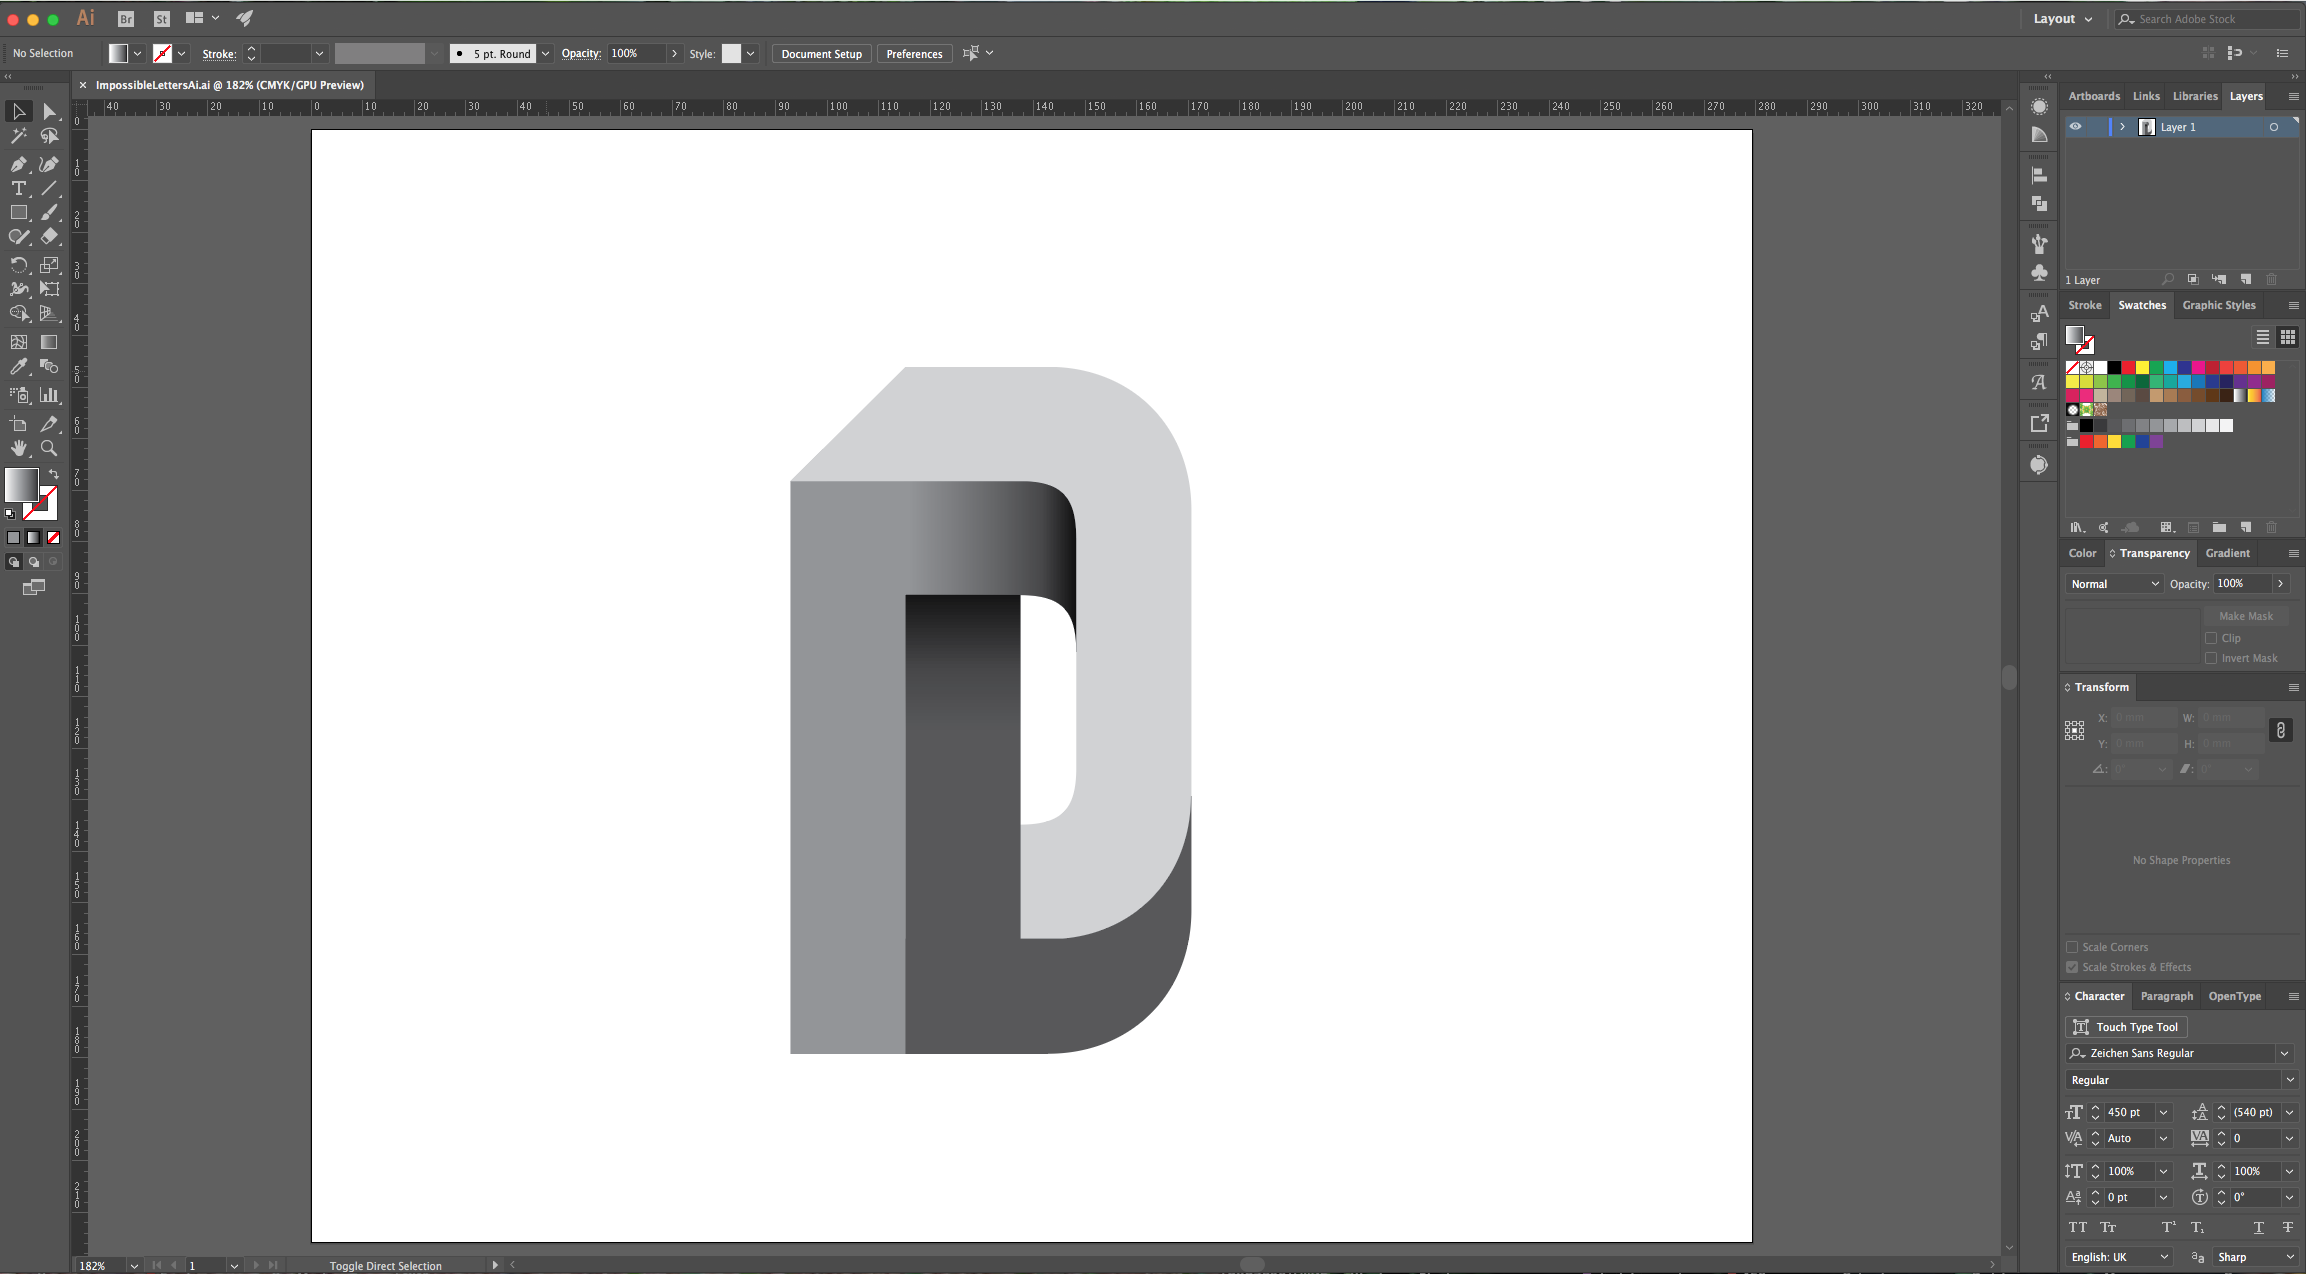
6 - Change the “Fill” color of the curved shape to a lighter shade of gray and the one of the inverted “L” to a darker shade. Select all, right-click on top of them, choose Transform > Reflect and click on the “Horizontal” Axis button. Click “OK”.
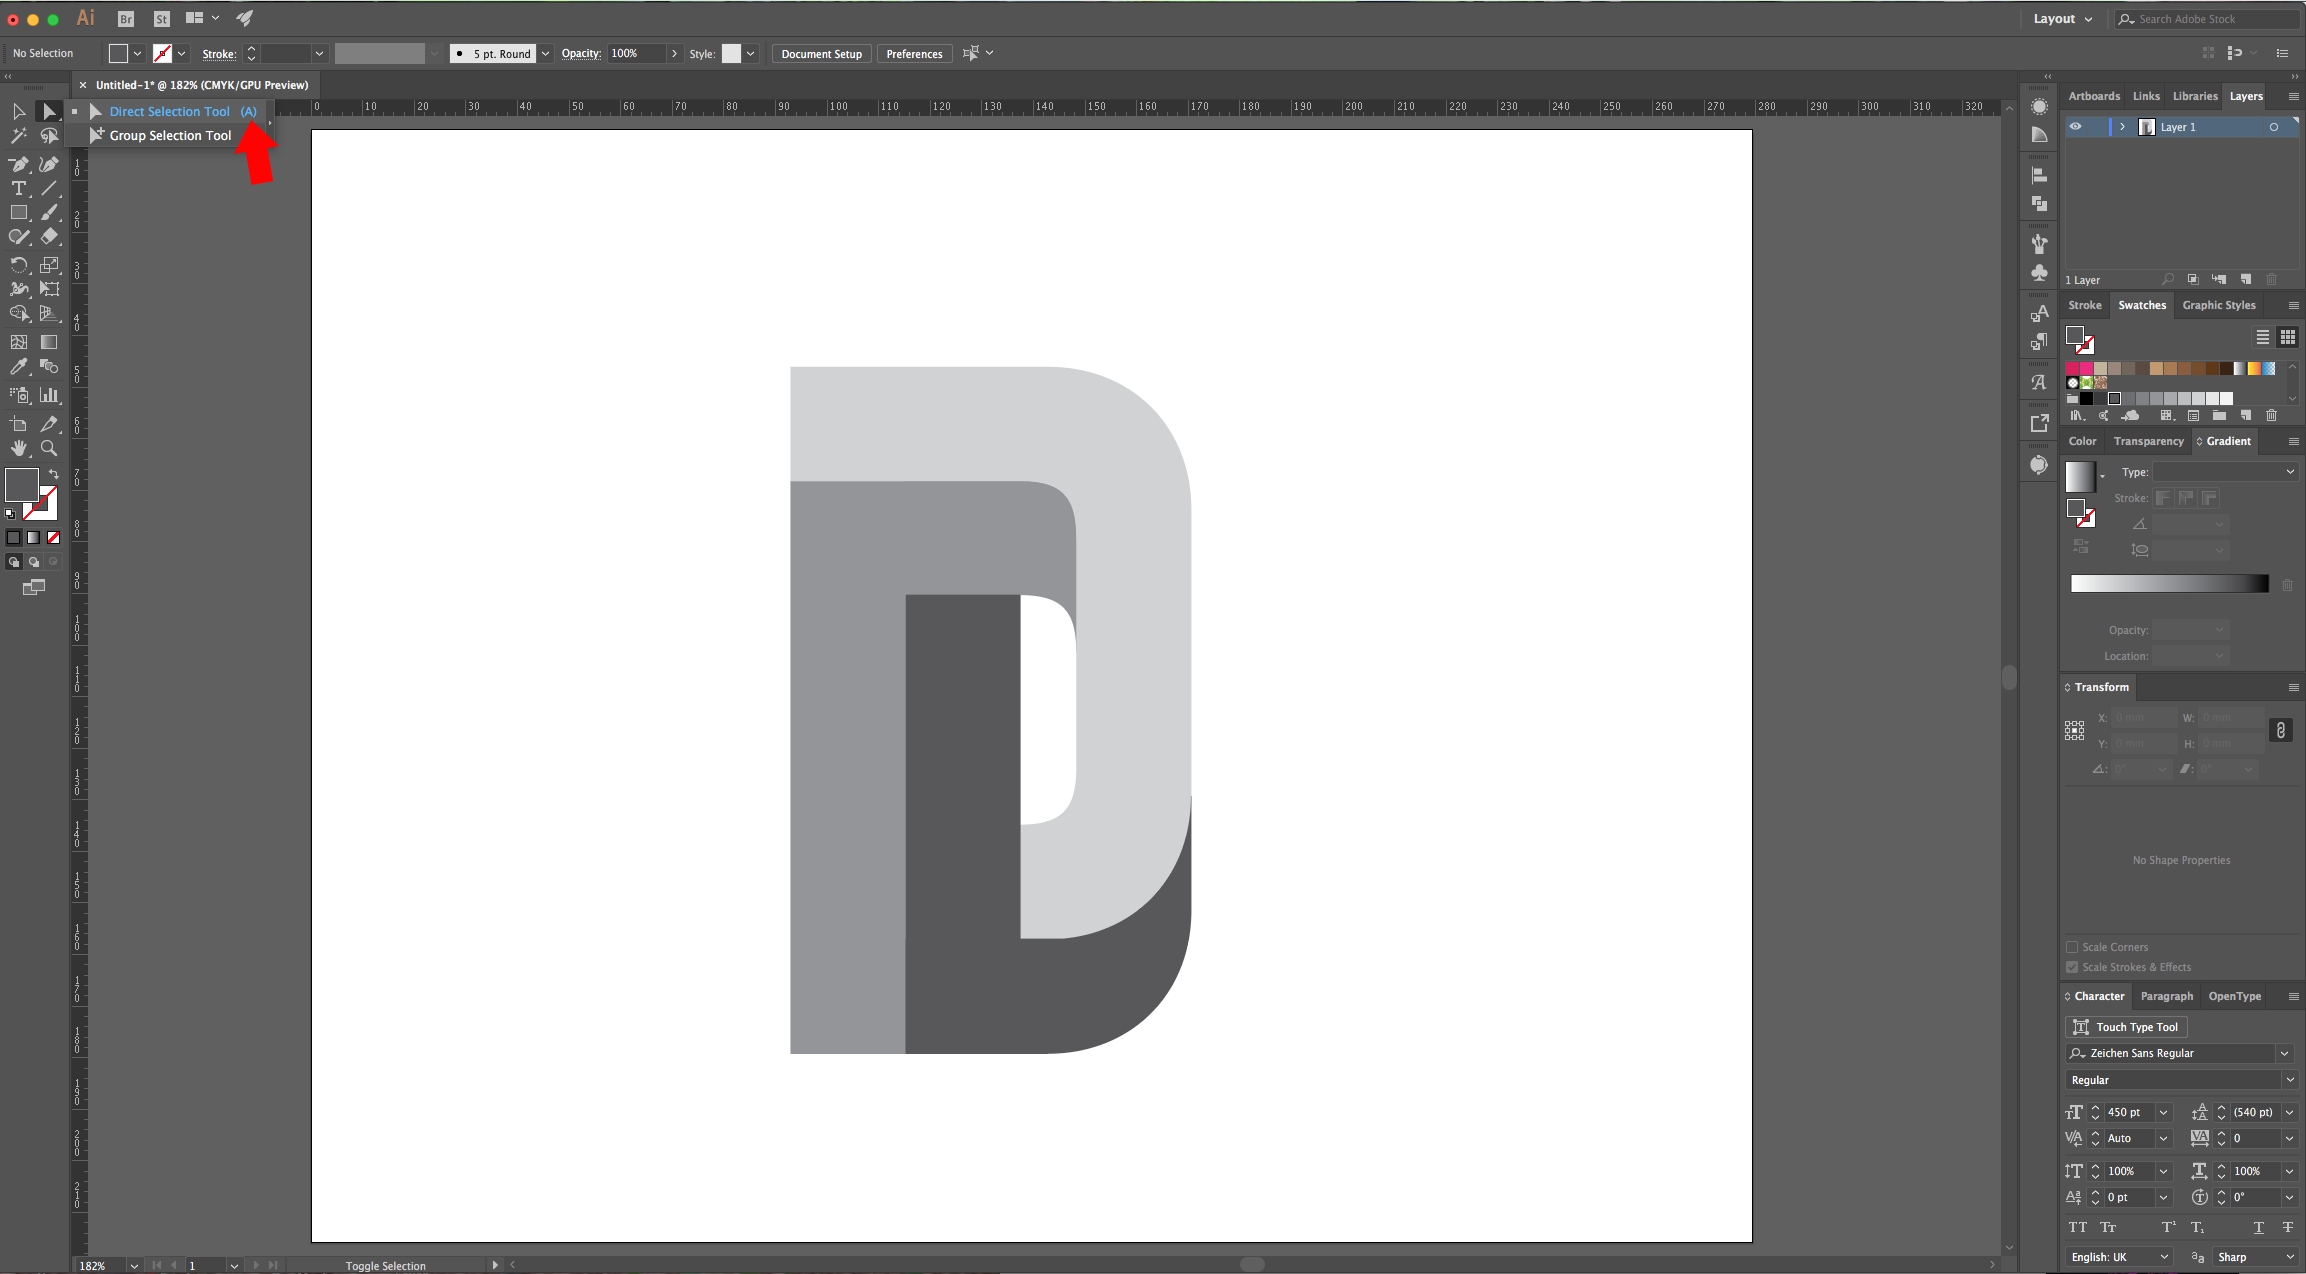
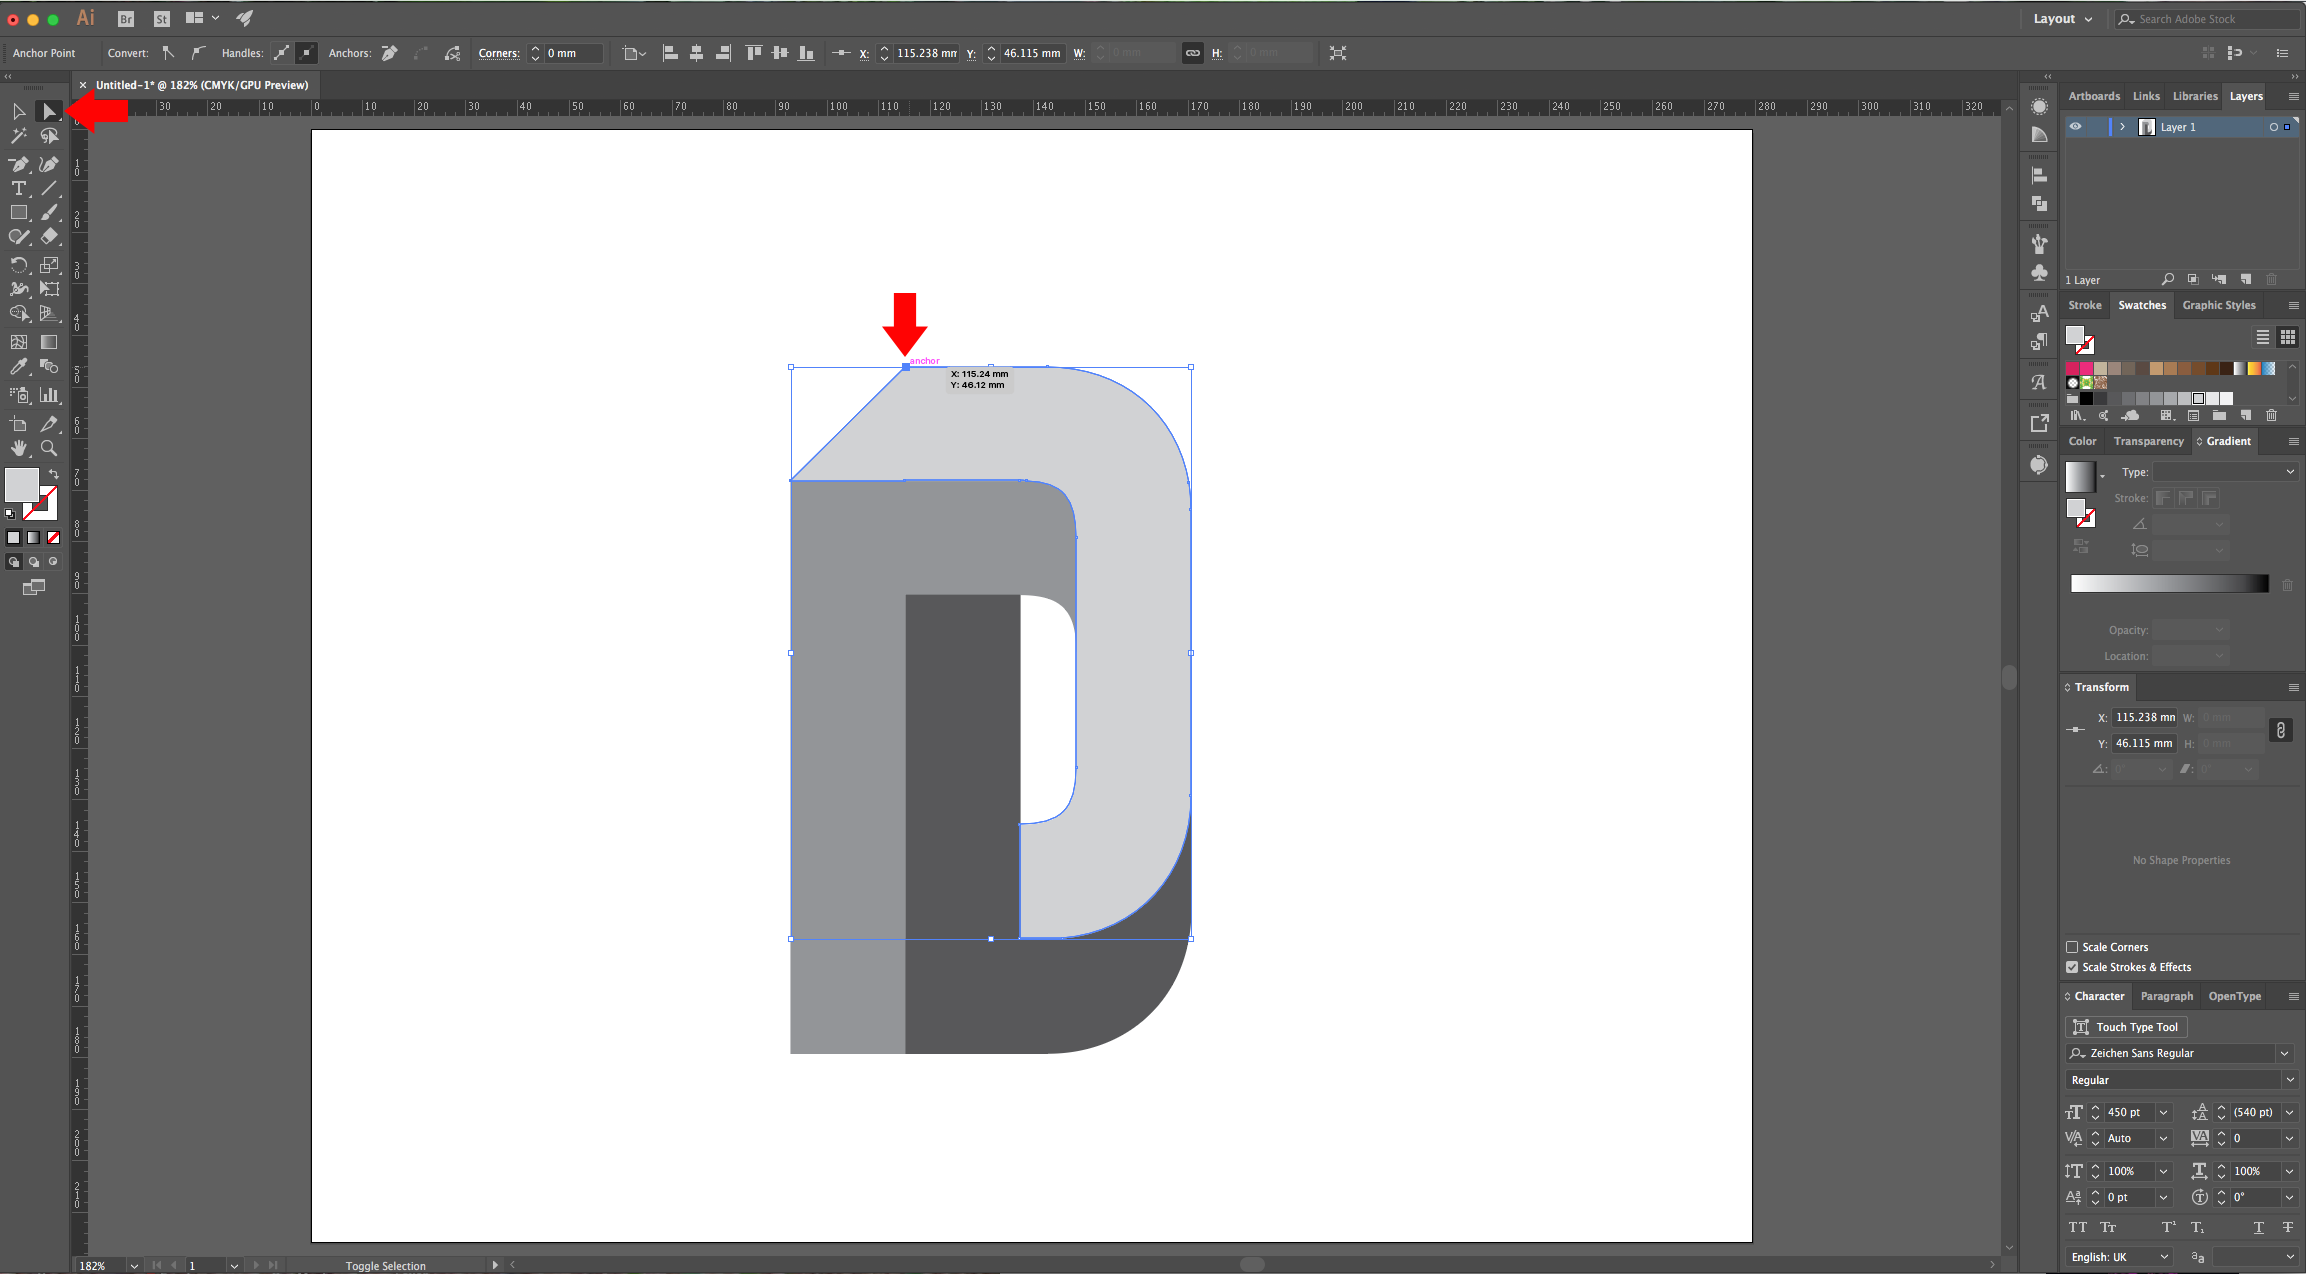
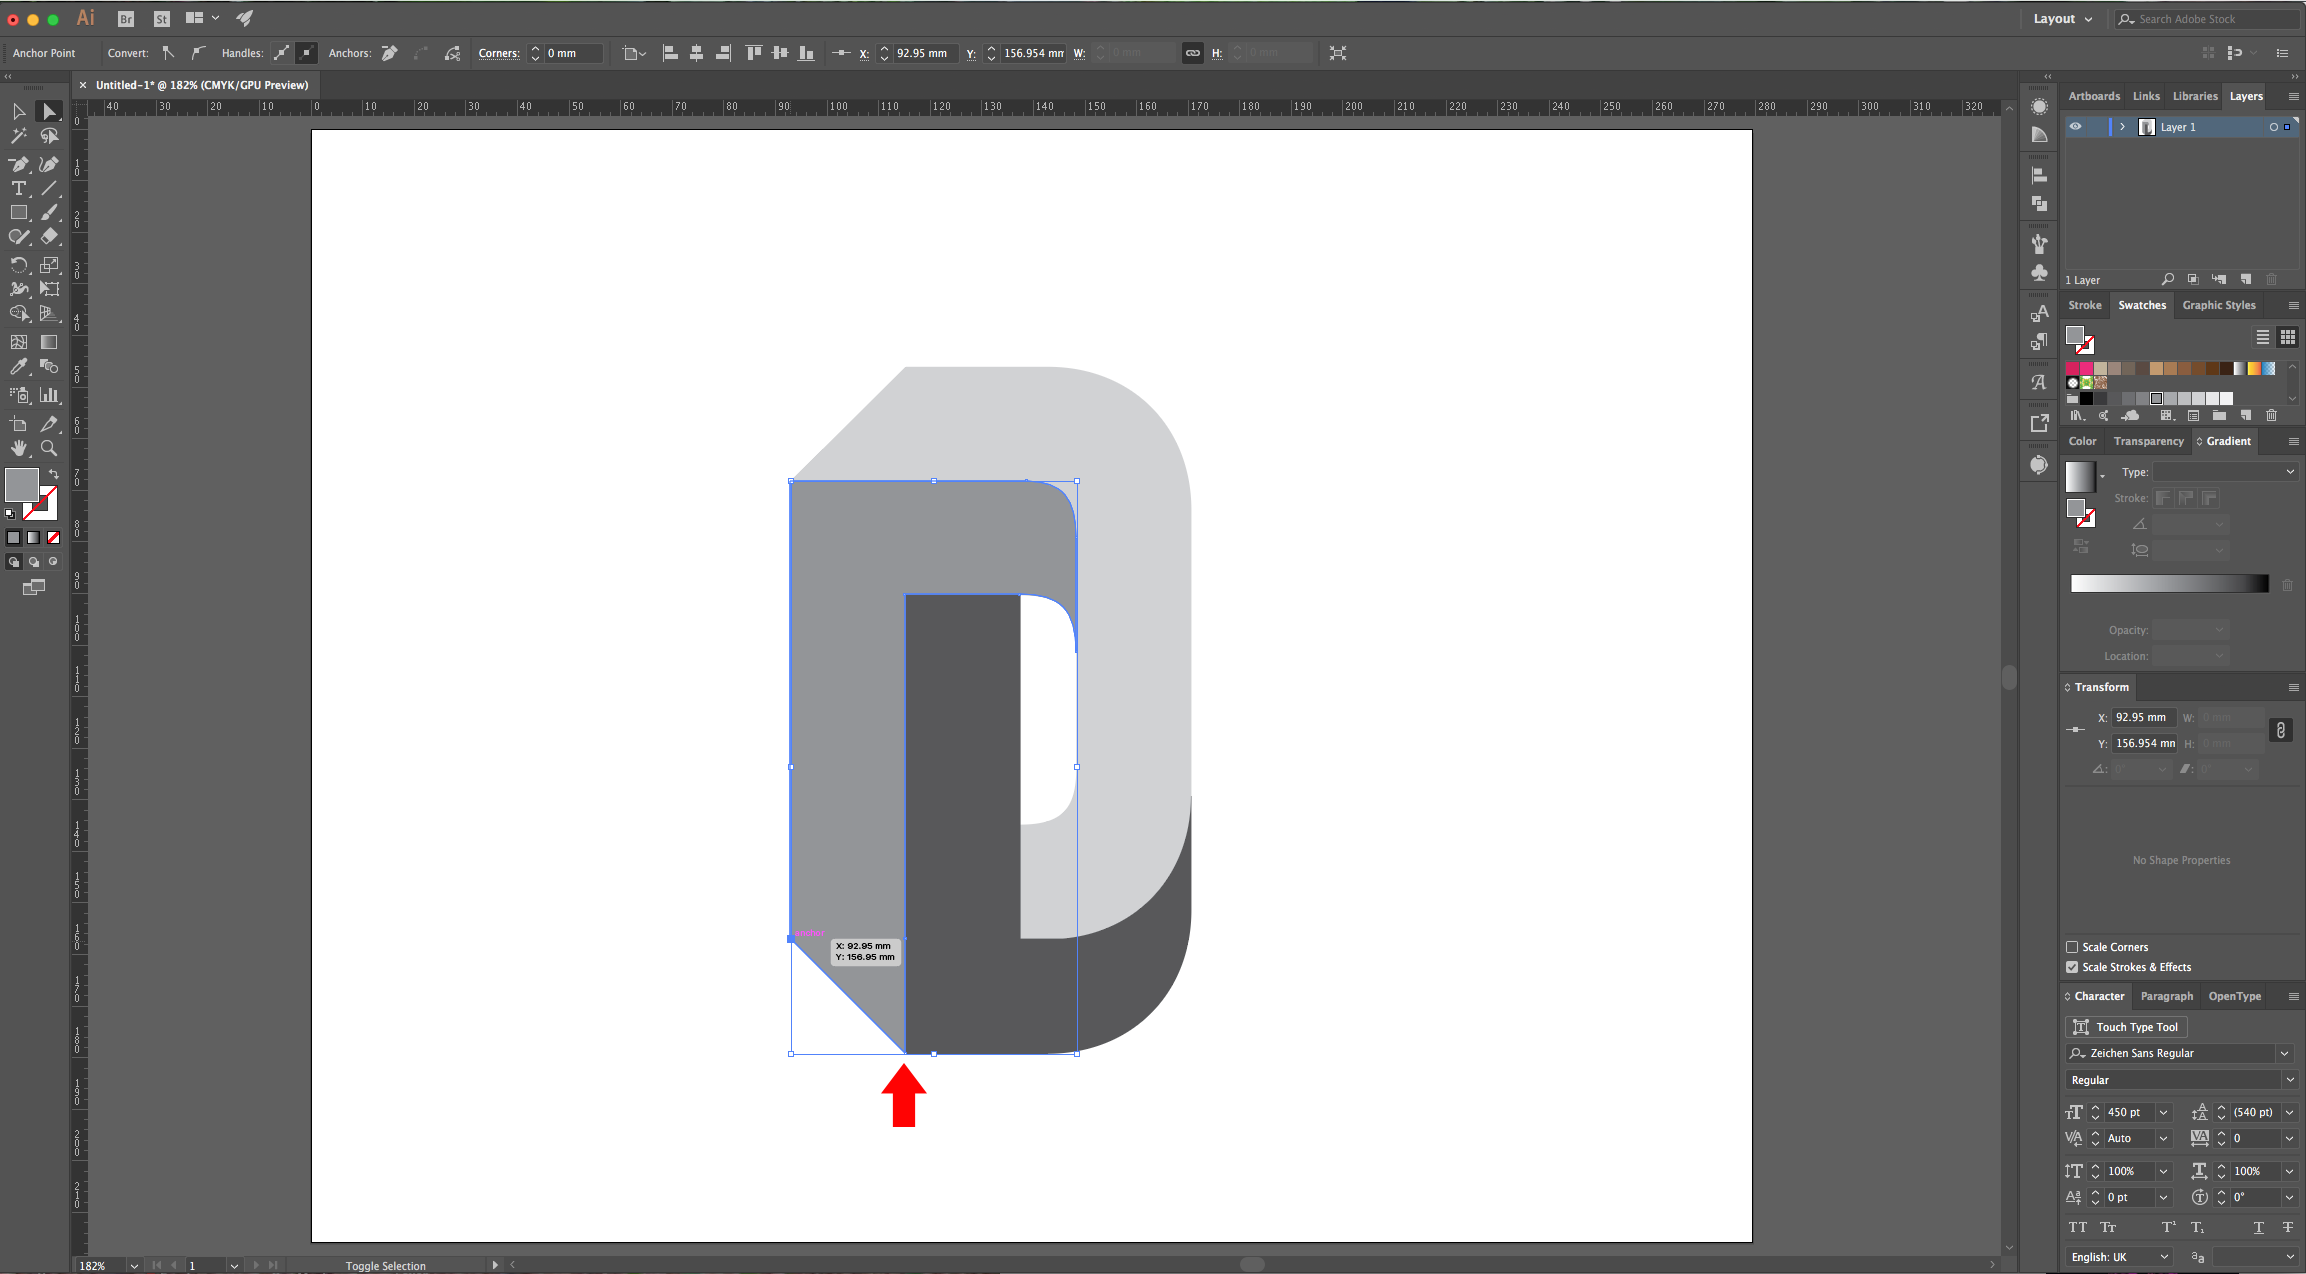
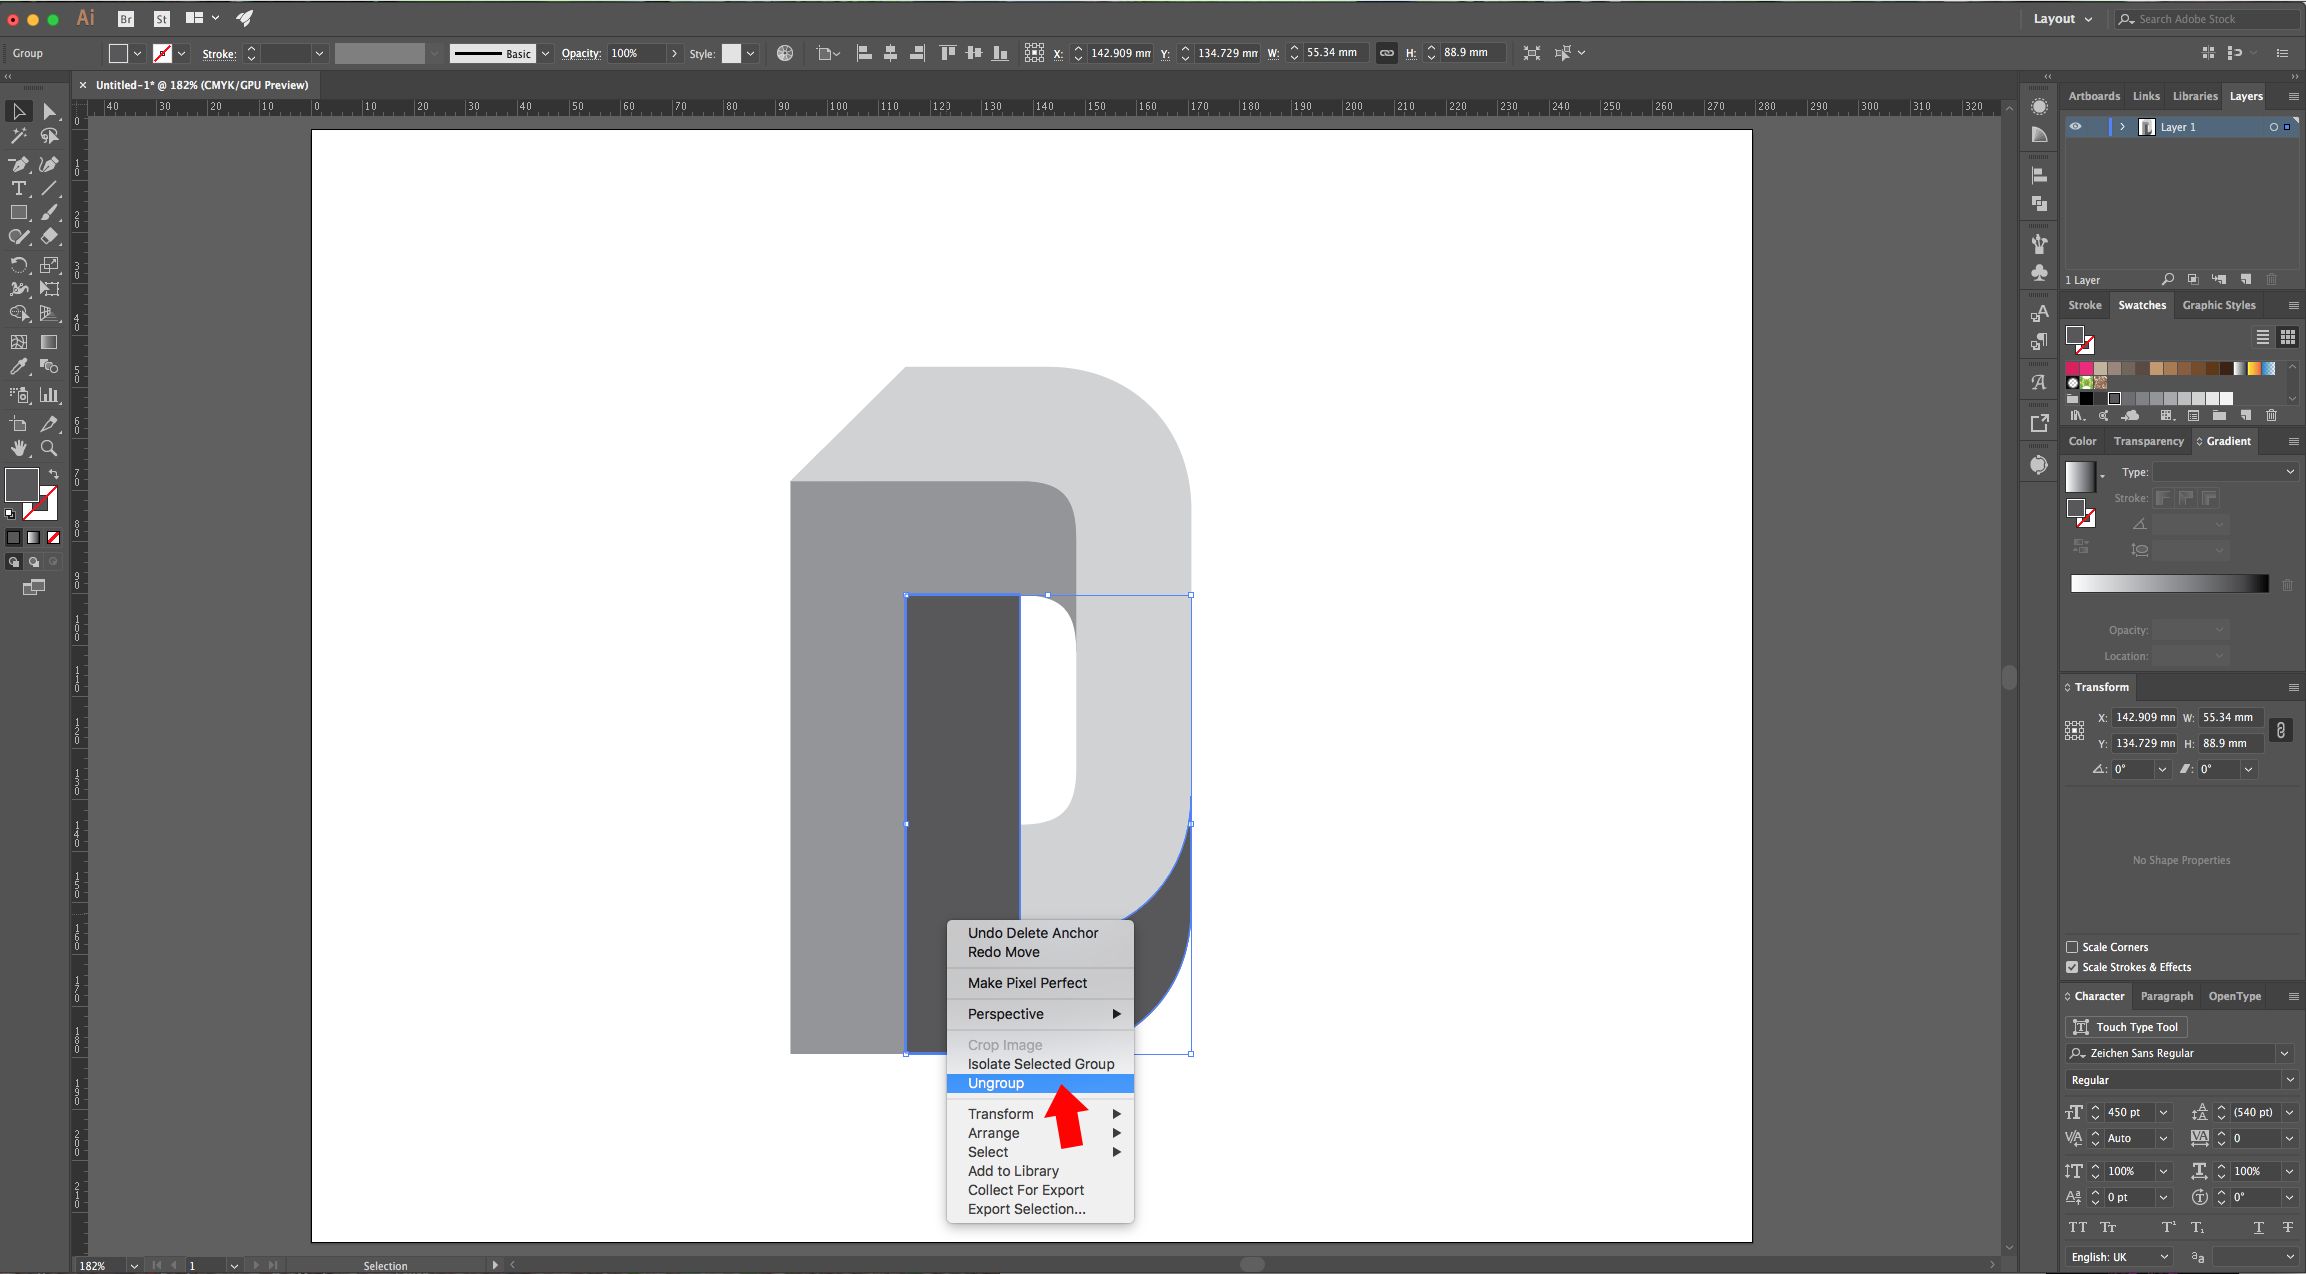
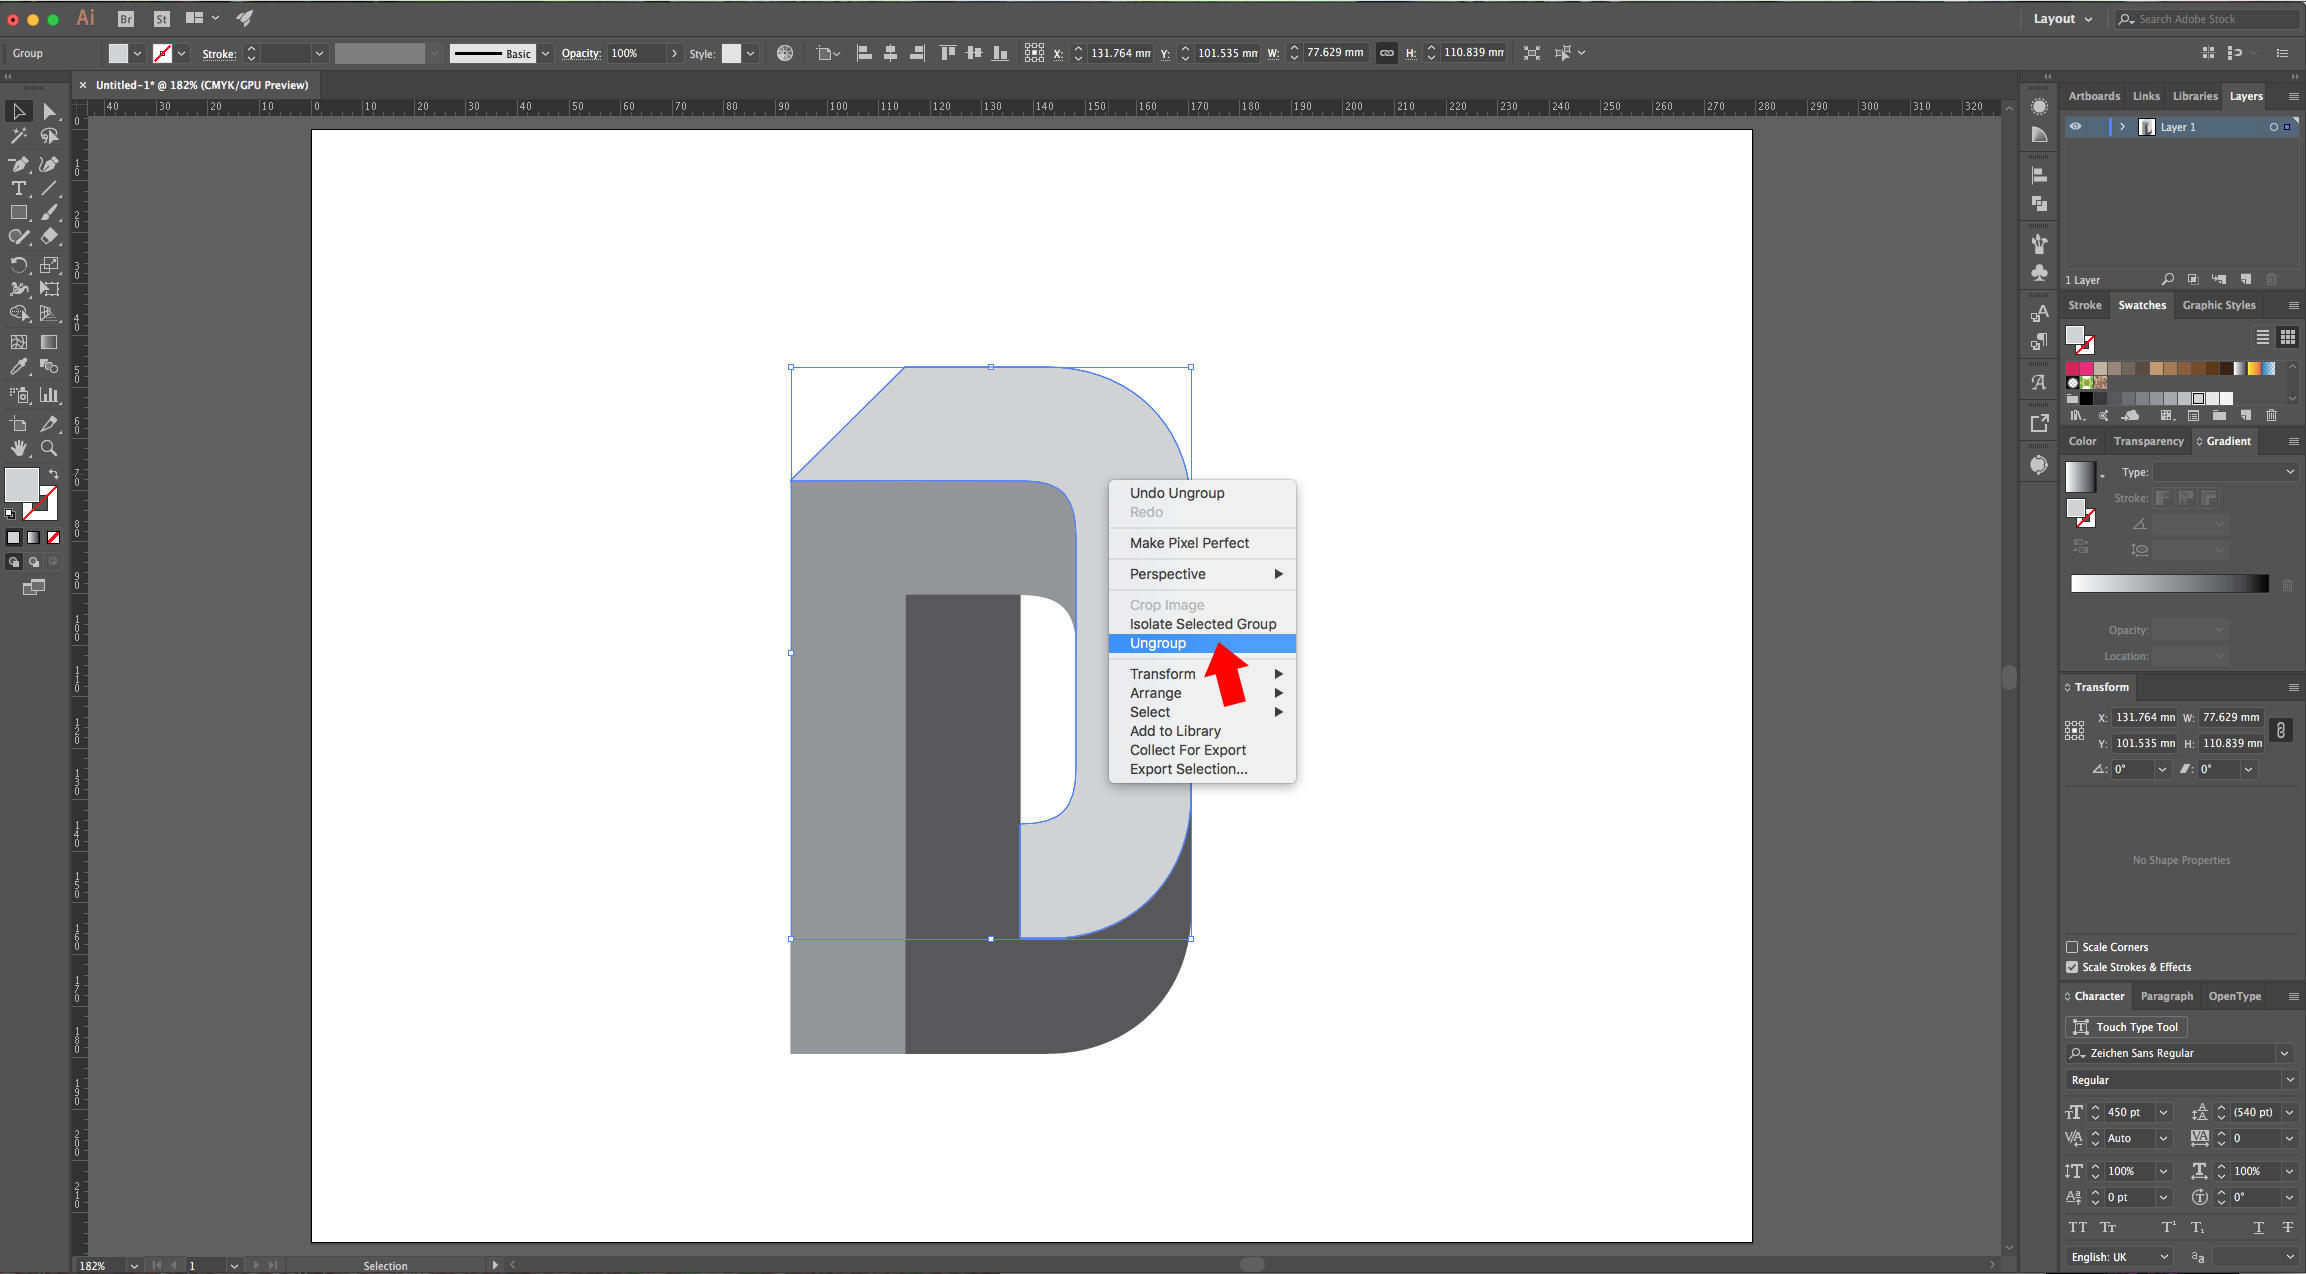
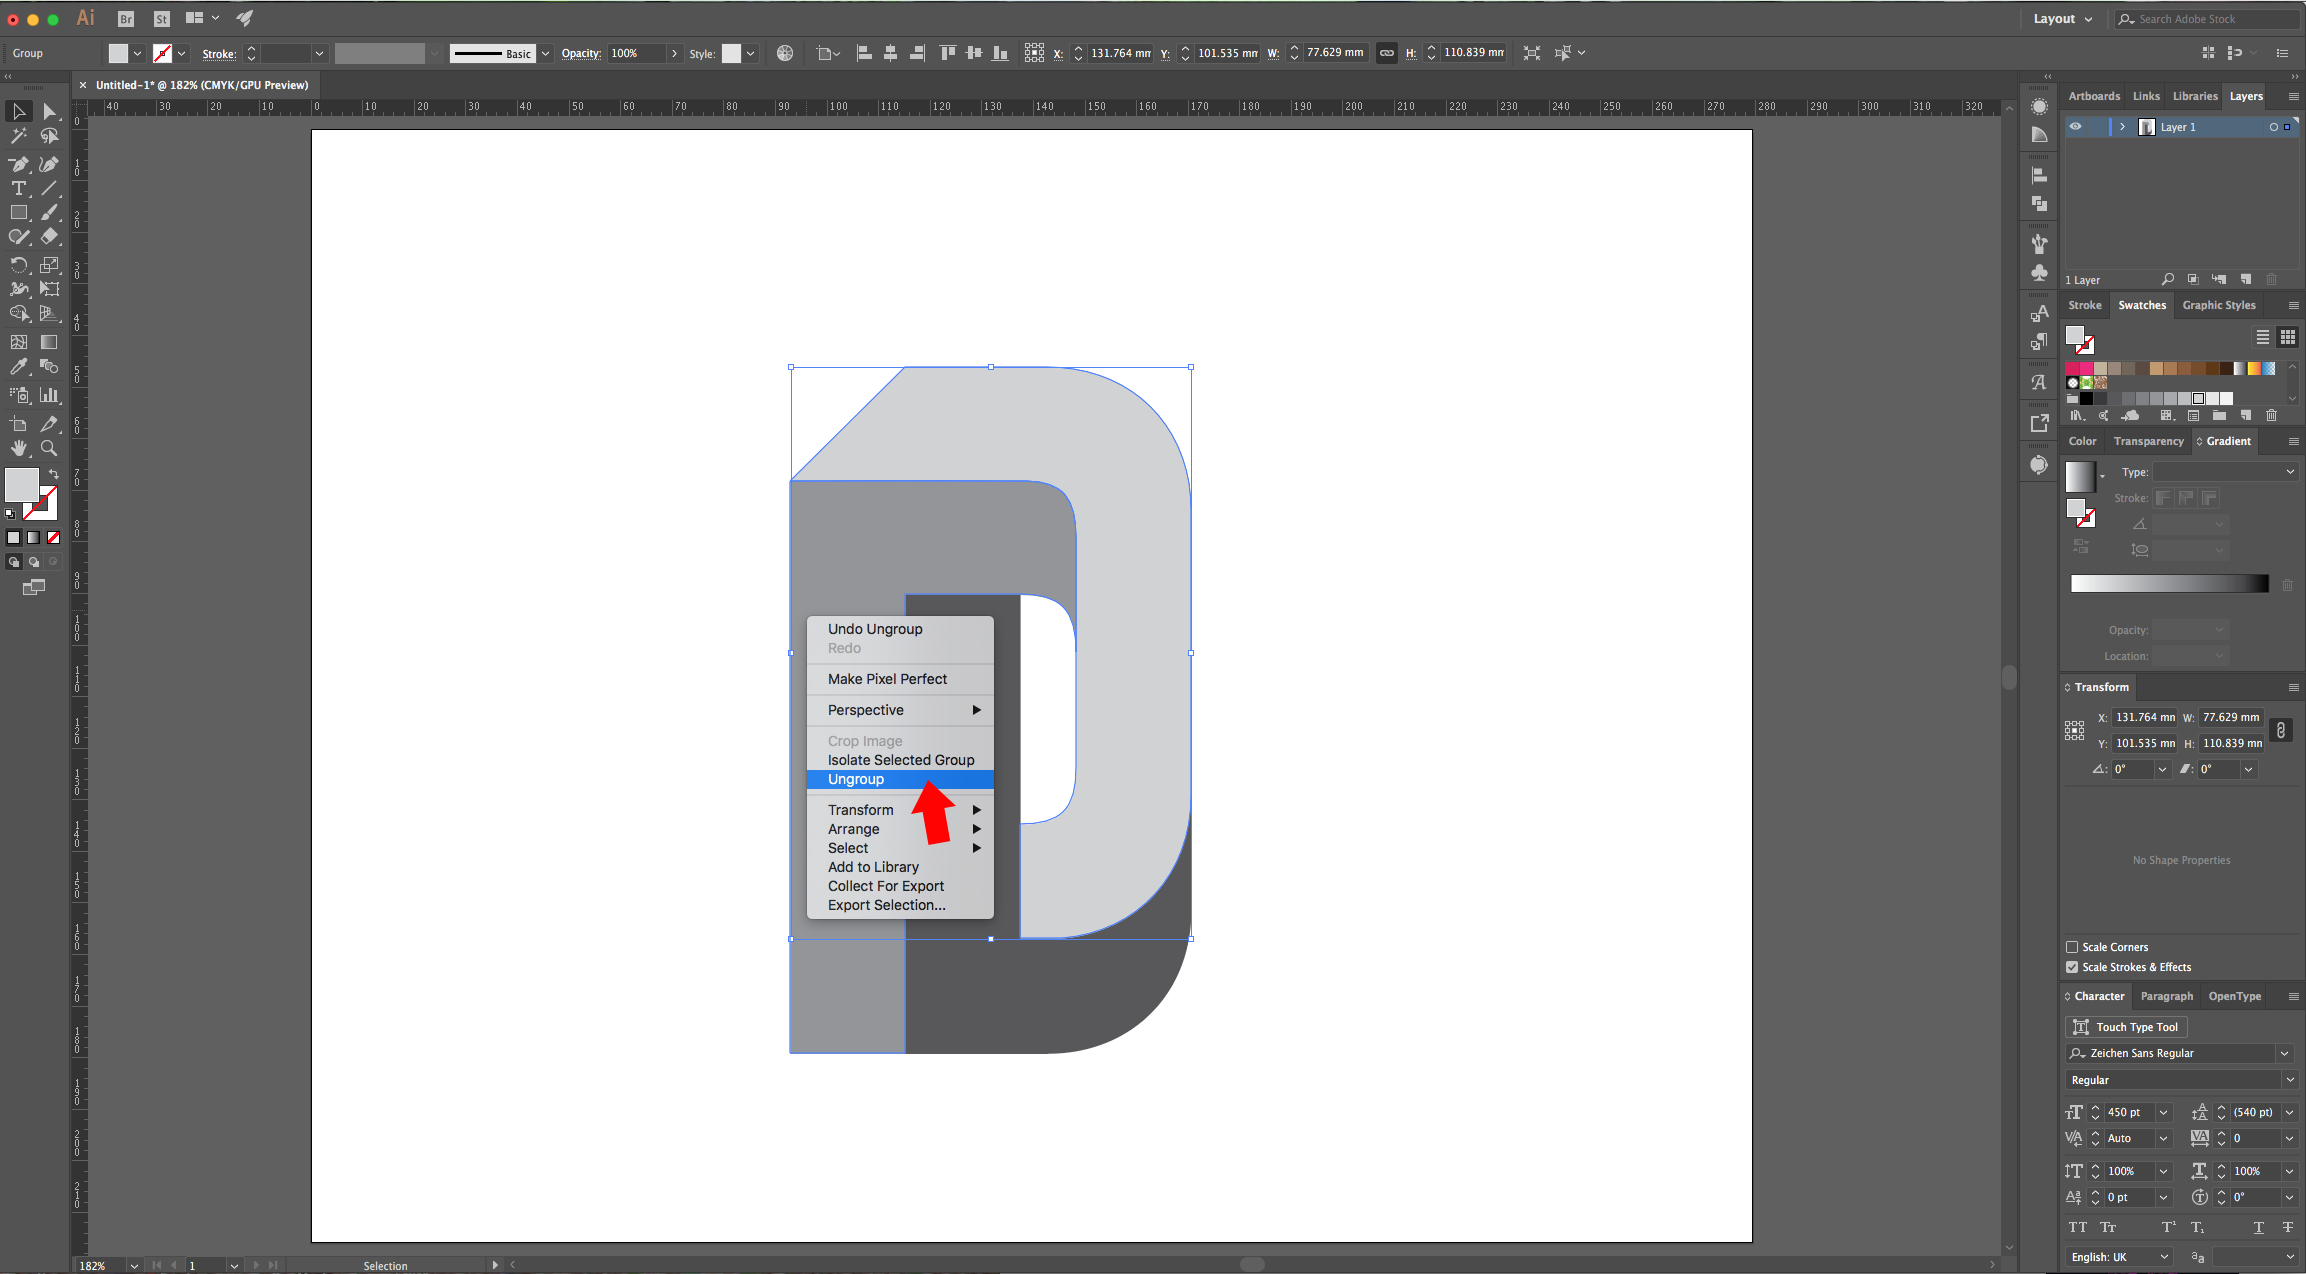
7 - Use the “Direct Selection Tool” (A) to select the Top-left “Anchor point” and while holding the “Shift” key move it to the right until you reach approximately the same spot where the inner part of the path is (“Smart Guides” will help locating it). Do the same with the Bottom-left one but drag it upwards. Right-click on top of each Path and choose “Ungroup”.
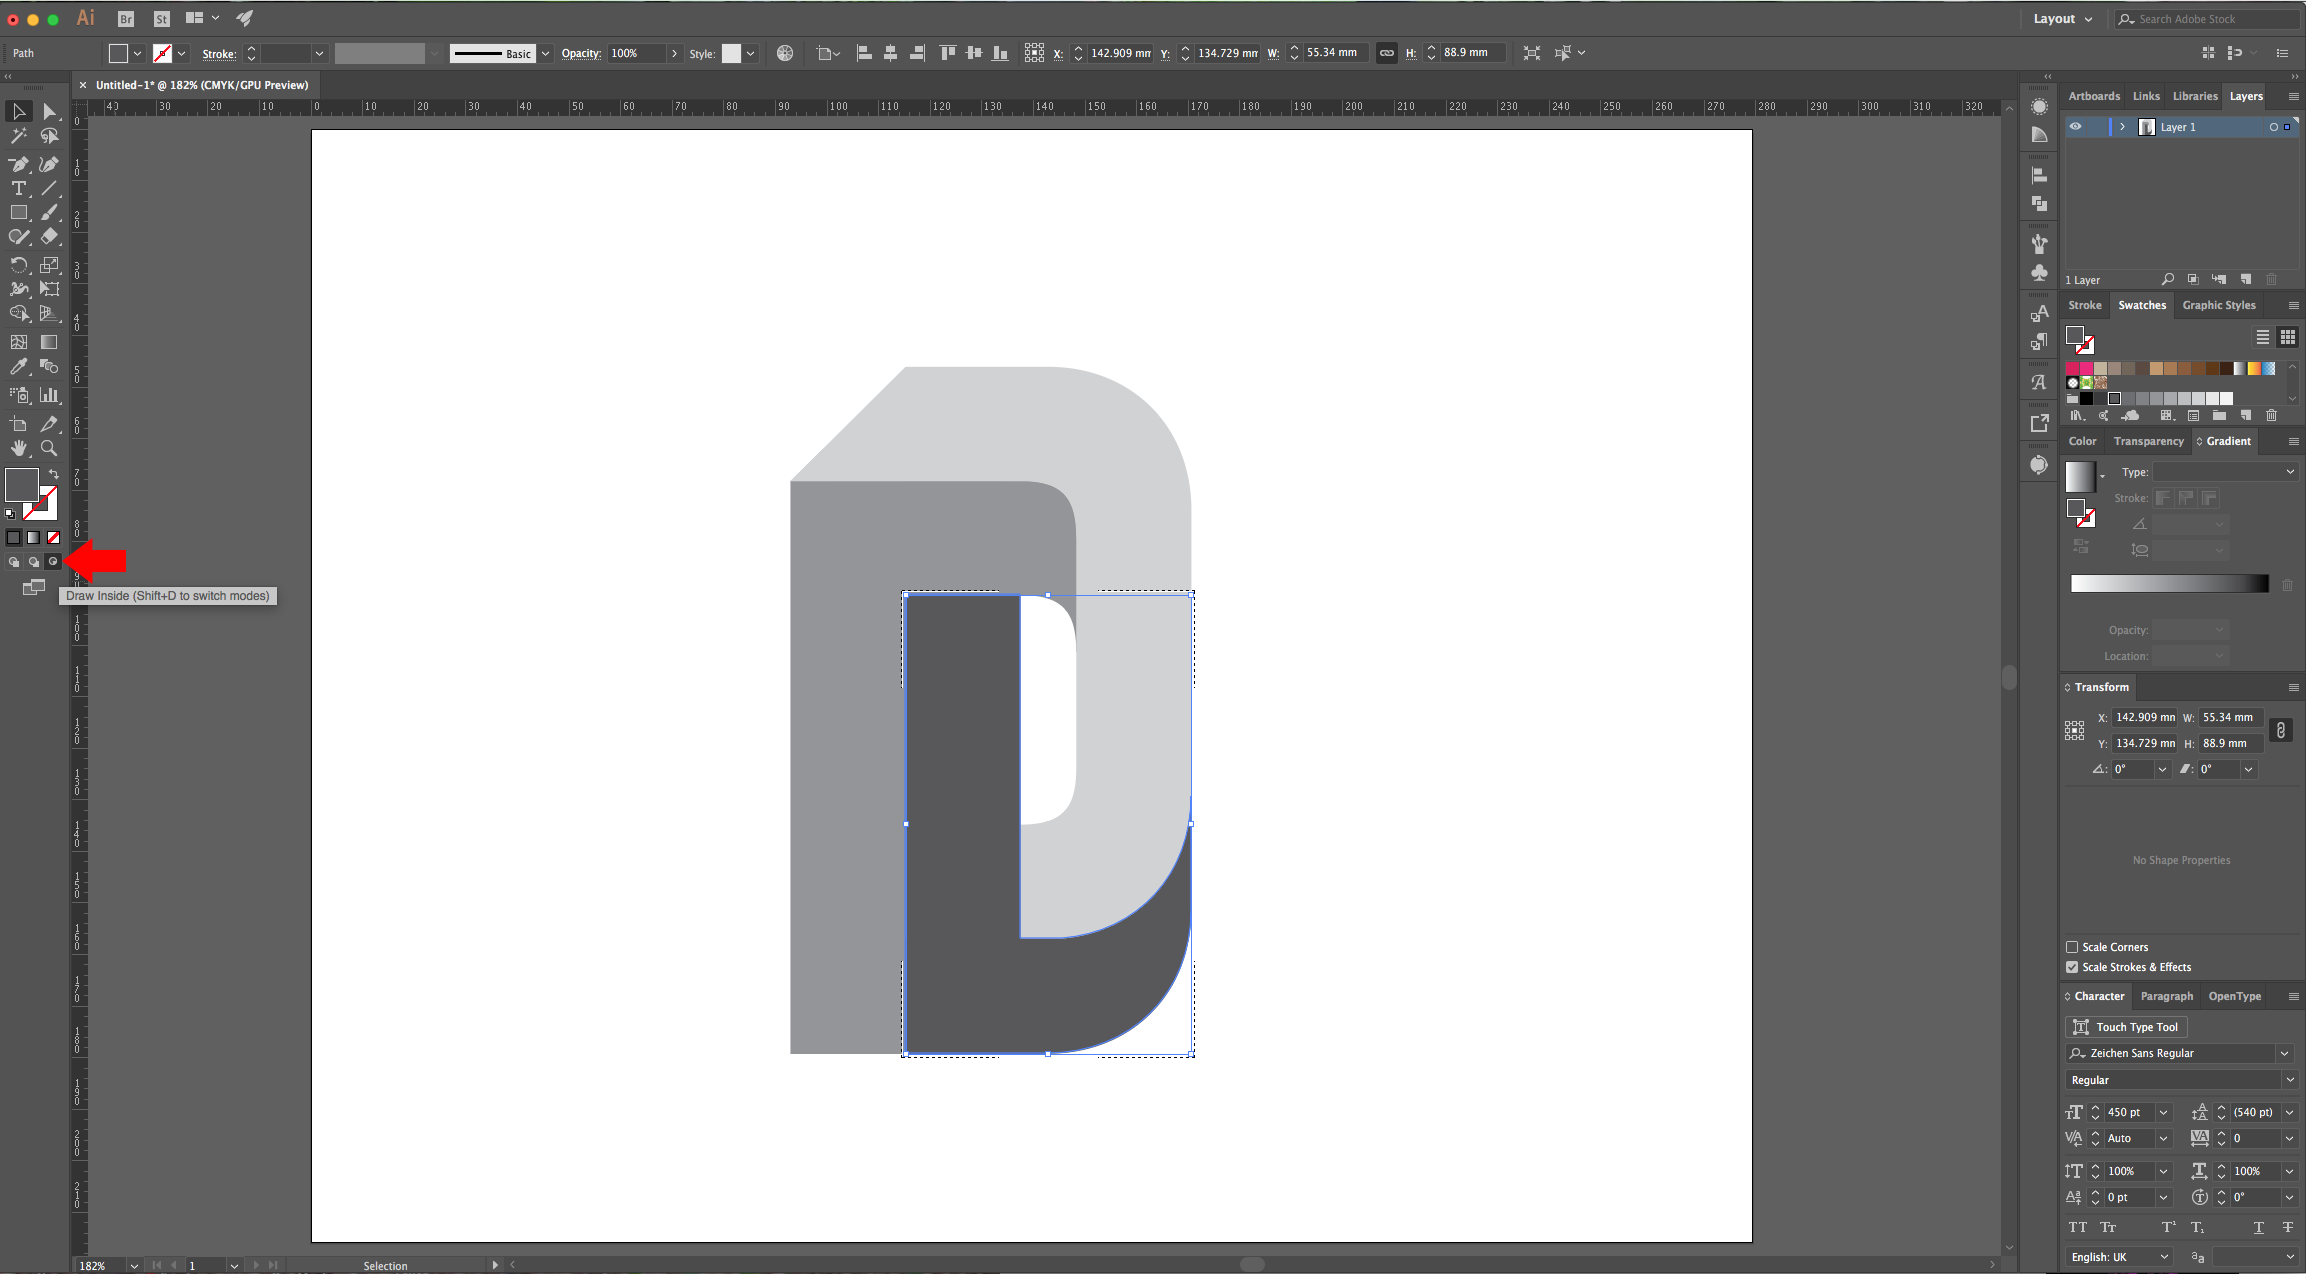
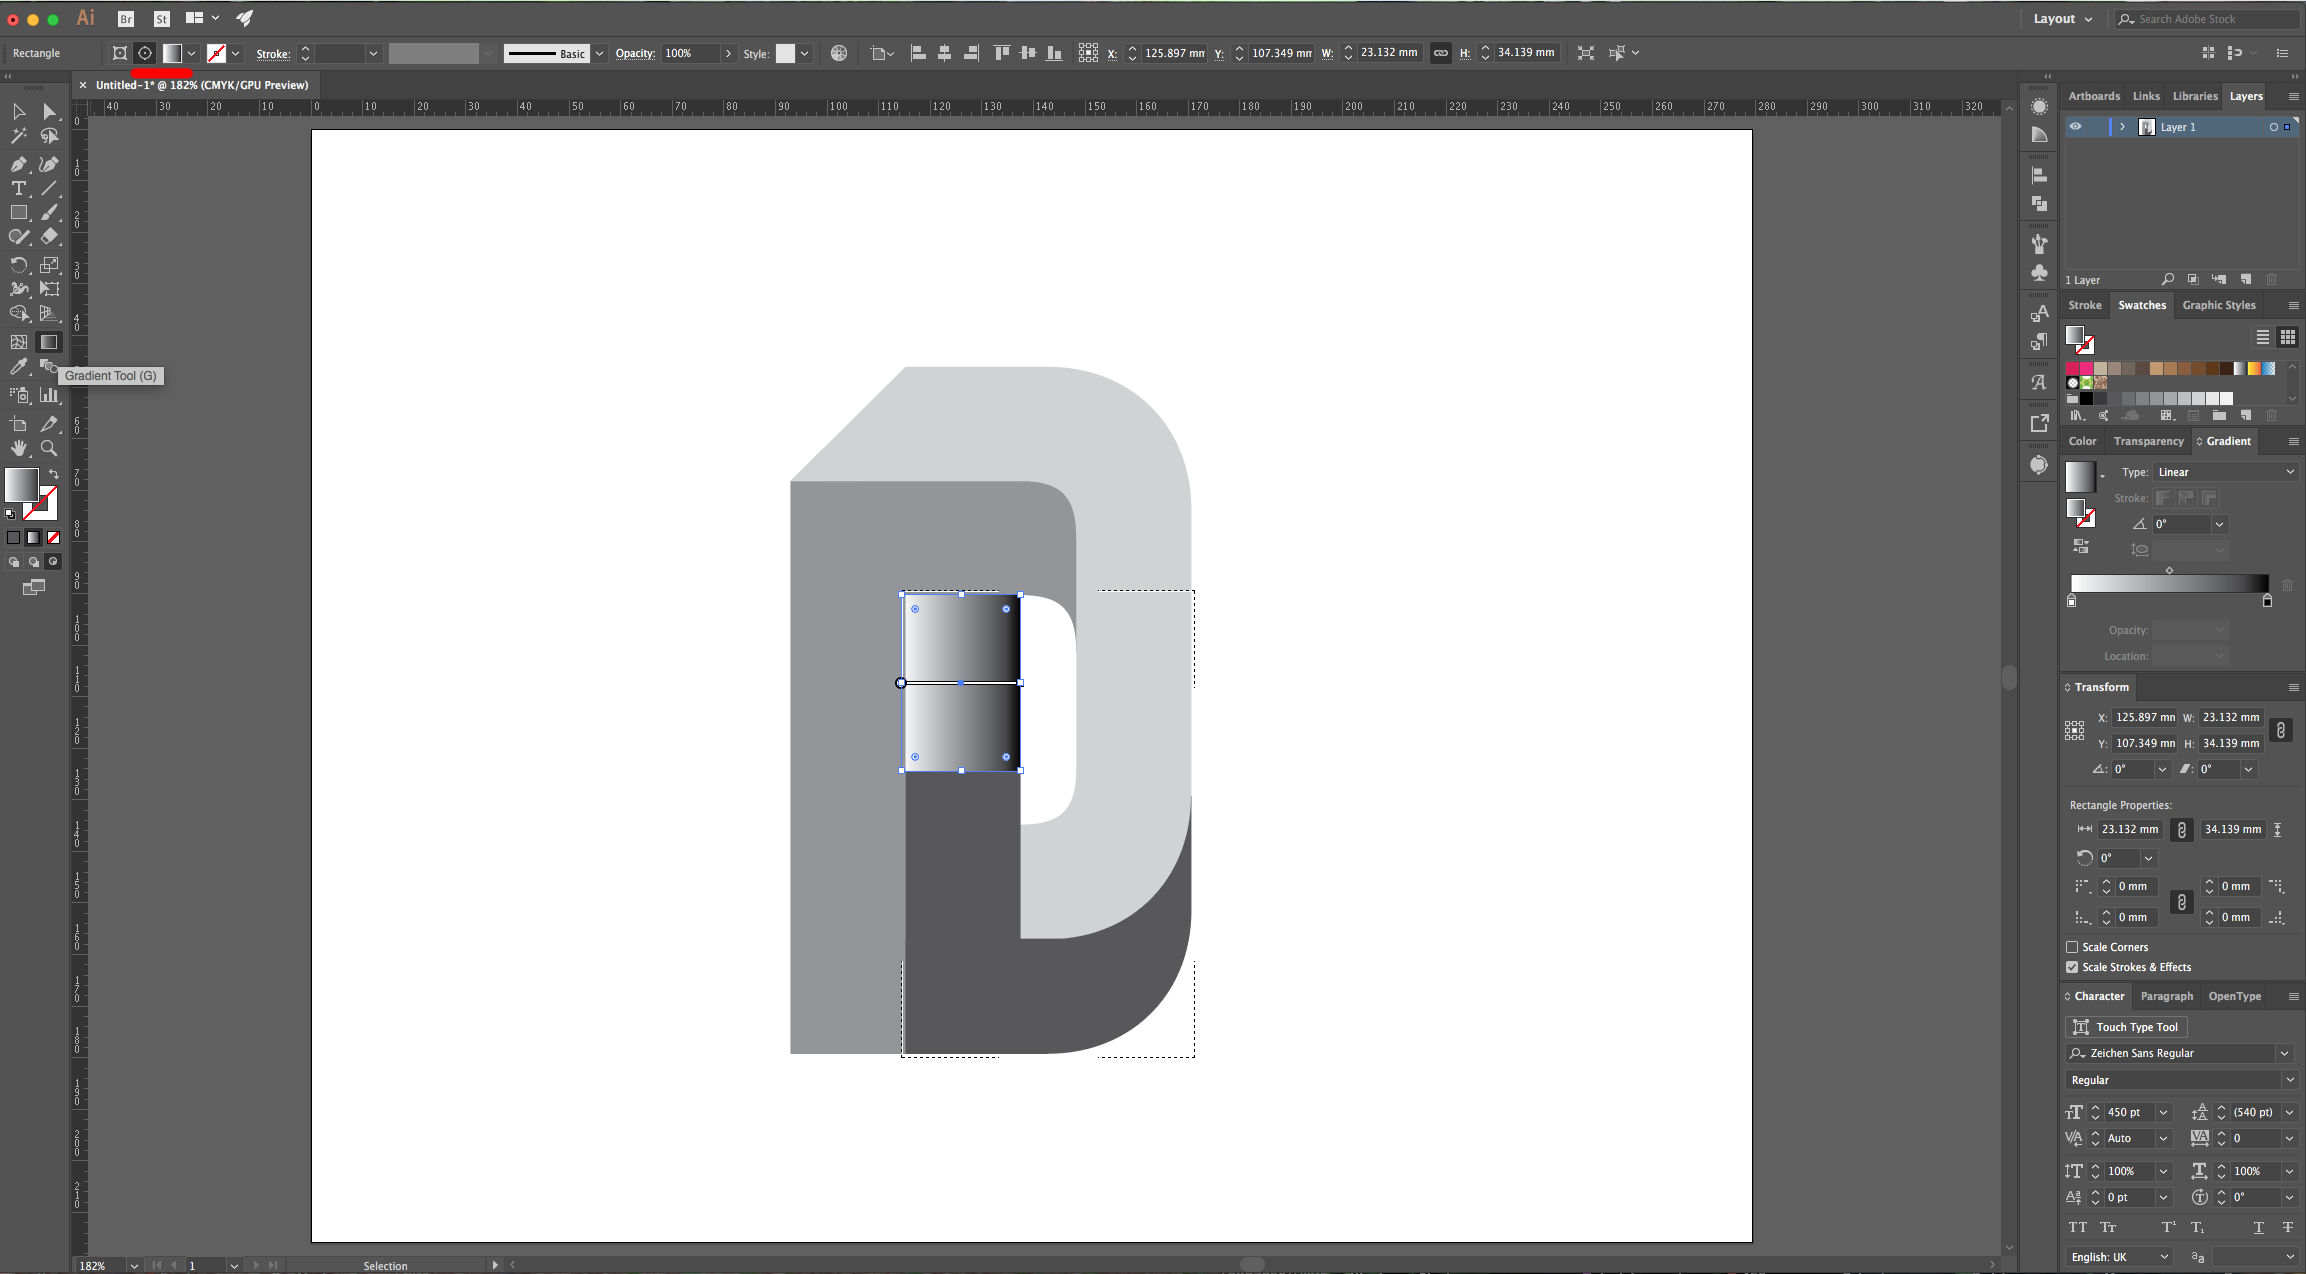
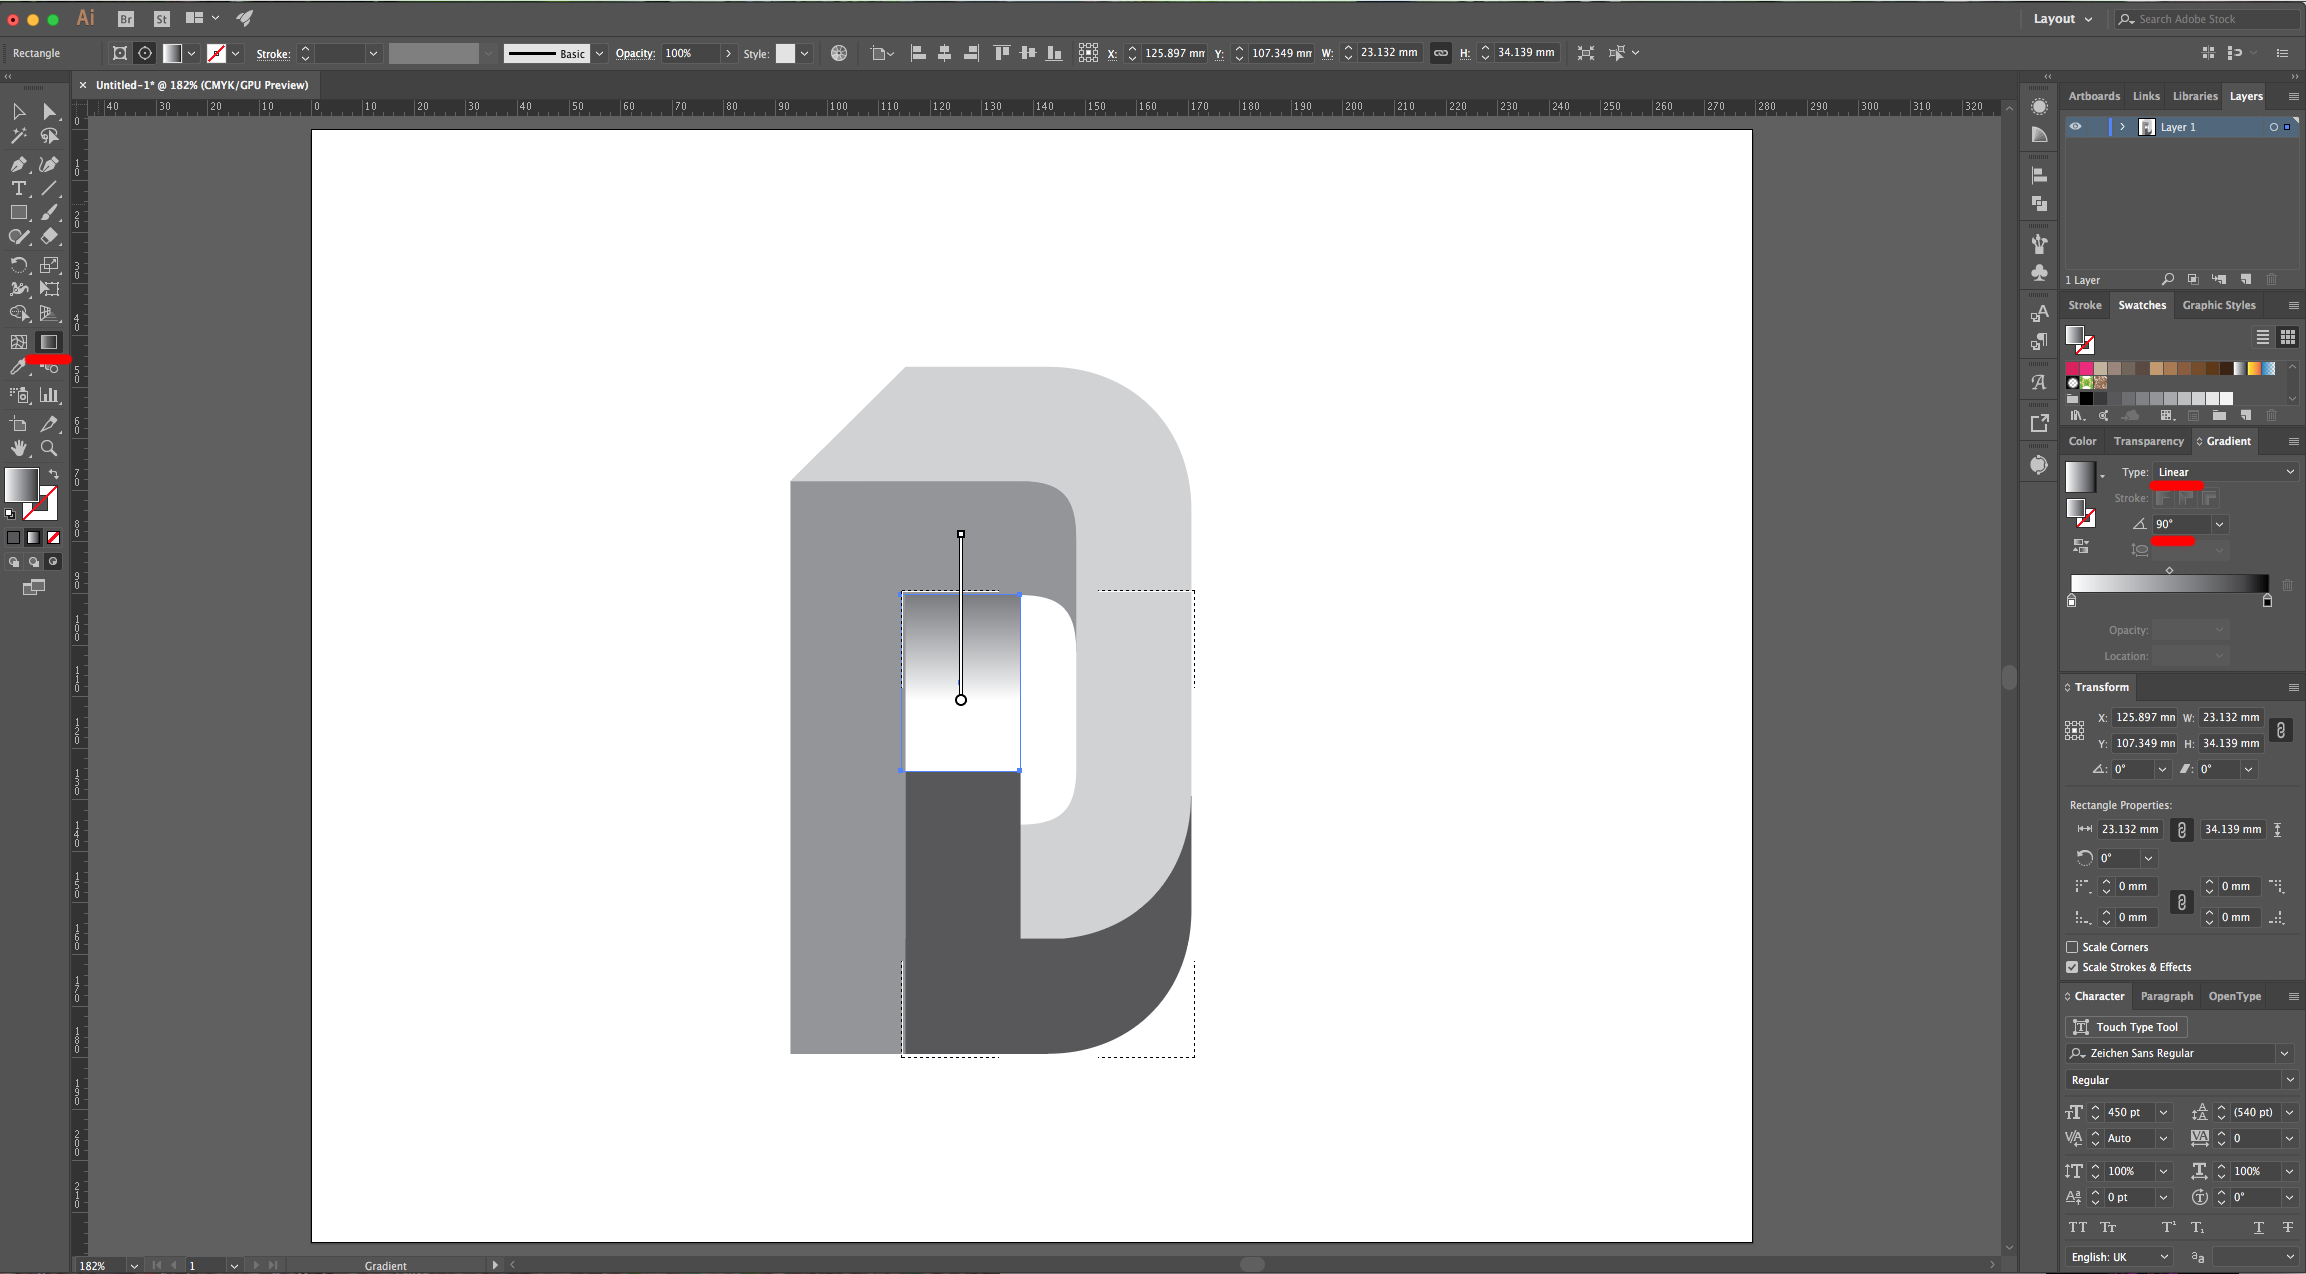
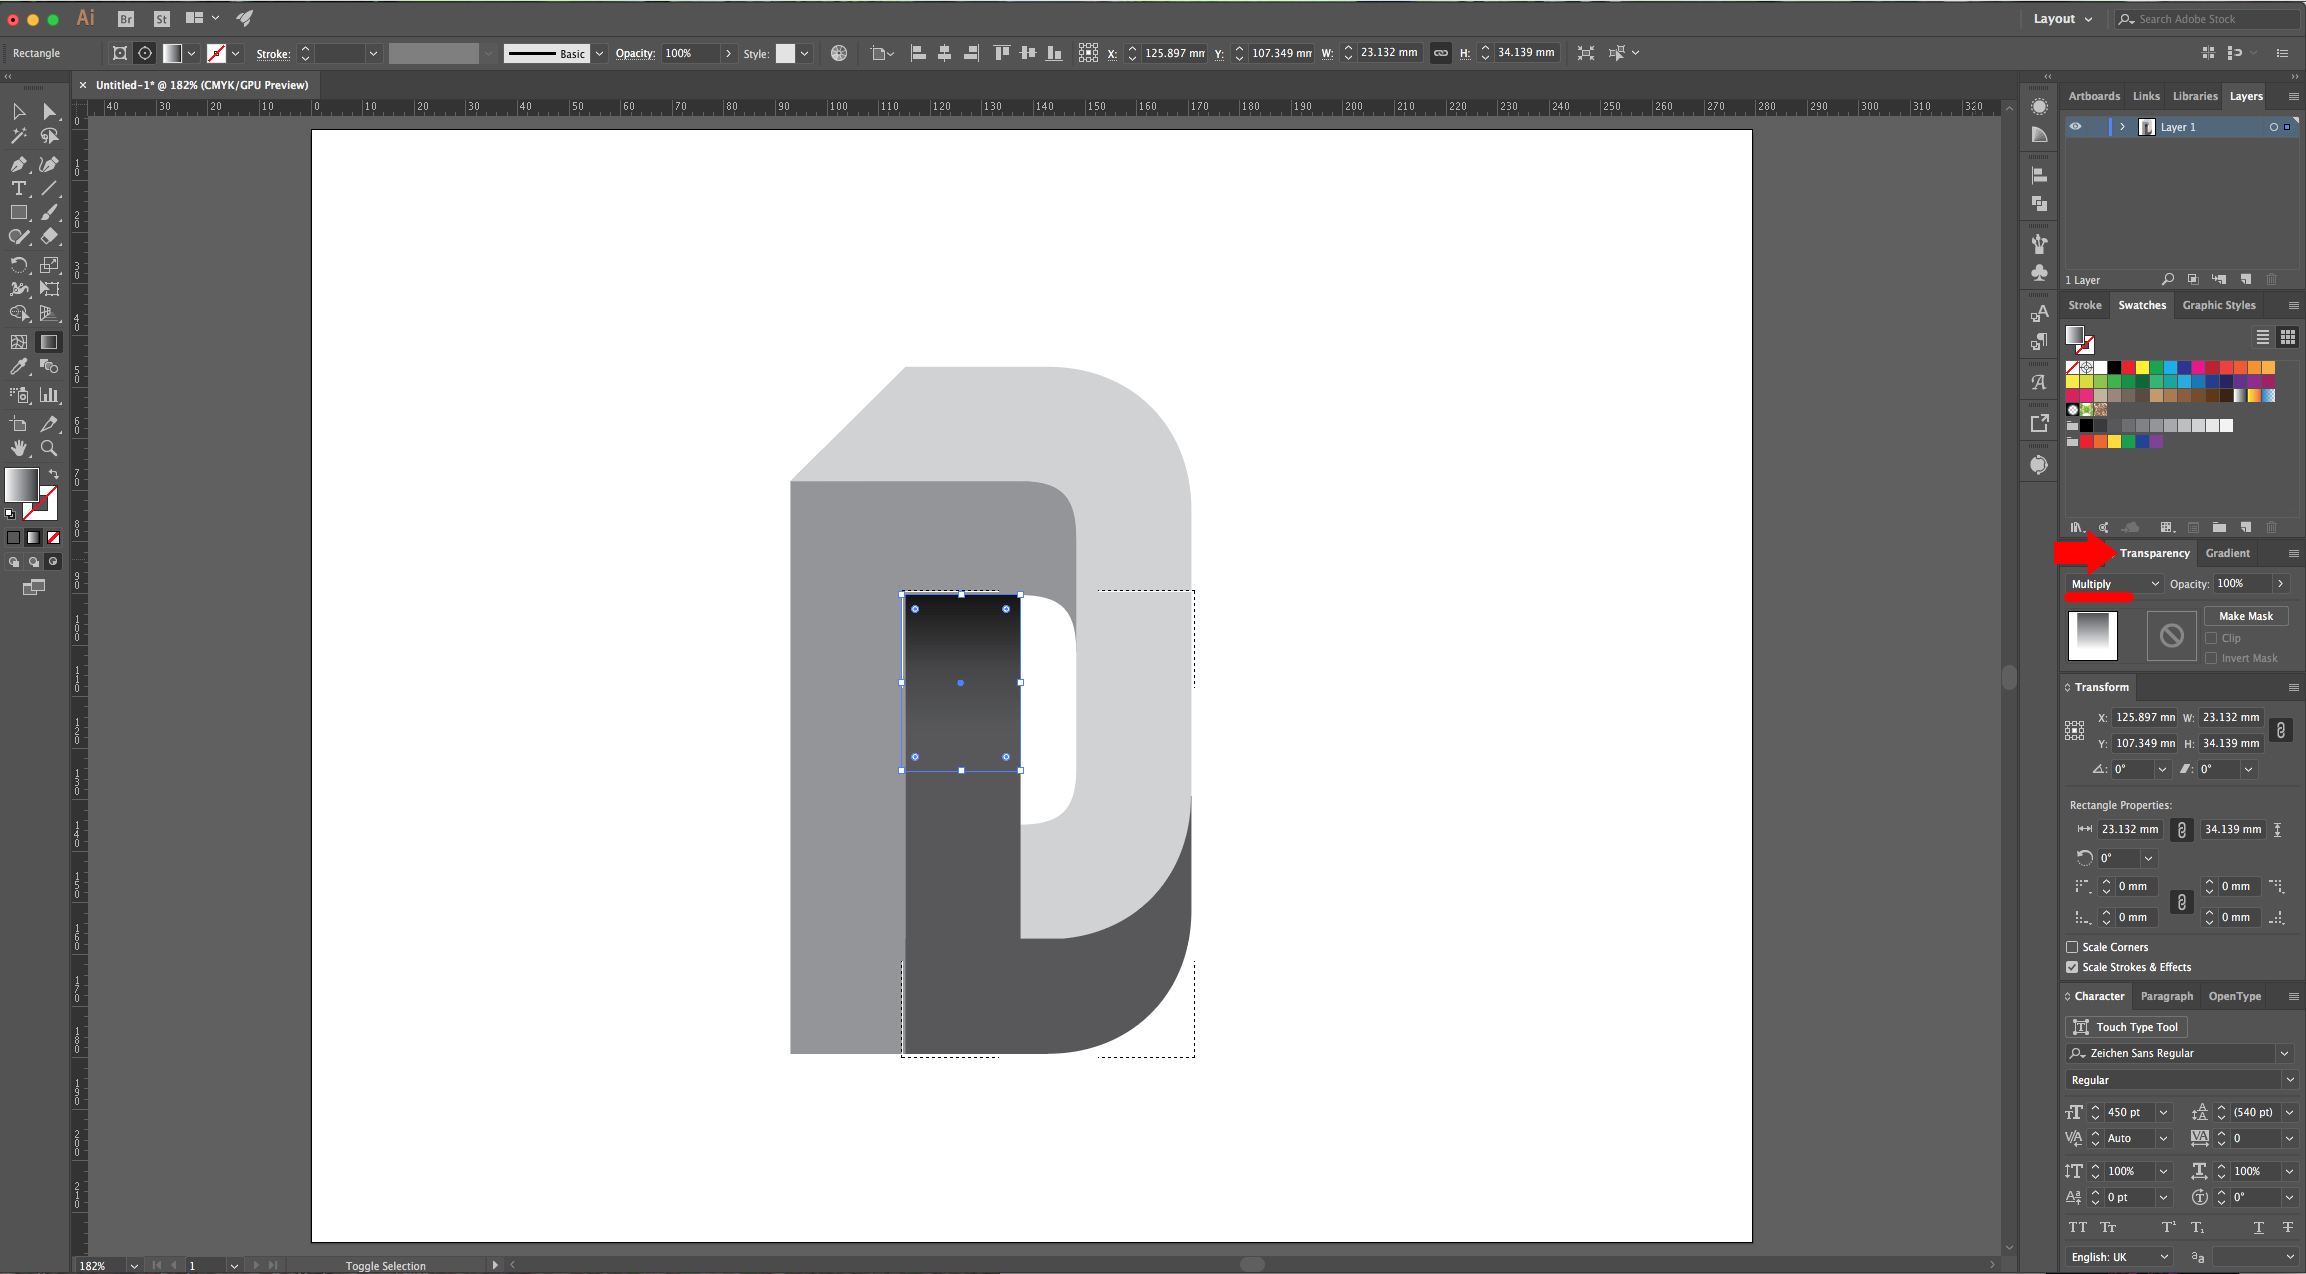
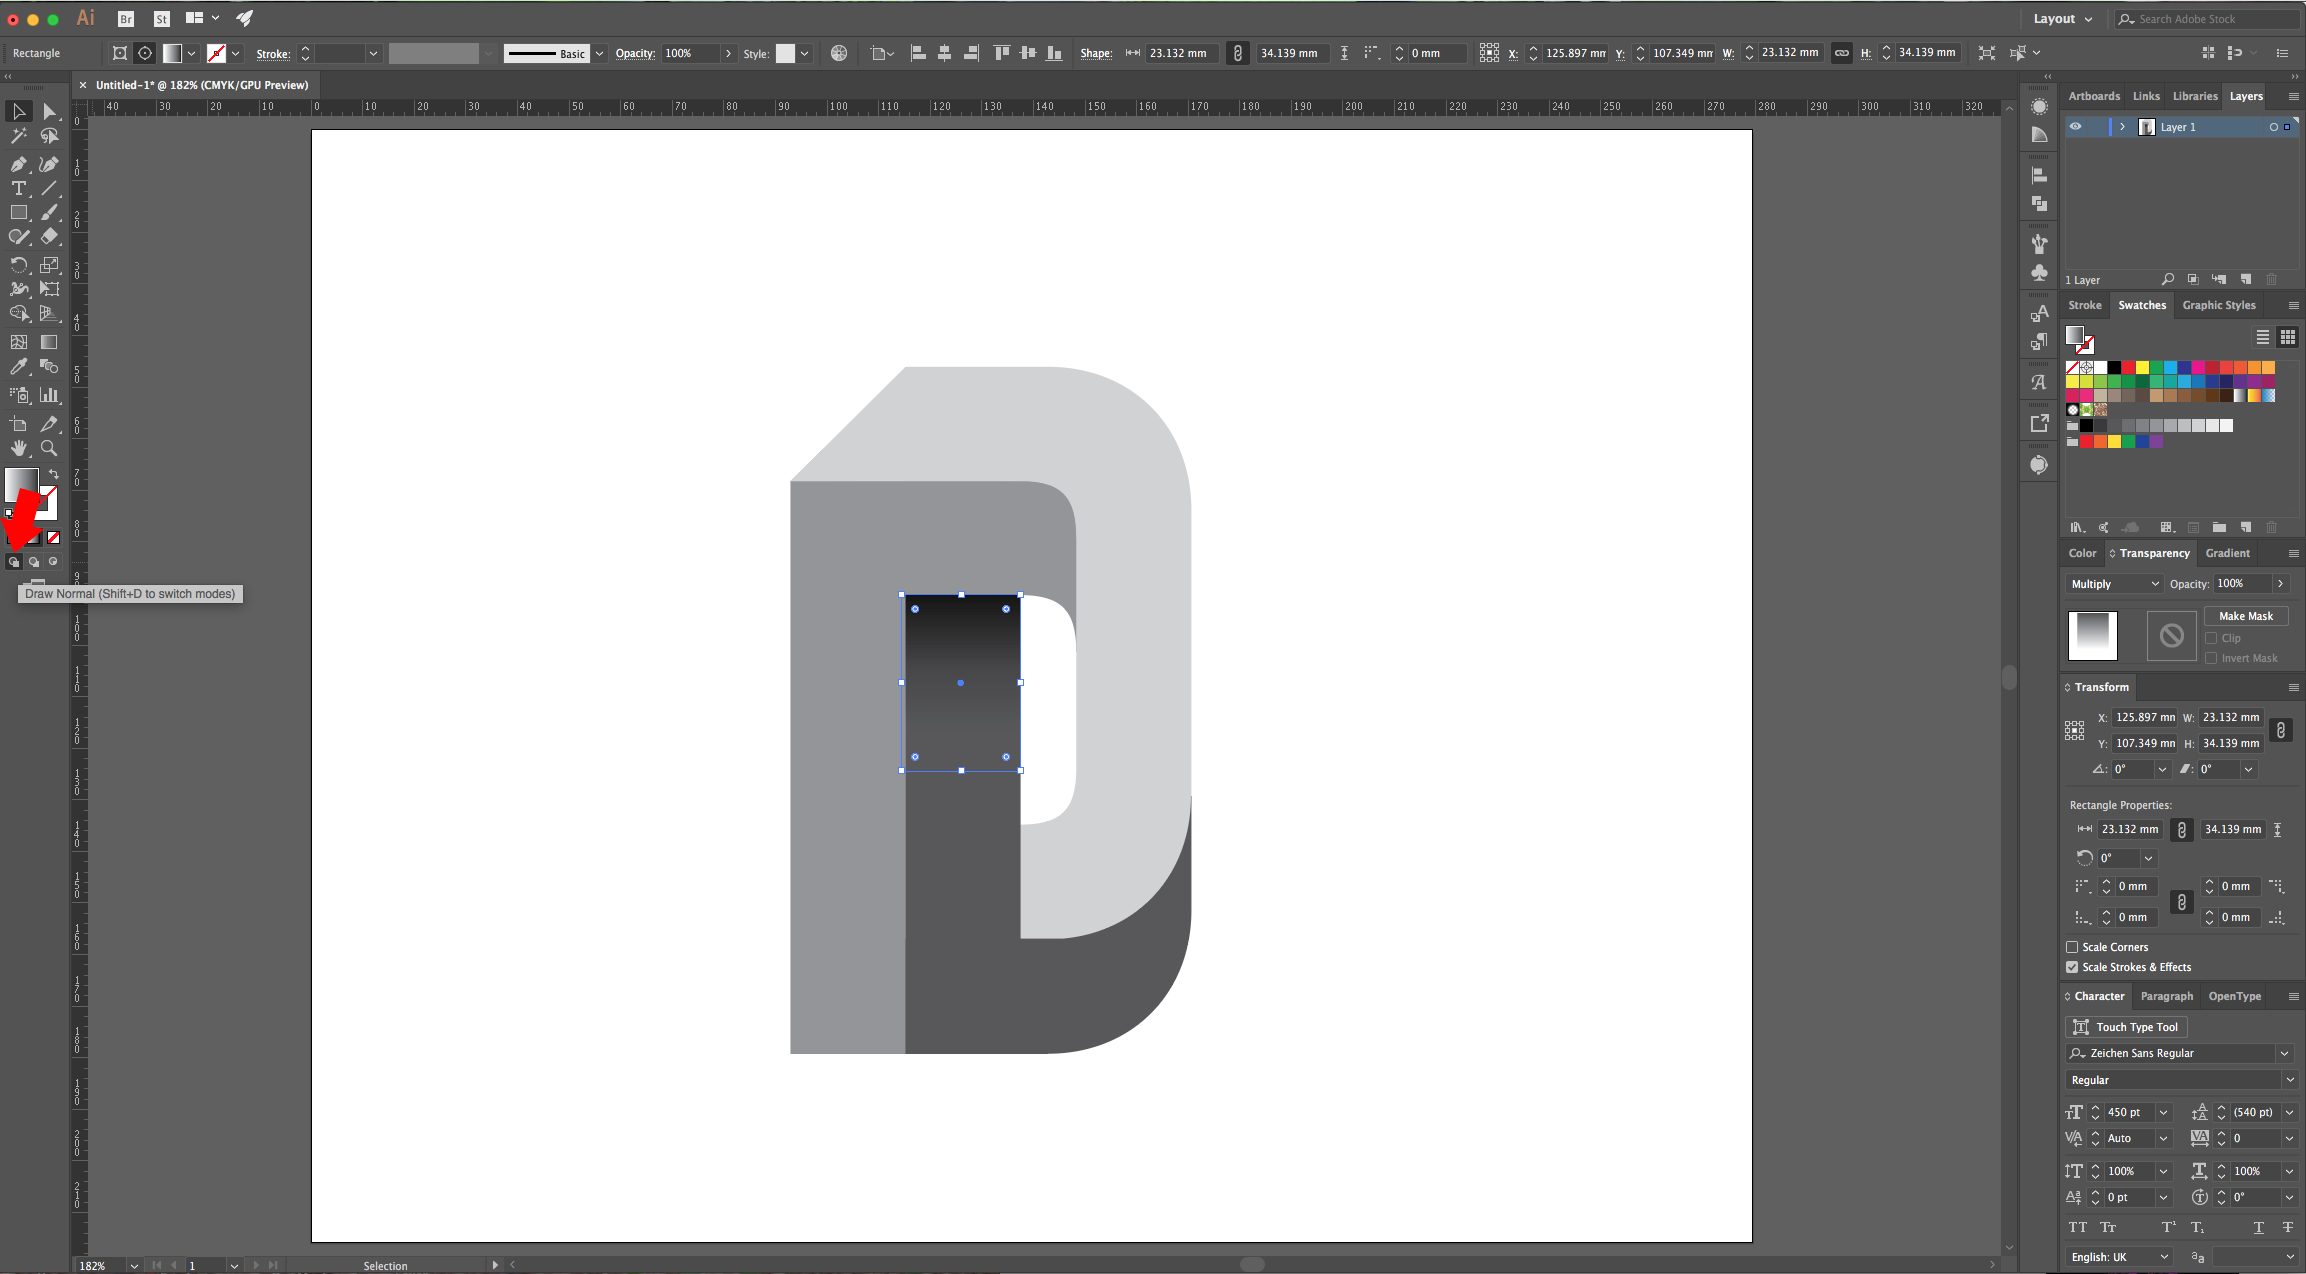
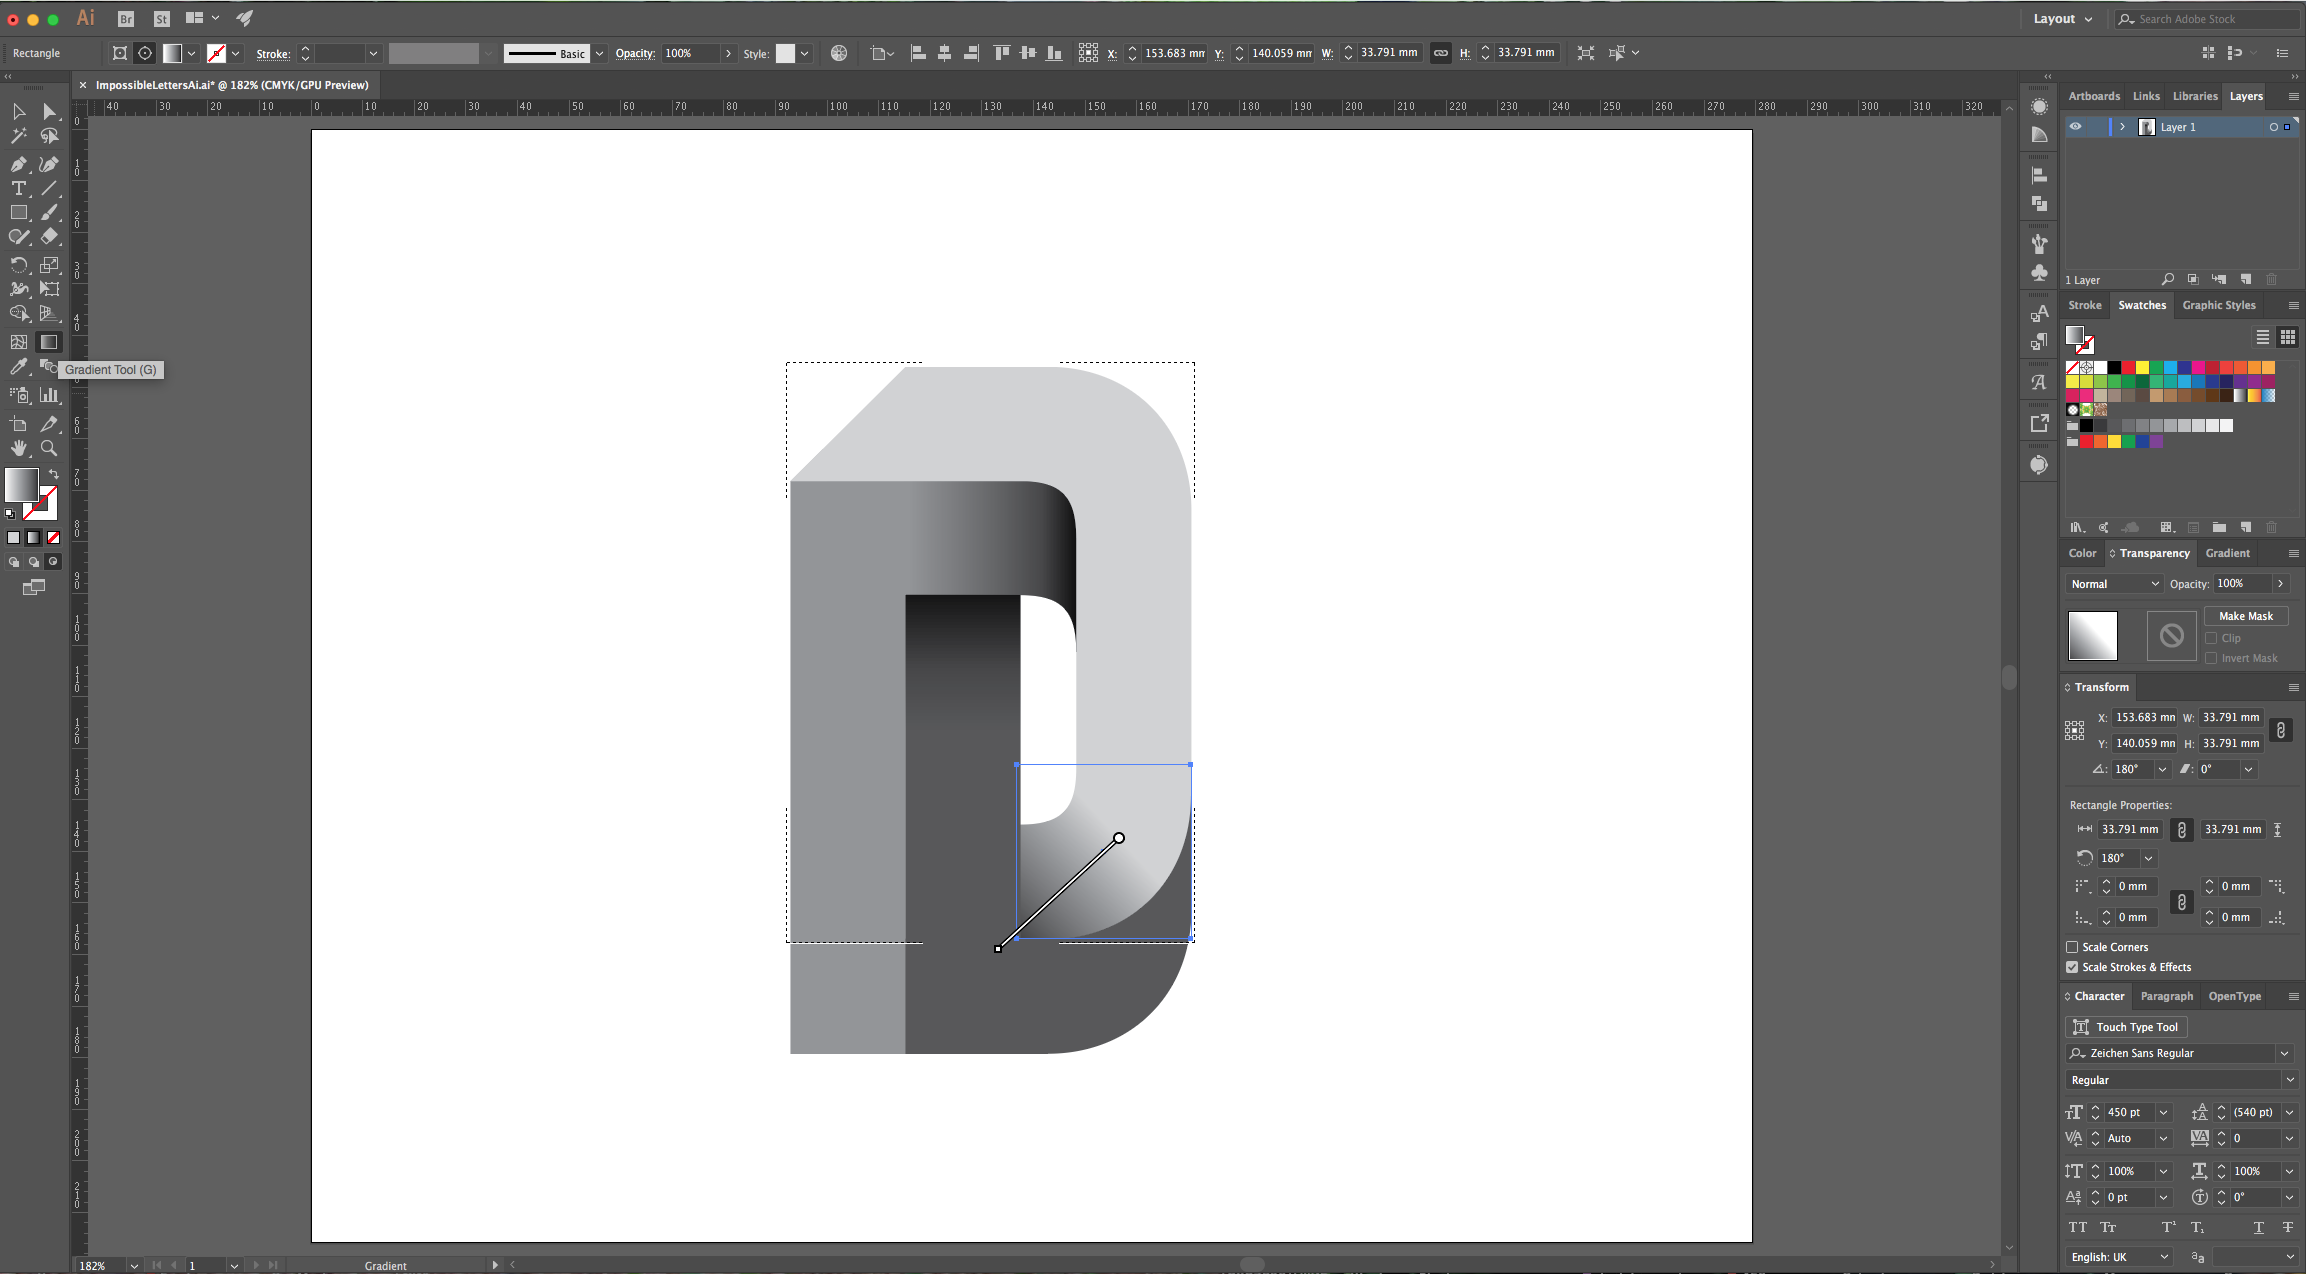
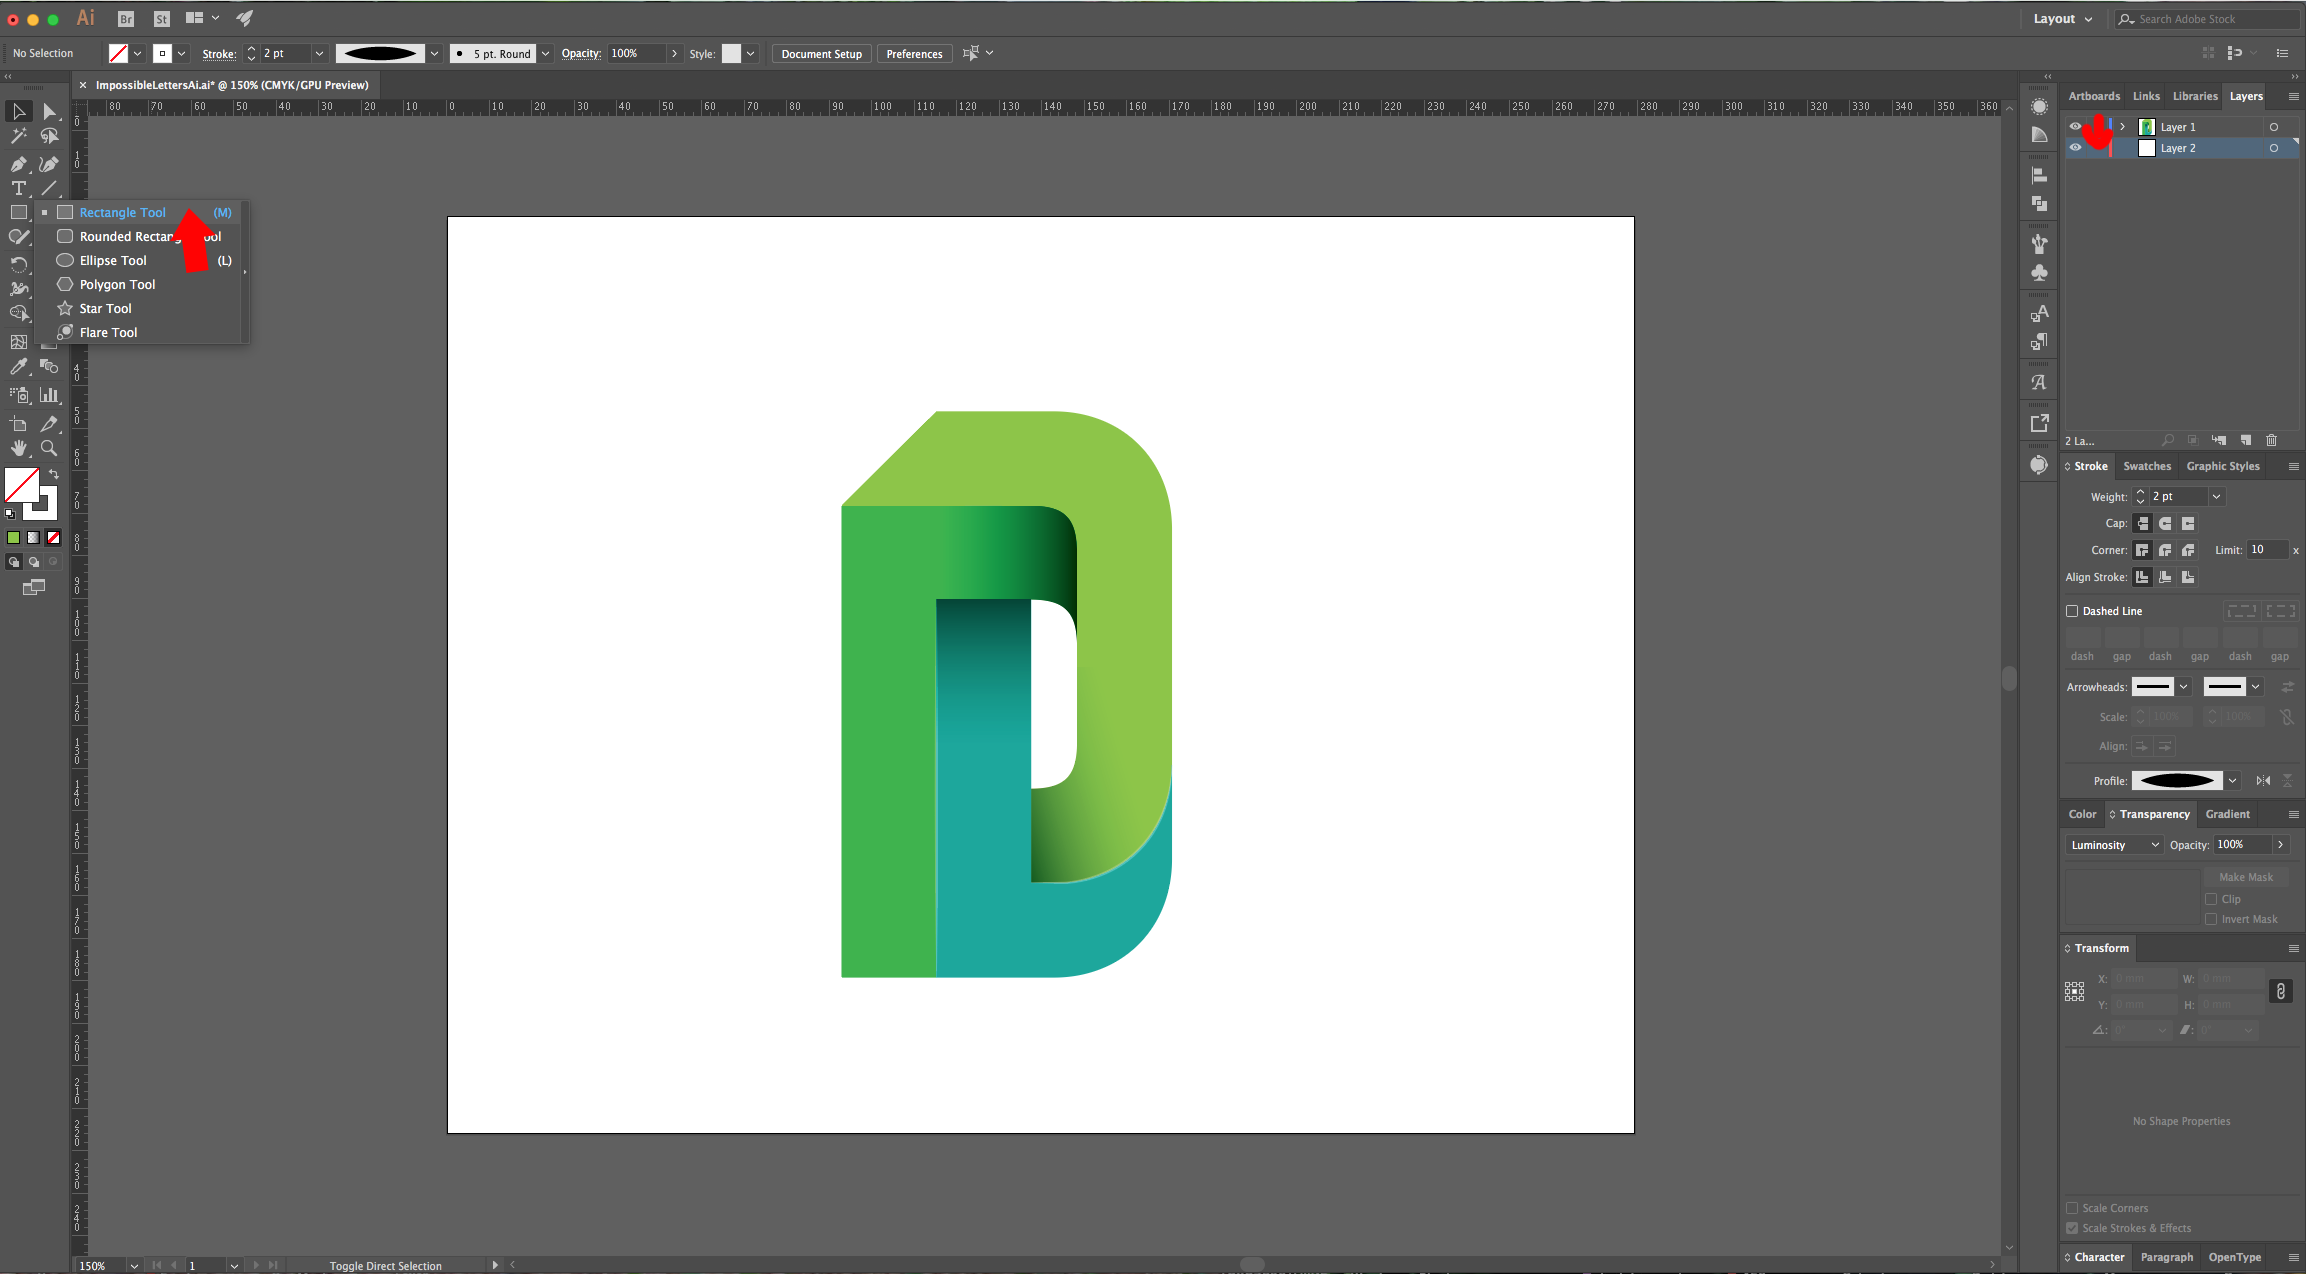
8 - Select one of them and click the “Draw Inside” button located at the bottom (right) of the “Toolbox”. Use the “Rectangle Tool” (M) and draw a small rectangle that covers the portion of your Path that should be “Shaded”, fill it with a “Radial Gradient” from Black to White or Black to Transparent. Click on the “Gradient Tool” (G) to bring out the Lever and play around with it until you are satisfied with it. Change the “Blending Mode” to “Multiply” in the “Transparency Panel”. To exit, click on the “Draw Normal” button (left).
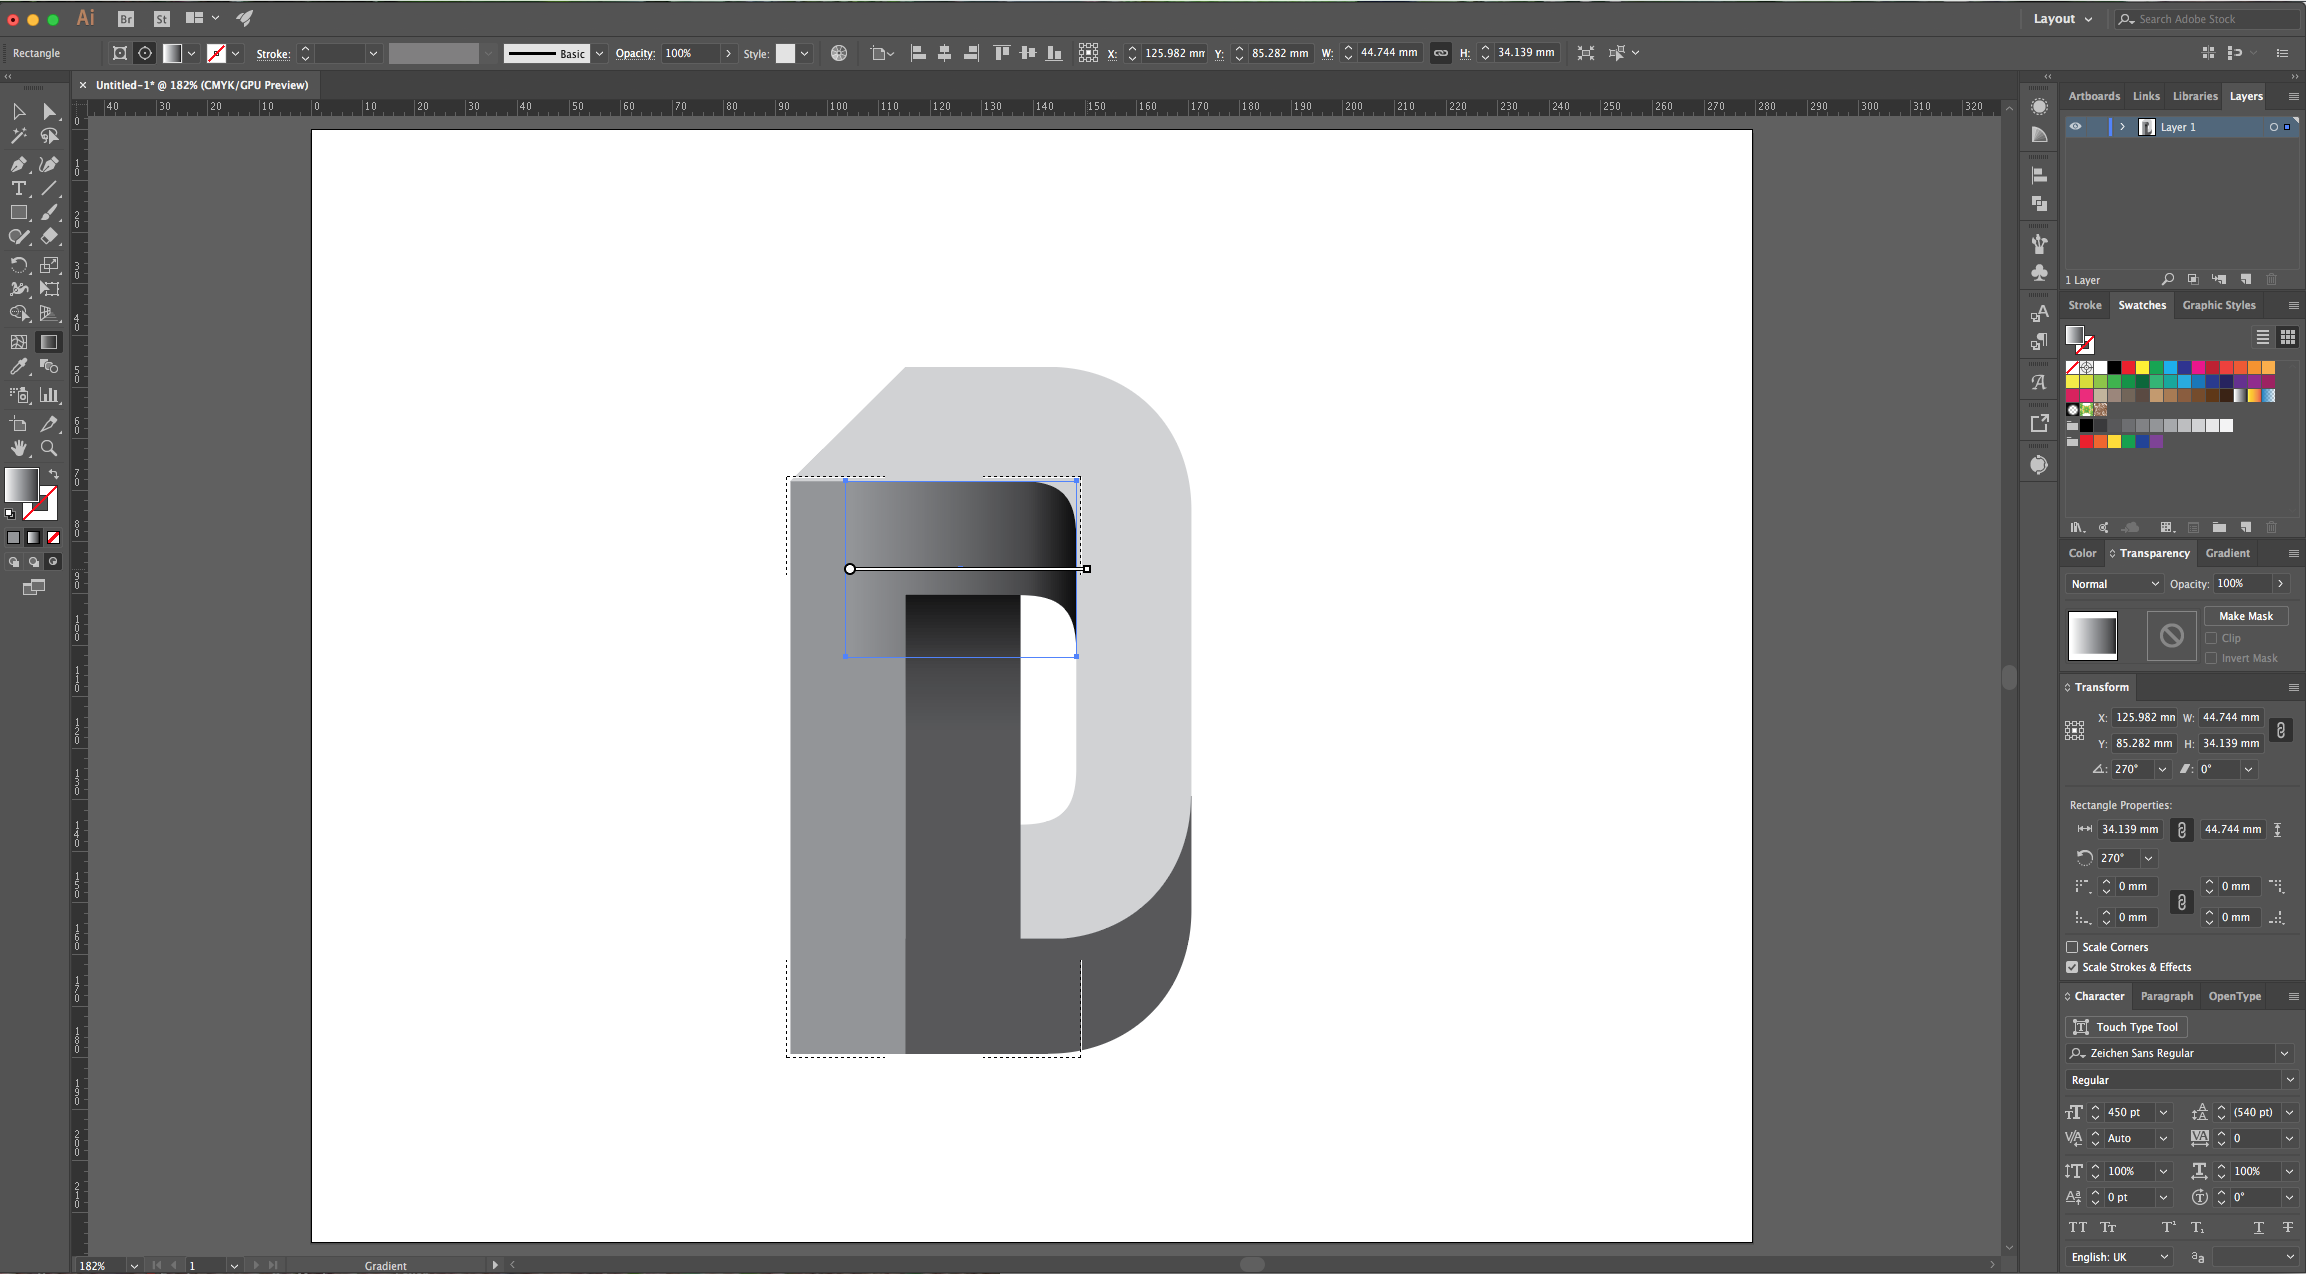
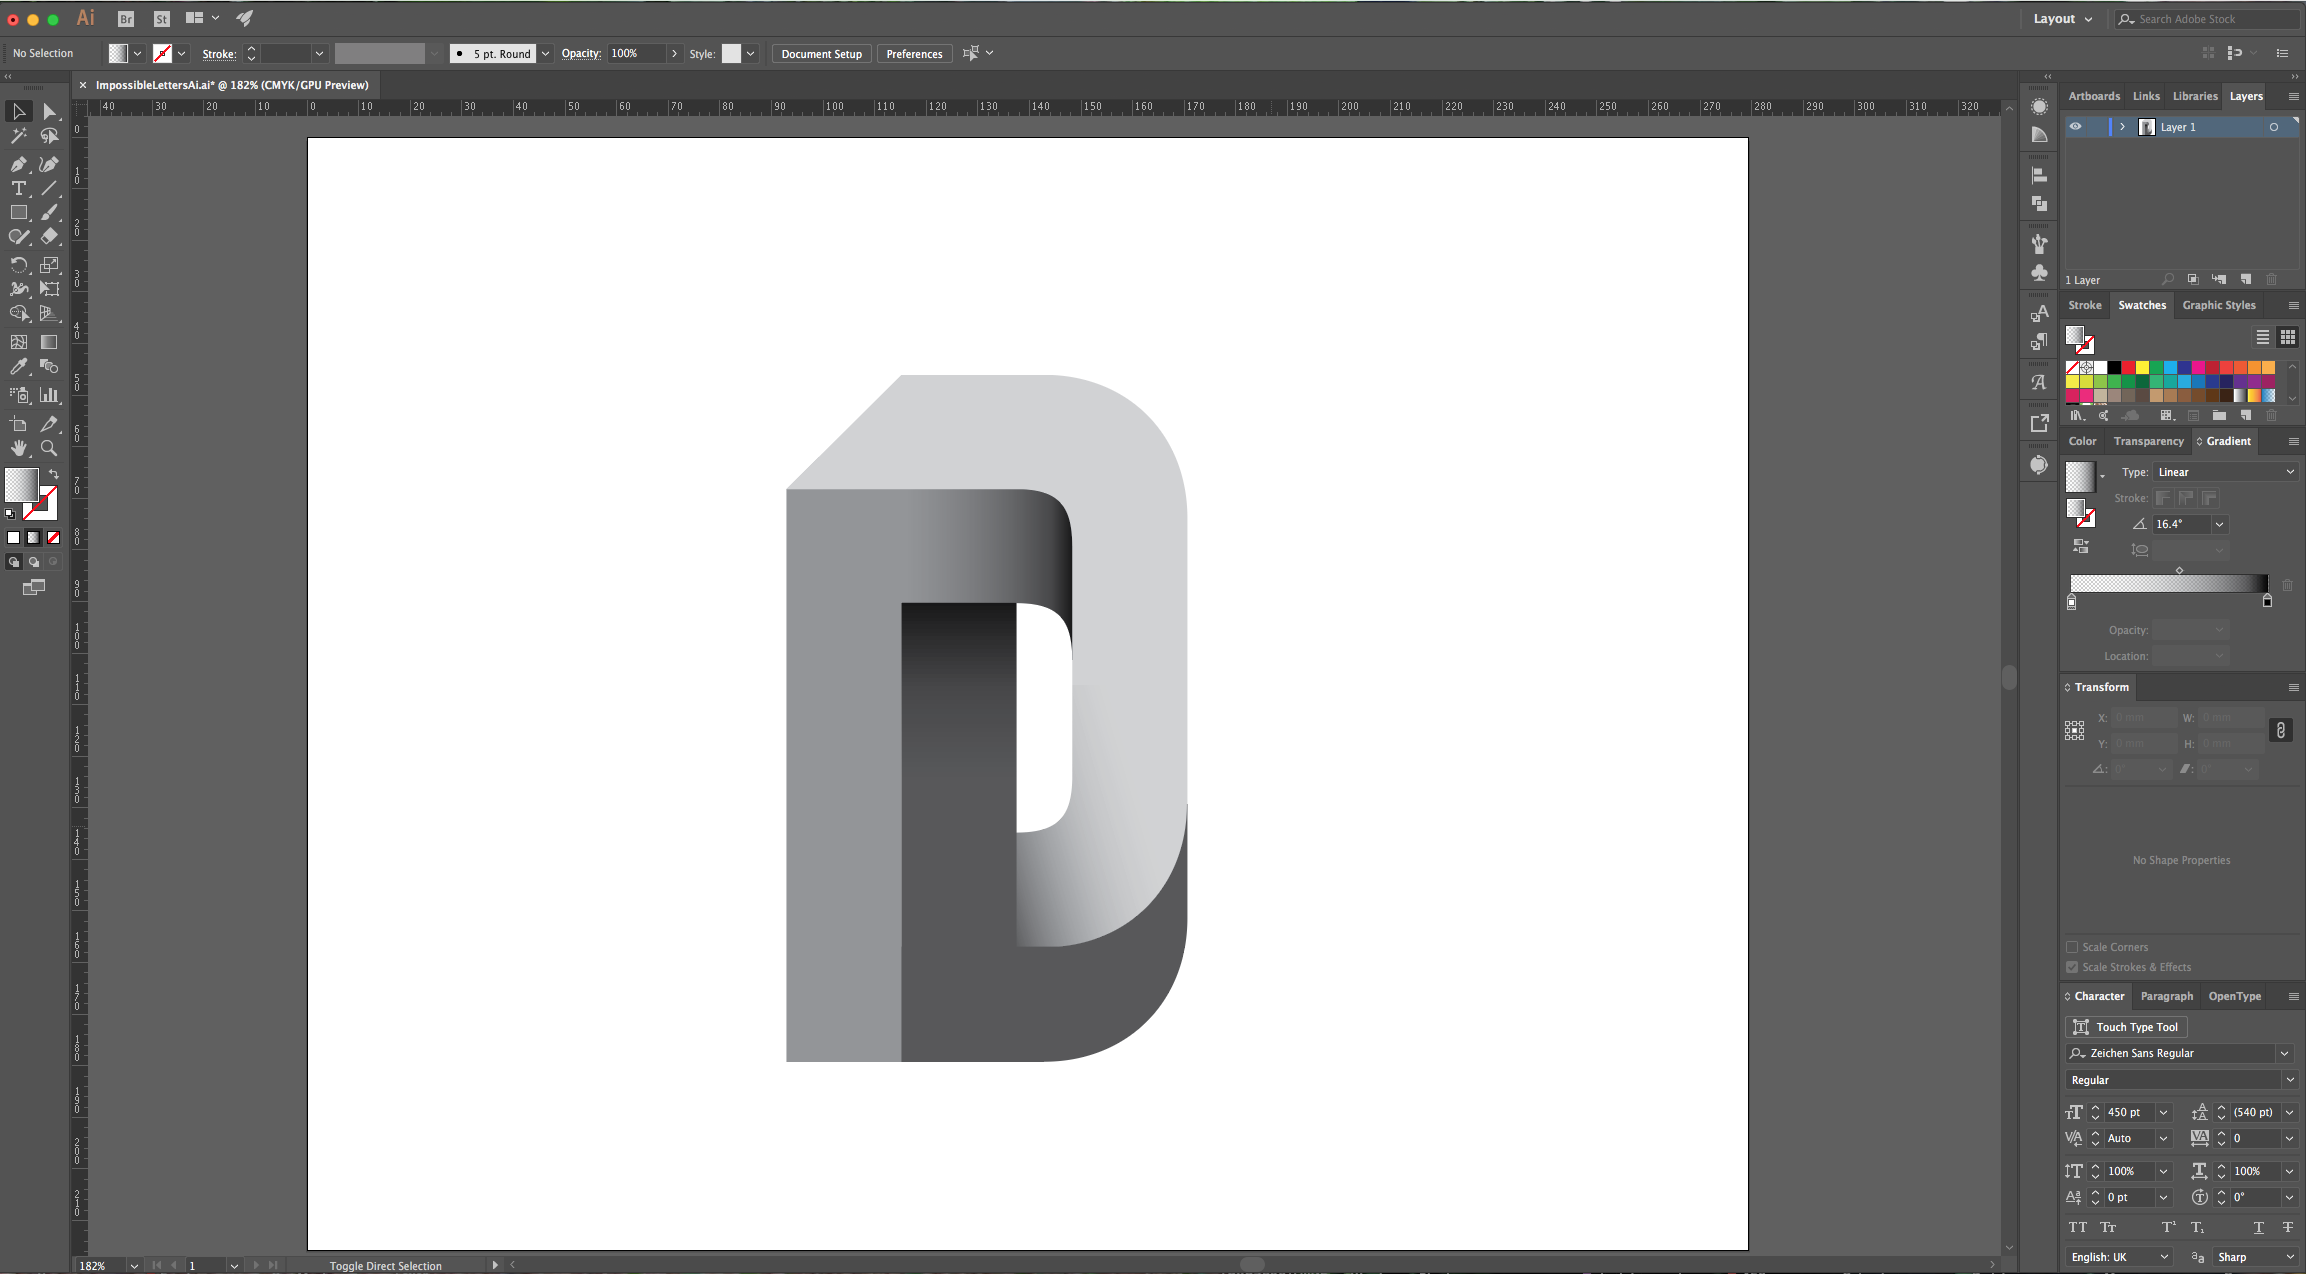
9 - Repeat the shading with the rest of your Paths, just make the gradient angle fit the one that your selected Path’s shadow should have.

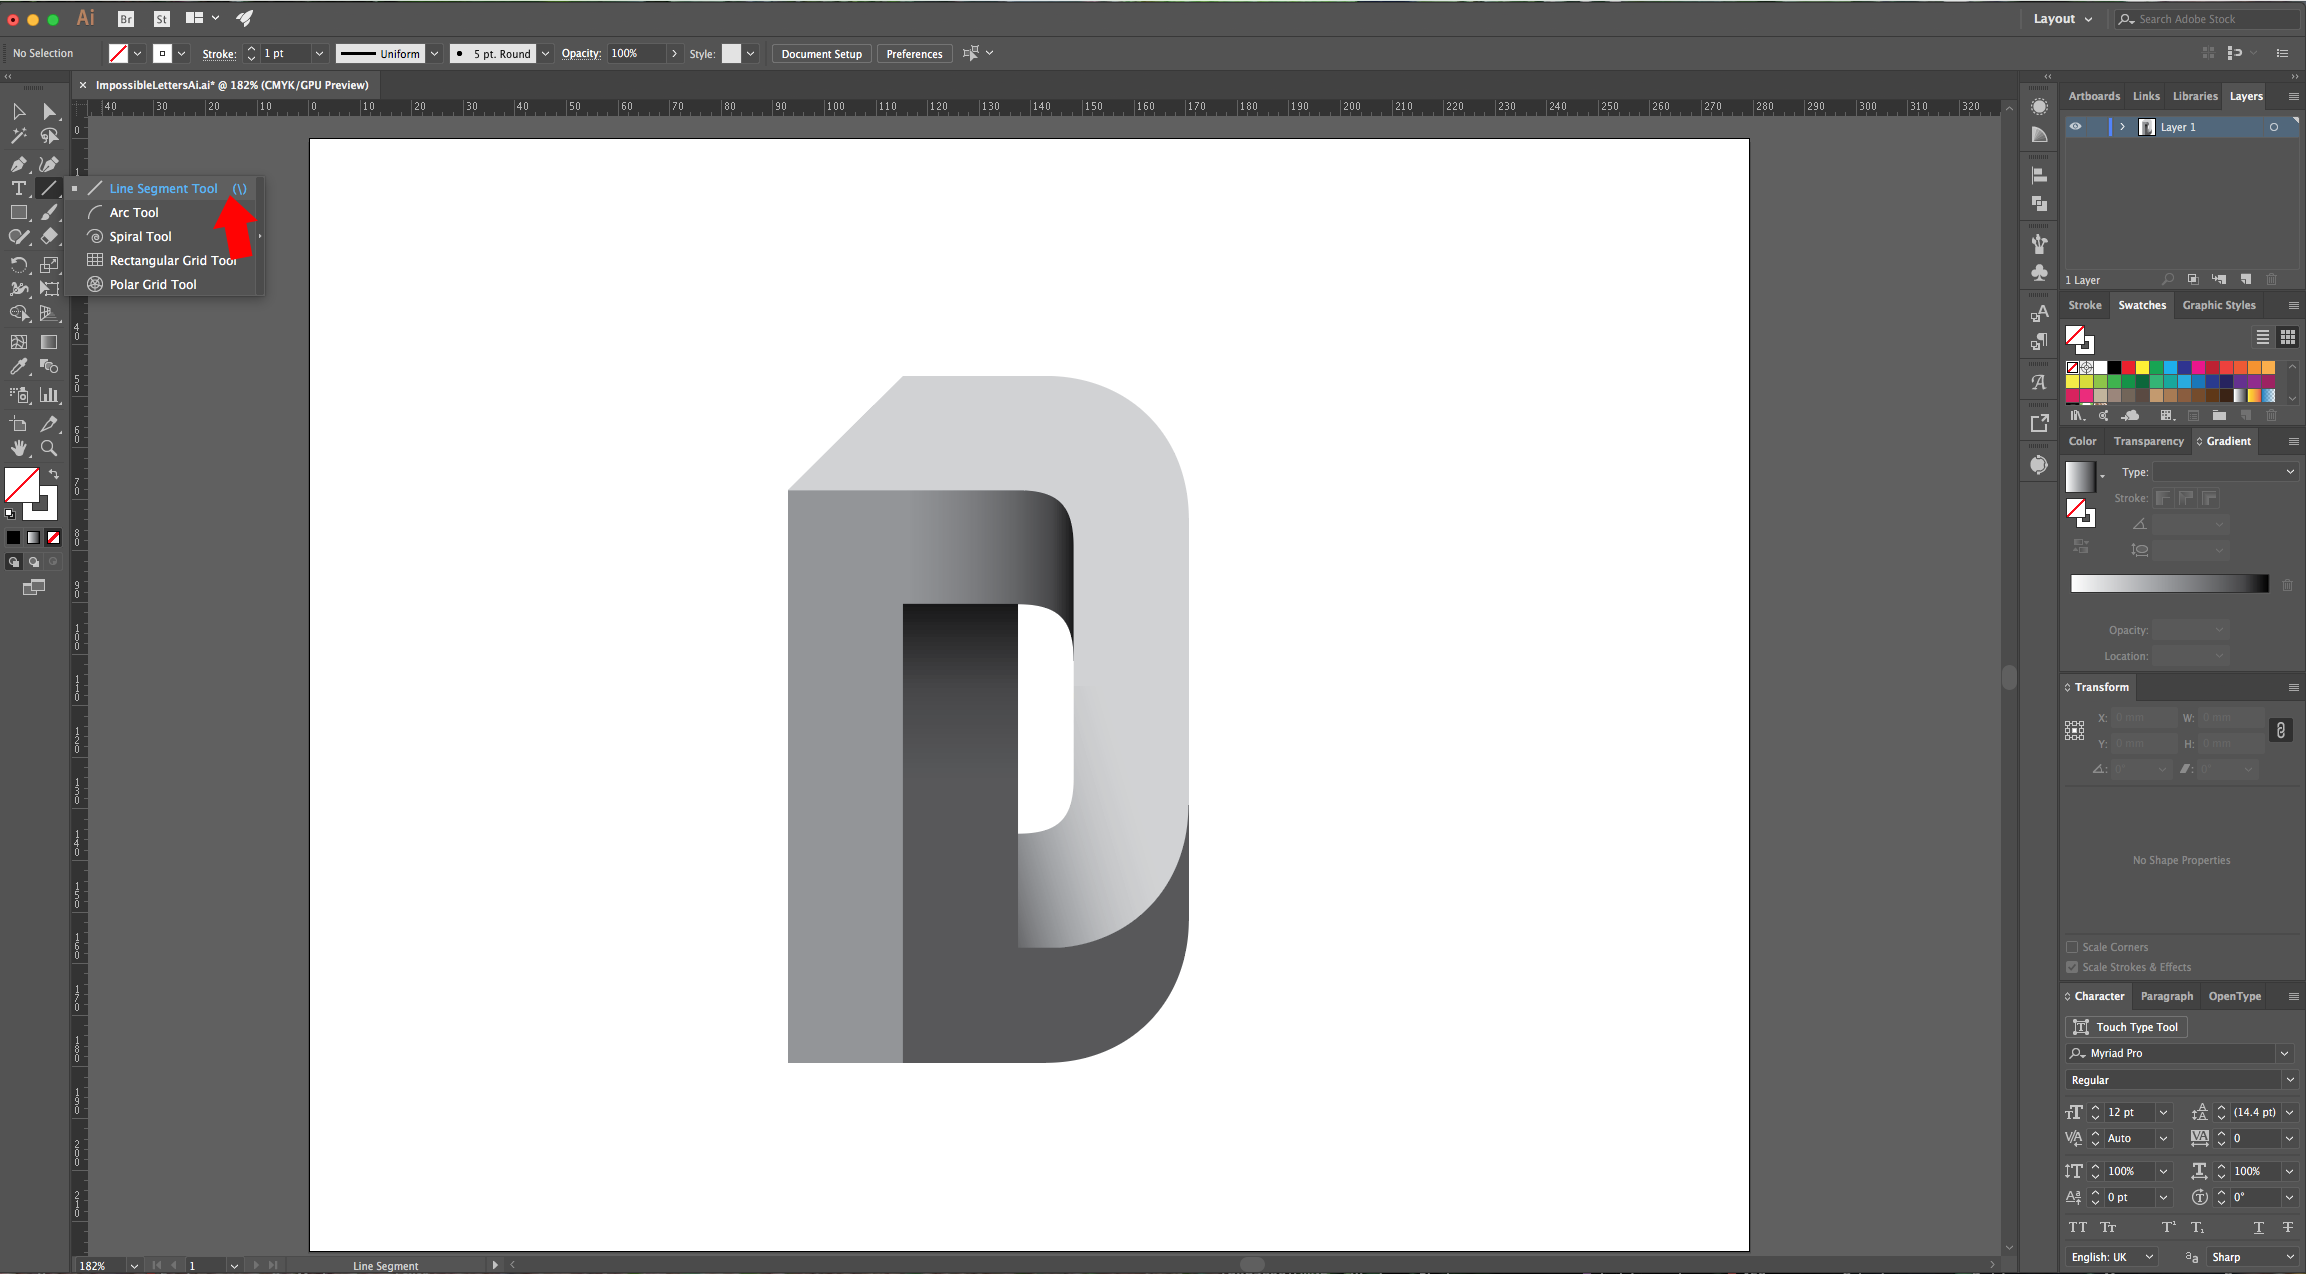
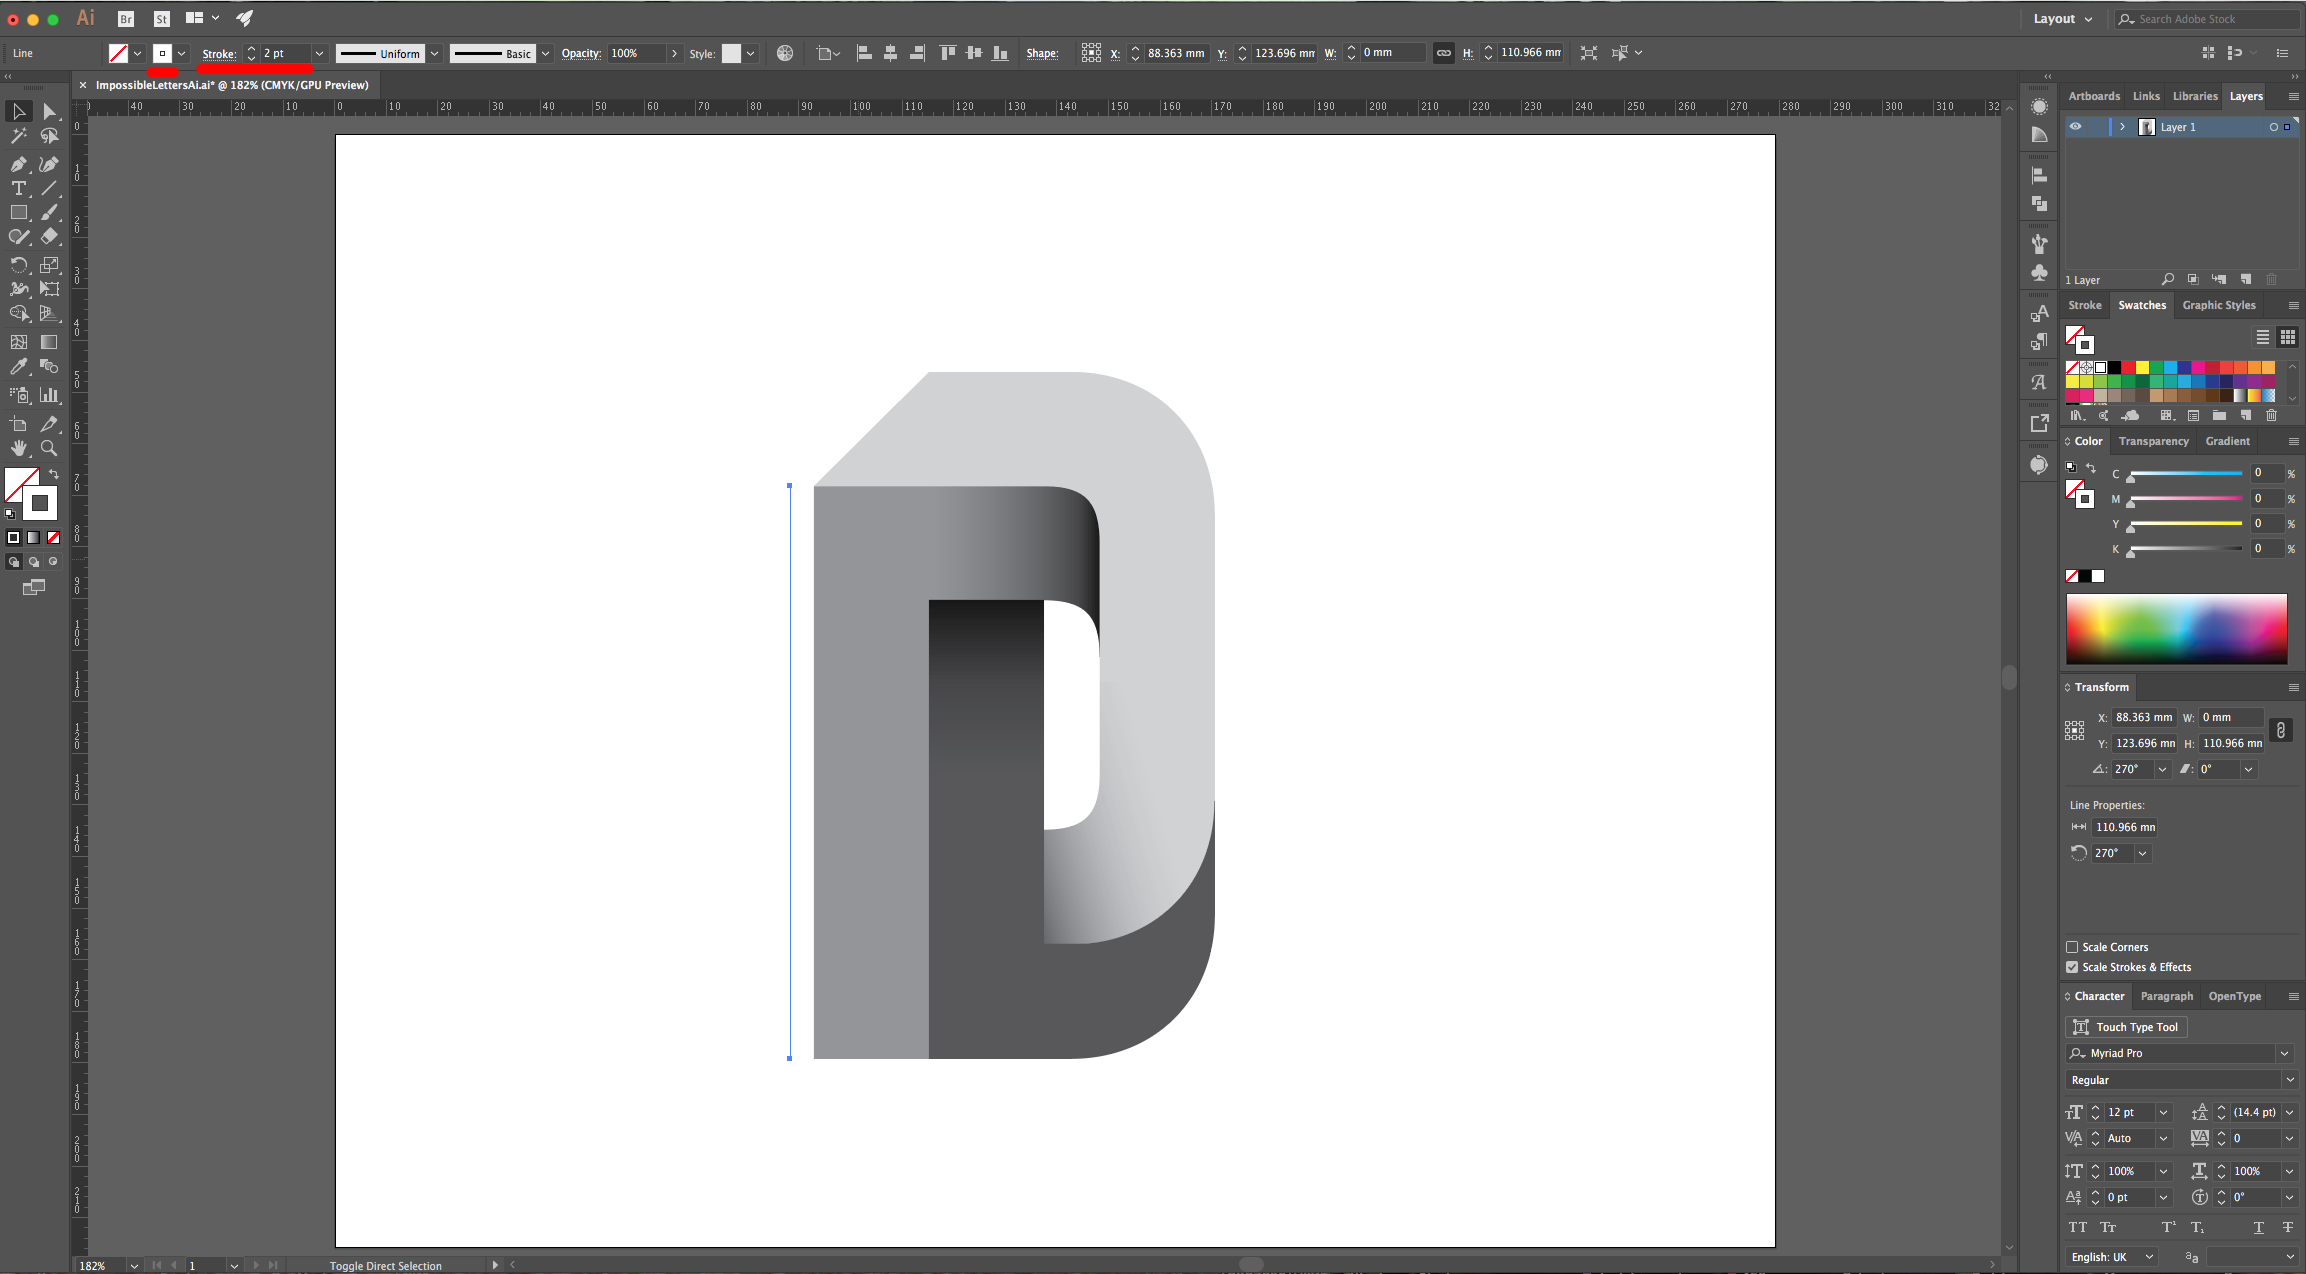
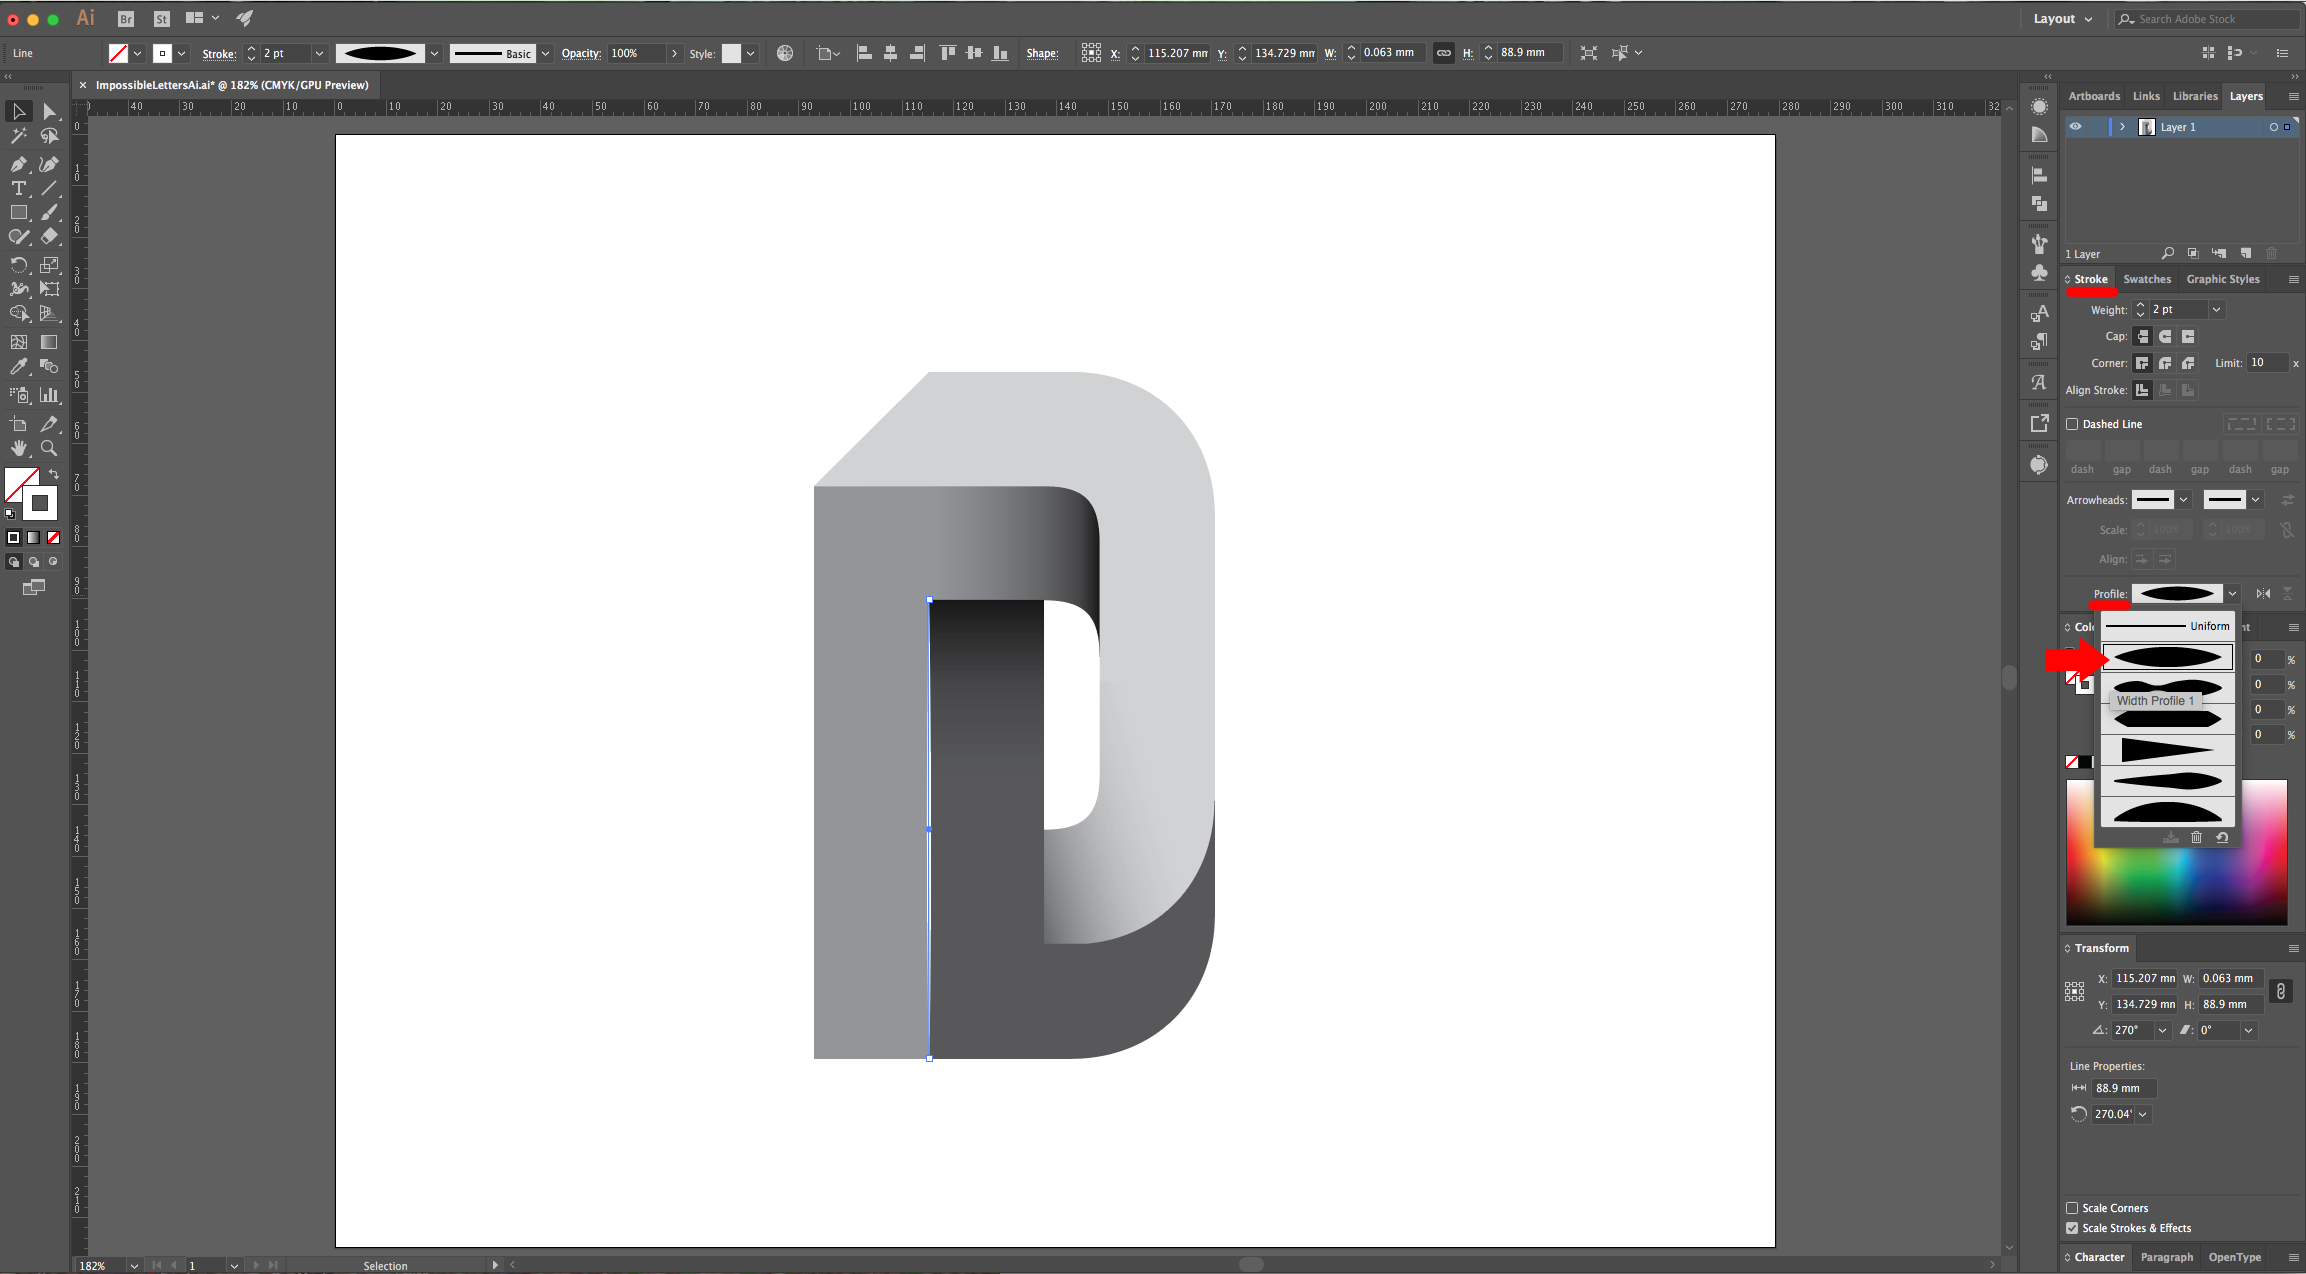
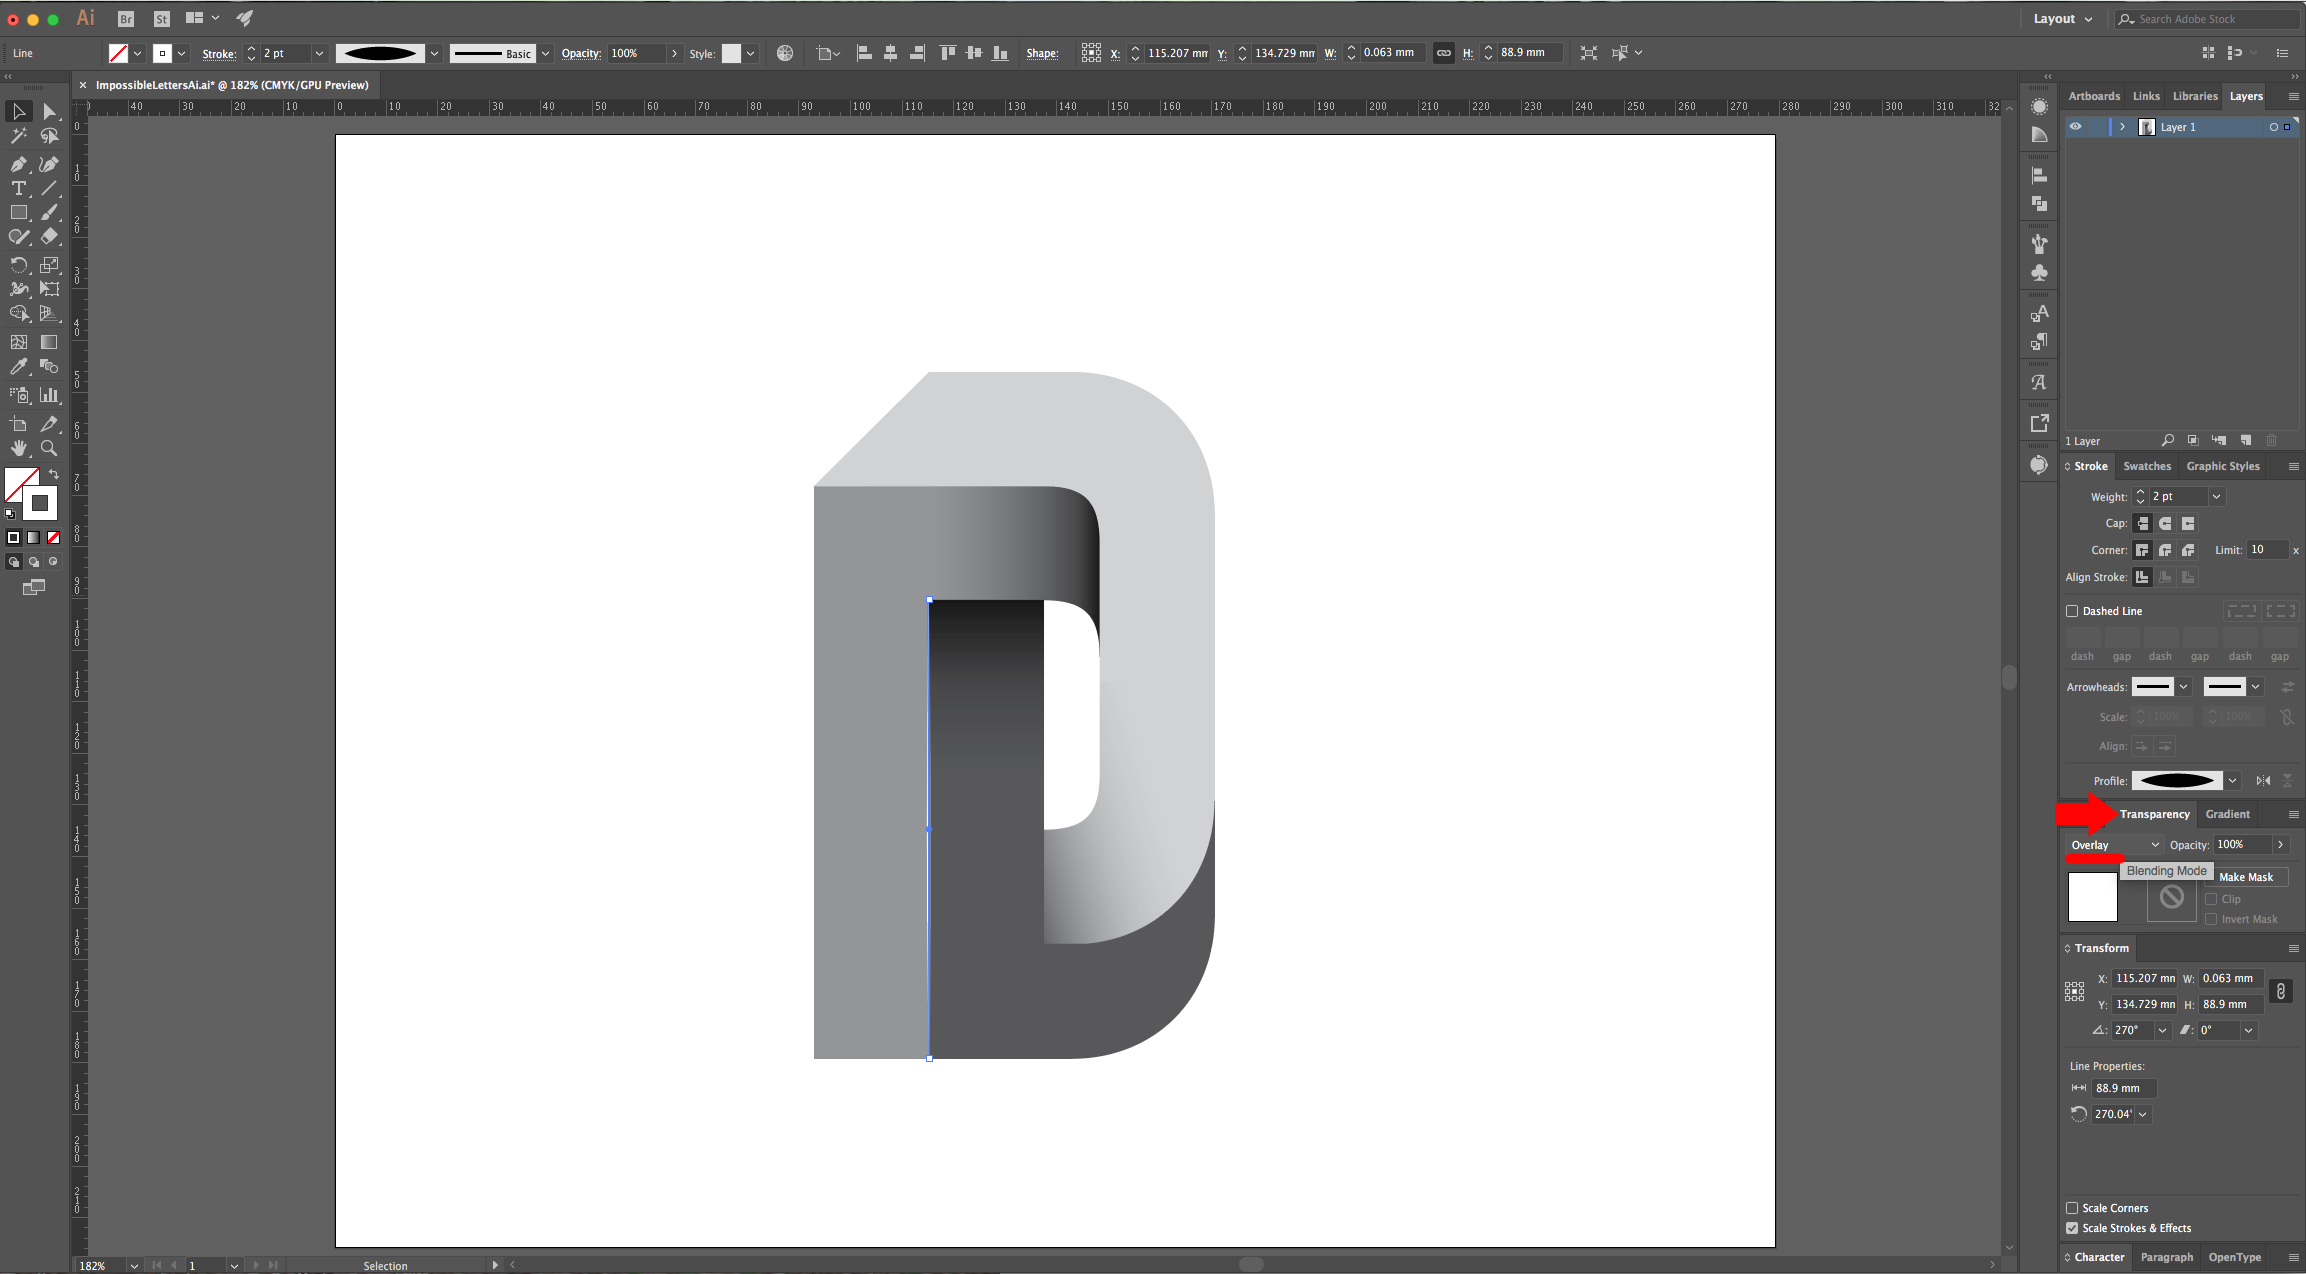
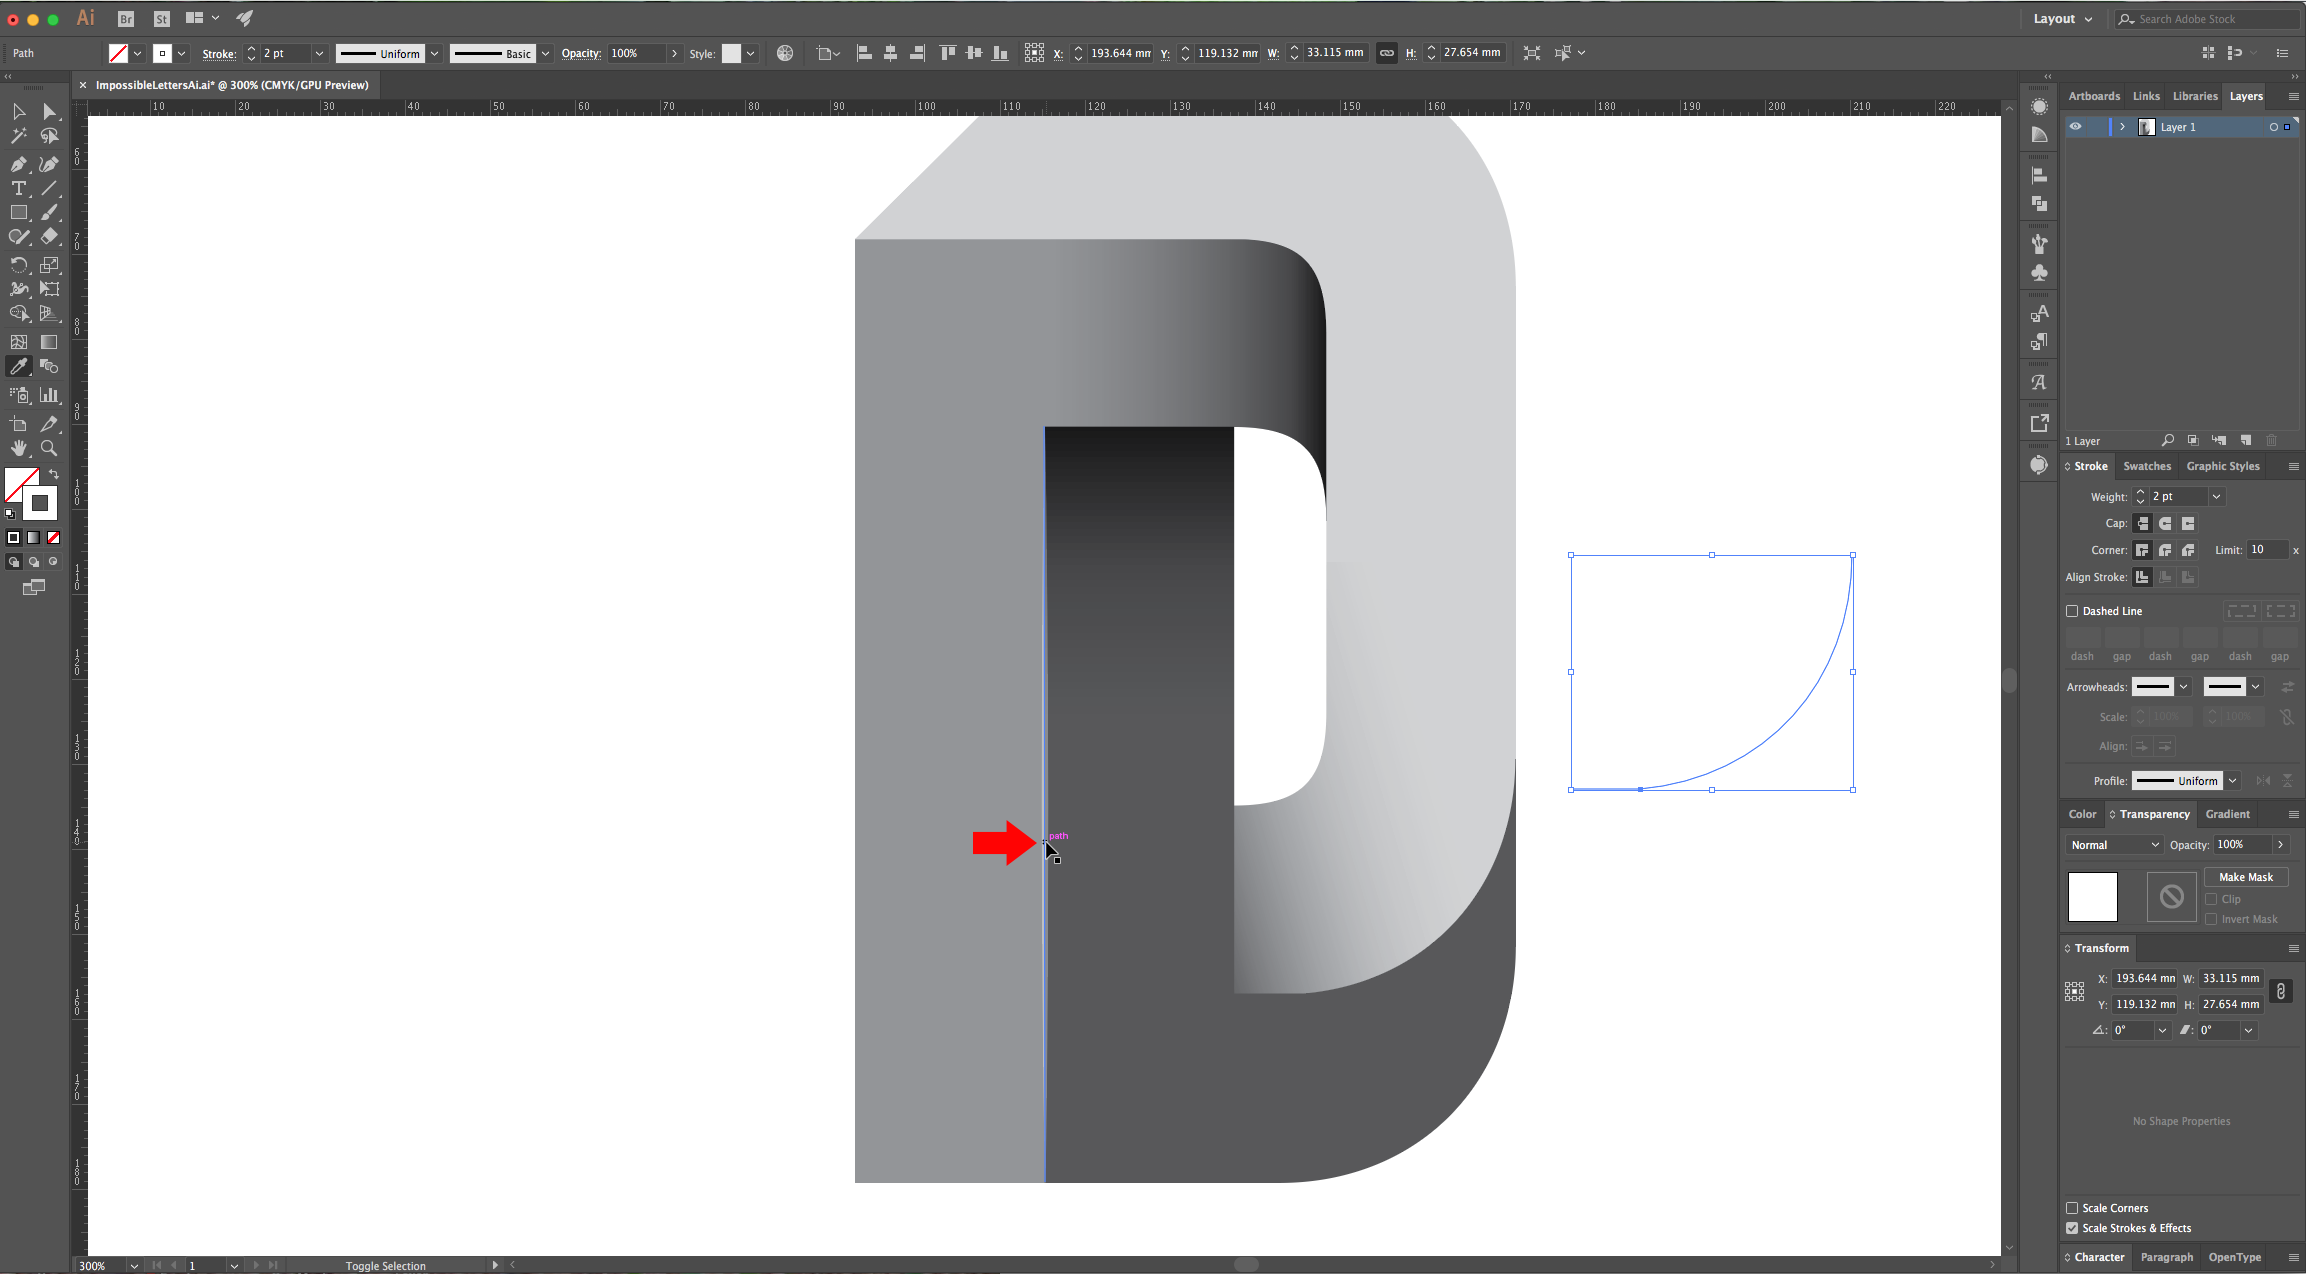
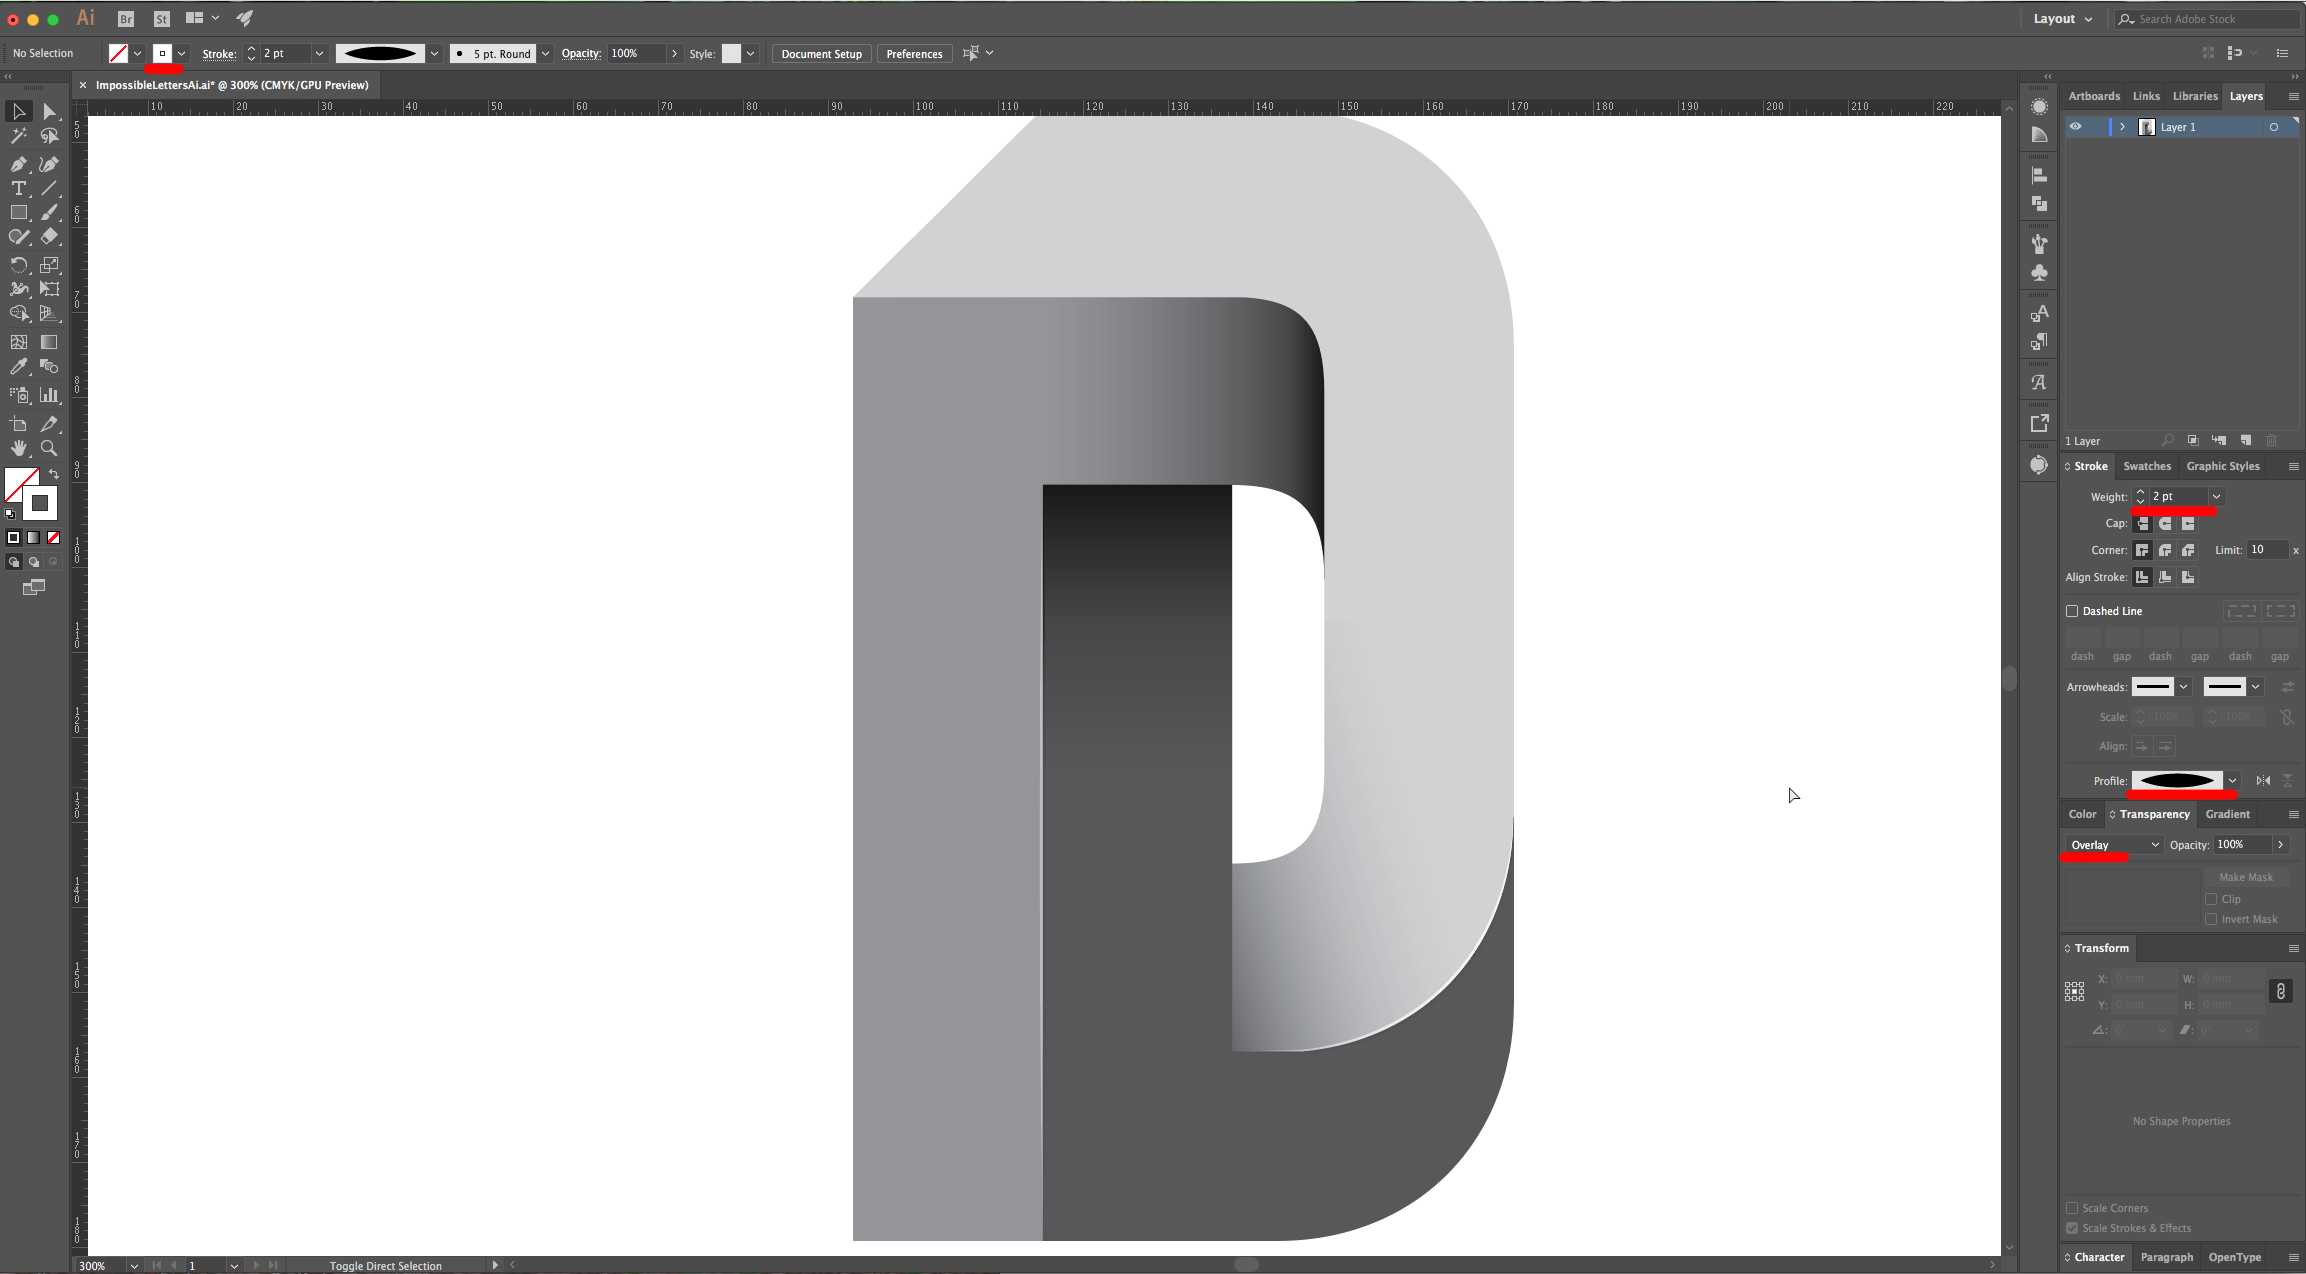
10 - Select the “Line Segment Tool” (\), set the “Stroke” color to White and the “With” to 2 Points and draw a vertical line that is almost as long as your letter. Place it in the intersection between two of your Paths and use the “Direct Selection Tool” (A) to drag the endpoints to make it fit. In the “Stroke Panel”, click on the “Profile” drop-down menu and choose “With Profile 1”. Then change the “Blending Mode” to “Overlay”.
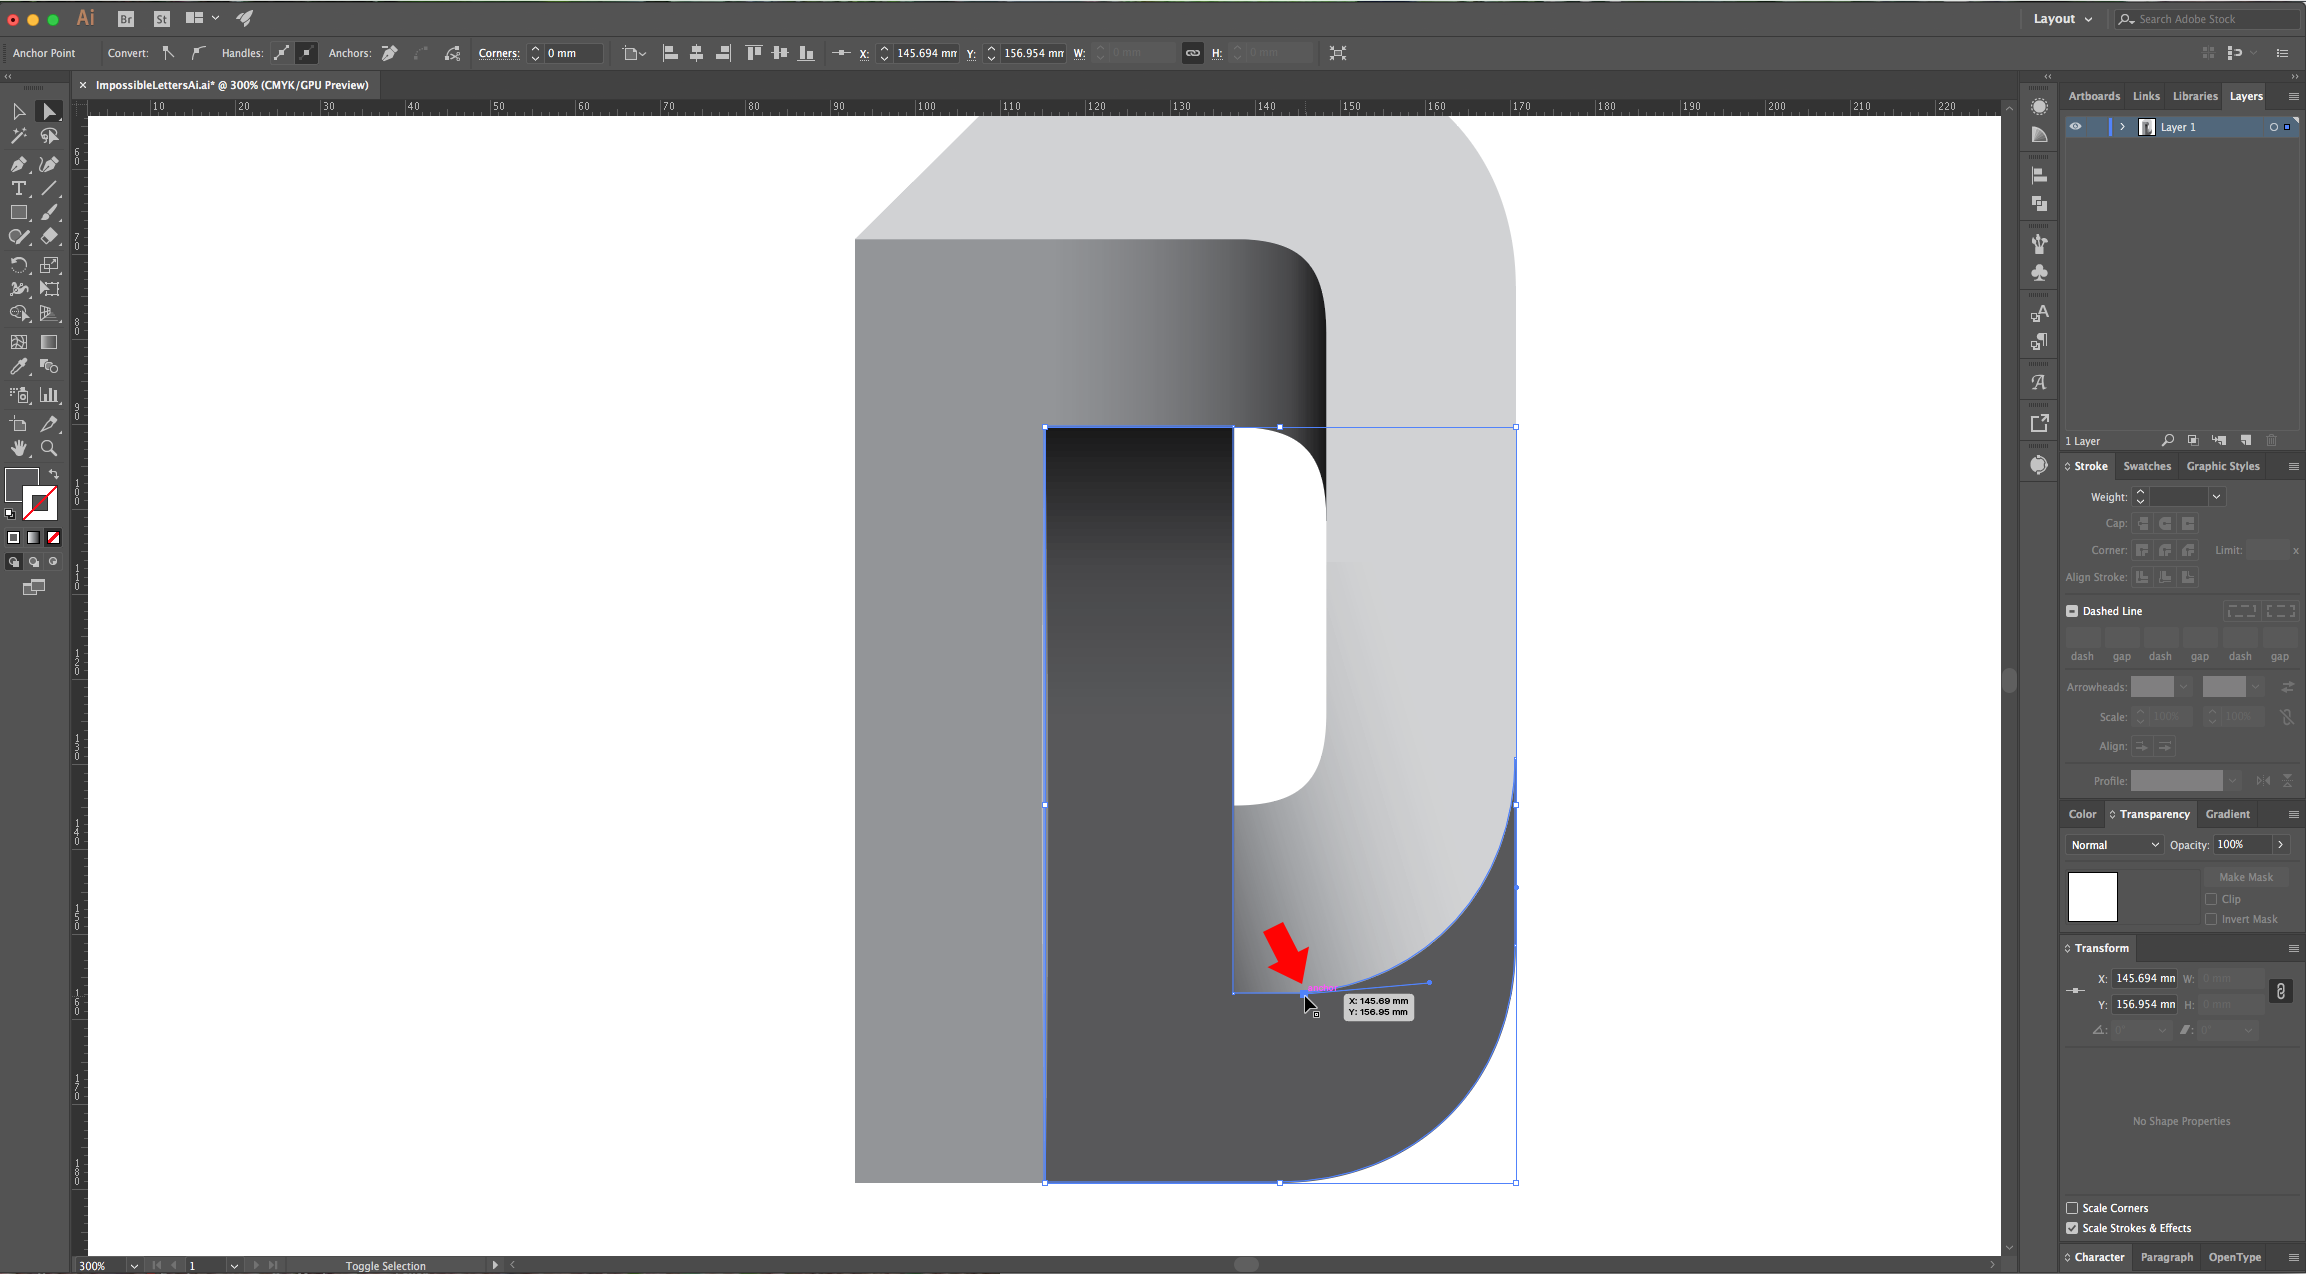
11 - With the “Direct Selection Tool” (A), click on the “Anchor Point” located in the middle of the “Curve” of the “L” shaped Path. “Copy” (Command/Control + C) and “Paste” it (Command/Control + V). Use the “Eyedropper Tool” (I) to give this Path the same characteristics as the one you made before, then, place it on top of the curve.

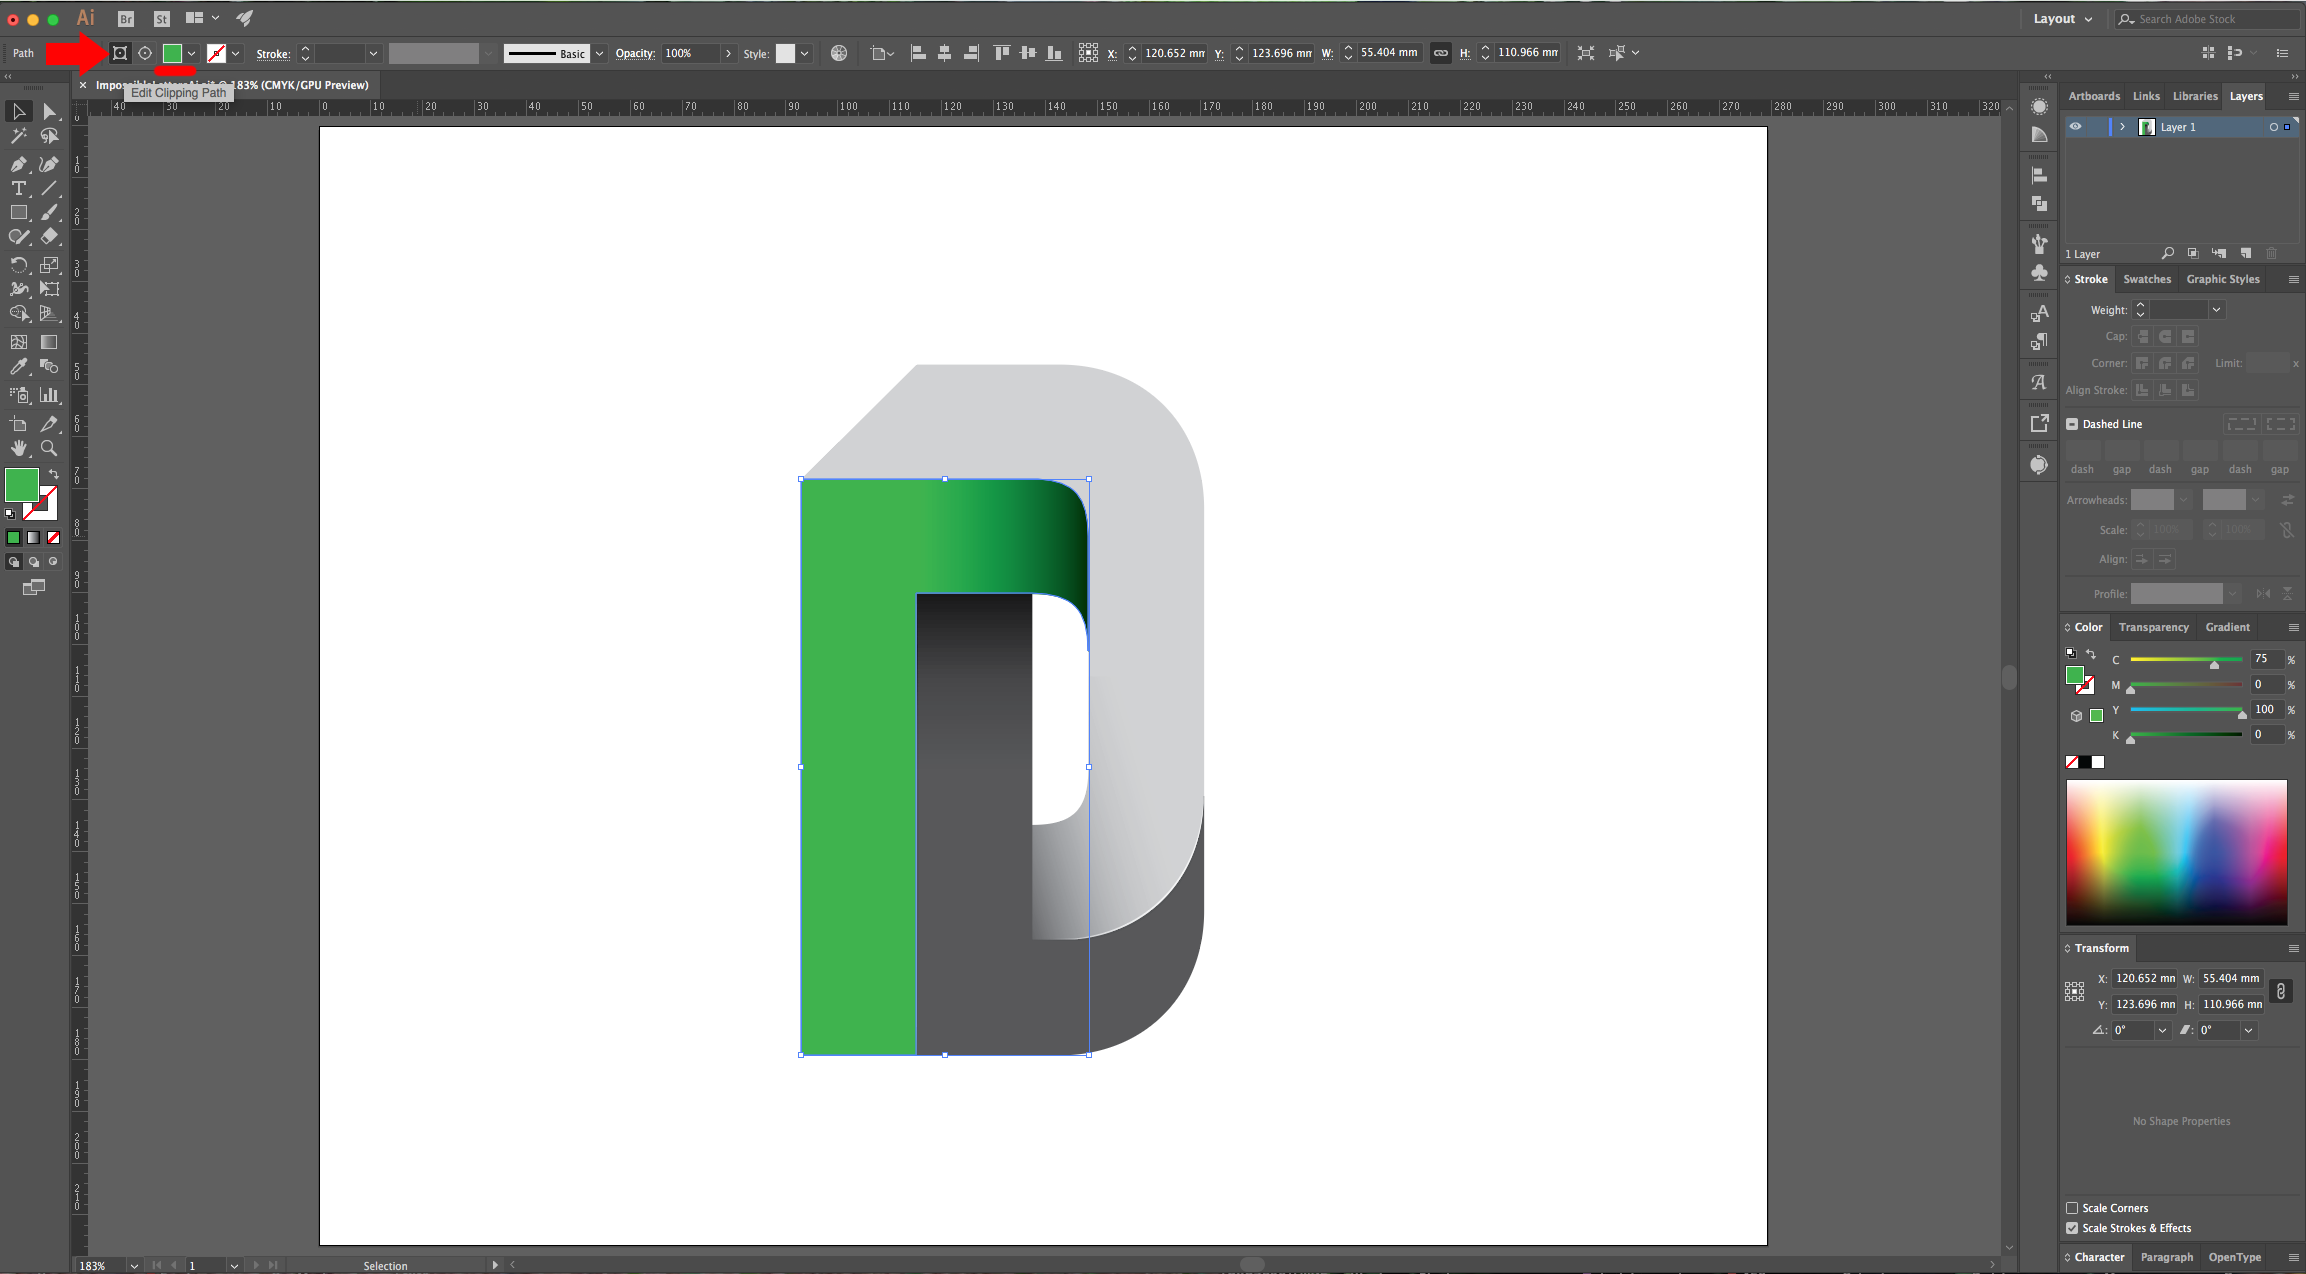
12 - On the Upper Menu click on “Edit Clipping Path” to change the “Fill” color if you want.
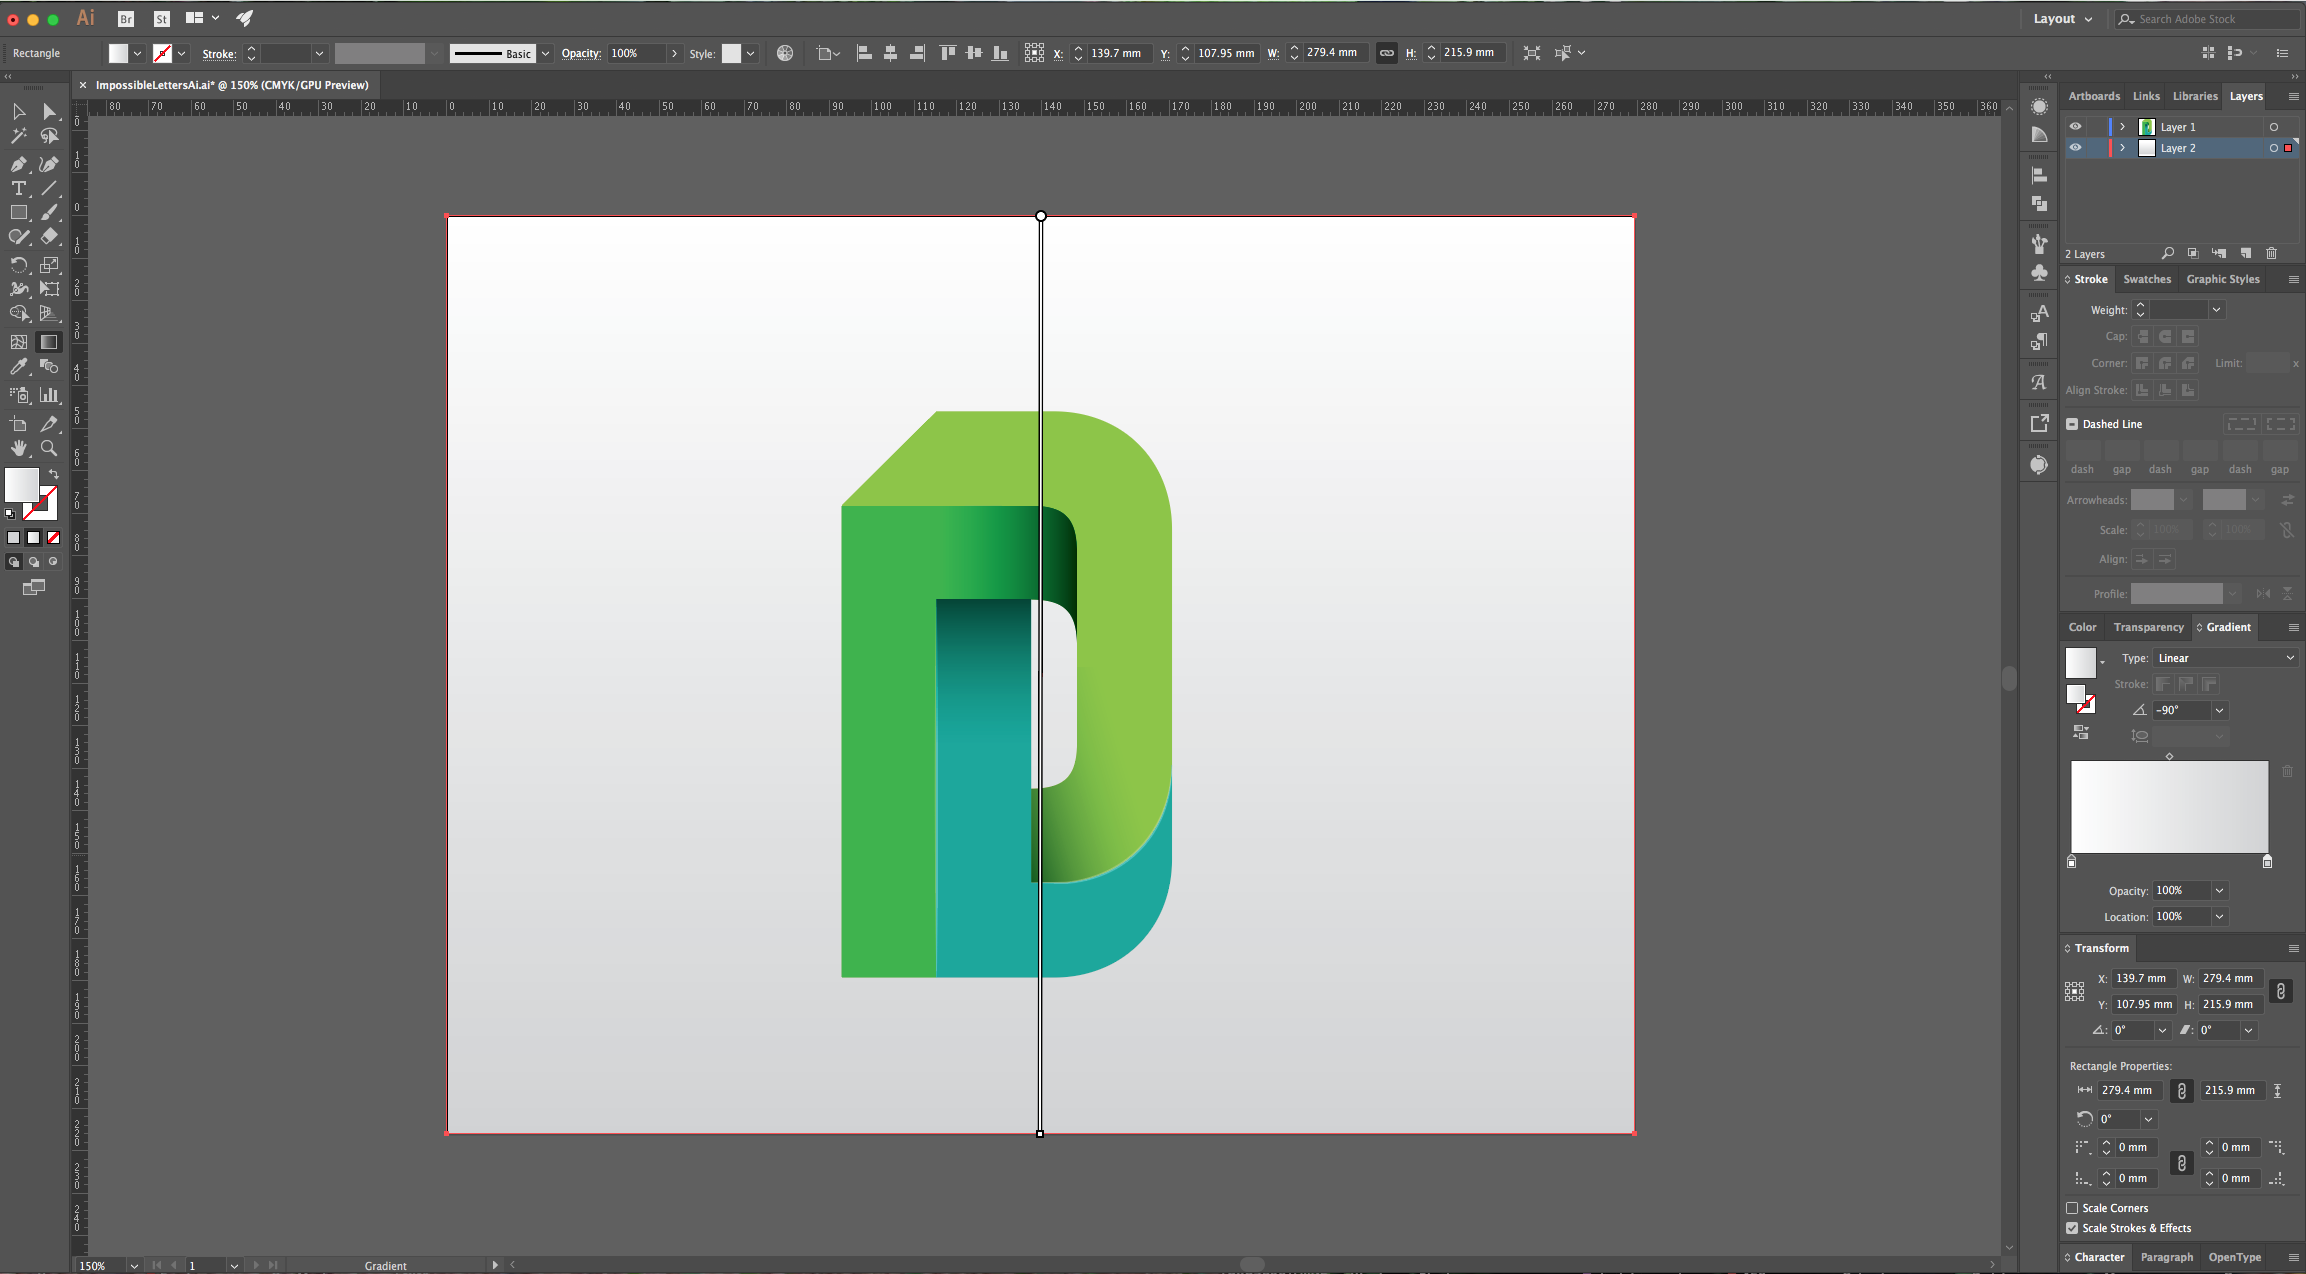
13 - Create a “New Layer” by clicking on the small button at the bottom of the “Layers Panel” and drag it under your current Layer. Select the “Rectangle Tool” (M), draw a rectangle that cover the entire Canvas and fill it with a White to Light Grey “Linear Gradient” with a -90° Angle.

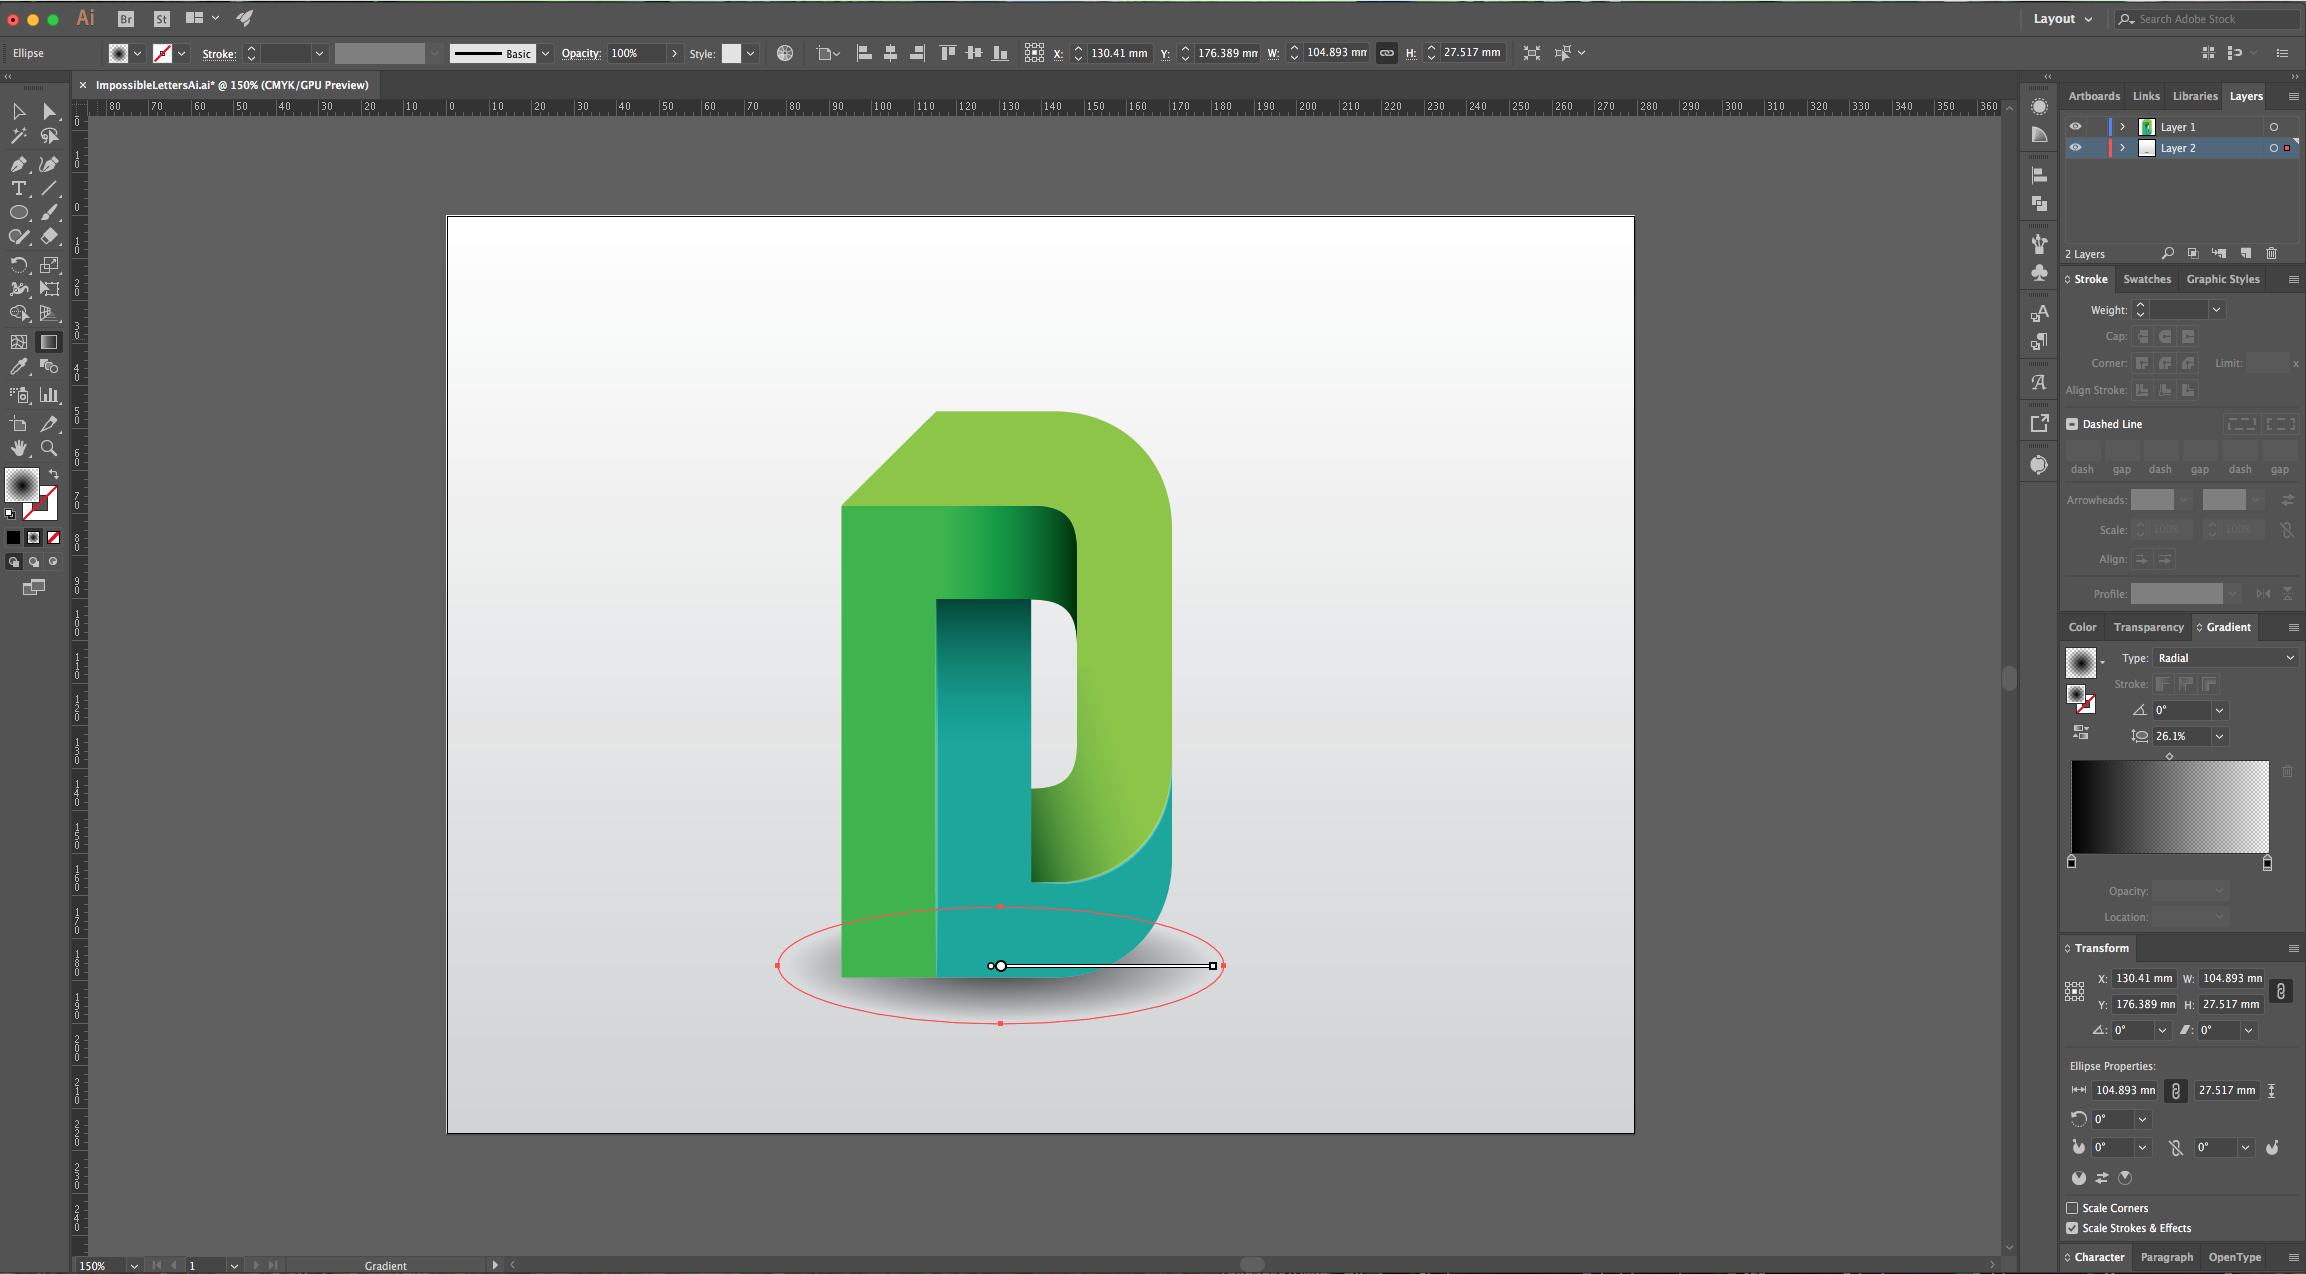
14 - Select the “Ellipse Tool” (L), create an oval shape under your letter and fill it with a “Radial Gradient” from Black to Transparent and with an “Aspect Ratio” of about 26%.


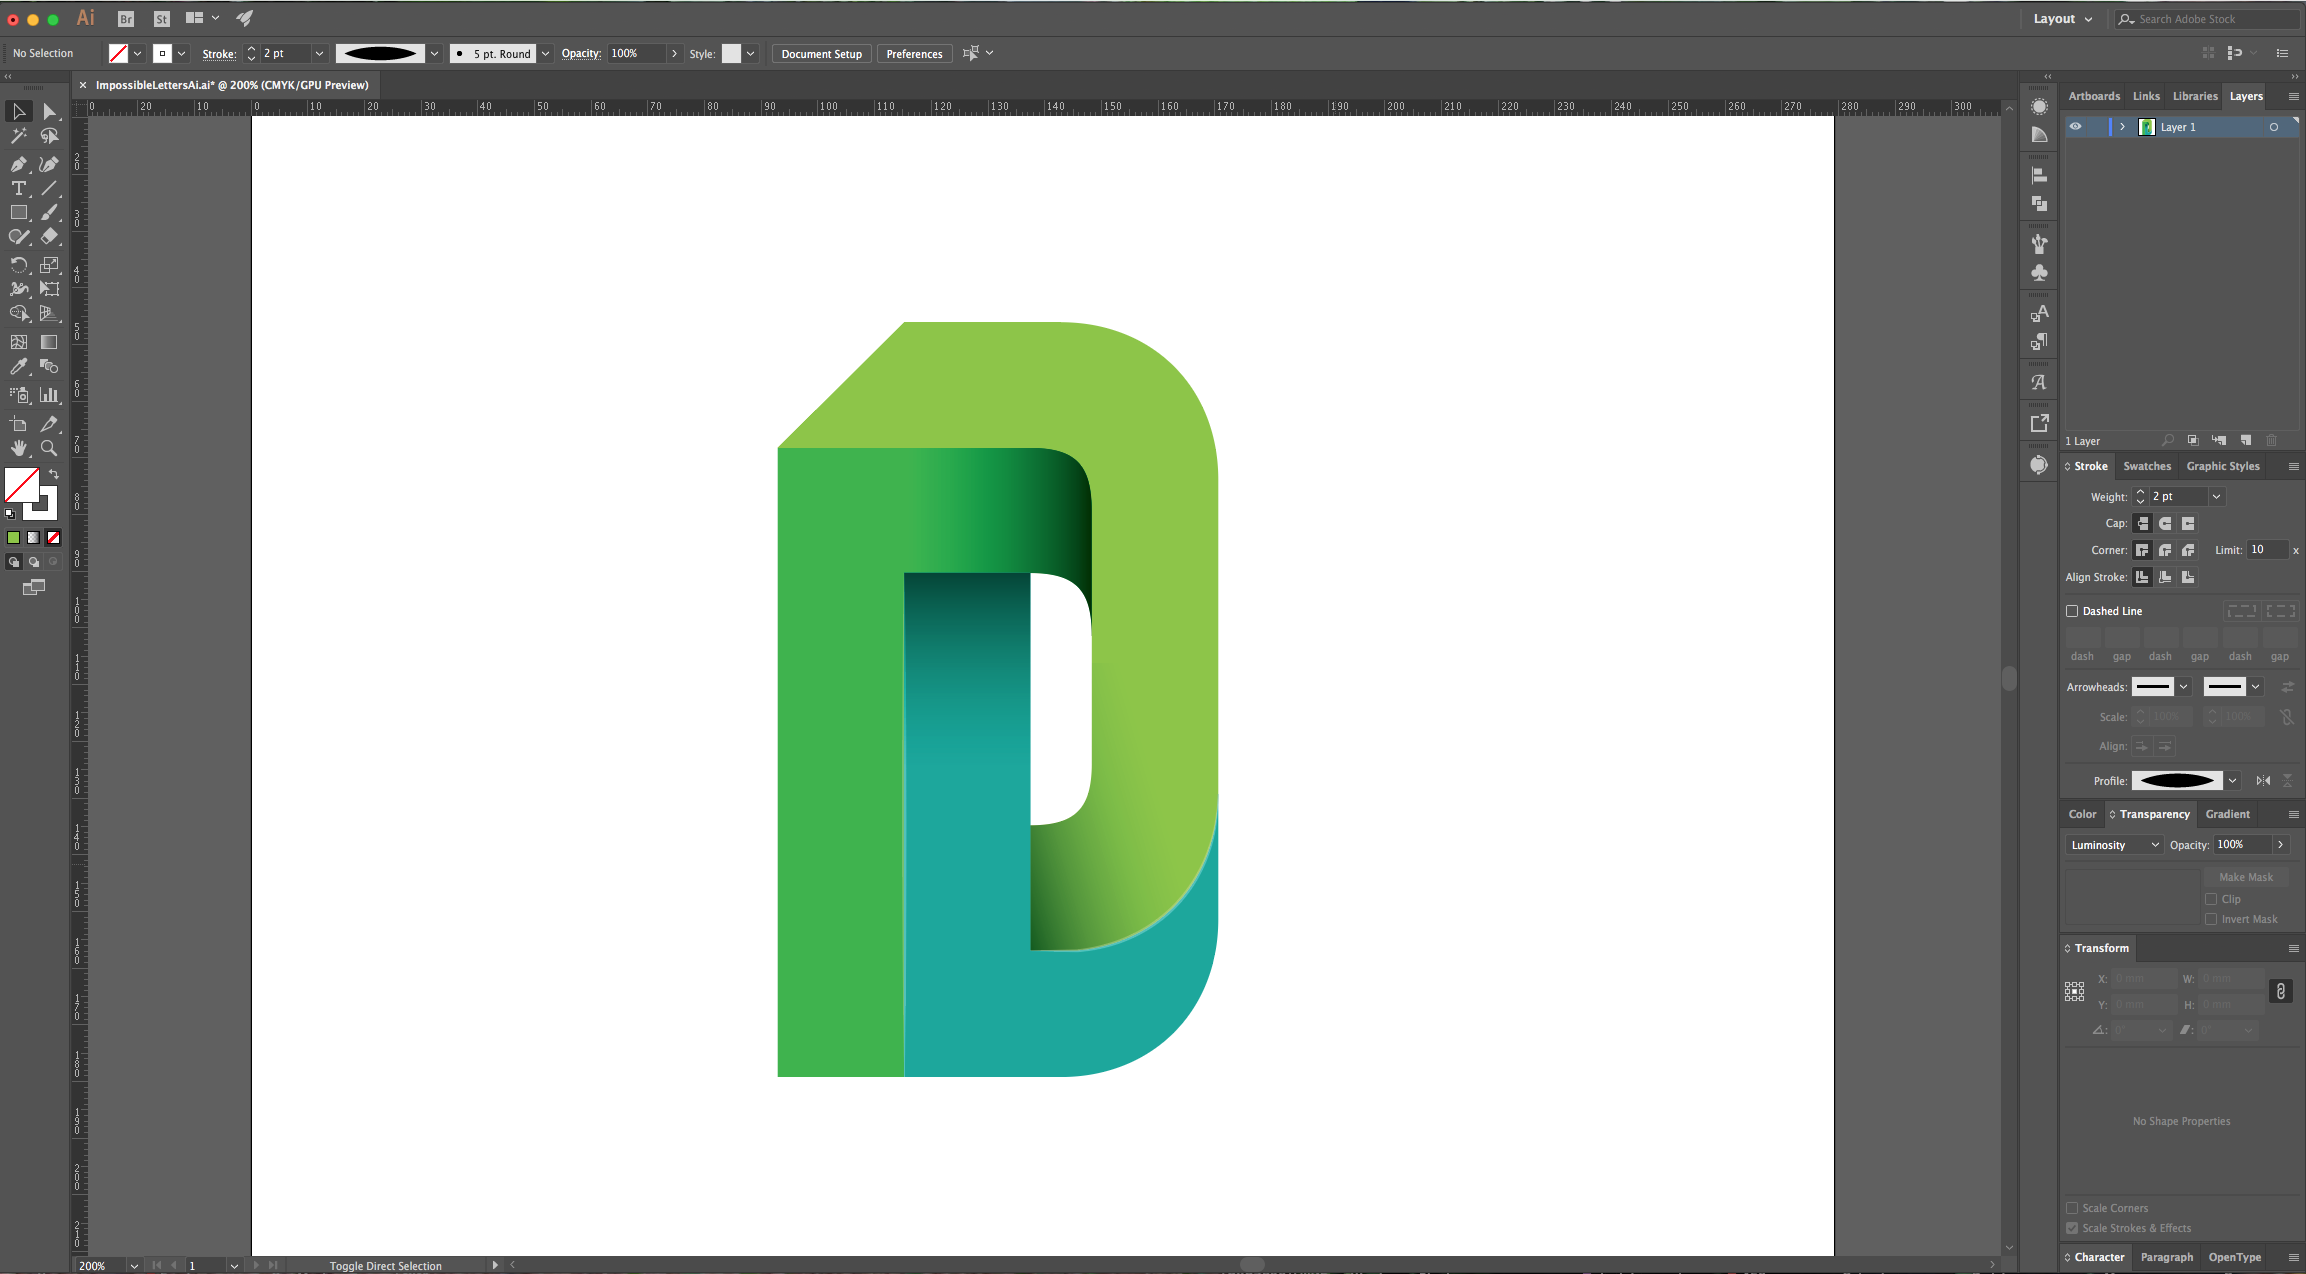
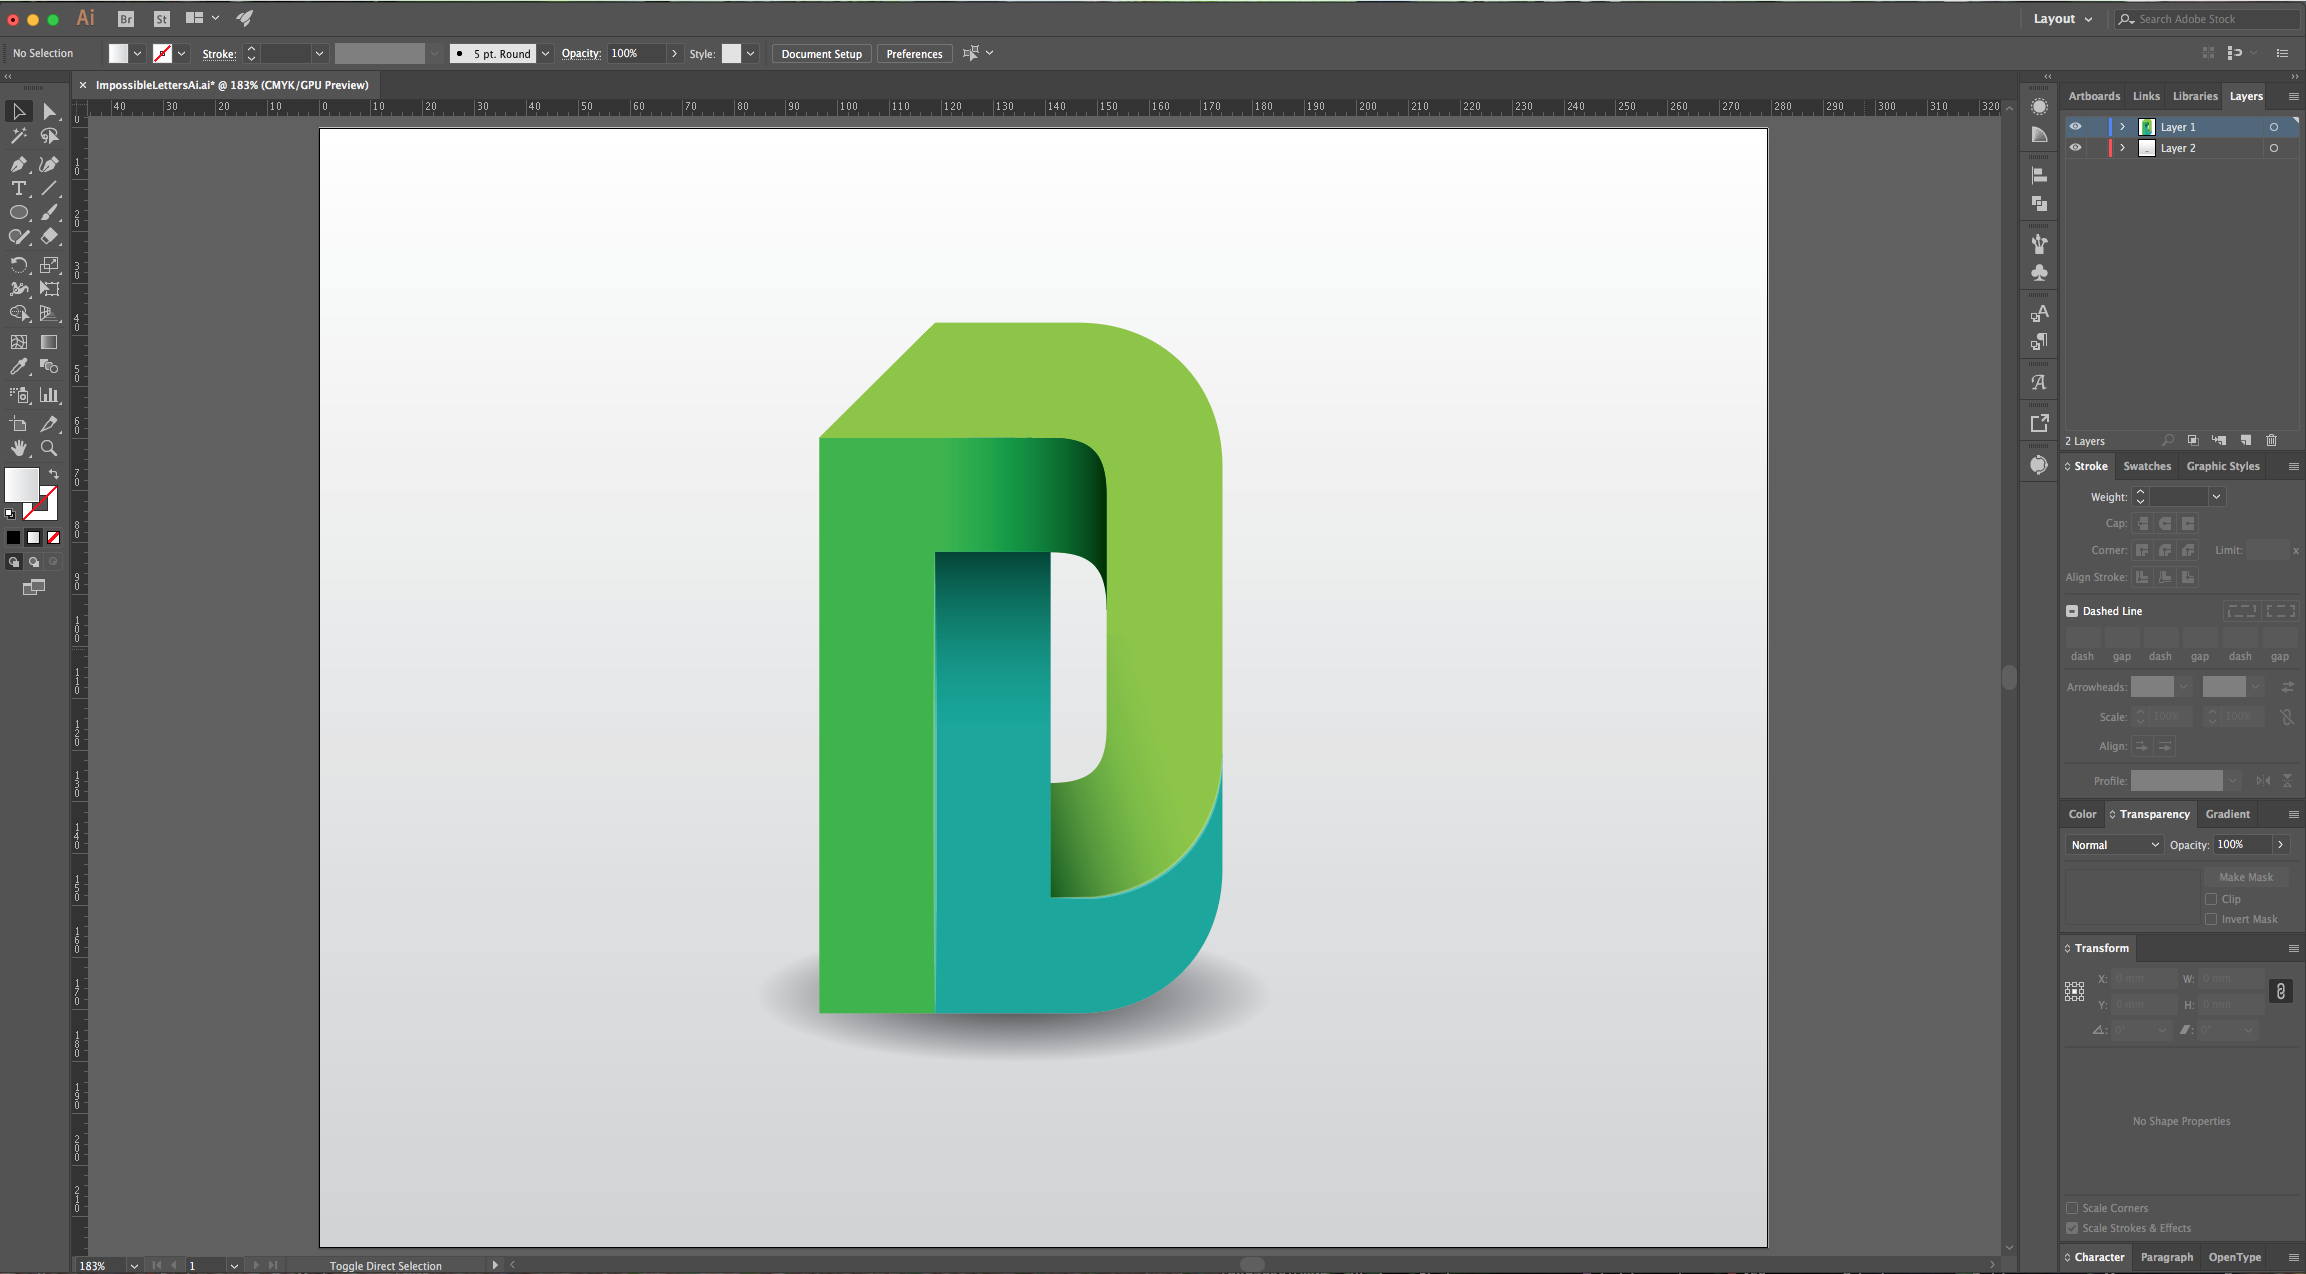
15 - Your work should be similar to this:
1 - In Illustrator, create a “New Document”. Select the “Type Tool” (T), choose your font and type your text (we used “Zeichen Sans”).
2 - Fill it with a medium grey, right-click on top of it and choose “Create Outlines”. Make sure that the “Smart Guides” are selected (Command/Control + U) and enter “Outline View” (Command/Control + Y). Both are located in the “View” Menu.
3 - Using the “Move Tool” click and drag your letter to the “Right” while holding the “Alt/Option + Shift” keys to duplicate it and move it in a straight line. Make the Leftmost Line of your duplicate coincide with the Inner Line of the Left Arm of your letter. Create another duplicate, but, click and drag your letter down this time (while holding the “Alt/Option + Shift” keys). Make the Top of this duplicate coincide with the Bottom Line of the Top Arm of your letter. If “Smart Guides” are on they should snap to it easily.
4 - For these steps, you can go in and out of “Outline View” (Command/Control + Y). Select all your paths and use the “Shape Builder Tool” (Shift + M) to unite some of the paths. First, select the Rightmost Path while holding the “Alt/Option” Key to “Delete” it. (If you are working with a different letter you need to figure out which portions should be deleted).
5 - Now, drag your cursor from the Top-left path down through the left part of the letter without getting to the Bottom path, before that, turn Right and Up to merge those paths together and create something similar to an “L” with a hook at the end. Create an “Inverted L” with the Middle and Top-right Paths. And a curved Path joining the remaining of the Paths (Bottom-left to right, then Up, then Left again). You should have three Paths now.
6 - Change the “Fill” color of the curved shape to a lighter shade of gray and the one of the inverted “L” to a darker shade. Select all, right-click on top of them, choose Transform > Reflect and click on the “Horizontal” Axis button. Click “OK”.
7 - Use the “Direct Selection Tool” (A) to select the Top-left “Anchor point” and while holding the “Shift” key move it to the right until you reach approximately the same spot where the inner part of the path is (“Smart Guides” will help locating it). Do the same with the Bottom-left one but drag it upwards. Right-click on top of each Path and choose “Ungroup”.
8 - Select one of them and click the “Draw Inside” button located at the bottom (right) of the “Toolbox”. Use the “Rectangle Tool” (M) and draw a small rectangle that covers the portion of your Path that should be “Shaded”, fill it with a “Radial Gradient” from Black to White or Black to Transparent. Click on the “Gradient Tool” (G) to bring out the Lever and play around with it until you are satisfied with it. Change the “Blending Mode” to “Multiply” in the “Transparency Panel”. To exit, click on the “Draw Normal” button (left).
9 - Repeat the shading with the rest of your Paths, just make the gradient angle fit the one that your selected Path’s shadow should have.
10 - Select the “Line Segment Tool” (\), set the “Stroke” color to White and the “With” to 2 Points and draw a vertical line that is almost as long as your letter. Place it in the intersection between two of your Paths and use the “Direct Selection Tool” (A) to drag the endpoints to make it fit. In the “Stroke Panel”, click on the “Profile” drop-down menu and choose “With Profile 1”. Then change the “Blending Mode” to “Overlay”.
11 - With the “Direct Selection Tool” (A), click on the “Anchor Point” located in the middle of the “Curve” of the “L” shaped Path. “Copy” (Command/Control + C) and “Paste” it (Command/Control + V). Use the “Eyedropper Tool” (I) to give this Path the same characteristics as the one you made before, then, place it on top of the curve.
12 - On the Upper Menu click on “Edit Clipping Path” to change the “Fill” color if you want.
13 - Create a “New Layer” by clicking on the small button at the bottom of the “Layers Panel” and drag it under your current Layer. Select the “Rectangle Tool” (M), draw a rectangle that cover the entire Canvas and fill it with a White to Light Grey “Linear Gradient” with a -90° Angle.
14 - Select the “Ellipse Tool” (L), create an oval shape under your letter and fill it with a “Radial Gradient” from Black to Transparent and with an “Aspect Ratio” of about 26%.
15 - Your work should be similar to this:
by @lornacane


