
How to Make Valentines in DesignScape
Learn how to make an adorable Valentines card in DesignScape with our in depth tutorial.
In this tutorial, we are going to have some fun making a Valentine's card in DesignScape. You will learn how to make a cute, quirky, or sweet card for that special someone. DesignScape is an awesome browser based design program available to Gold Plus Members. There is no need to download anything, you can start creating immediately.

If you are not a Gold Plus Member, not to worry, we have a free 30-day trial just for you. Not only does DesignScape come with tons of great features, but it’s also an excellent alternative to Photoshop and Illustrator.
On the landing page, click on DesignScape.

For this tutorial, we are using a cute Valentine's SVG along with a red glitter texture. For the background, we will use this pink digital paper. Our text will be created using a beautiful curly script font called Balerina.
Step 1 - Add and Edit your Background
Let’s begin by first creating a new project. We set our dimensions to 1500 x 1500 px and set the DPI to 300. You can use any size you want for your Valentine's card.
Before carrying, be sure to upload your font to DesignScape.
Import Then Edit the Background
With our document set up, we now want to drag and drop our image into DesignScape. Open the folder where your background is stored, then drag + drop it into your new document.

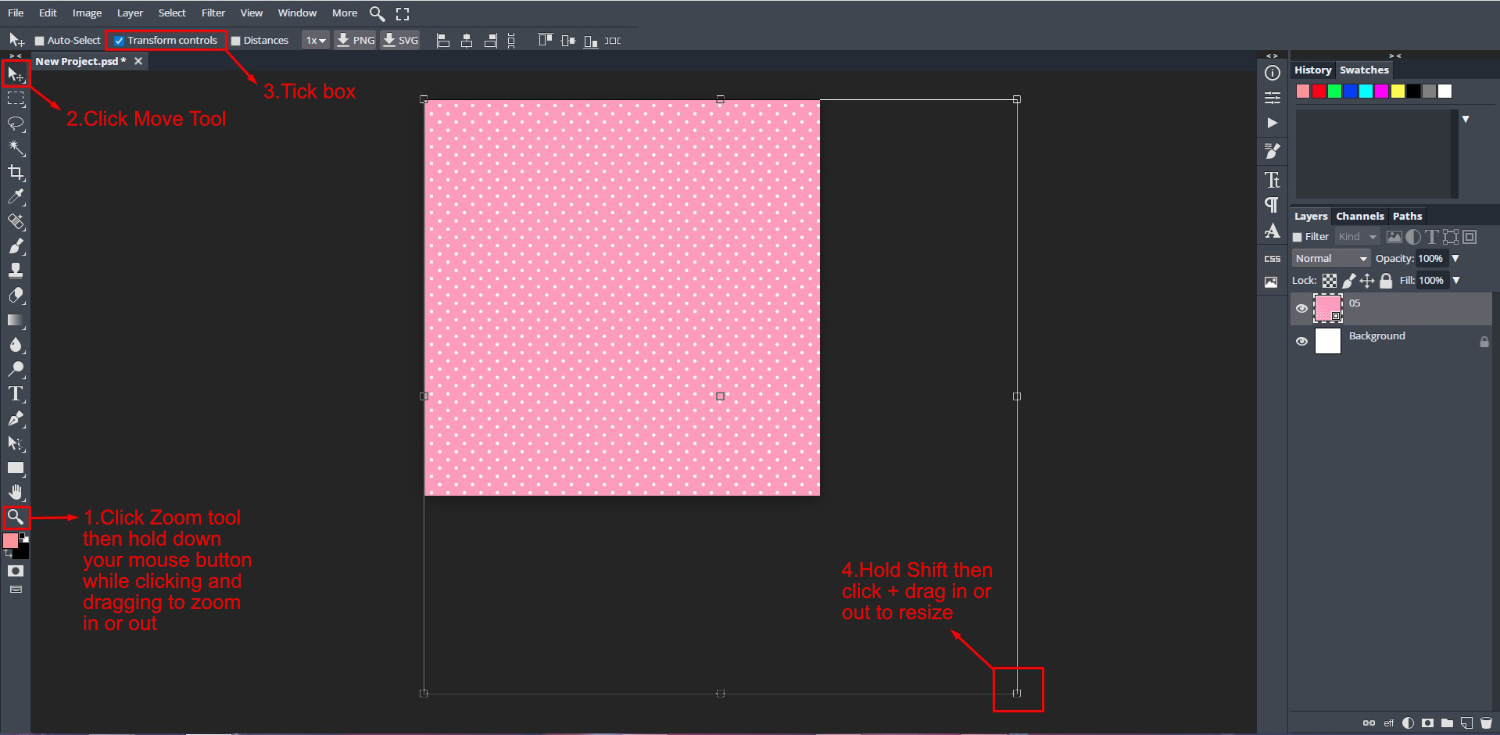
You can resize as needed. We want the dots in the background to be slightly bigger.
For this, you may need to zoom out a bit to better see everything. On the left side toolbar, click on the Zoom Tool. Now, hold down your left mouse button, then click + drag to zoom out.
Click on the Move Tool, then tick the box for Transform controls at the top toolbar. This will activate the sizing handles. Now you can transform and scale the background.
While holding Shift, click + drag out a corner node to resize the background.
Add Brightness/Contrast Adjustment Layer
To make the background lighter, we are going to add a non-destructive Brightness/Contrast Adjustment Layer. With this layer, you can go back and adjust it later on if needed.
Go to Layer > New Adjustment Layer > Brightness/Contrast. A new layer will appear under the Layers Panel on the right. The properties window will also open. Here you can adjust the Brightness and Contrast as needed. We changed our Brightness to 49.

If you need to edit the Brightness/Contrast layer, all you need to do is double click the thumbnail. Alternatively, click on the Properties icon in the panel next to the Layers Panel.

Step 2 - Use the Custom Shape Tool
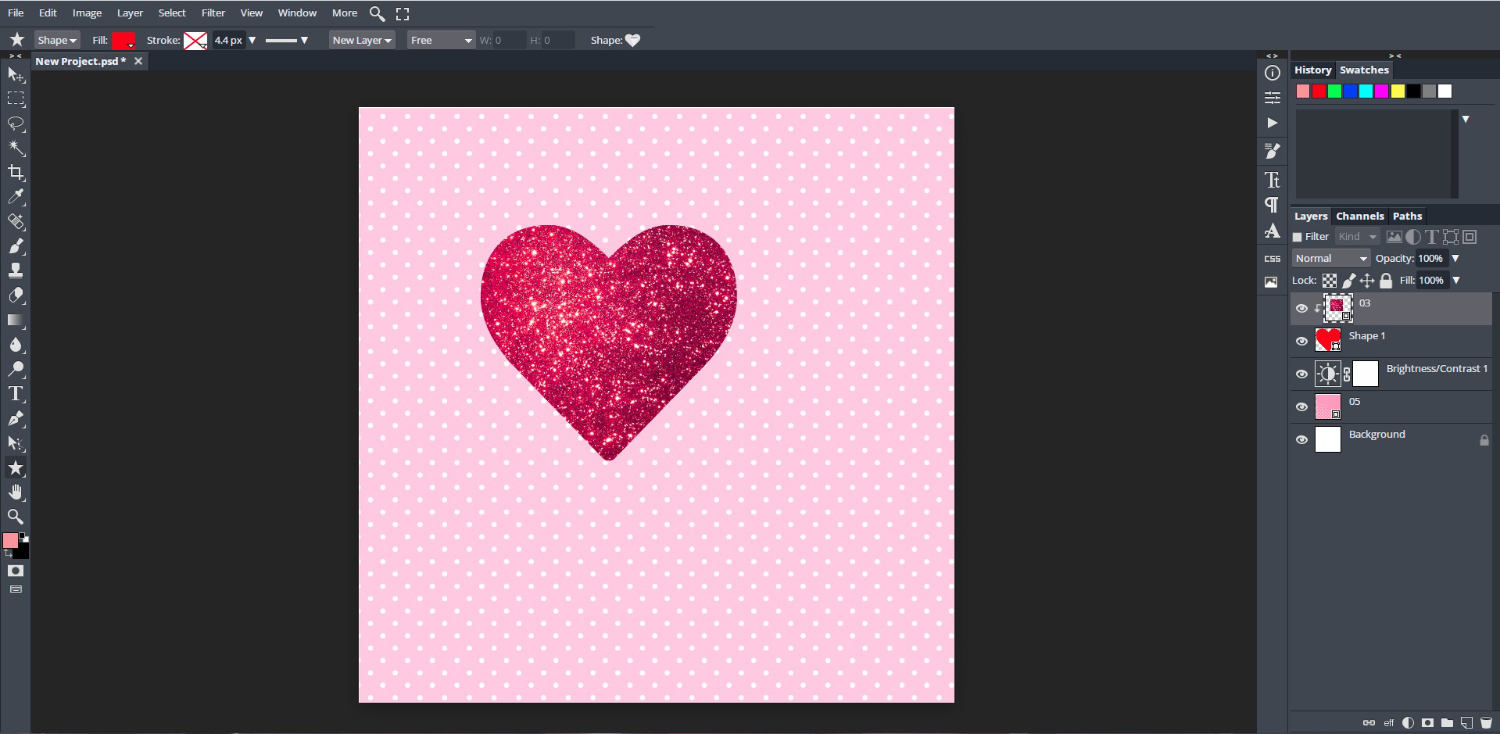
DesignScape is pre-loaded with a wide variety of different shapes to choose from. We are going to create a Heart shape using the Custom Shape tool. Once selected, click + drag your Heart shape out.
By default, the shape will be filled with red. To close out of the properties window, click on the Properties icon.

Import a Texture
Let us add a glitter texture to our Heart shape. As with the background, locate your texture then drag and drop it into DesignScape. Using the Move Tool, resize then reposition the texture over the Heart shape.

Create a Clipping Mask
Next, we want to clip the texture to the Heart shape. To do this we will create a clipping mask in DesignScape. Since the shape is already below the texture layer, right-click > Clipping Mask.
As a Clipping Mask is non-destructive, you still have the flexibility to move the texture around until you are happy with it.
Group the Layers
We want to group the shape and texture layers so they are easier to move around. Click on the texture layer then hold Shift + click to select the shape layer. With both selected, go down to the bottom of the Layers Panel and click on the Folder icon.
Both layers are now grouped.

To edit the Heart shape or texture, click on the arrow to open the folder. Then click on the layer to edit.
Step 3 - Import Main Design Element
We are now ready to import our main design. We want to adjust color and text, so we chose to work with the SVG file.
Enter Smart Object Mode
Double click on the thumbnail of the newly imported design in the Layers Panel. In our case, the “For You” SVG design.
A new window will open with each element placed on its own layer. This is the Smart Object where we can edit each part as needed.

Add a Color Overlay
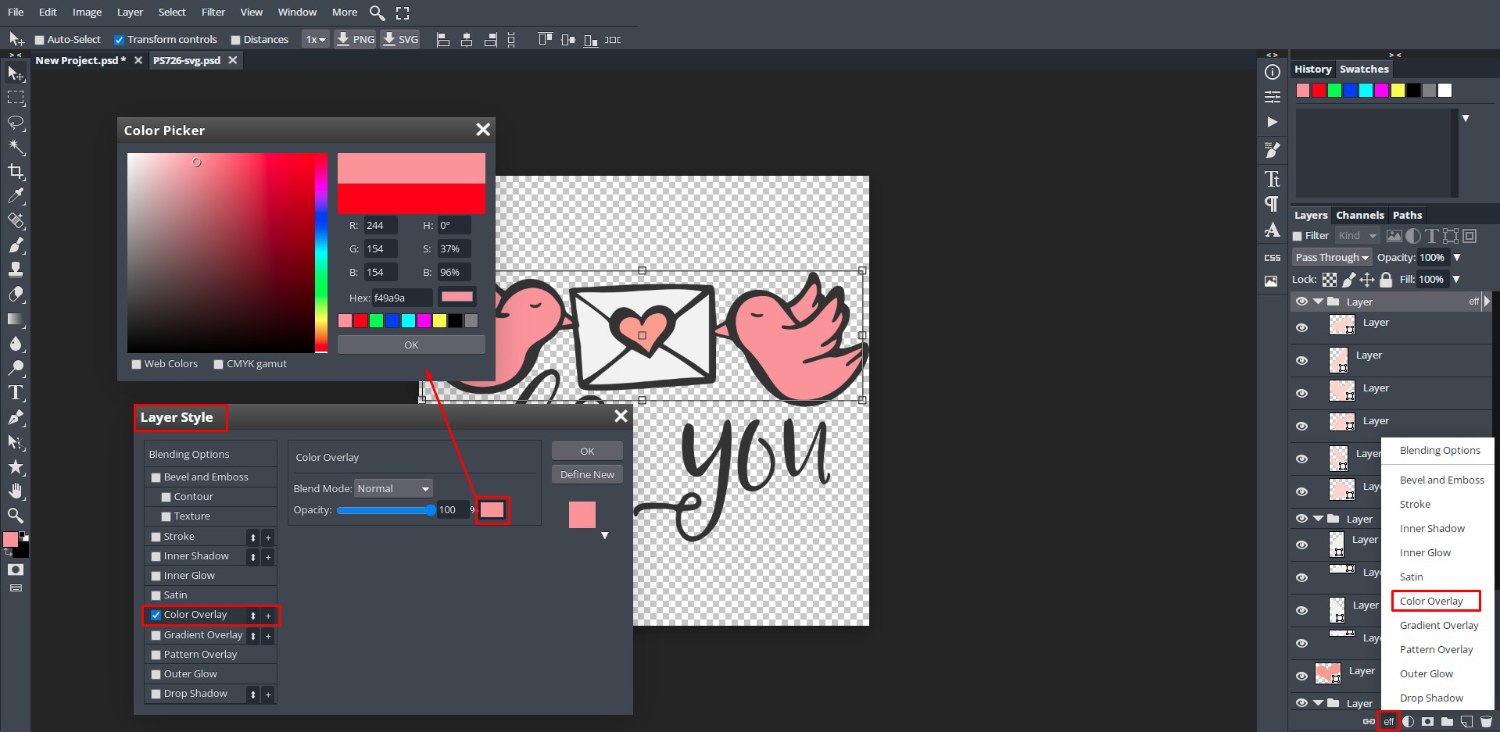
We want to change the color of the birds. So we selected the topmost layer folder. This contains all of the color elements for the birds. Next, go to the bottom of the Layers Panel and click in eff > Color Overlay. The Layer Style Panel will open.
We clicked on the Color Picker box in the Layer Style Panel and adjusted our color. Then we clicked OK twice to commit the changes.
Save Smart Object
To apply the changes to the original file, we need to save the Smart Object. Go to File > Save (Smart Object). You will get a notification saying the Smart Object was updated.

Click back on the original file and your changes should be updated.

Step 4 - Create your Text Objects
Let us add some text to our design to make it stand out.
Use the Text Tool
On the left side toolbar, click on the “T” for the Text Tool. Now, go to the top toolbar and select your font from the Font Family. Then, add a value in the text size box. We used a value of about 407px for our project.
For more information on adding text, we have a very helpful tutorial on text basics in DesignScape.

Change the Text Color
You can change the color of your text by using the Color Picker on the top toolbar. Click the color box to open the options. To keep the writing as cohesive as possible, we want to sample from the color in the main design element.
Once you open the Color Picker panel, your cursor will turn into crosshairs for sampling. Place the cursor/crosshairs over the letter “F” in “for you” then click to sample the color. You will see the new color appear in the top preview box.

Remember to click OK to commit to the changes.
Type out your Text
Now, click anywhere on the canvas and start typing. We added two text objects, one that said “My” and a second one “beats only”. To add a second text object, click back on the Text Tool, then start typing.
Resize all of your text objects as needed.

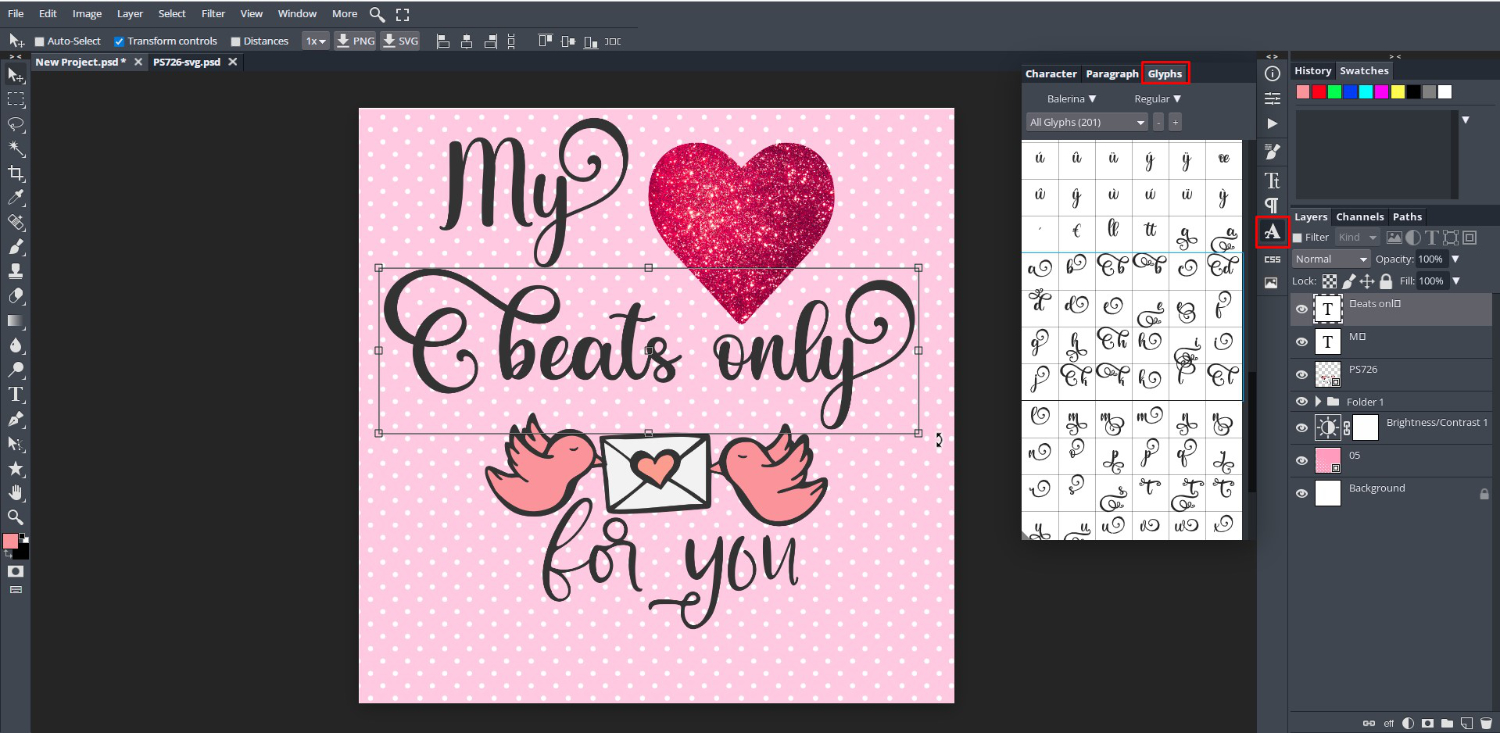
Add Glyphs to your Text
To give the Valentine's card a more romantic look, we are going to add glyphs to our text. DesignScape has a glyphs feature built right in, so there is no need for external software. For our text, we added swirled letters for a fancy feel to our project.
Step 5 - Create an Offset Stroke
The text could do with a little something more to make it pop so we added an offset stroke.
To quickly apply strokes to multiple text objects, just add and edit a stroke for one text layer. Then, select the next text layer and add a stroke. The previously used settings are automatically applied.

Apply Offset to Main Design Text
The same can be applied to the main design element. If the Smart Object window is still open, click on it to access it. If not, double-click on the main design element to open Smart Object mode.
In this window go to the Layers Panel and scroll down to the layer containing the words/letters. Click on the top word layer then hold Shift + click on the fourth word layer to select all four layers.

Now right click > Merge Layers. Add a Stroke by going to eff > Stroke. As the layers were combined into one, the stroke is applied to all of the wording at once. All you need to do is click OK.

Adjust Spacing of Main Design
The spacing needs to be adjusted as the offset is overlapping on the rest of the design. Make sure the layer with the offset is selected, then click on the Move Tool. Hold Shift to constrain the position. Then click + drag the wording down as far as you need it.
Once again, go to File > Save (Smart Object) to apply the changes.

Step 6 - Align the Elements
Click back on the original file to see the changes. To quickly align the elements, click the top layer then hold Shift + click the Folder layer. Now all the elements, except the background, are selected. Go to the top and click on Align Horizontally.
You may need to manually adjust the position of the word “My” and Heart texture. Click on the “My” text layer and use the Move Tool to adjust. Do the same for the Heart Texture. If you need a visual guide, activate the rulers by going to View > Rulers. Now, click + drag down your guides from the top and the left to place.
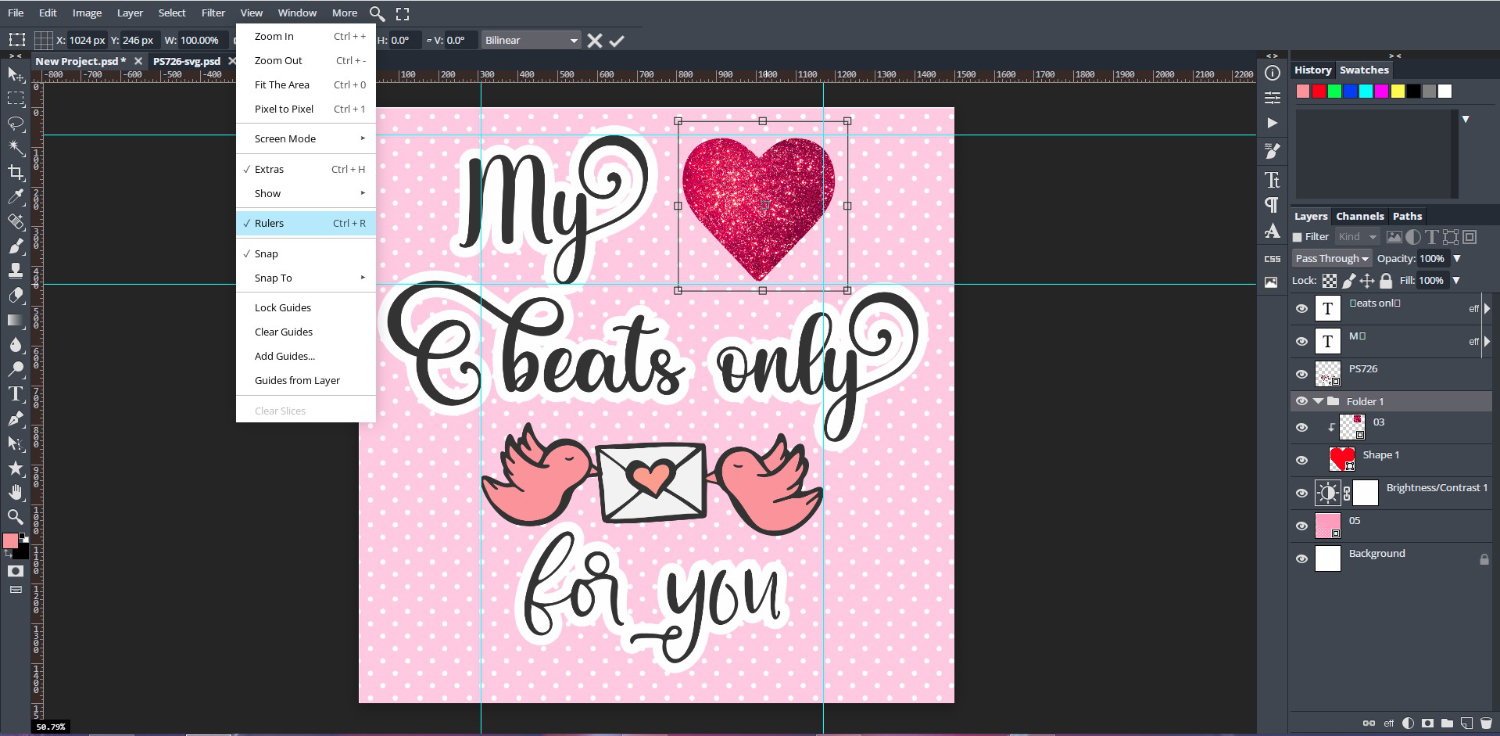
To remove the guides, just drag them back up or to the left.
Finally, we can save our design in one of many formats provided on DesignScape. We want to save it as a JPEG, so click on File > Export as > JPG.
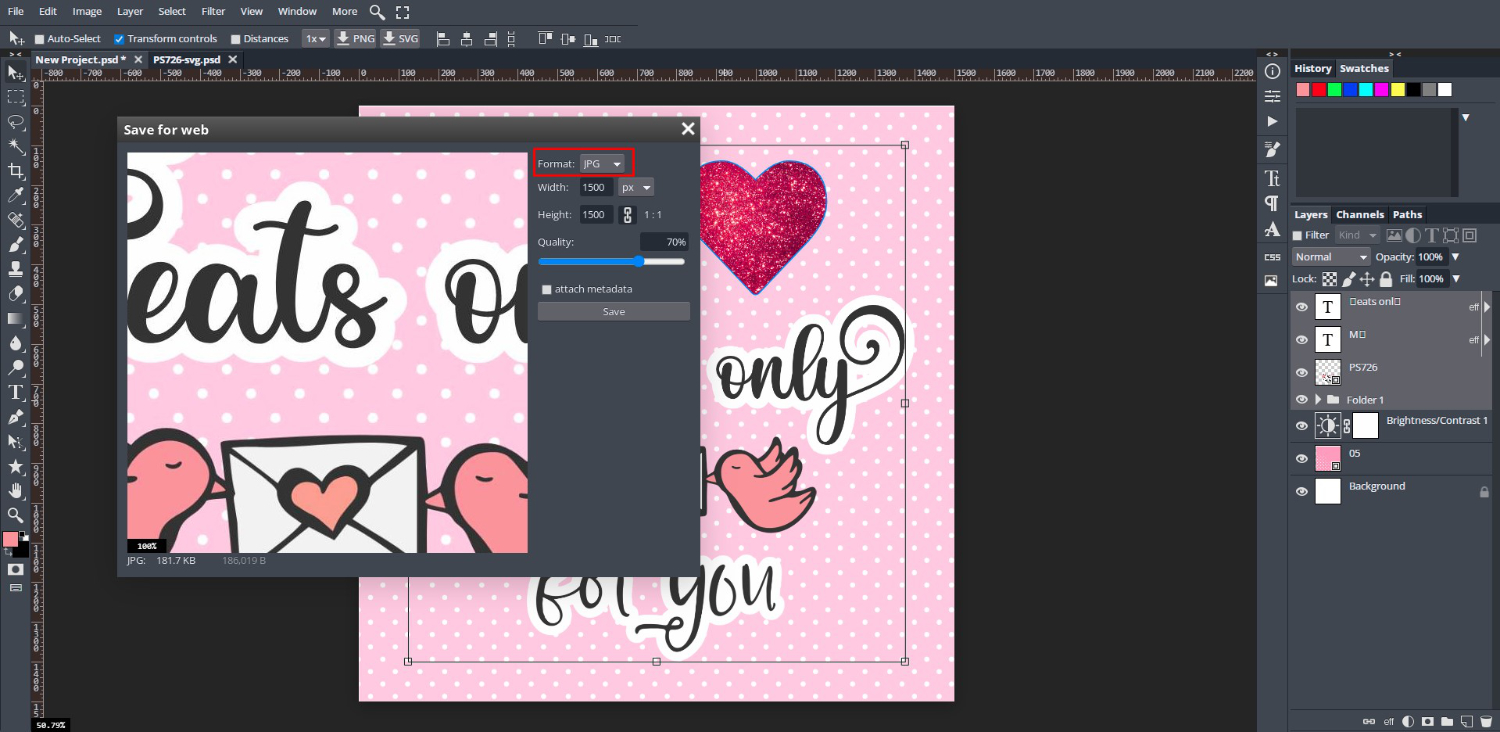
Your lovely and creative design is now ready for use in your projects.

We hope that you enjoyed following this tutorial on how to make a Valentine's card in DesignScape. You can learn more about how to use DesignScape including using Smart Object mockups to display your designs.


