
How to use Fonts in Inkscape
In our tutorial we will show you how to use fonts in Inkscape. Fonts play an important role in design such as enhancing the display of your product. Many fonts come with glyphs which add further detail to your text. These glyphs can be accessed with the Character Map and used in Inkscape.
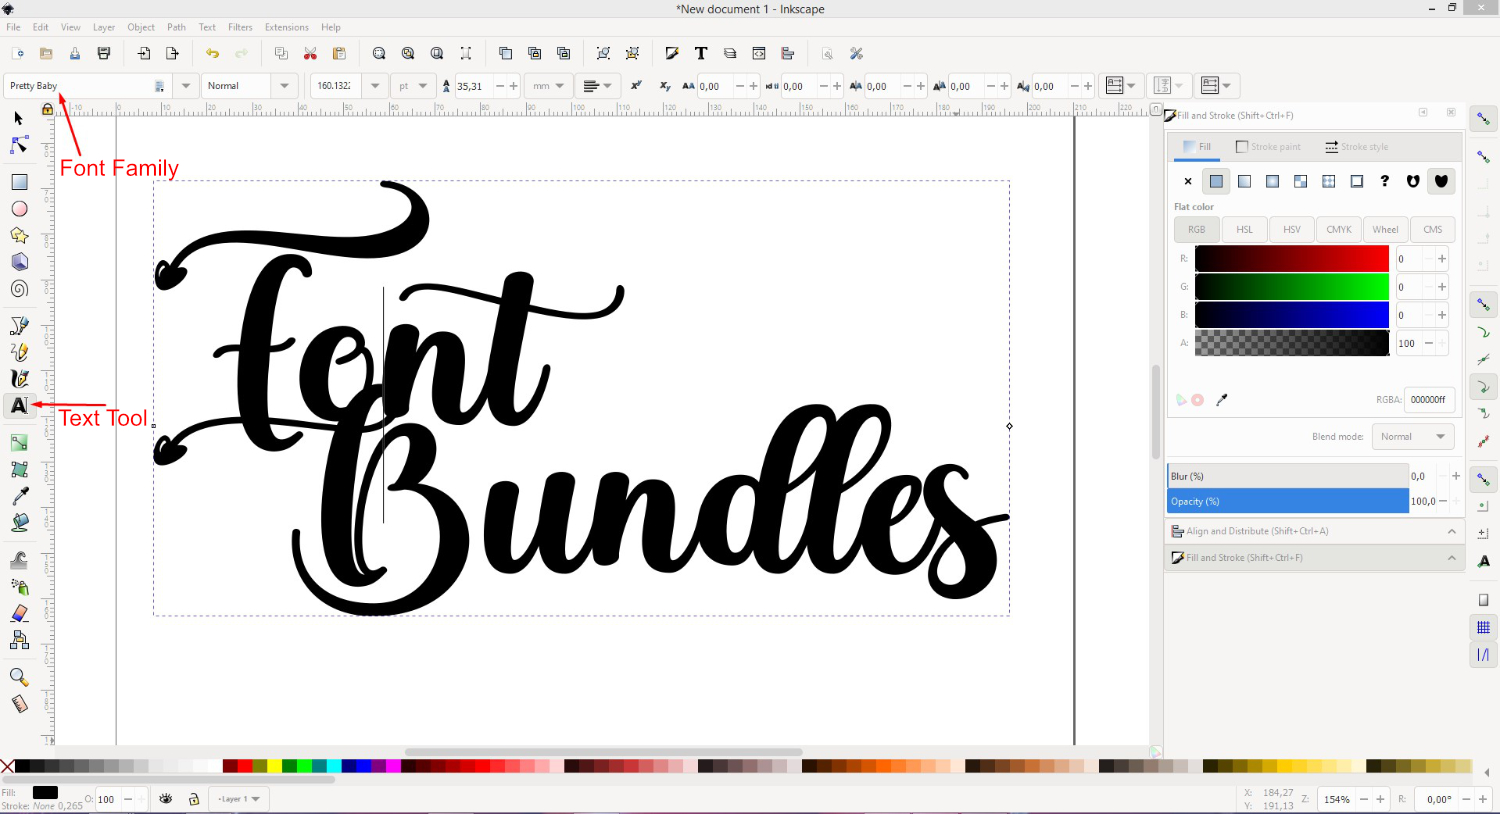
We will be using a calligraphy script font font called Pretty Baby. If you would like to use another font, browse through our modern calligraphy fonts for more options.
Step 1 - Download and Install Fonts
You can use any font that is available on your system. We downloaded and installed our fonts before opening Inkscape. If you need further help with this, we have a great tutorial on installing fonts on a PC or Mac.
As we are using a PC for this tutorial, once the font file was downloaded, we double clicked to open the installation. The Install button was clicked at the top and the font installed.

Step 2 - Add Text and Change the Font
To add your text you will need to use the Create and edit text objects tool. You can find the tool on the left hand side toolbar. Select the tool then click anywhere in the document. Start typing out your text.
At the top left corner of the screen, click on Select Font Family. You can choose from a list of fonts on your system or type in the font name. You will only be able to change the font when you are in text edit mode. If you click away at any time, just double click on the text to access the edit mode.
You don’t need to highlight your text to change the font. However, you may at times find that the font doesn’t change. If this happens you need to select or highlight the font while in edit mode, then change it accordingly. Do this by clicking + dragging your mouse over your text.

Step 3 - Add Font Glyphs to Text
More and more fonts today come with a selection of glyphs. Glyphs can contain swirls, shapes, and so on to enhance the look of your text. A quick and easy way of accessing glyphs for Inkscape is by using the Character Map.
For our text below we highlighted the B for Bundles, copied the glyph in Character Map and pasted into Inkscape.

Glyphs were added to the rest of the text to give the lovely result in the image below.

You can adjust the size of your text by clicking away to exit edit mode. Then click back on the text to access the resizing handles. Color can be added using the Fill and Stroke Panel by going to Object > Fill and Stroke. You can also add color using the palette at the bottom of the screen.

If you need to modify the text, such as adjusting the swirls, you will need to convert text to a path first.
Now that you know how to use fonts in Inkscape, you can experiment further by adding a gradient for example. We hope that you enjoyed this tutorial and find it useful for your future crafts.


