Pixel Art Flowers in Illustrator
We are going to create some Flowers as an example, but you can create anything you want. You need a reference image or vector.
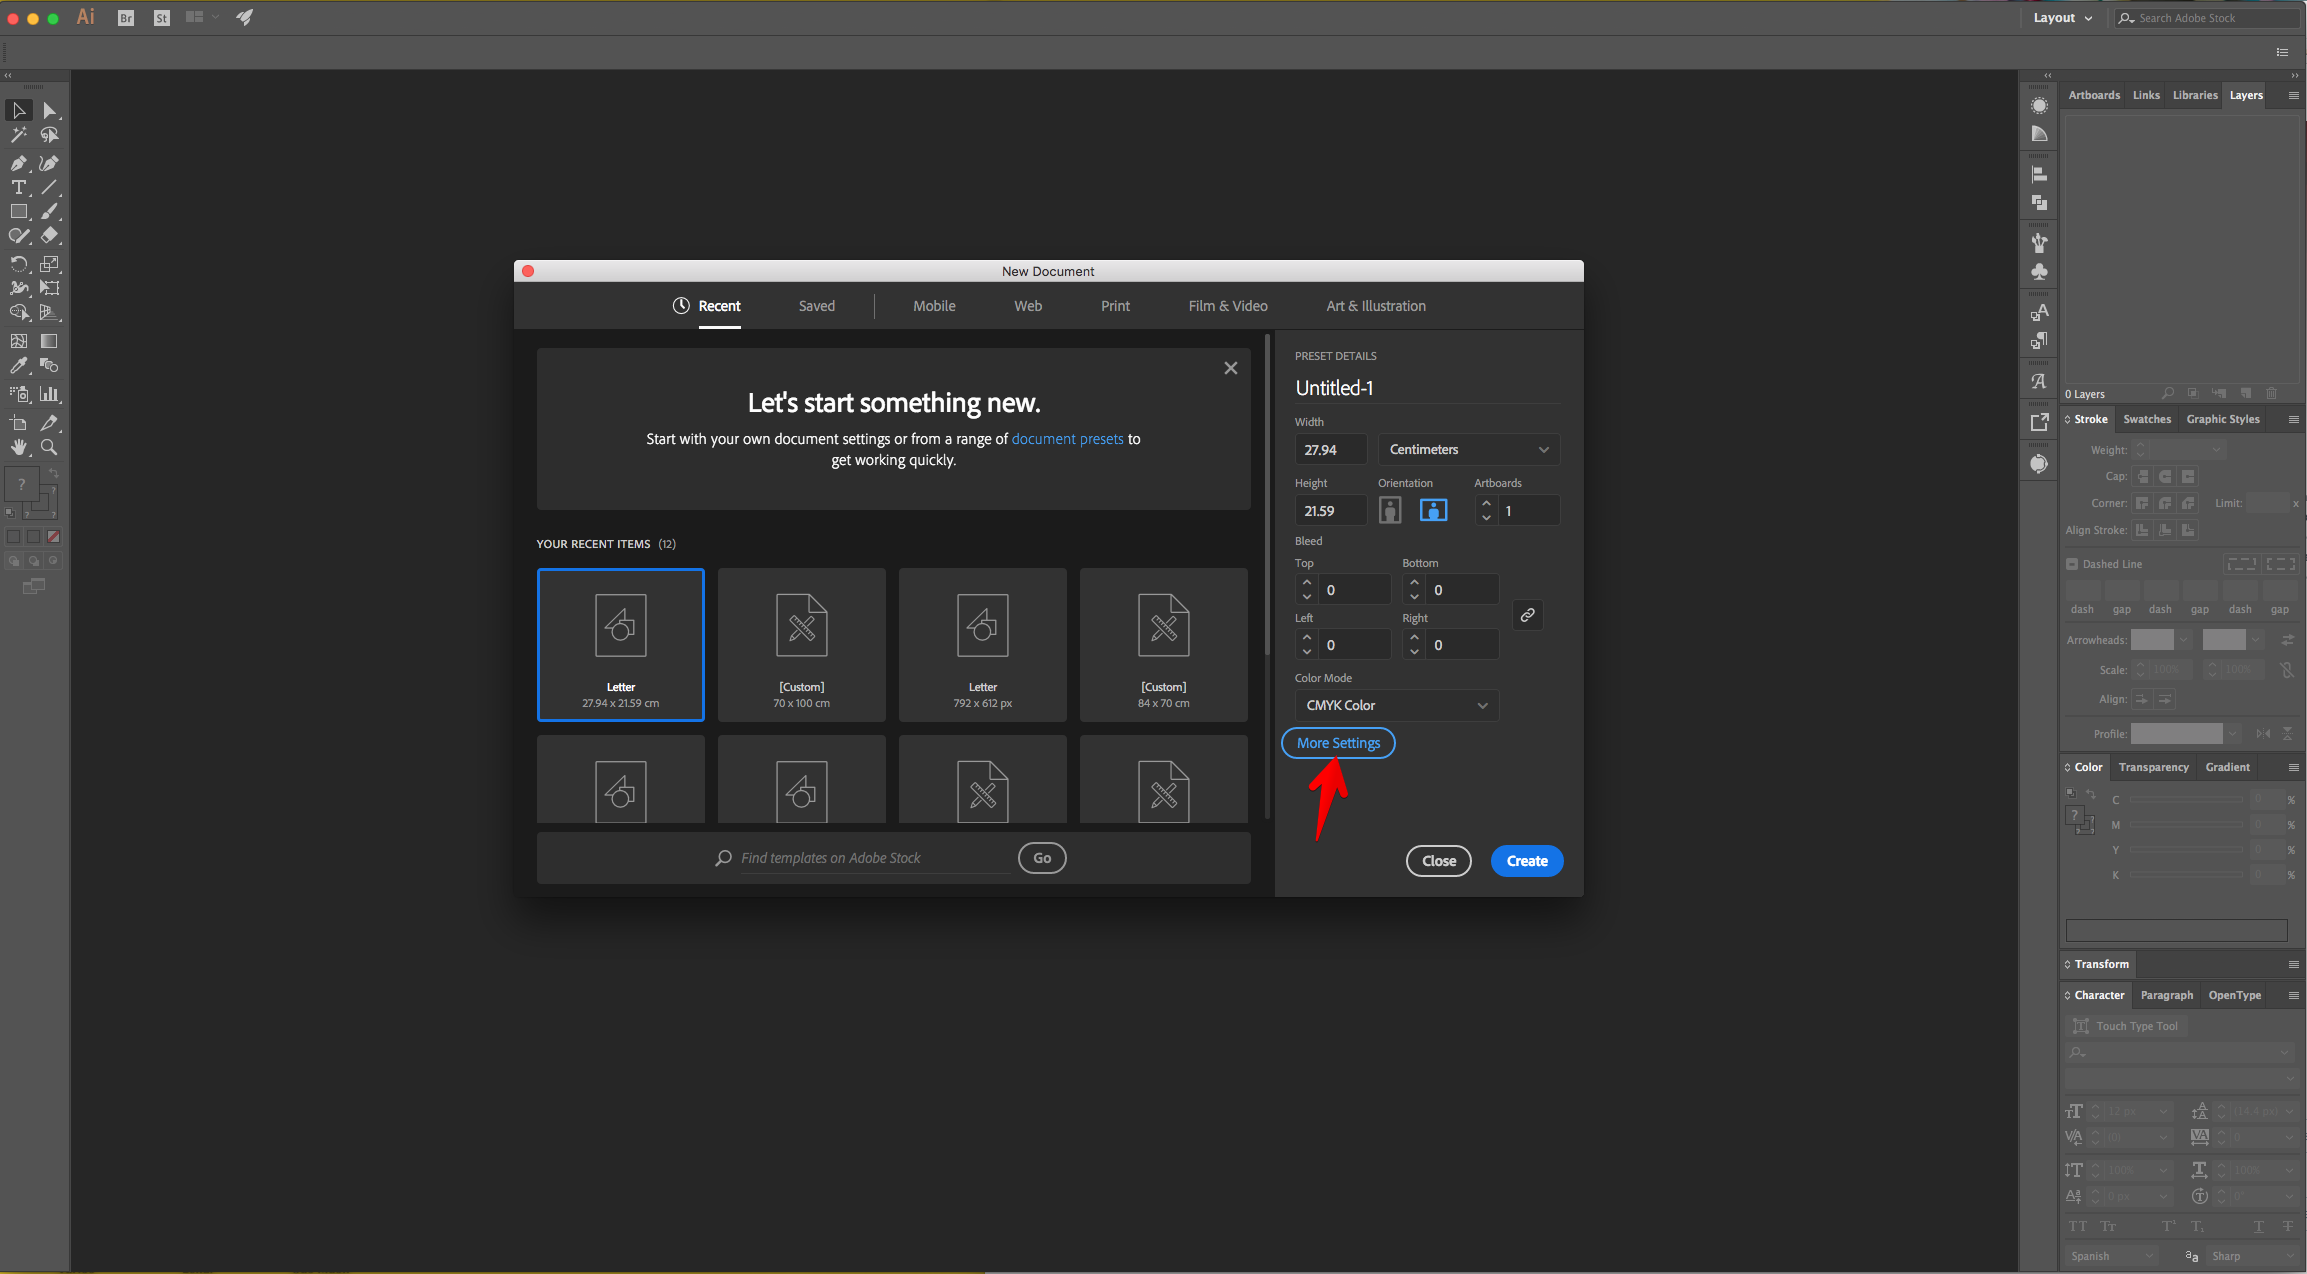
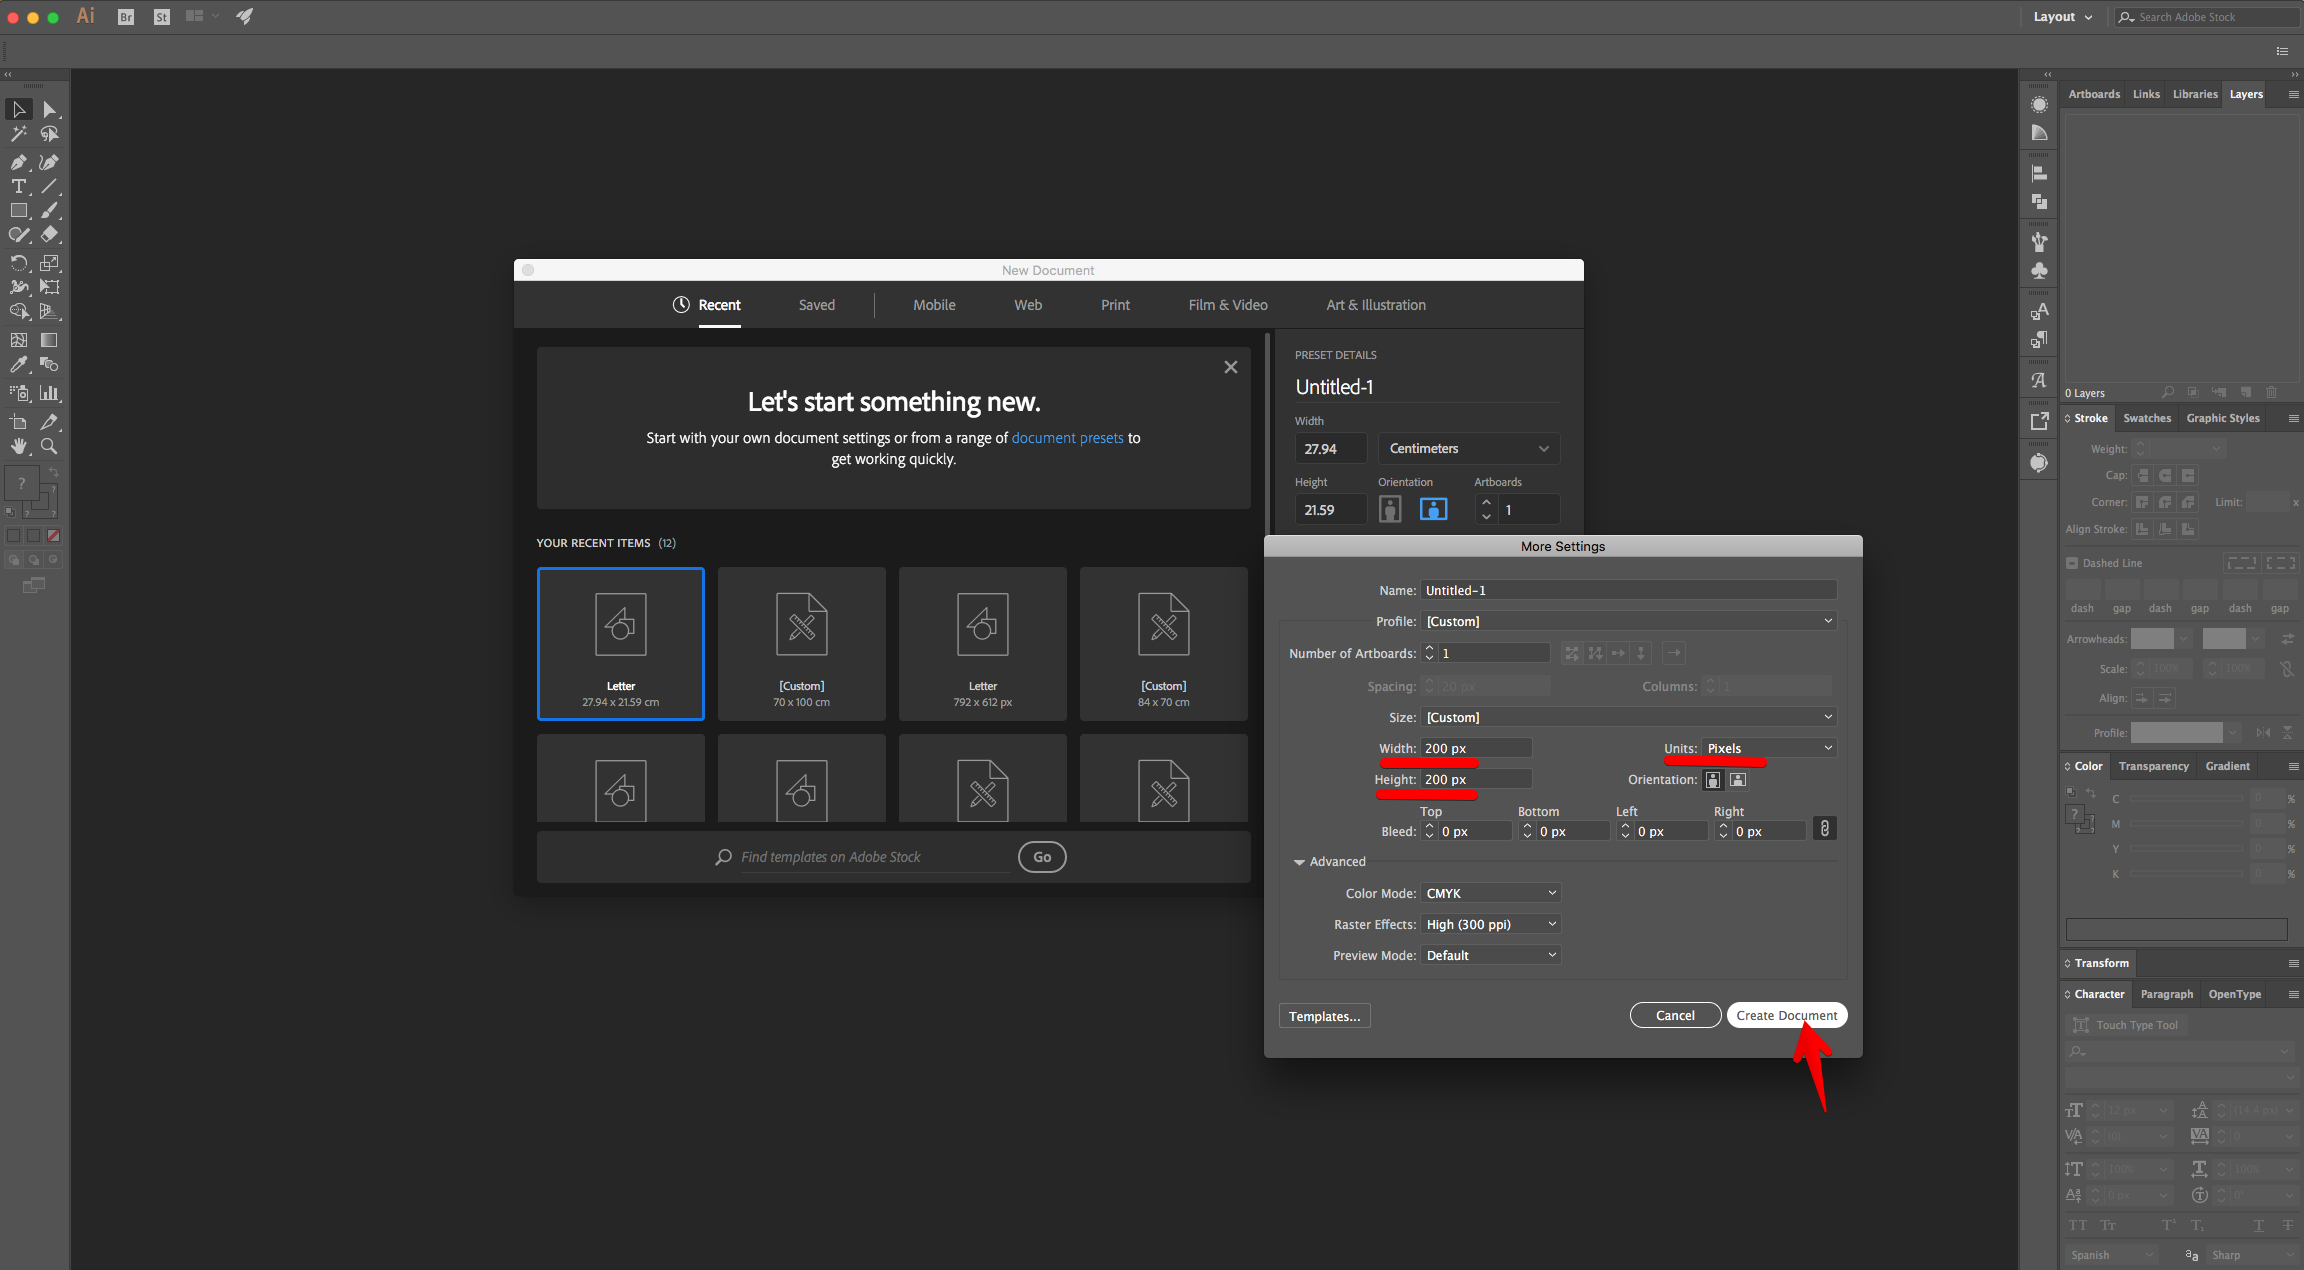
1 - In Illustrator, create a “New Document”. Click “More Settings”, change the Units to “Pixels” and use a “Width” and “Height” of 200.
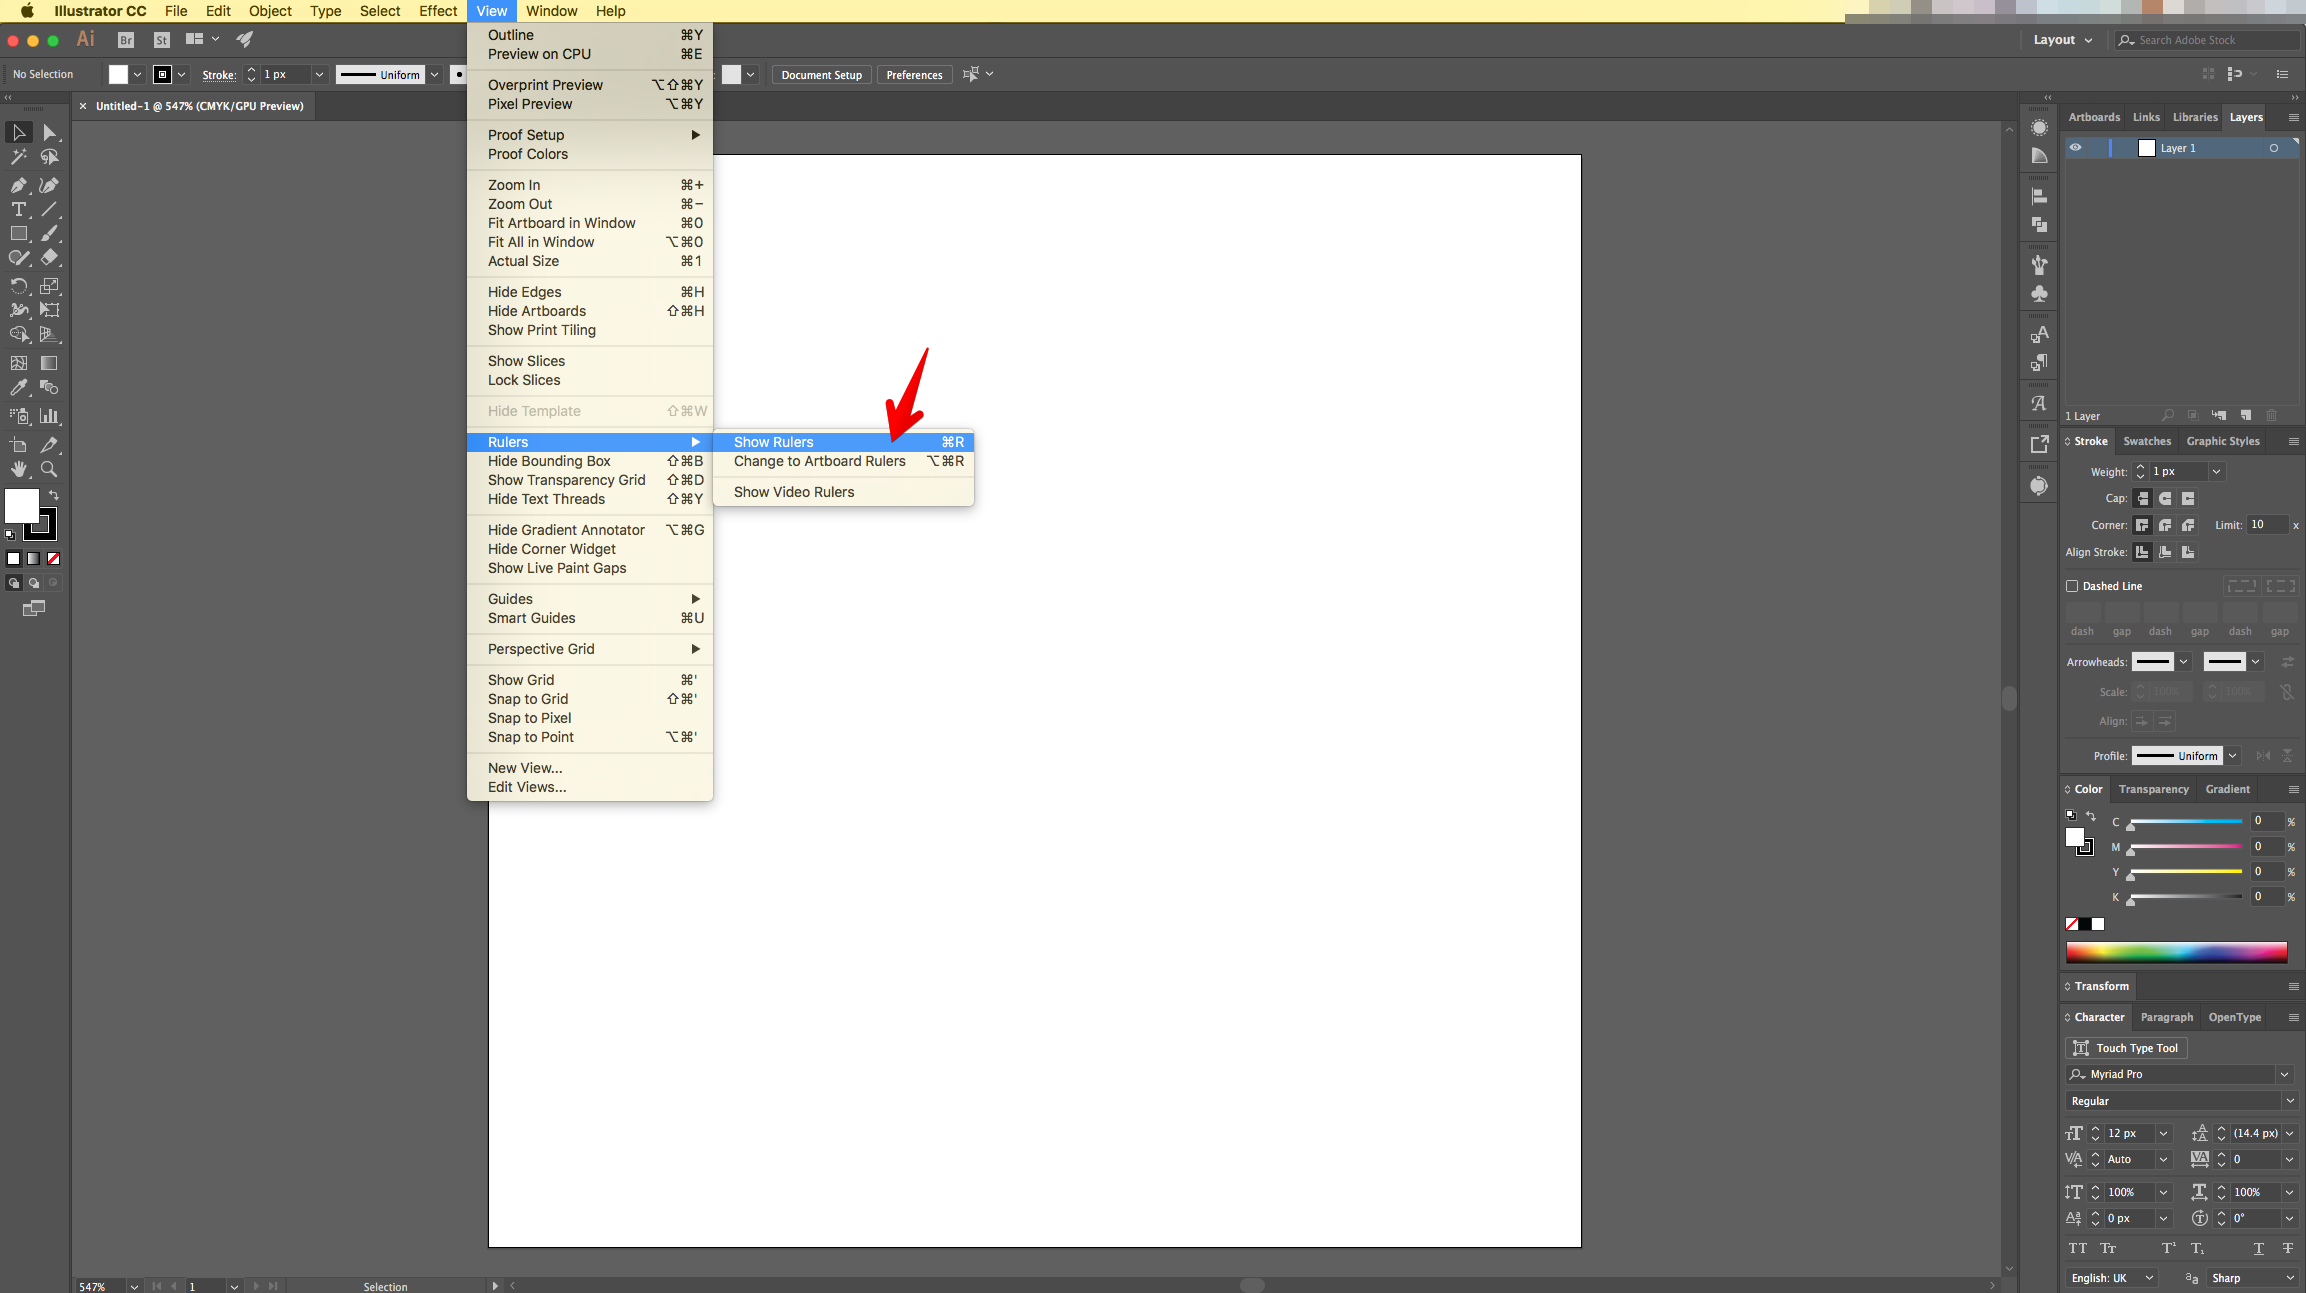
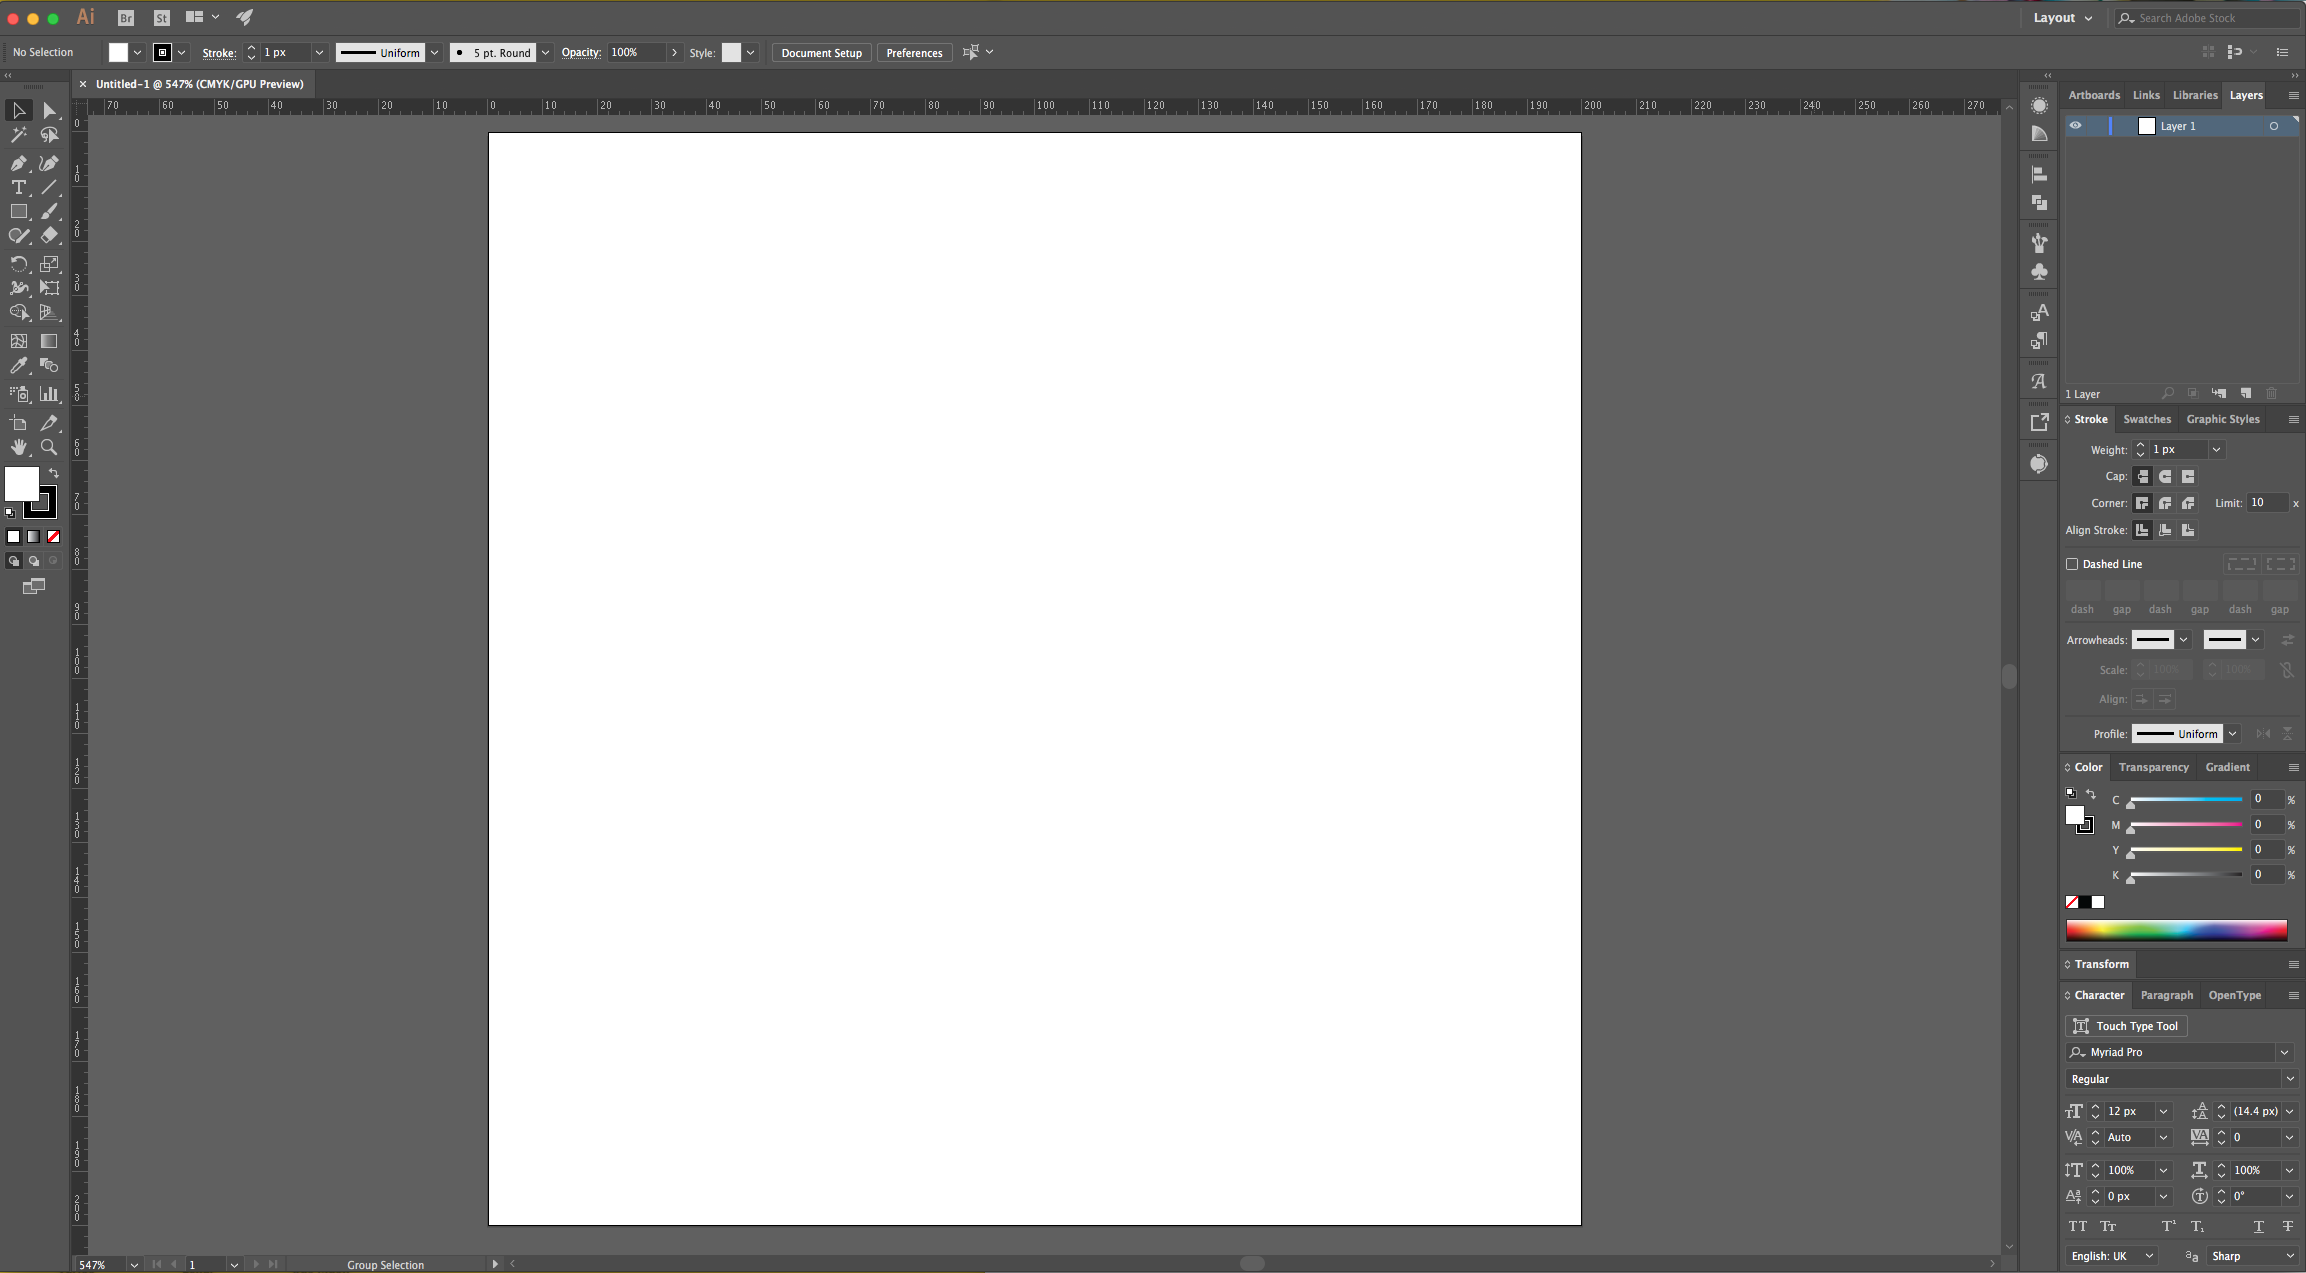
2 - If you need the Document “Rulers” go to View > Rulers > Show Rulers (Command/Control + R).
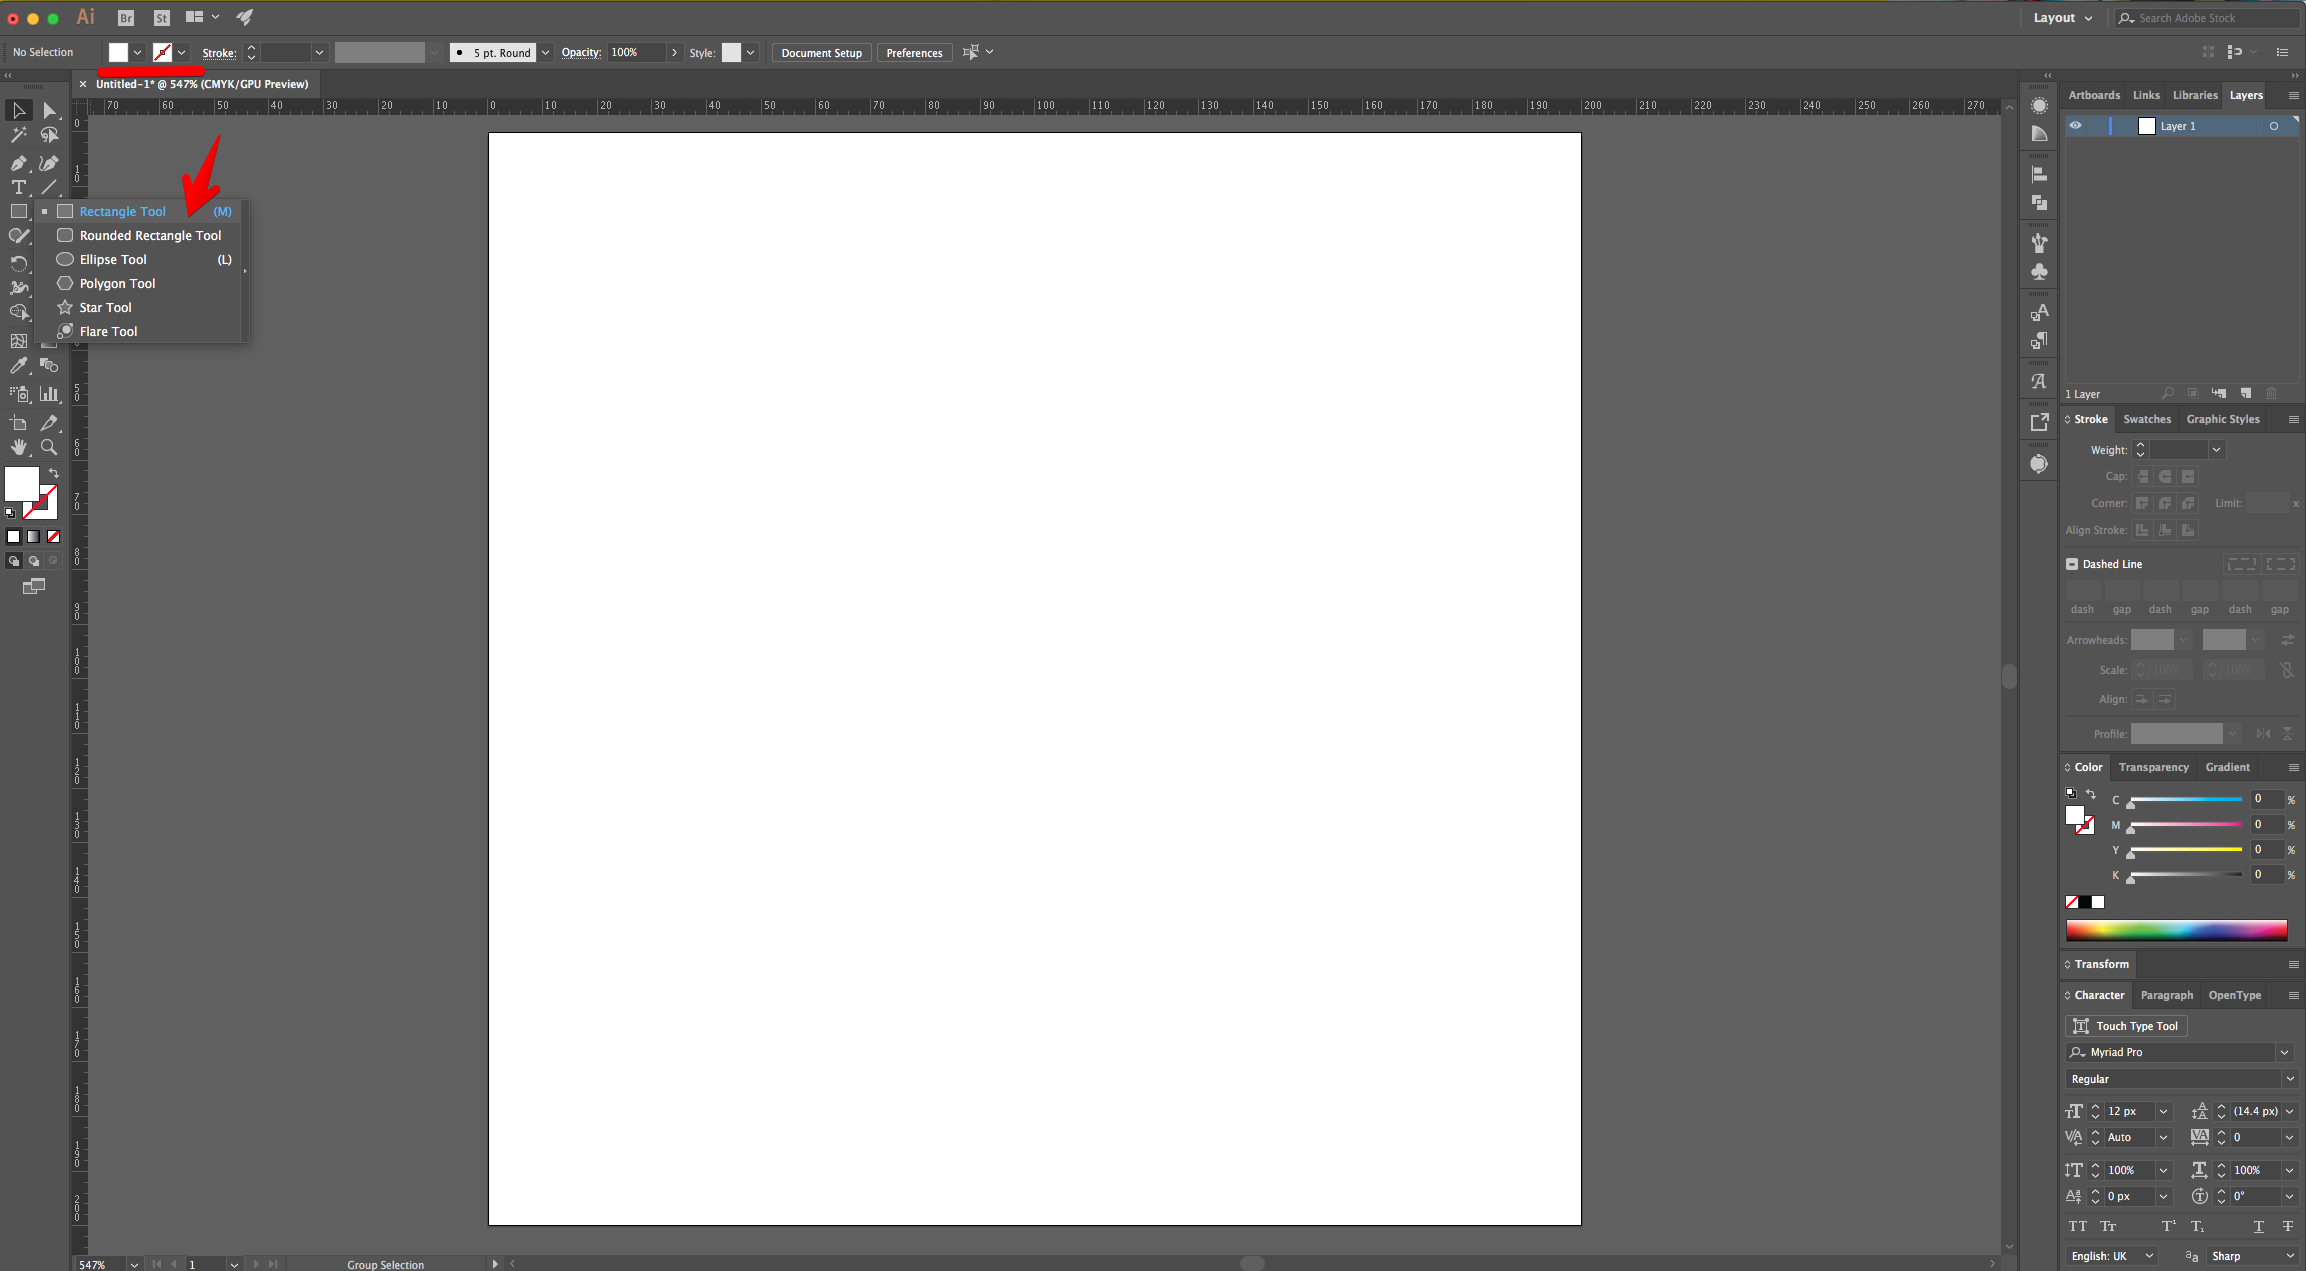
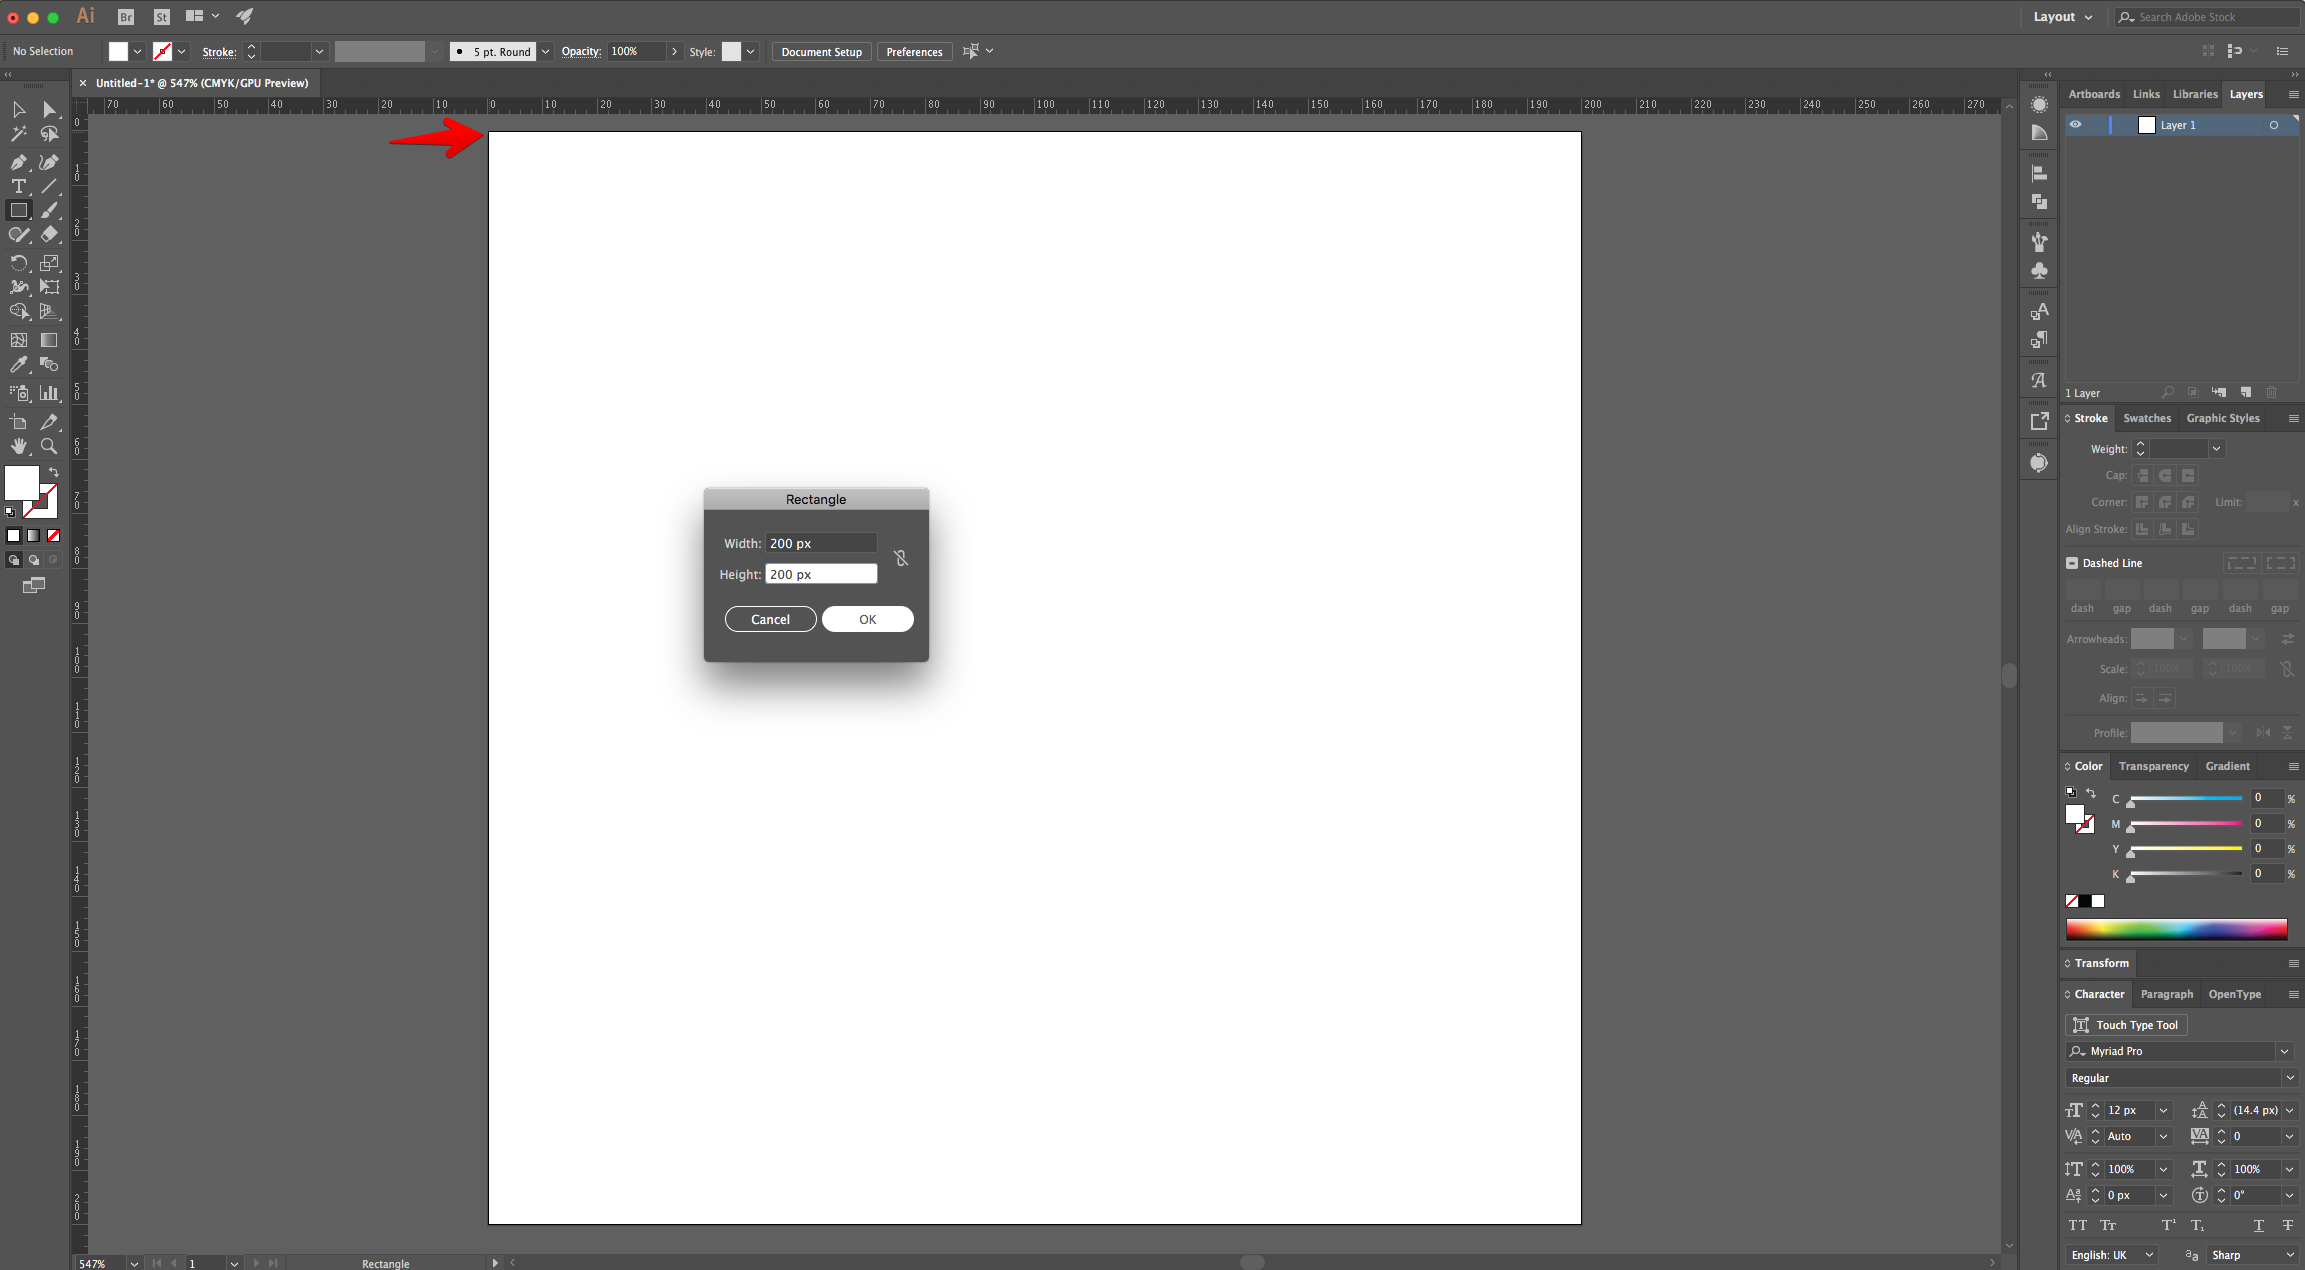
3 - Select the “Rectangle Tool” (M), click on the Top - Left corner of your document’s and input the same “Width” and “Height” values (200 x 200 px). Use White as “Fill” color.
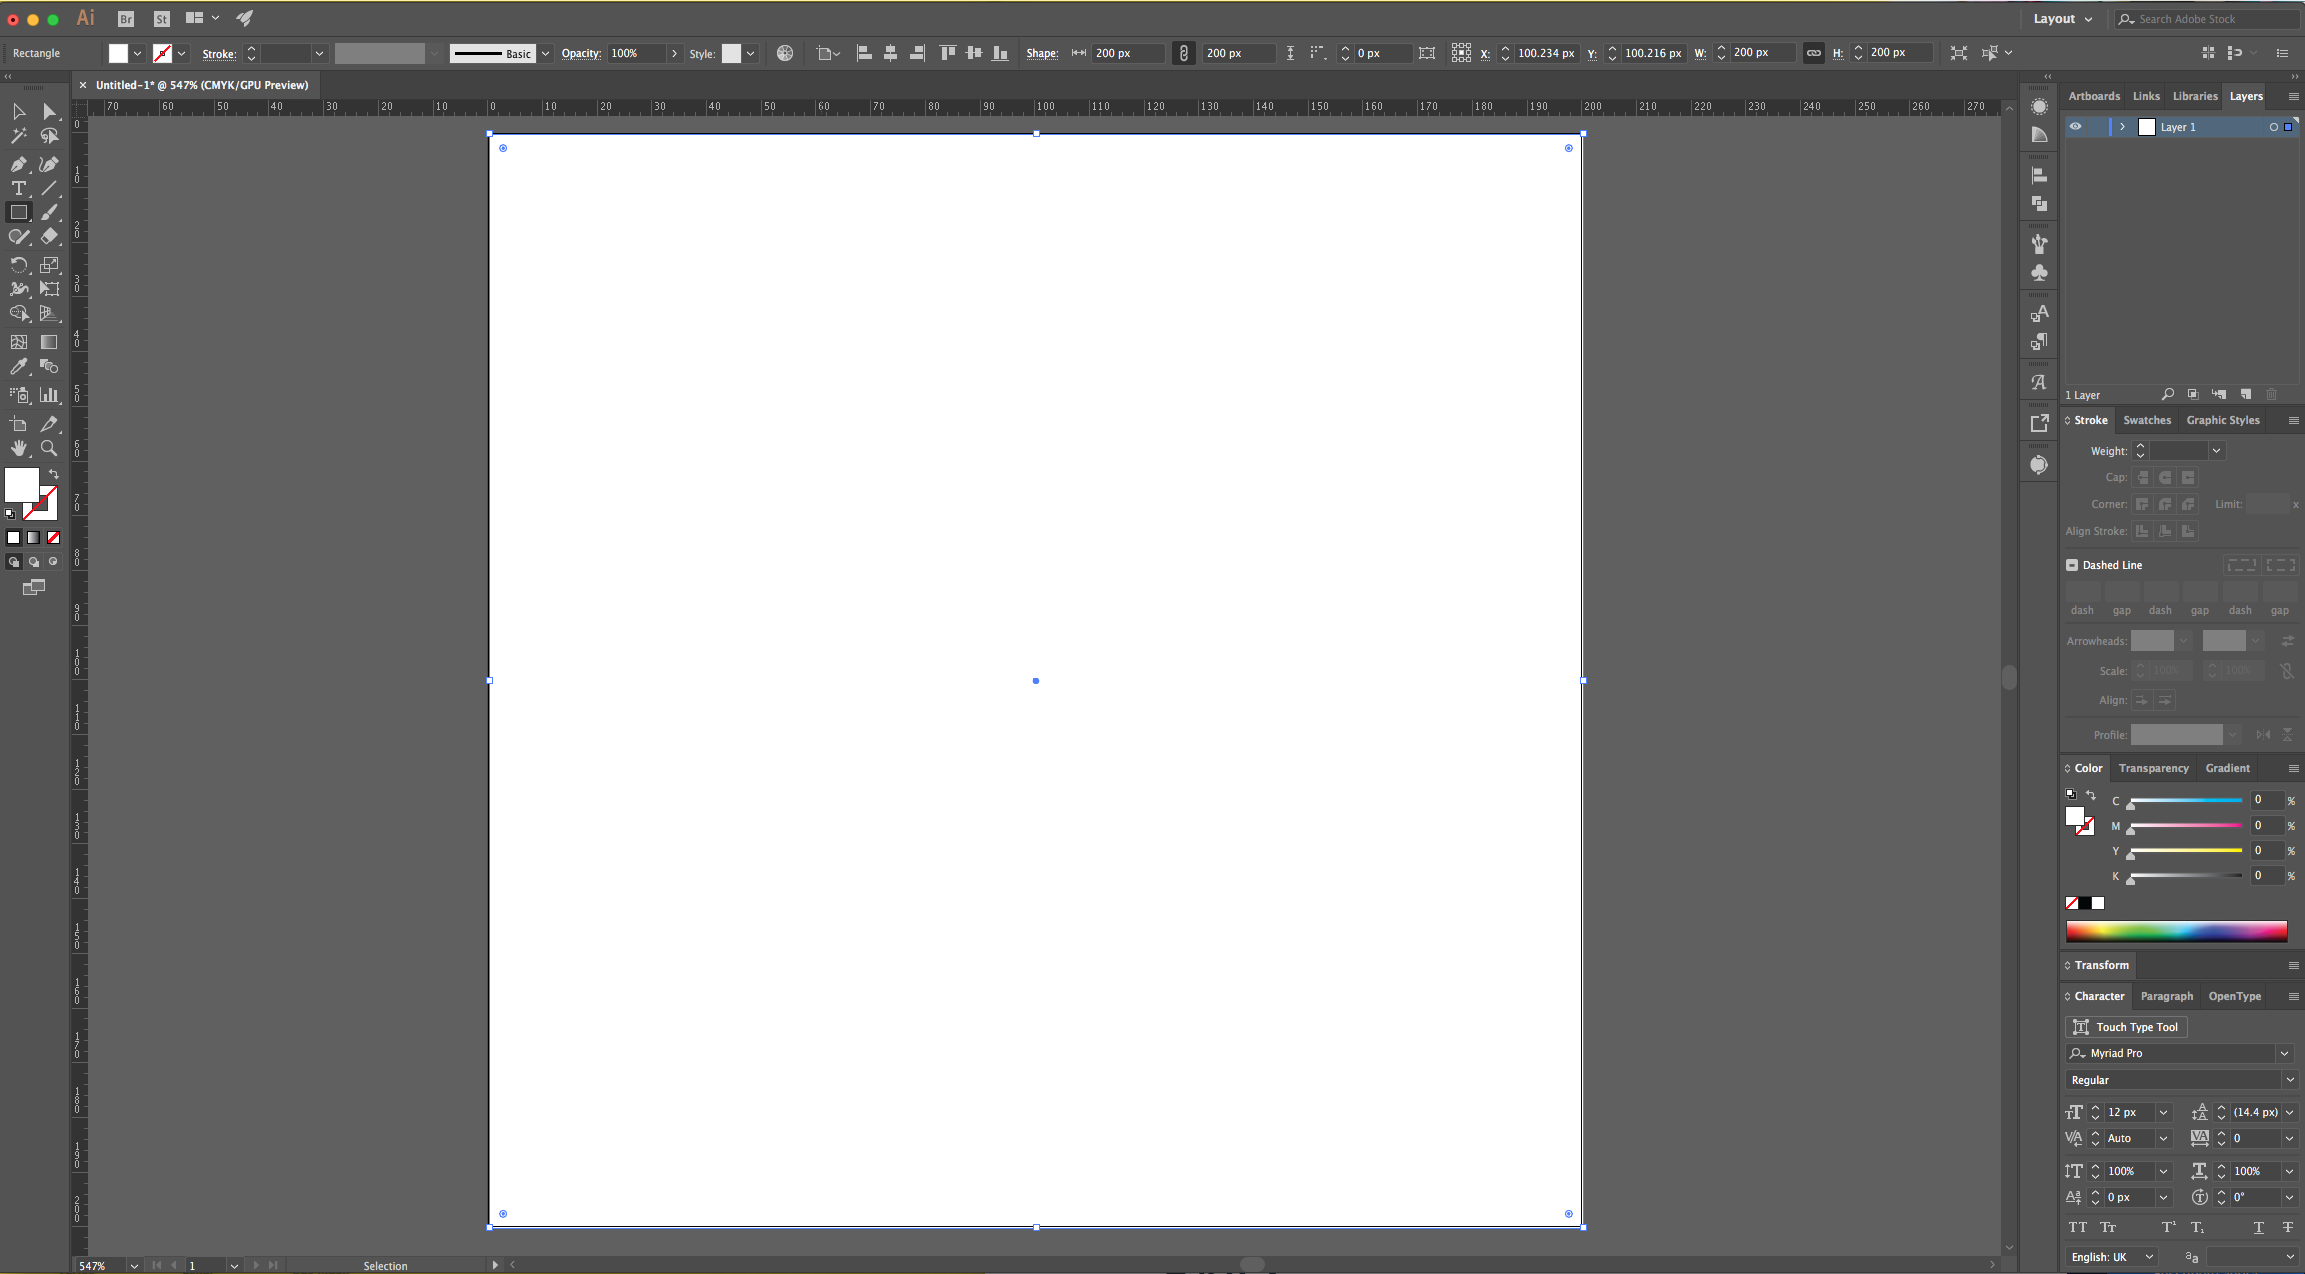
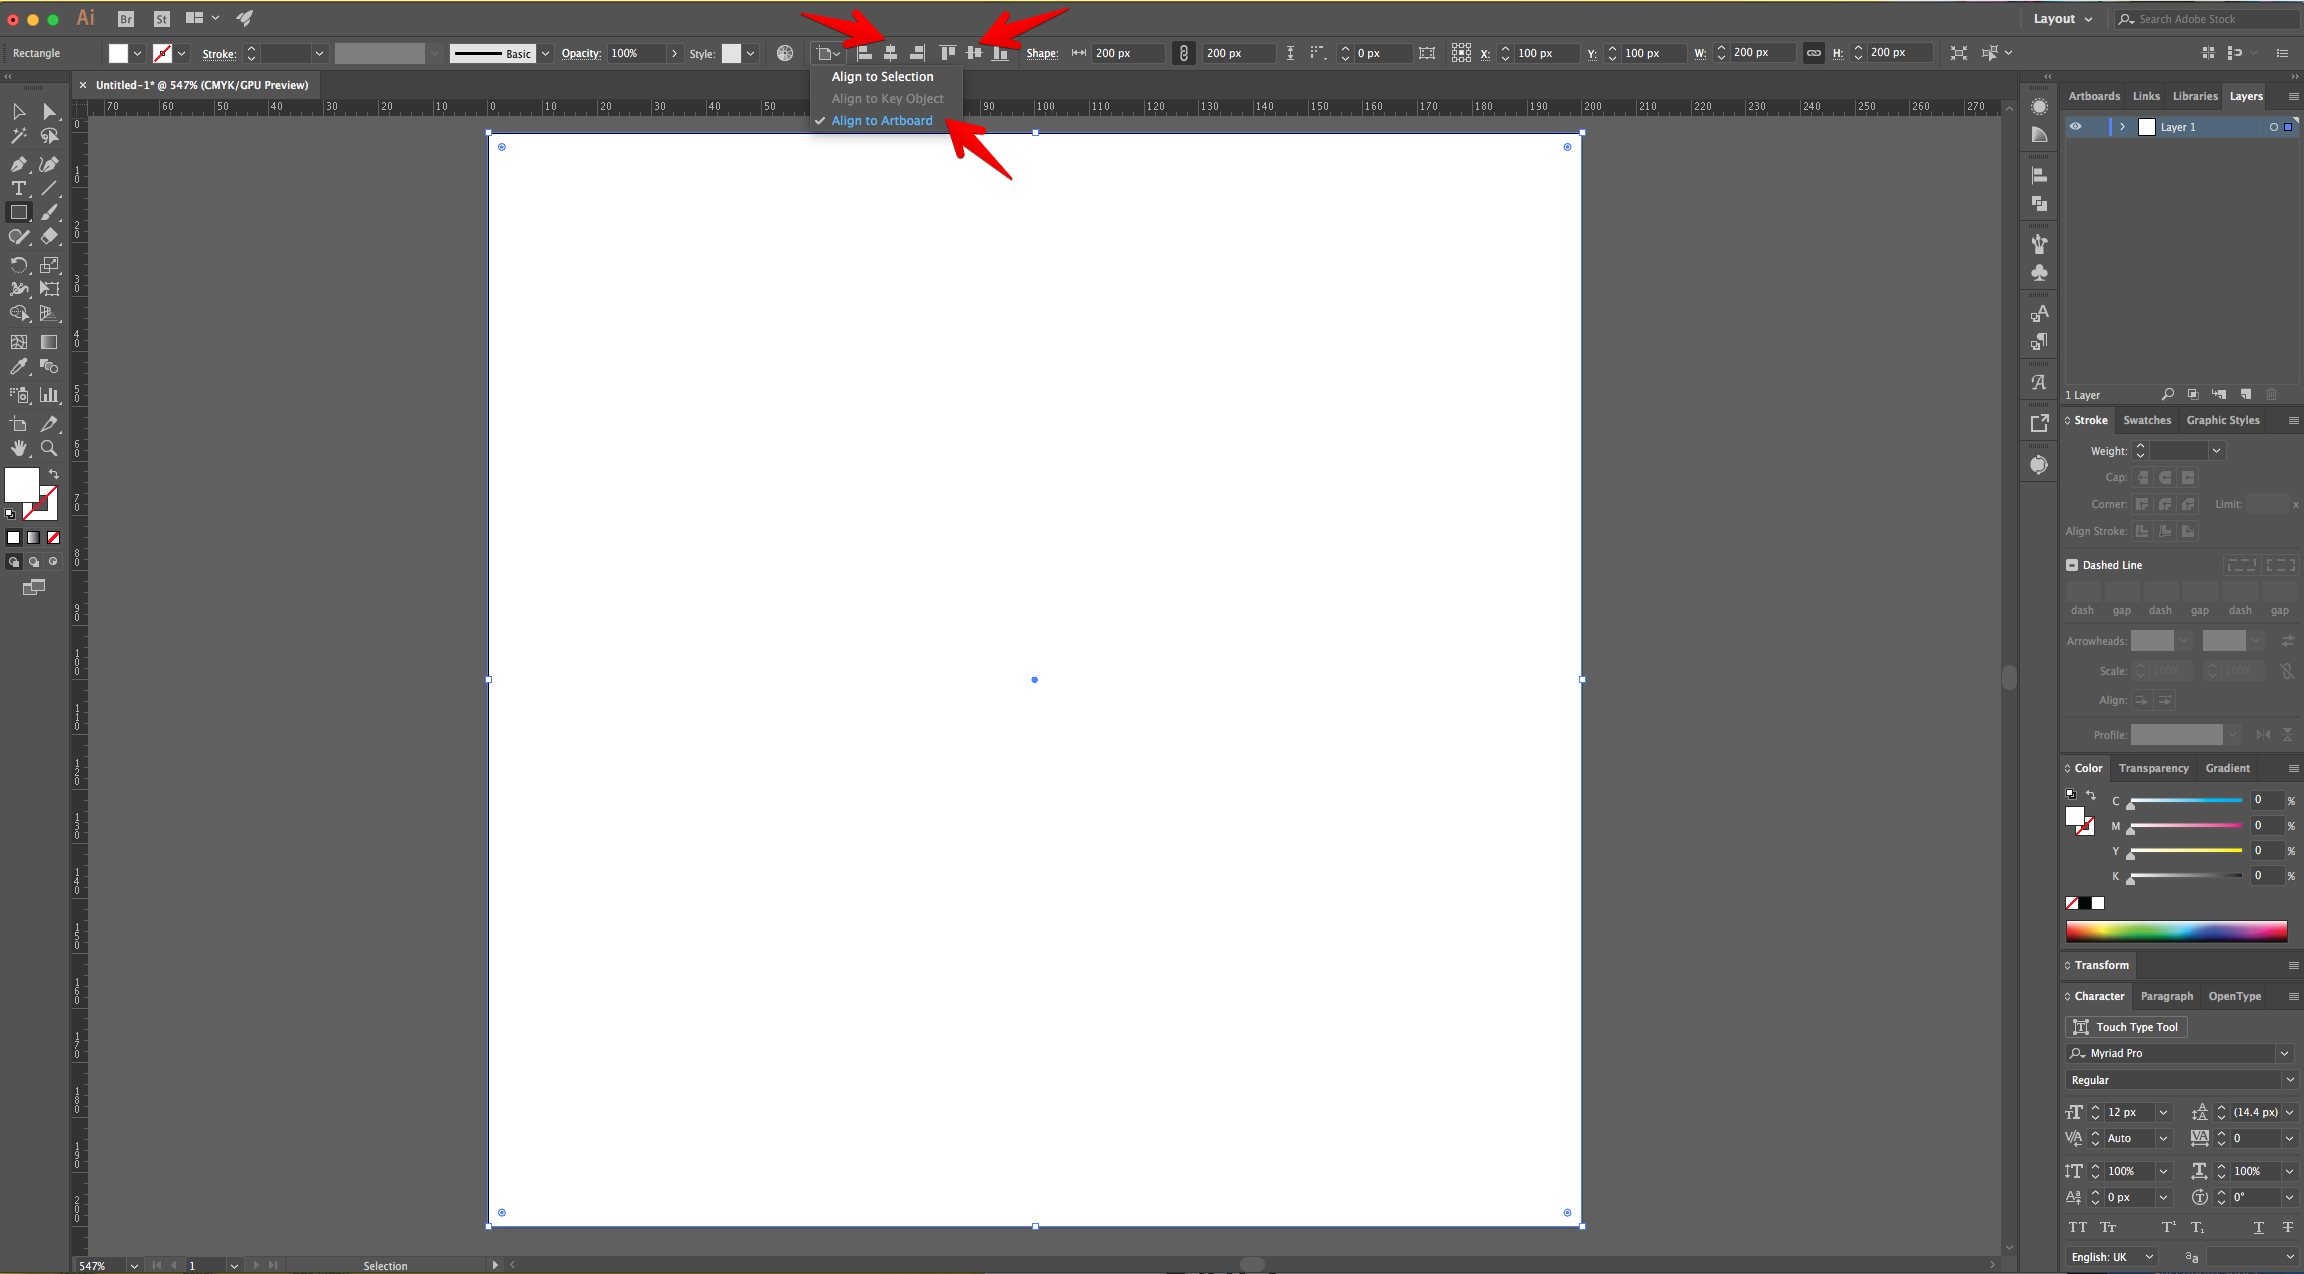
4 - Center it using the “Horizontal Align Center” option on your Top Menu and make sure that “Align to Artboard” is selected. Or use the same options in the “Align Panel”.
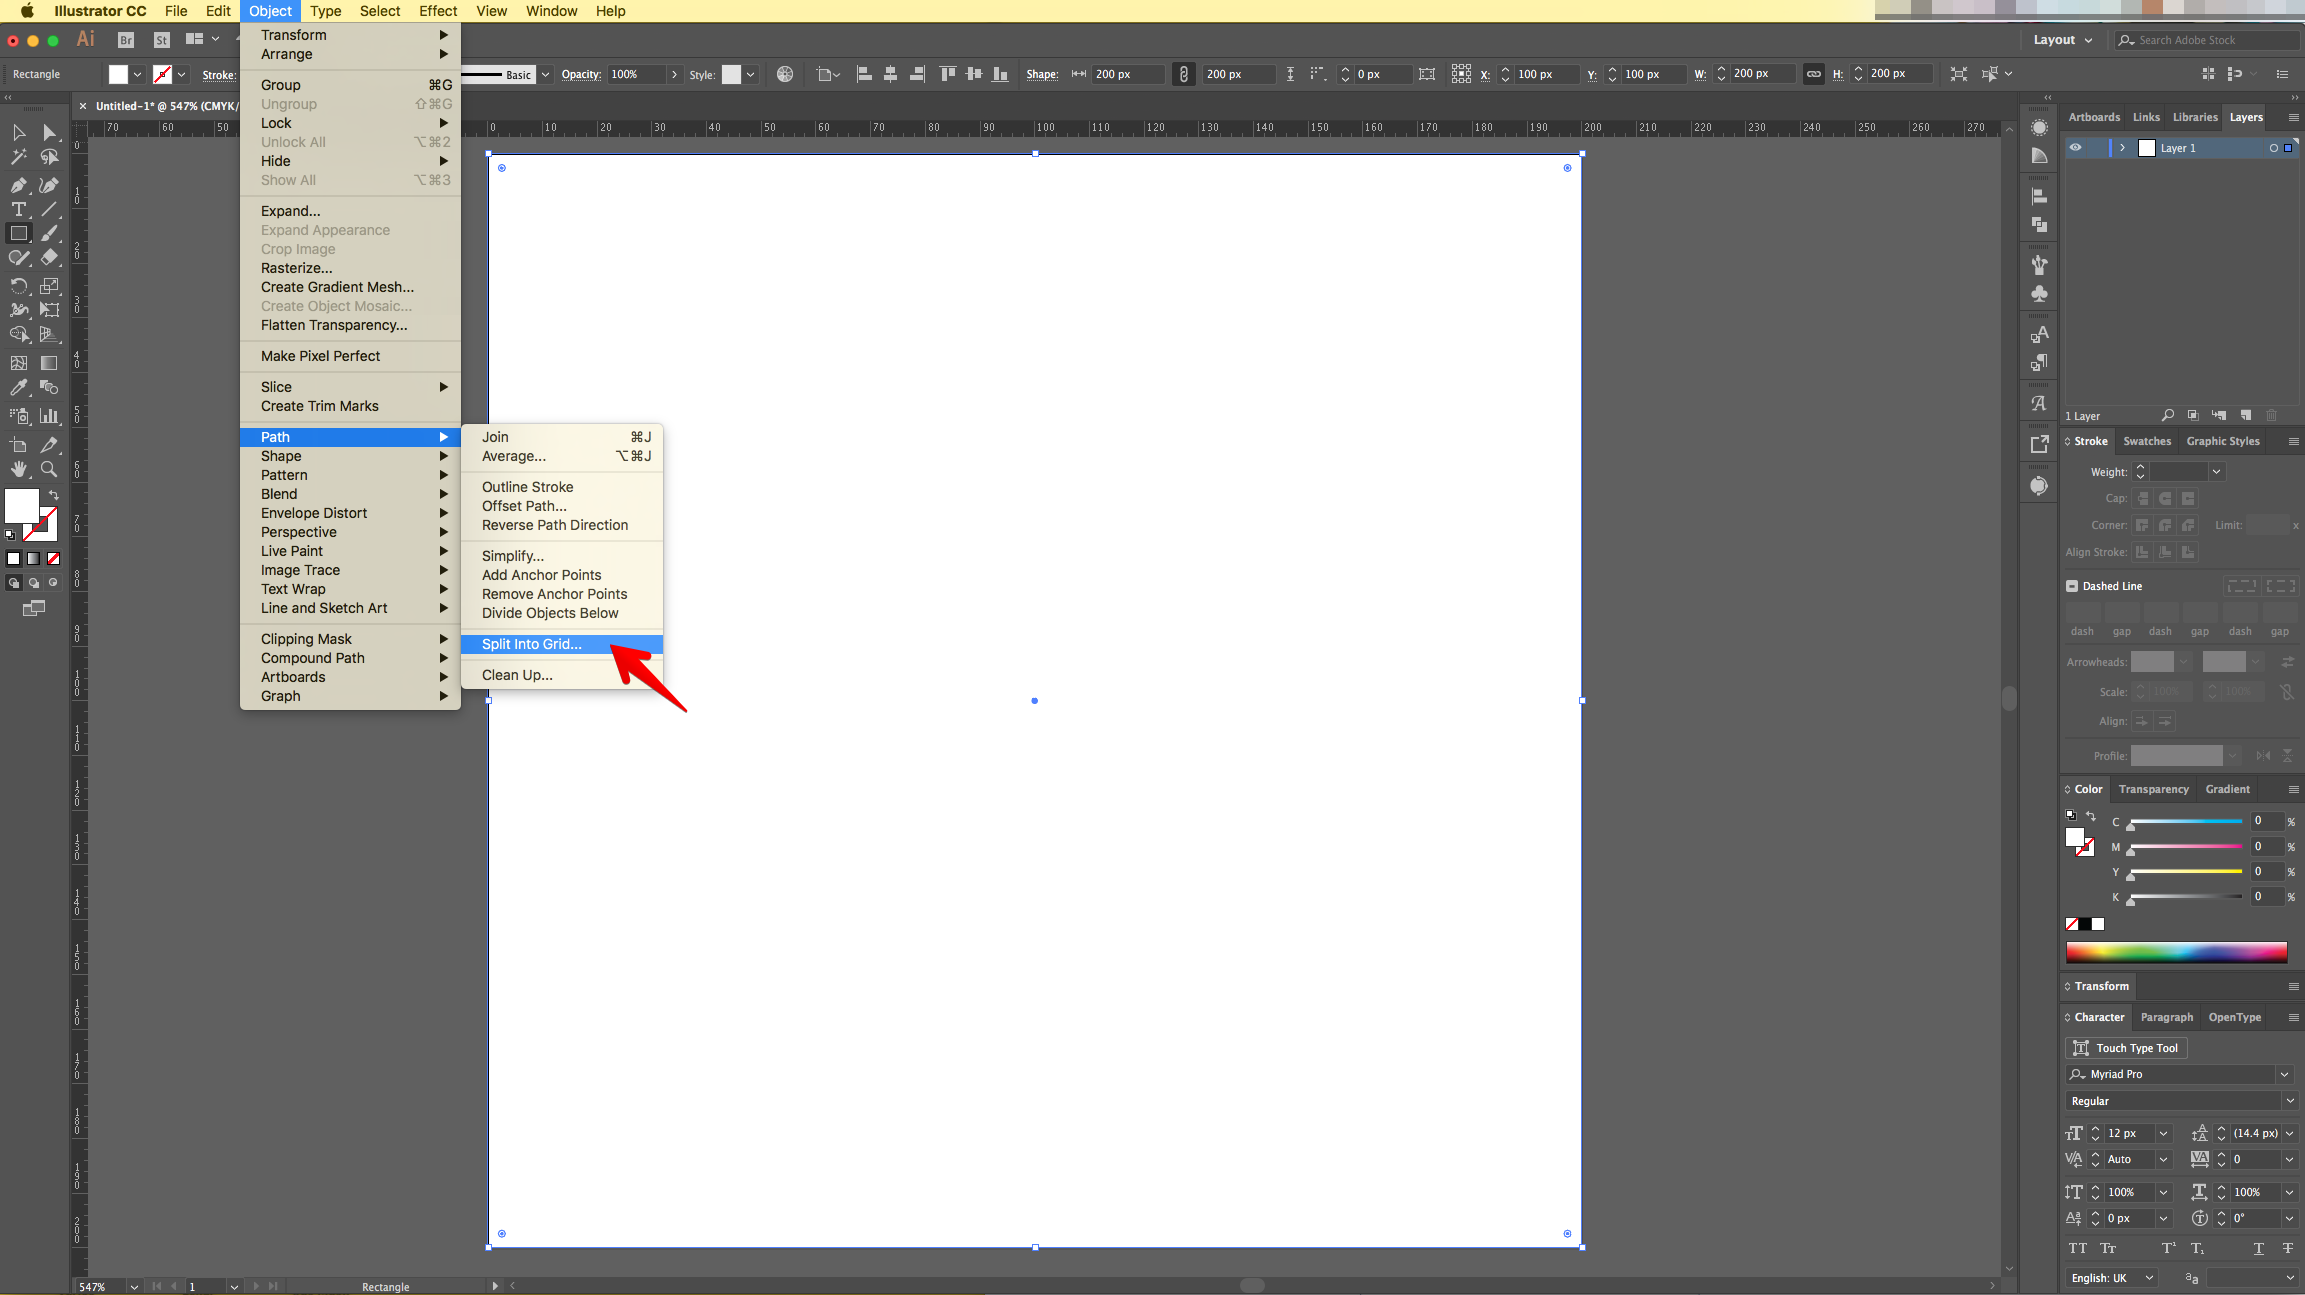
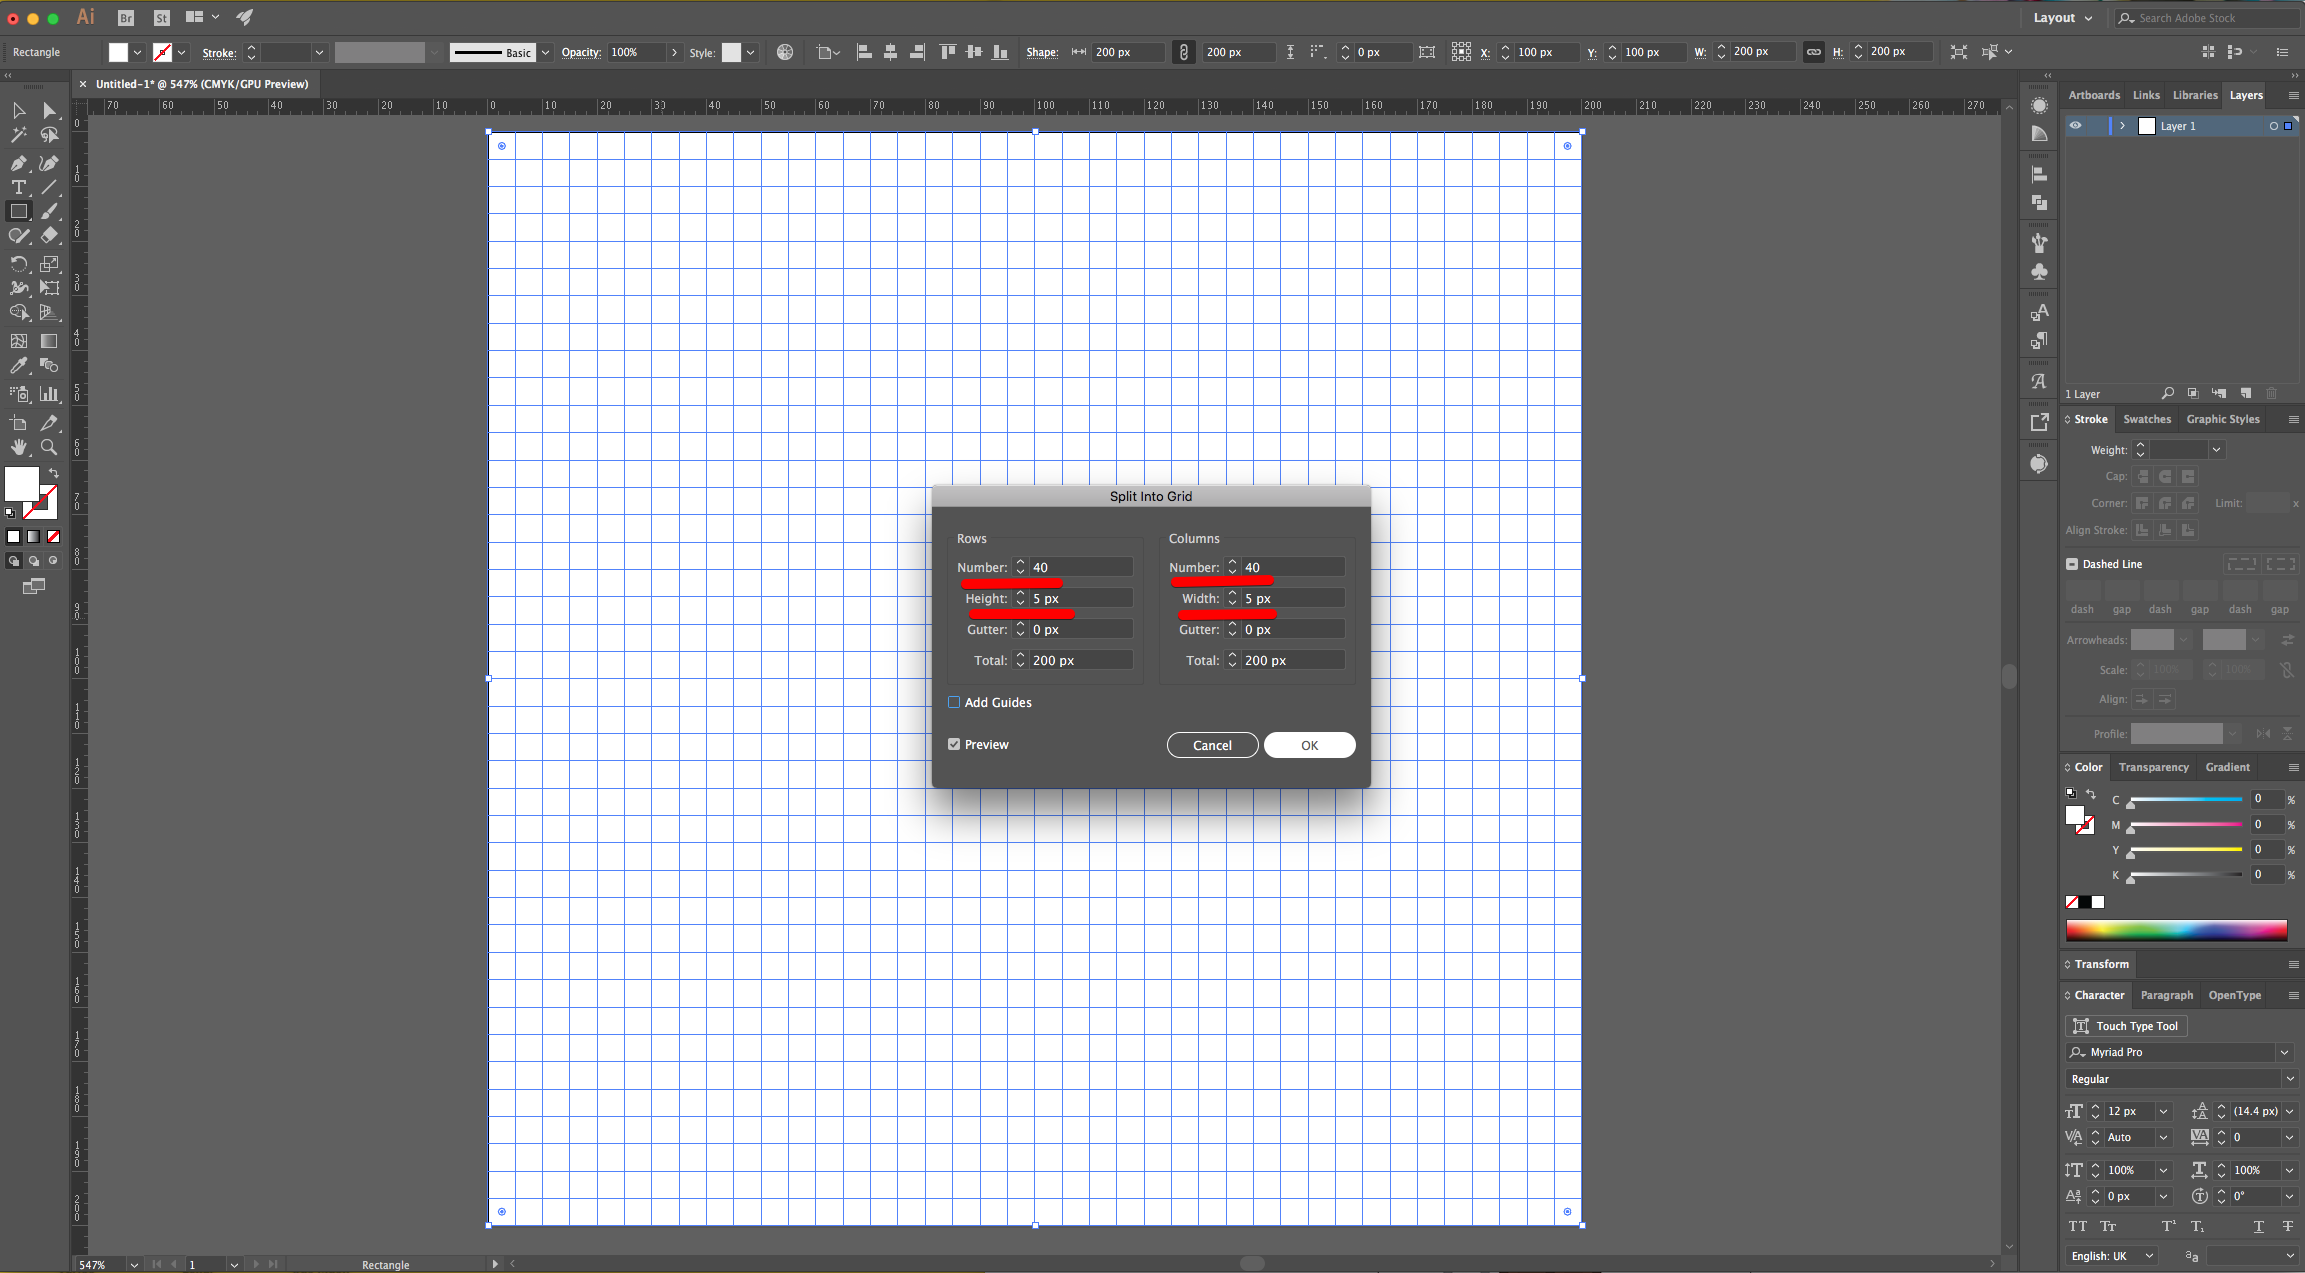
5 - With the Shape still selected go to Object > Path > Split into Grid... Set the number of “Rows” and “Columns” to 40 and the “Width” of both to 5 px.
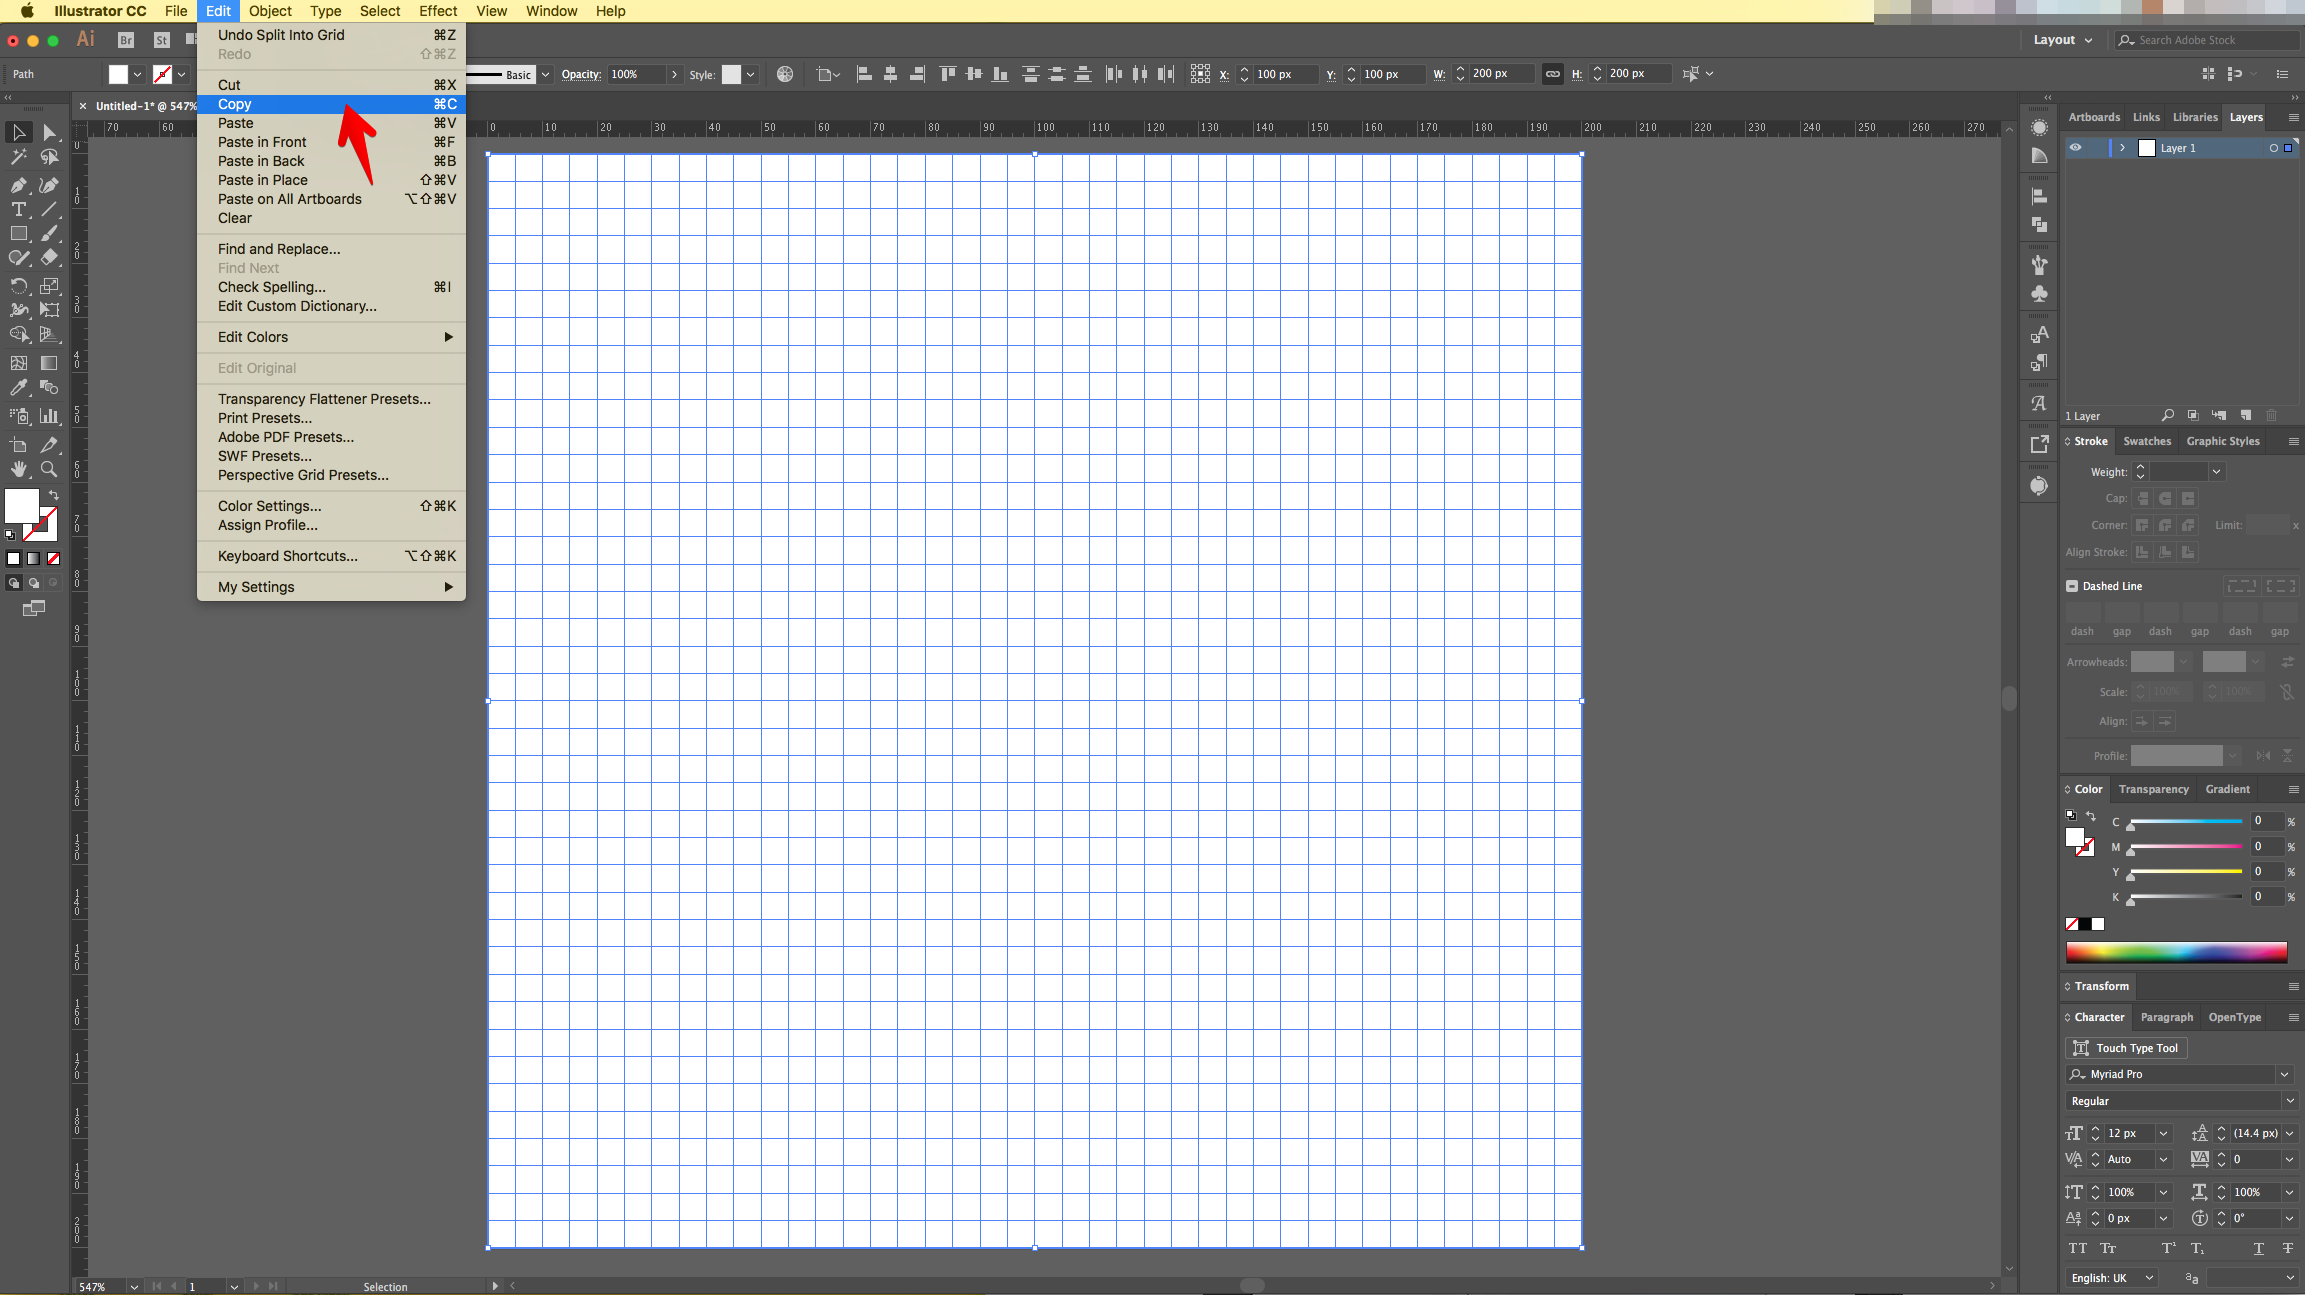
6 - “Copy” the Grid (Command/Control + C) and “Paste in Front” (Command/Control + F).

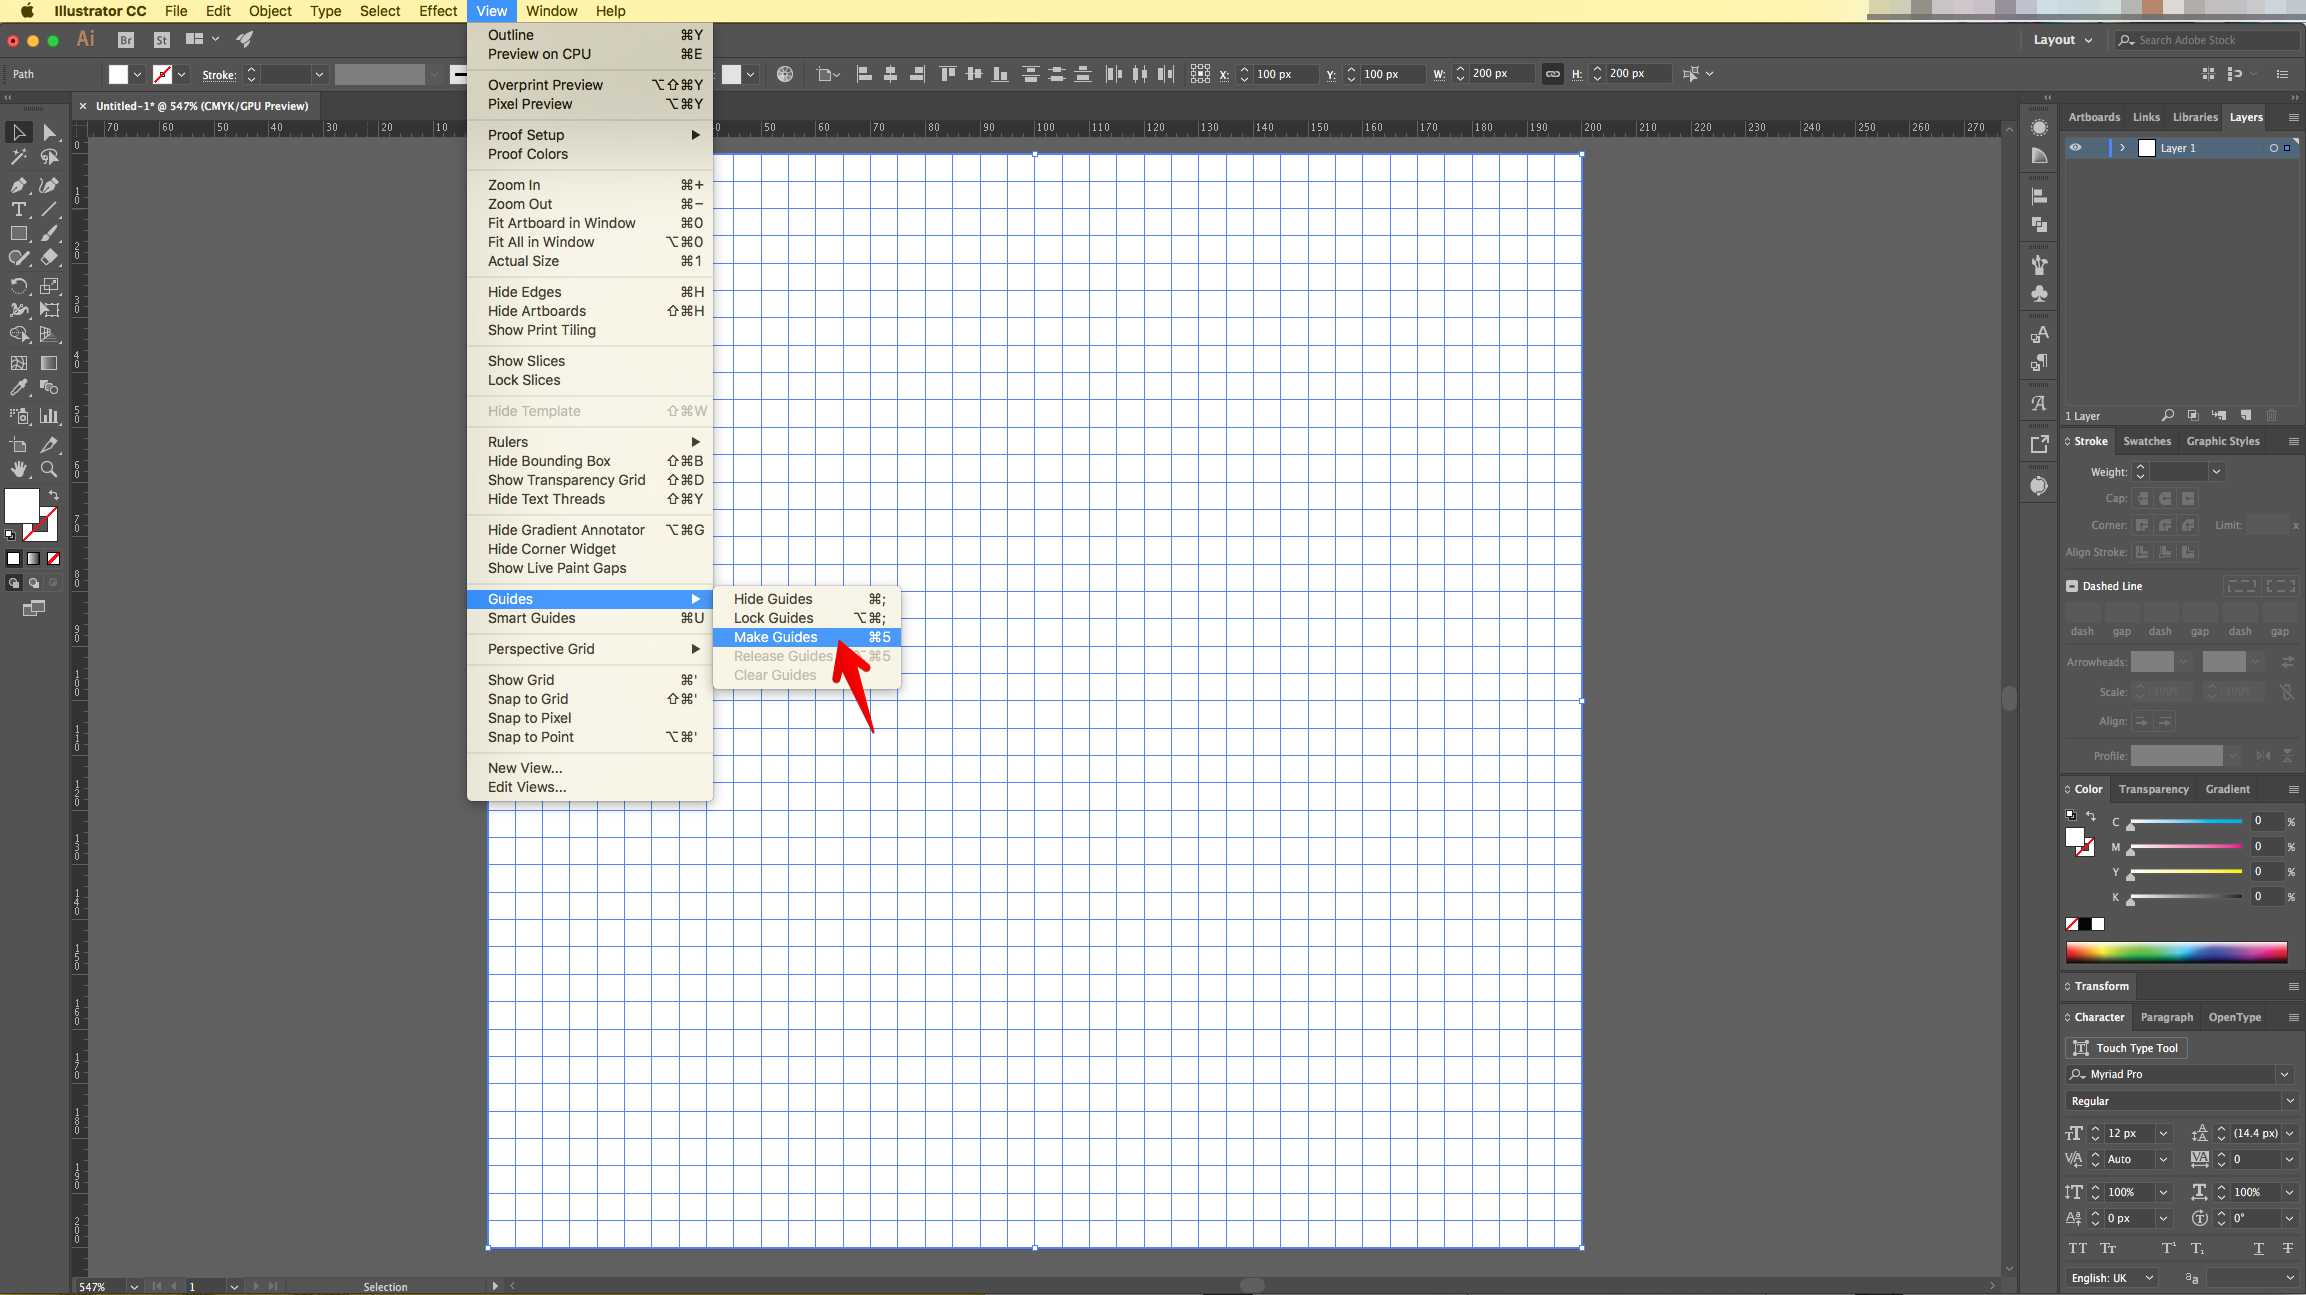
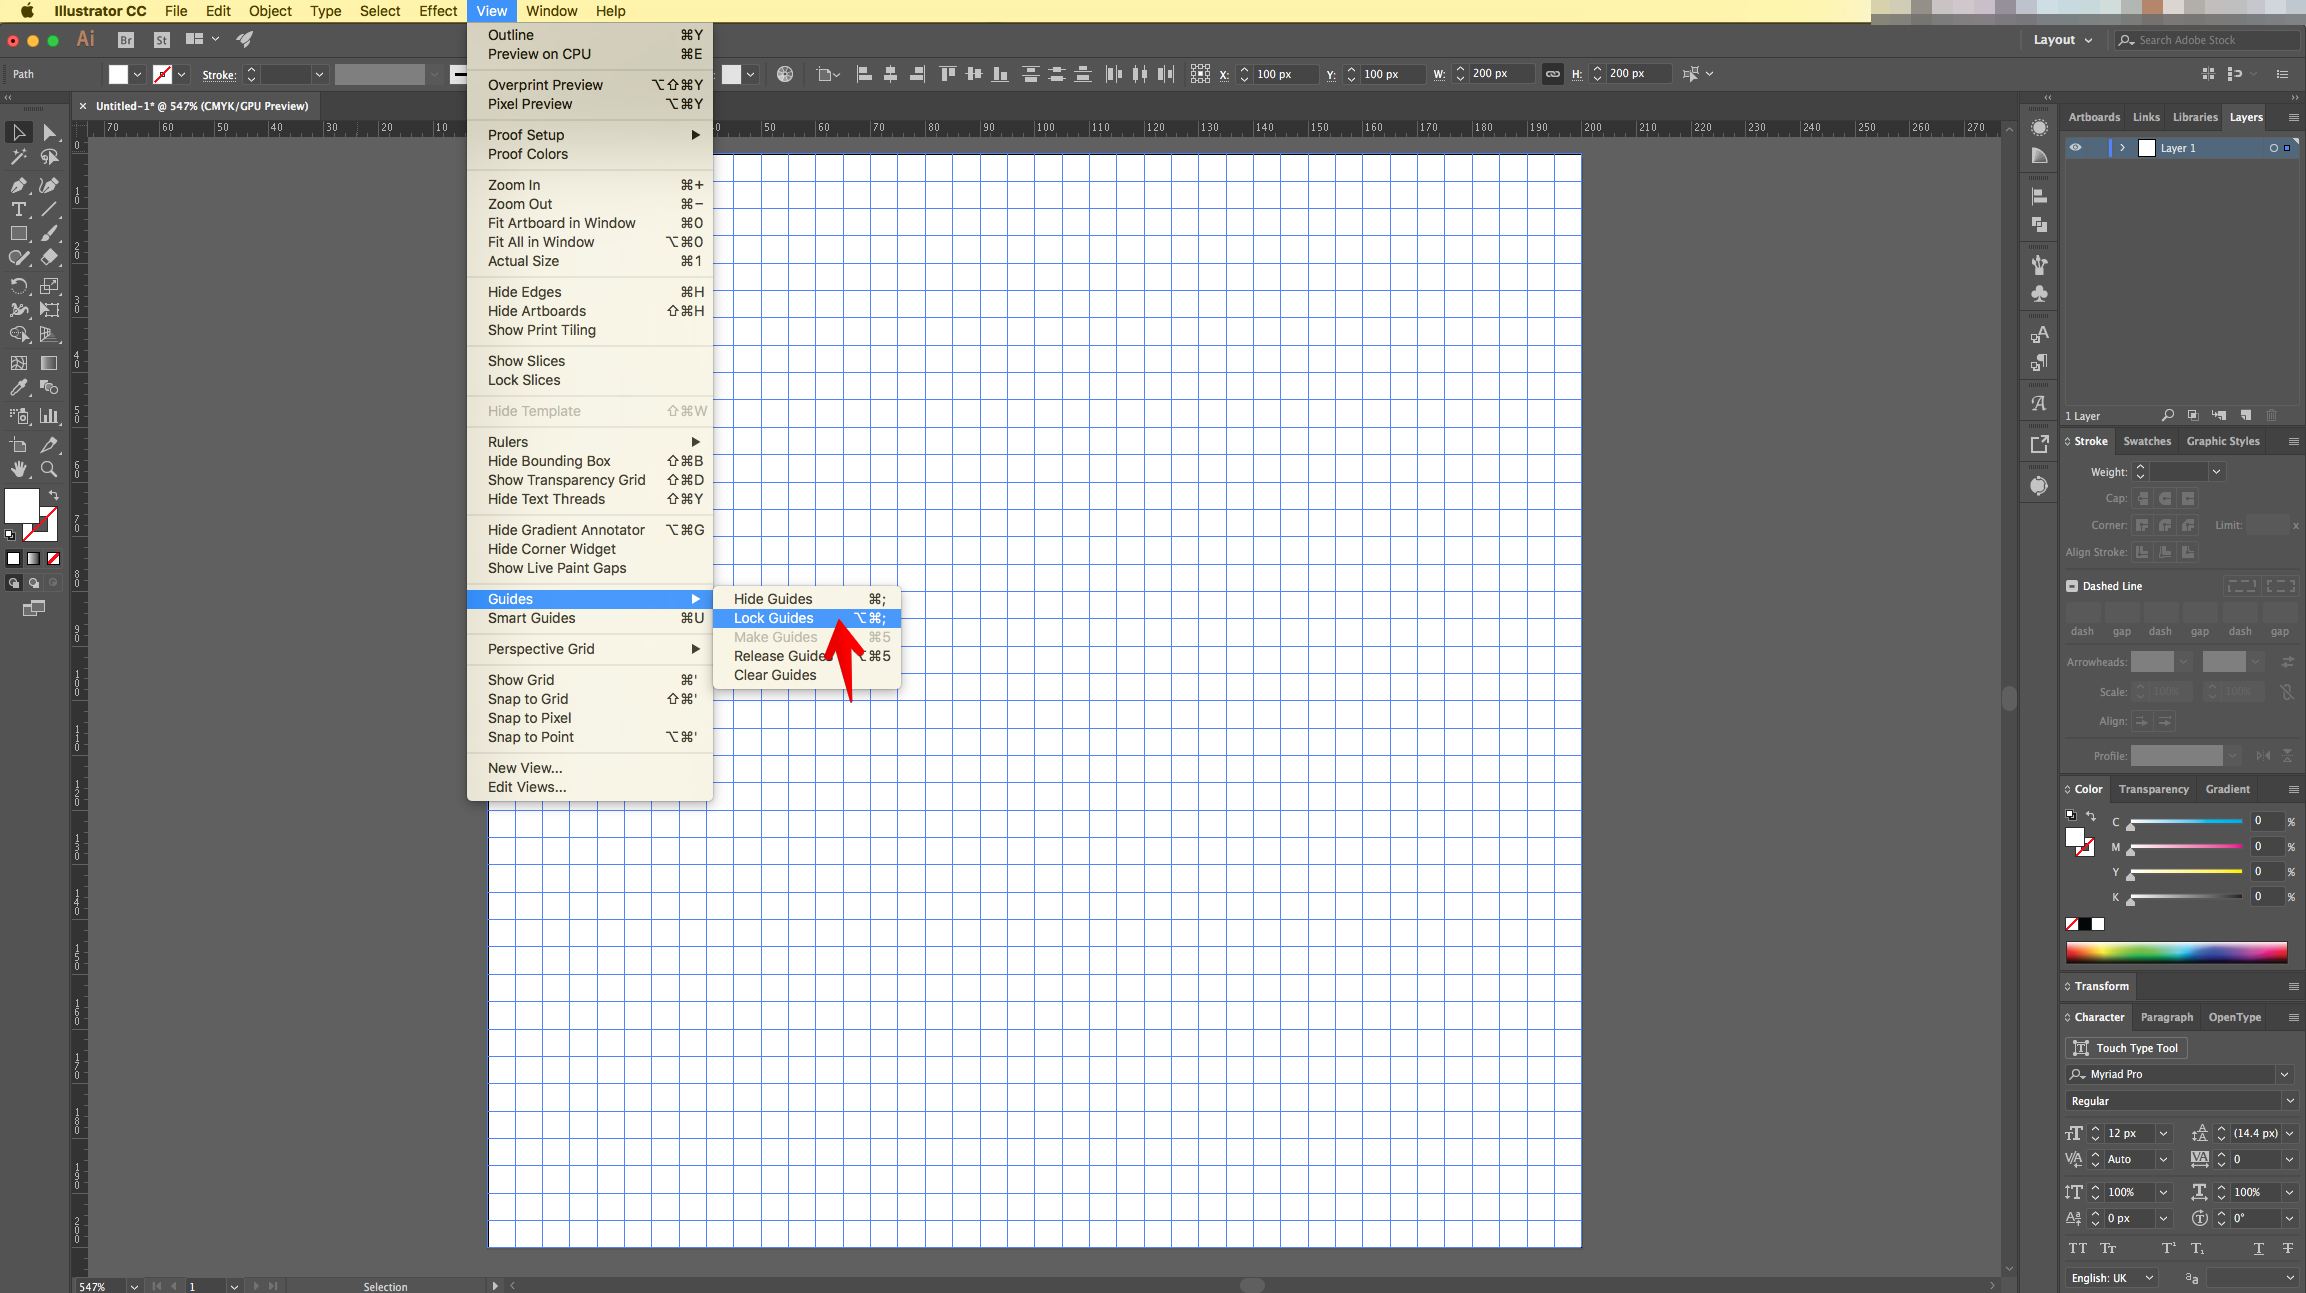
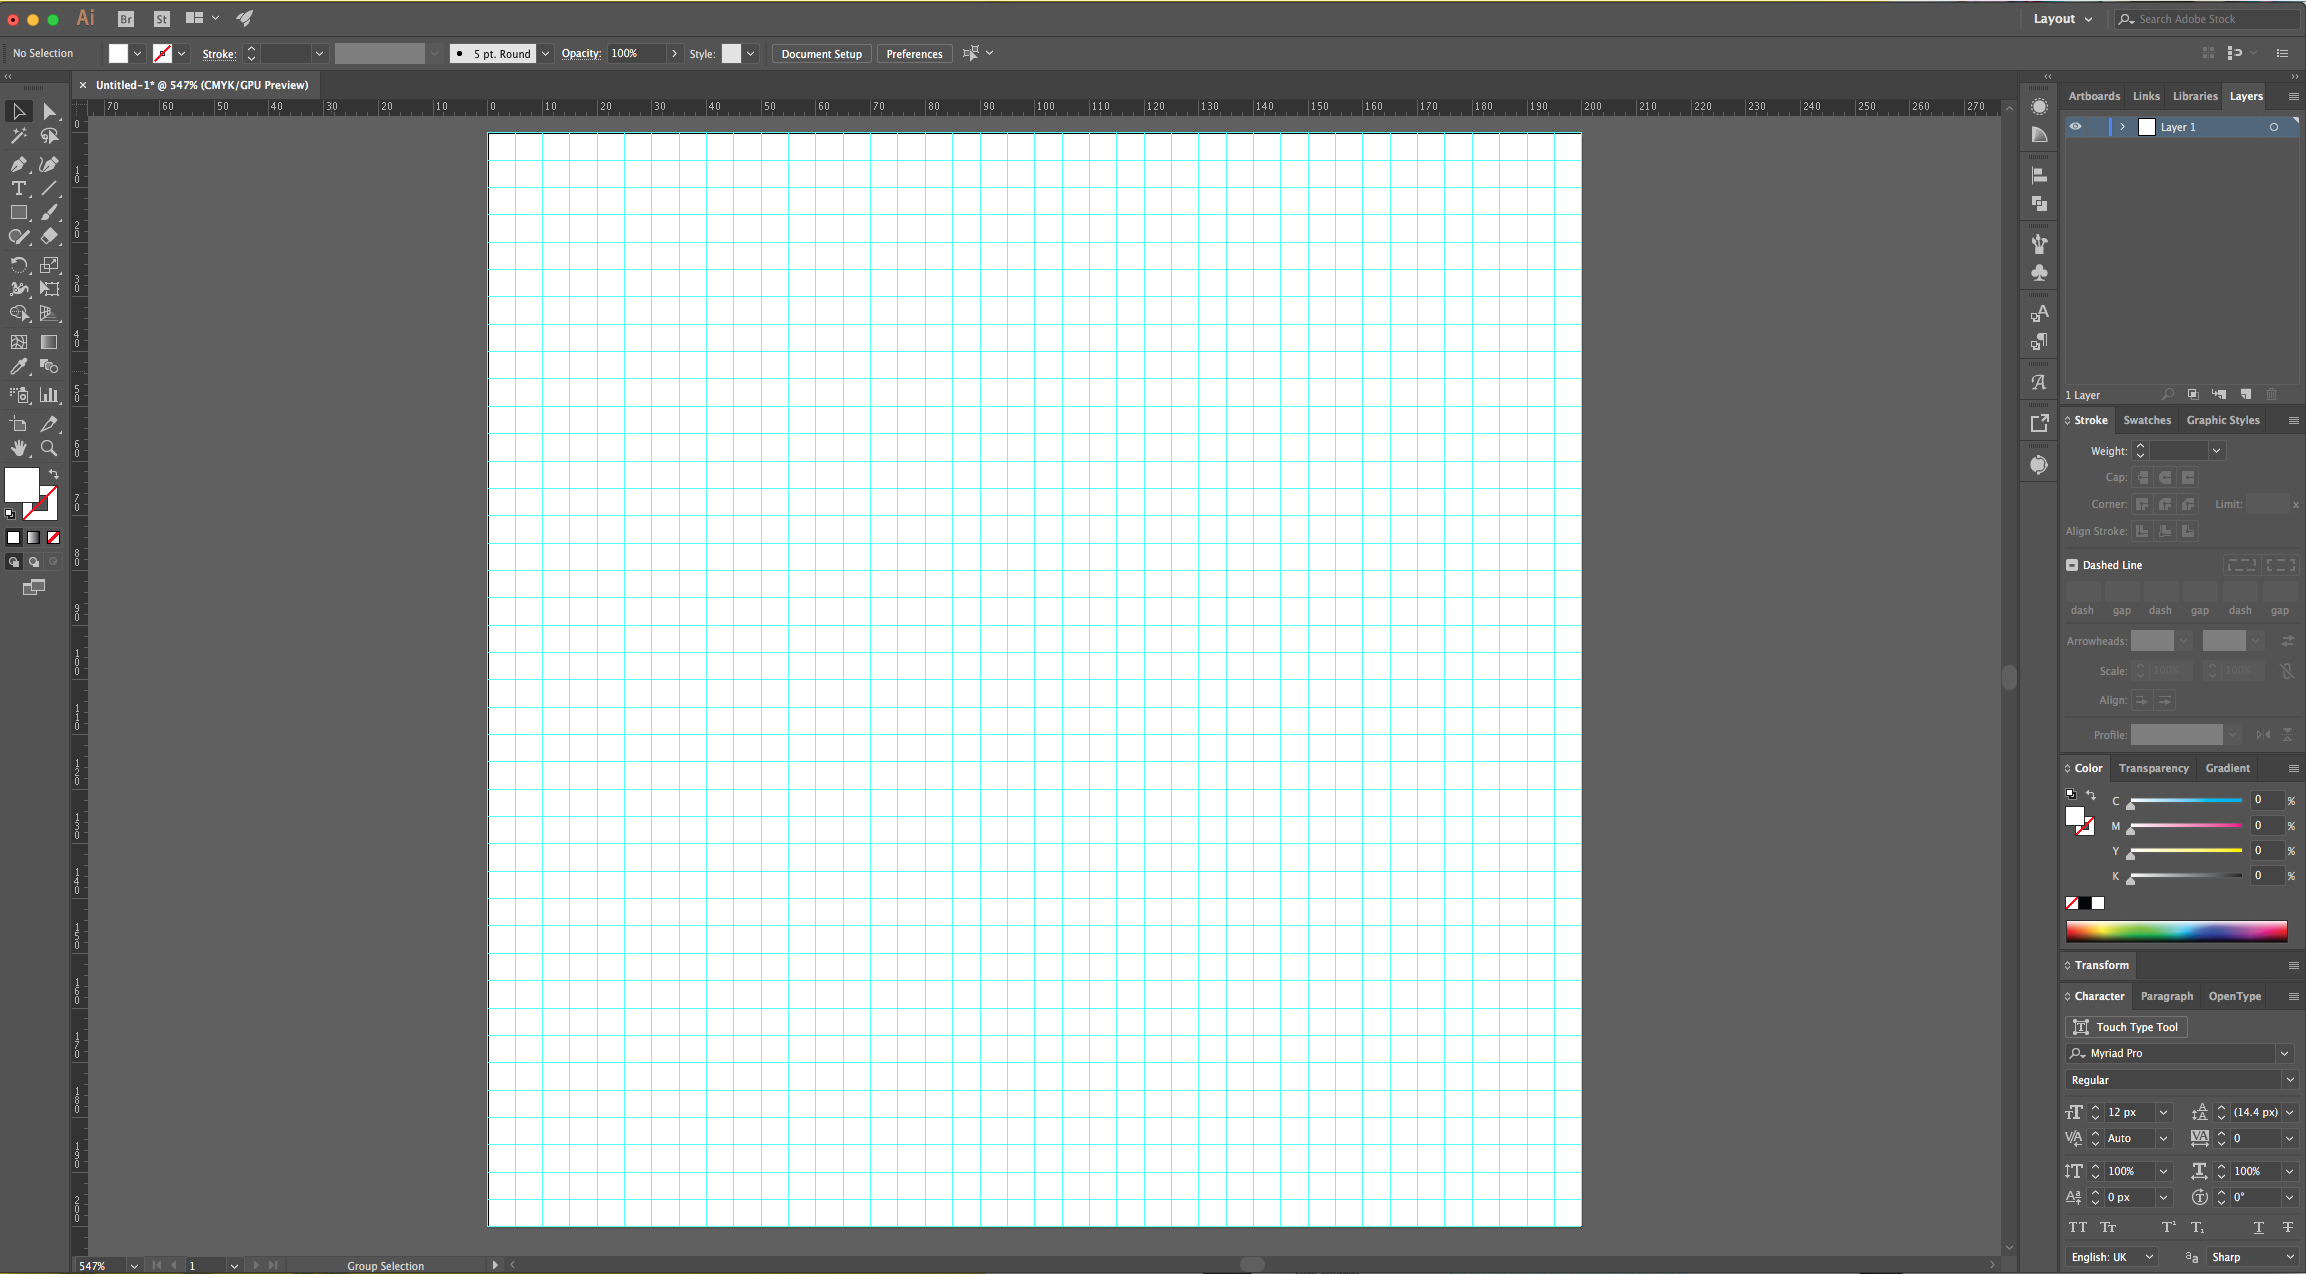
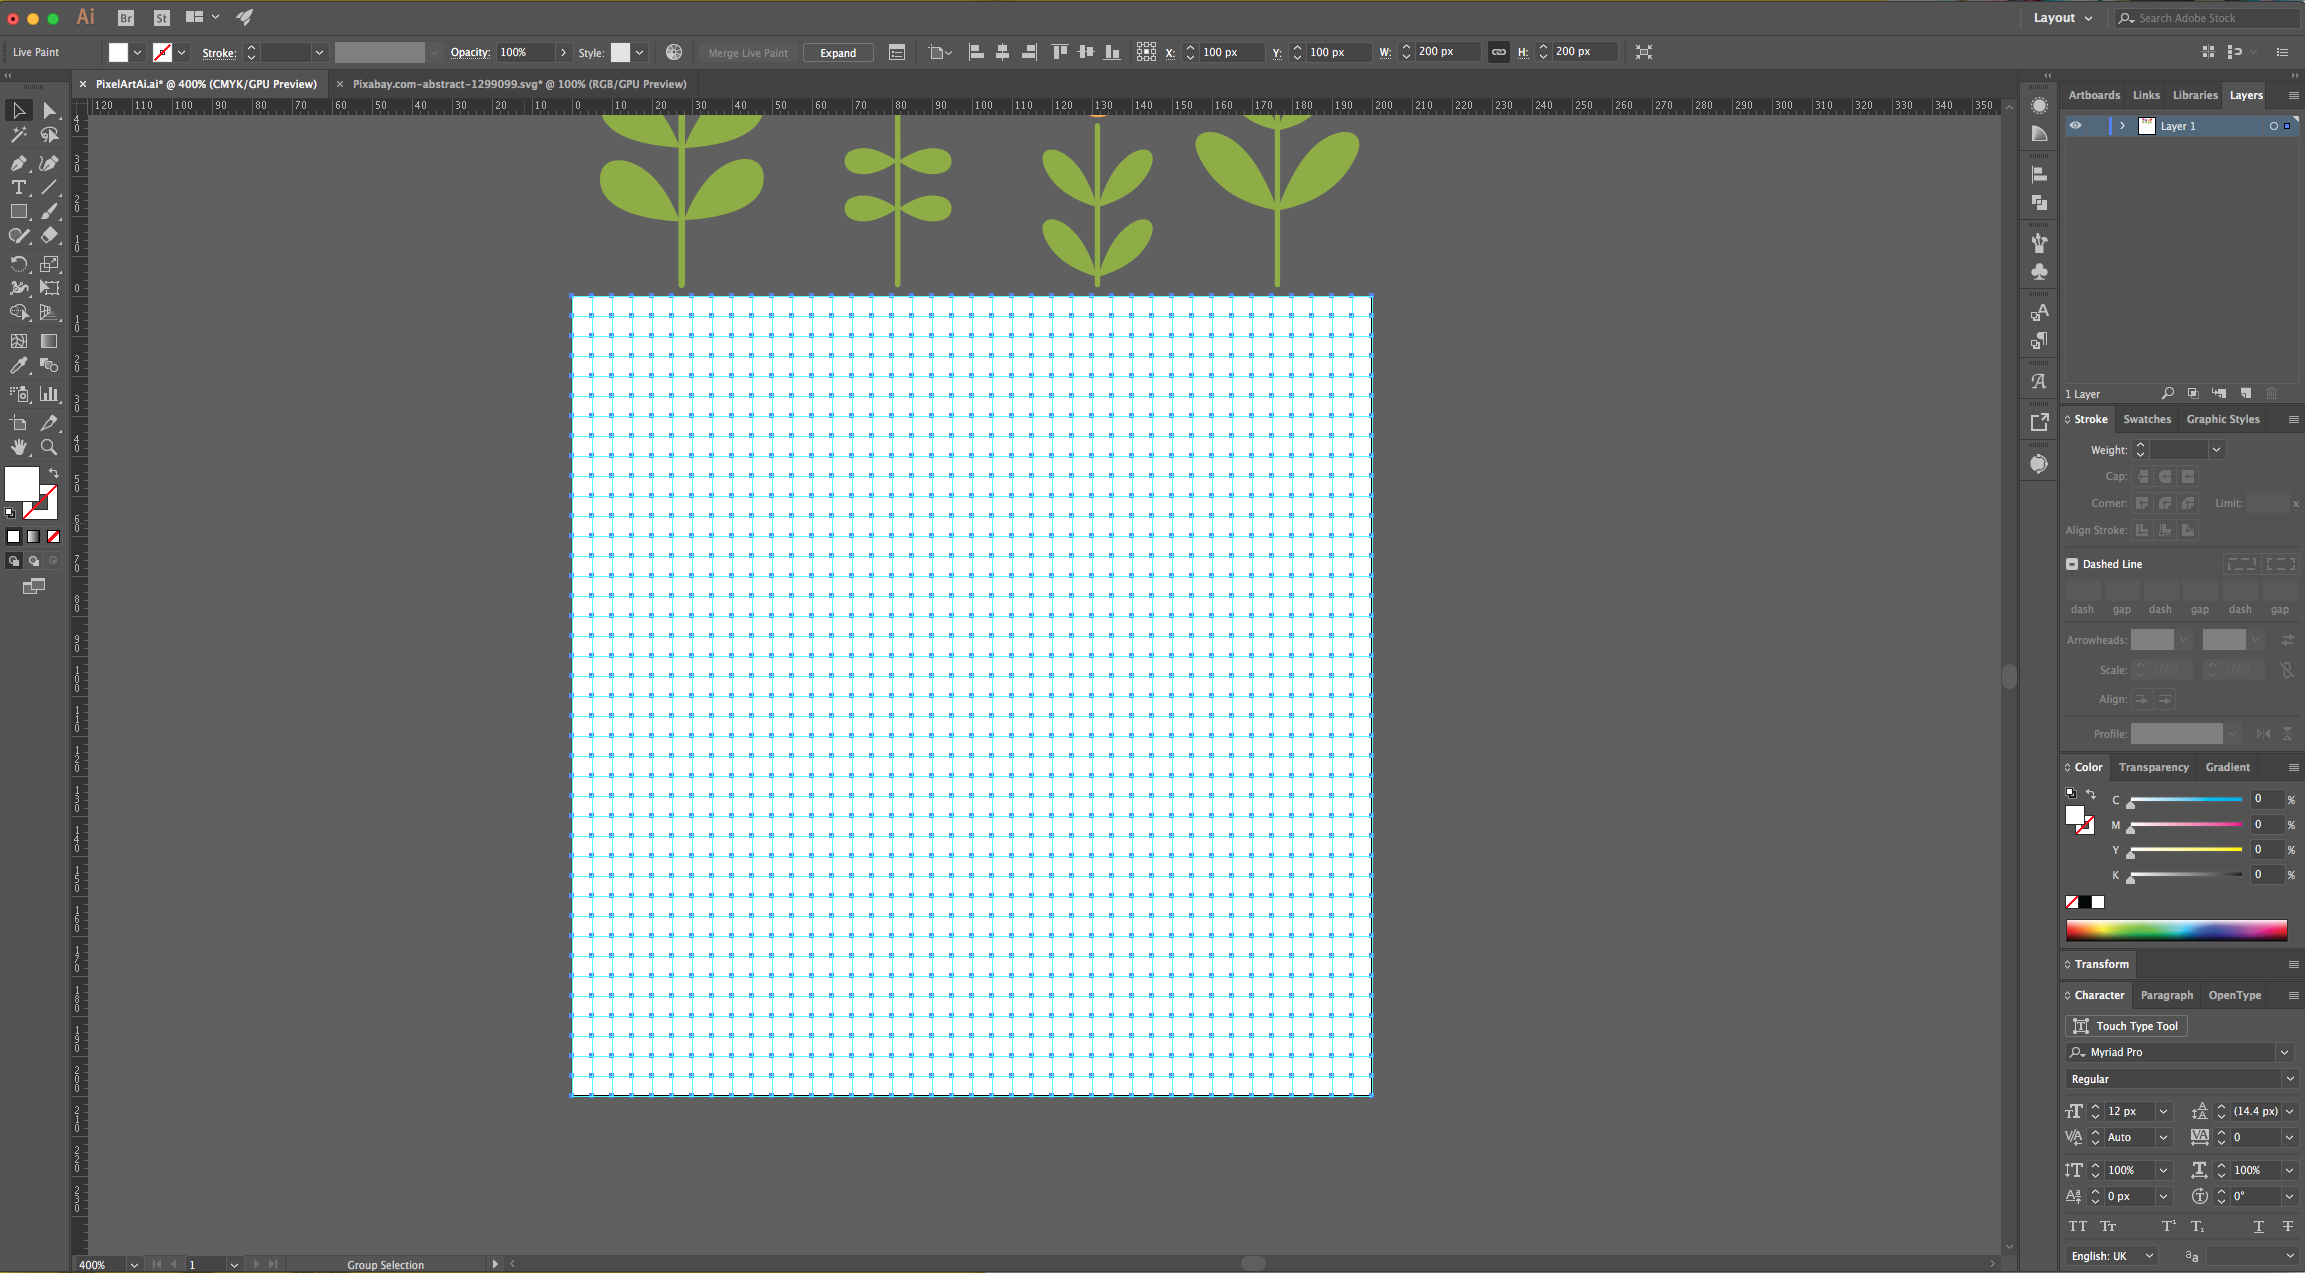
7 - With the Copy selected go to View > Guides > Make Guides (Command/Control + 5).
8 - Then, to make sure that the Guides are locked go to View > Guides > Lock Guides.
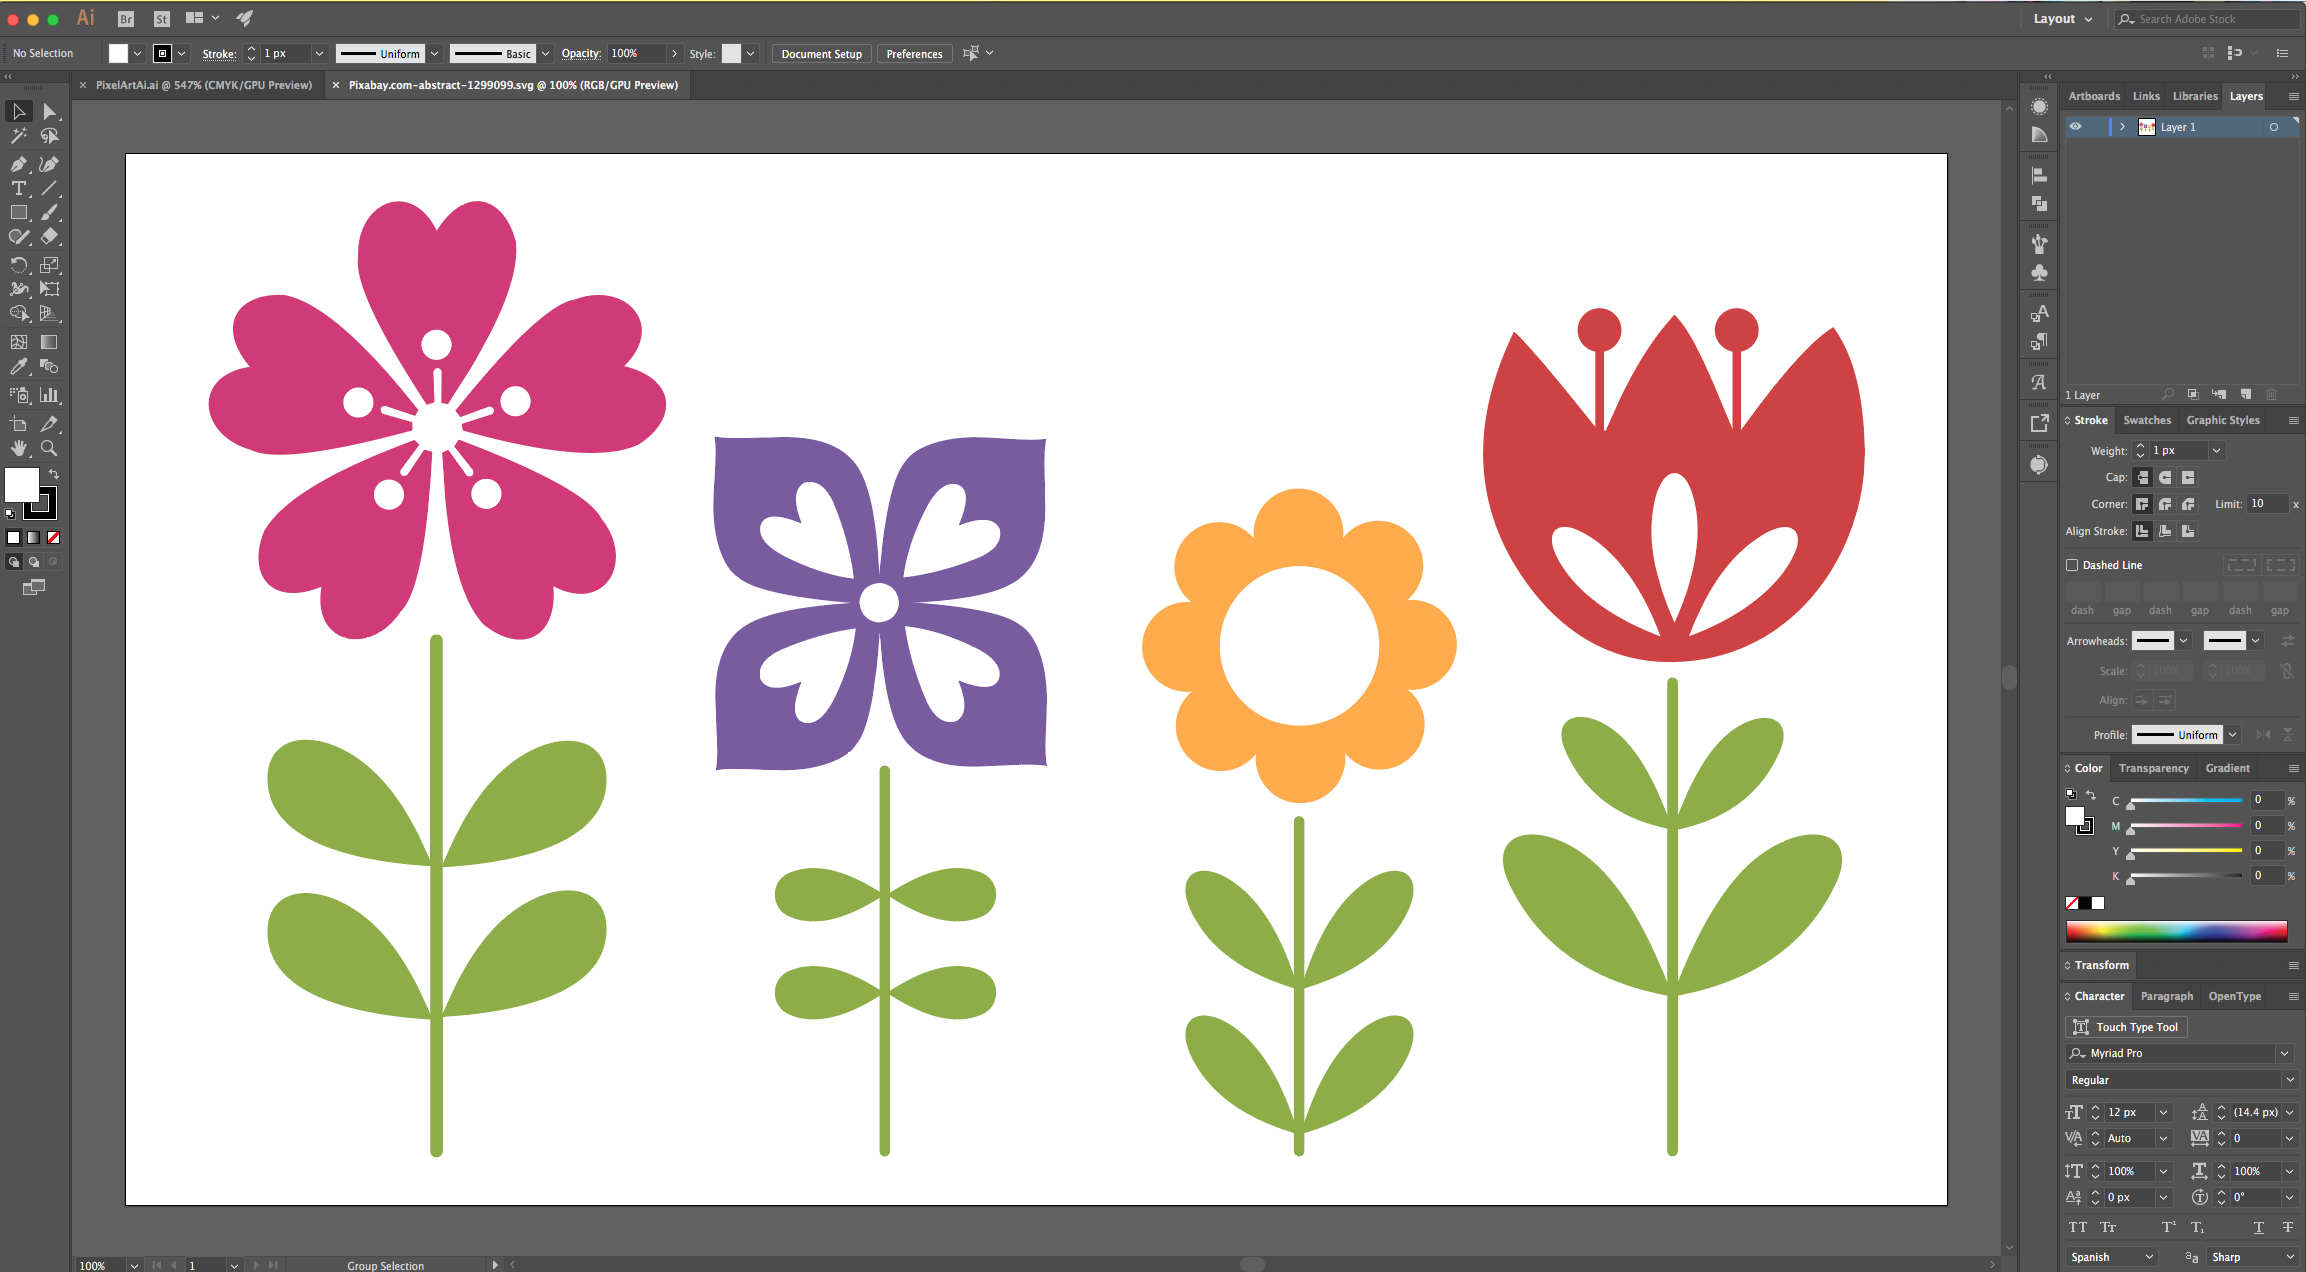
9 - Open the “Reference File” and bring it into your “Document”.
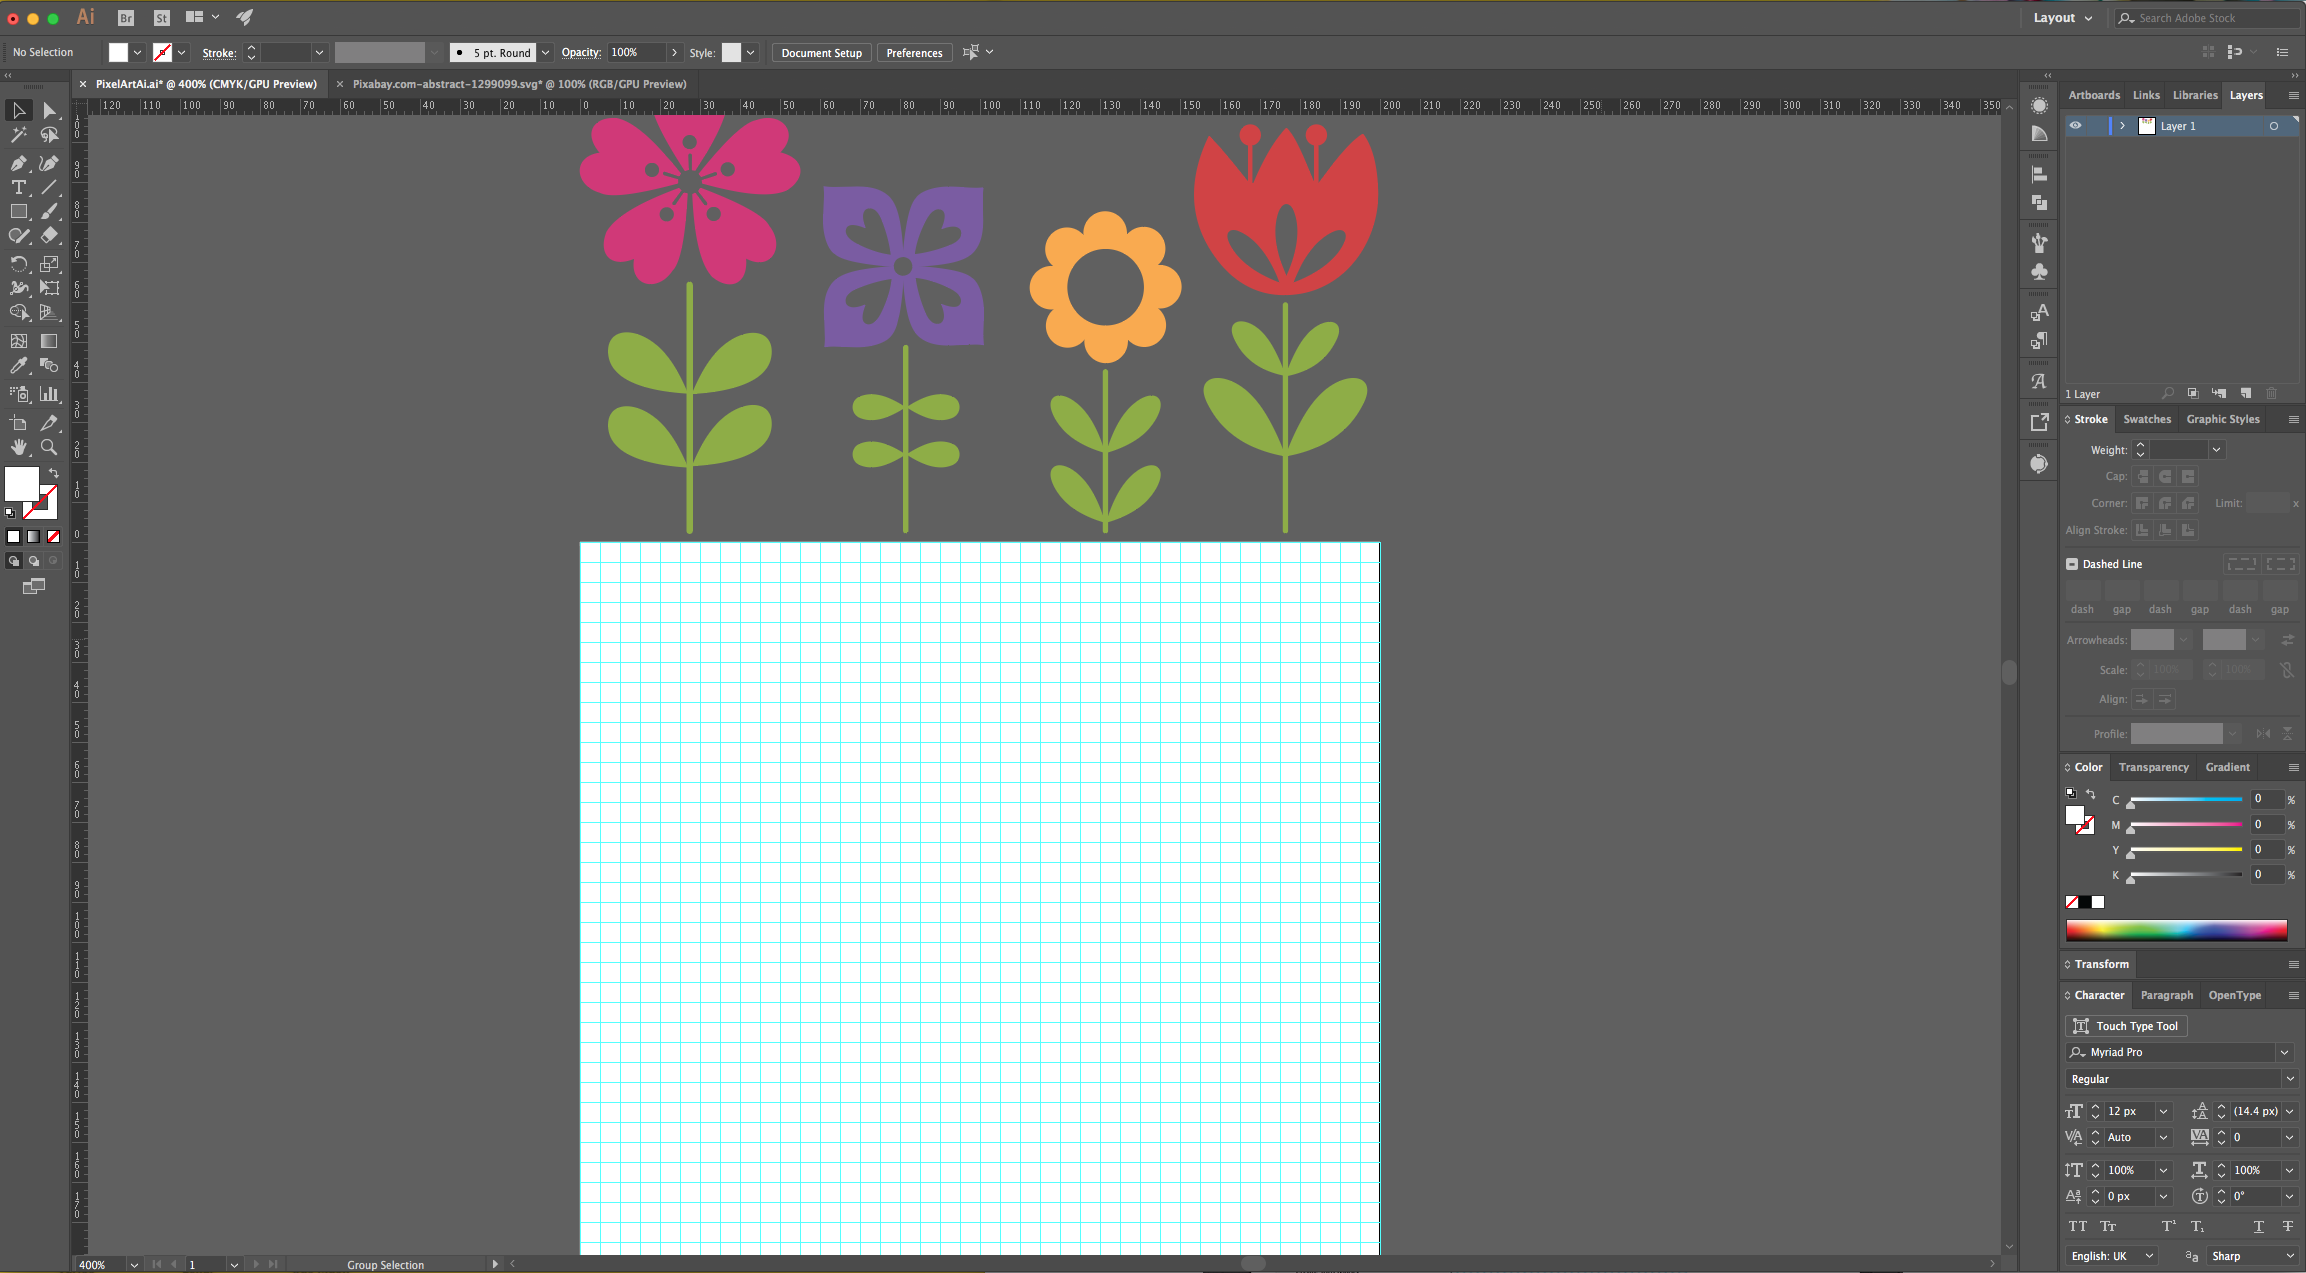
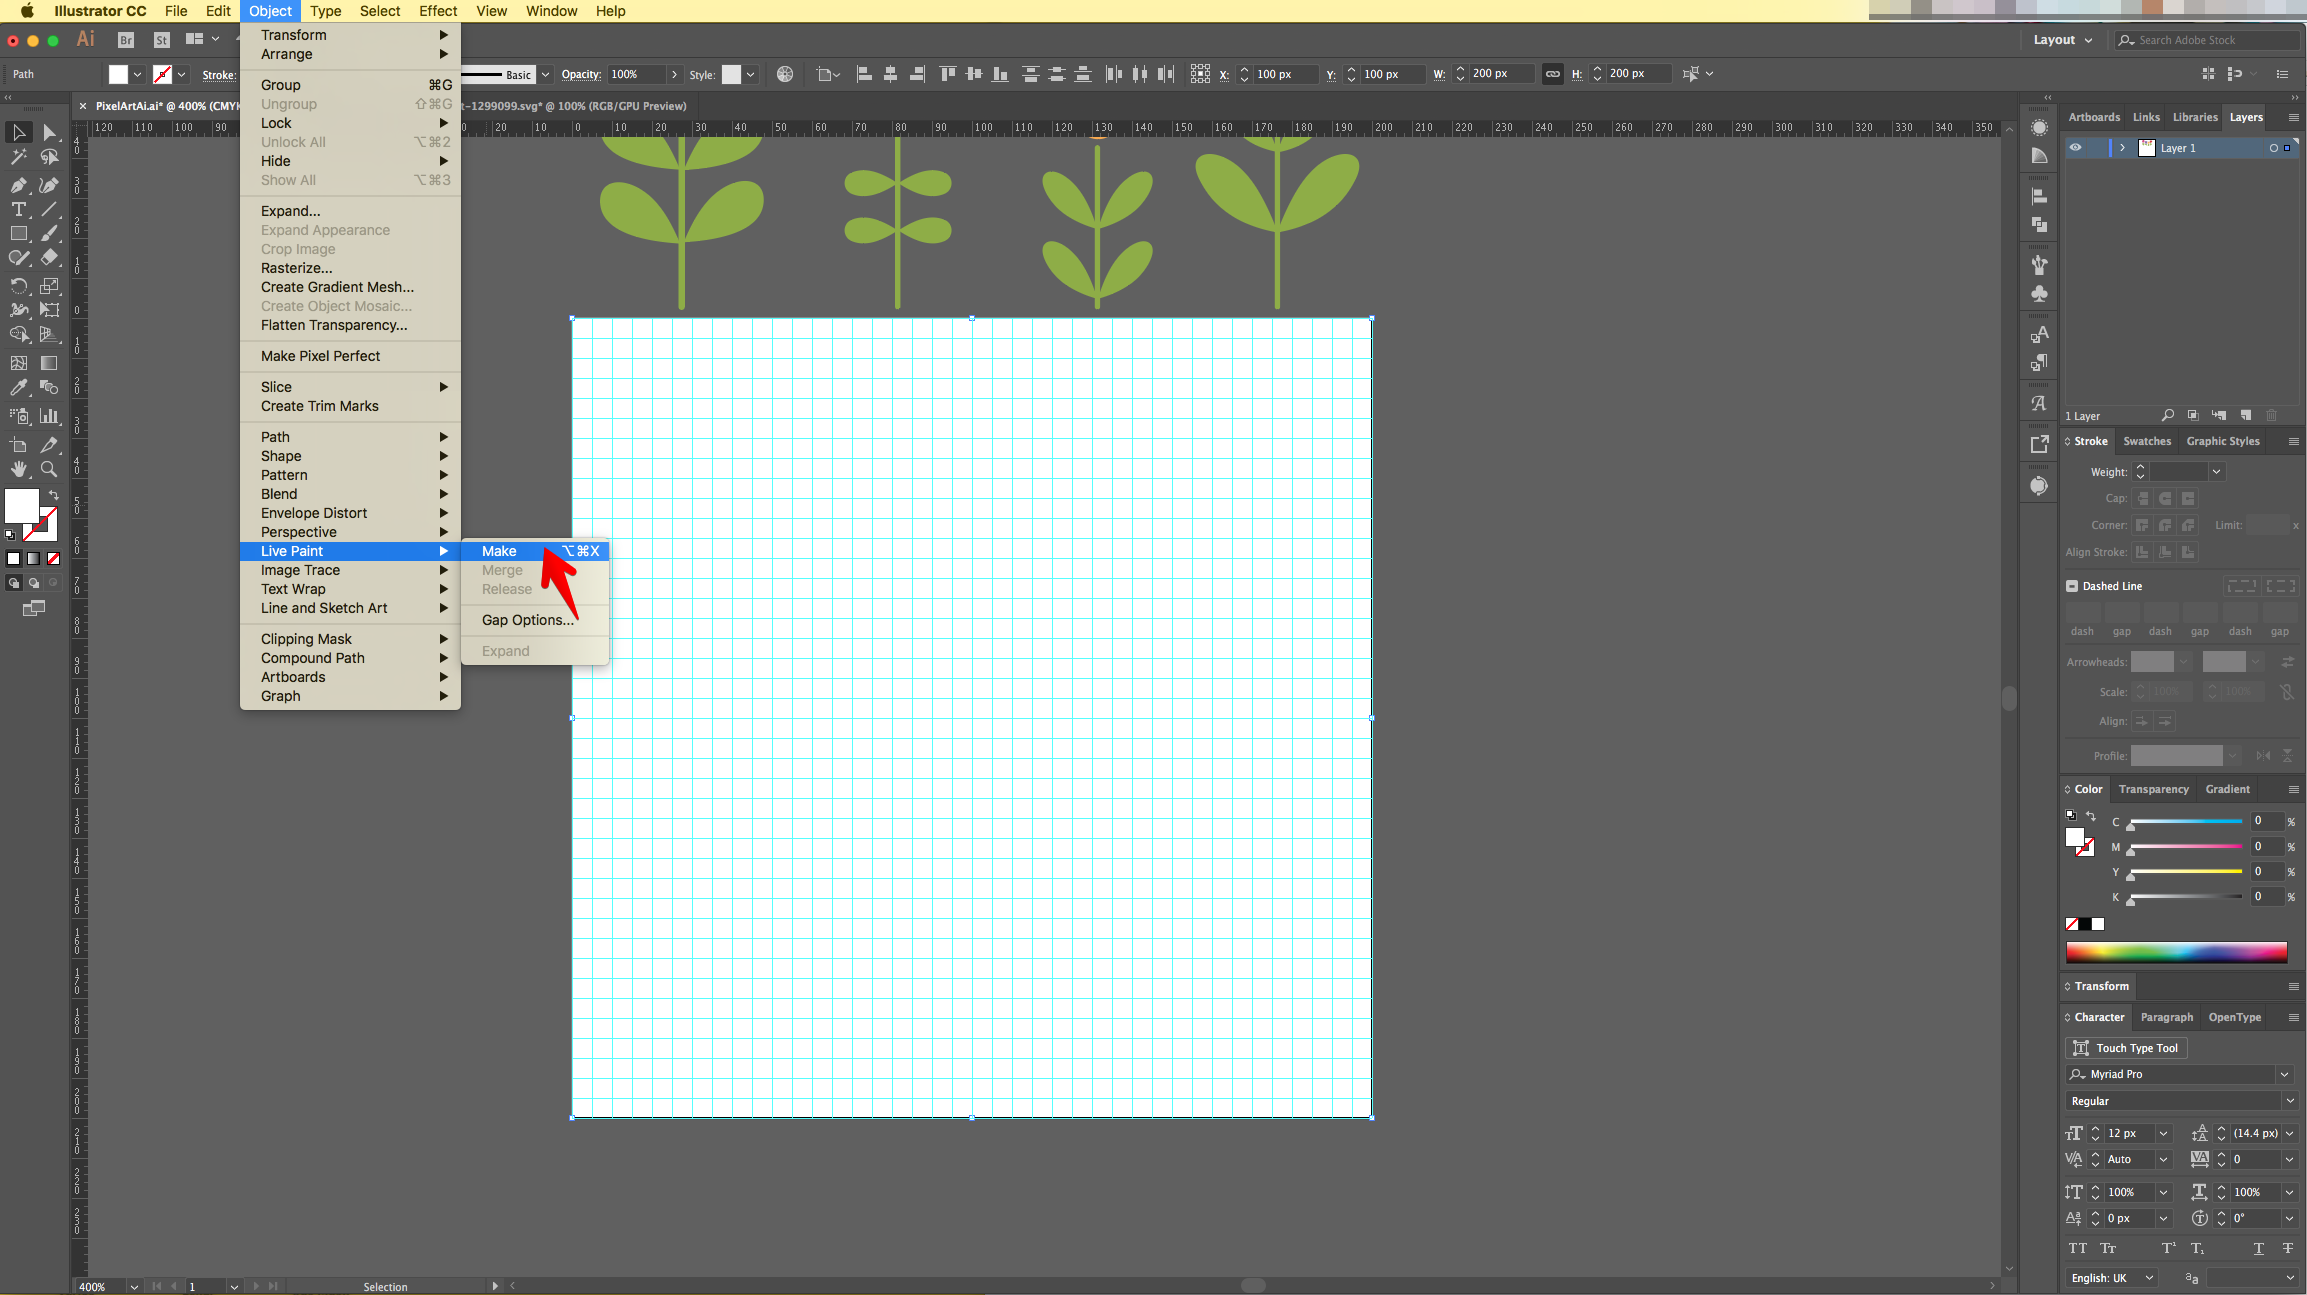
10 - Select the “Grid” and go to Object > Live Paint > Make.
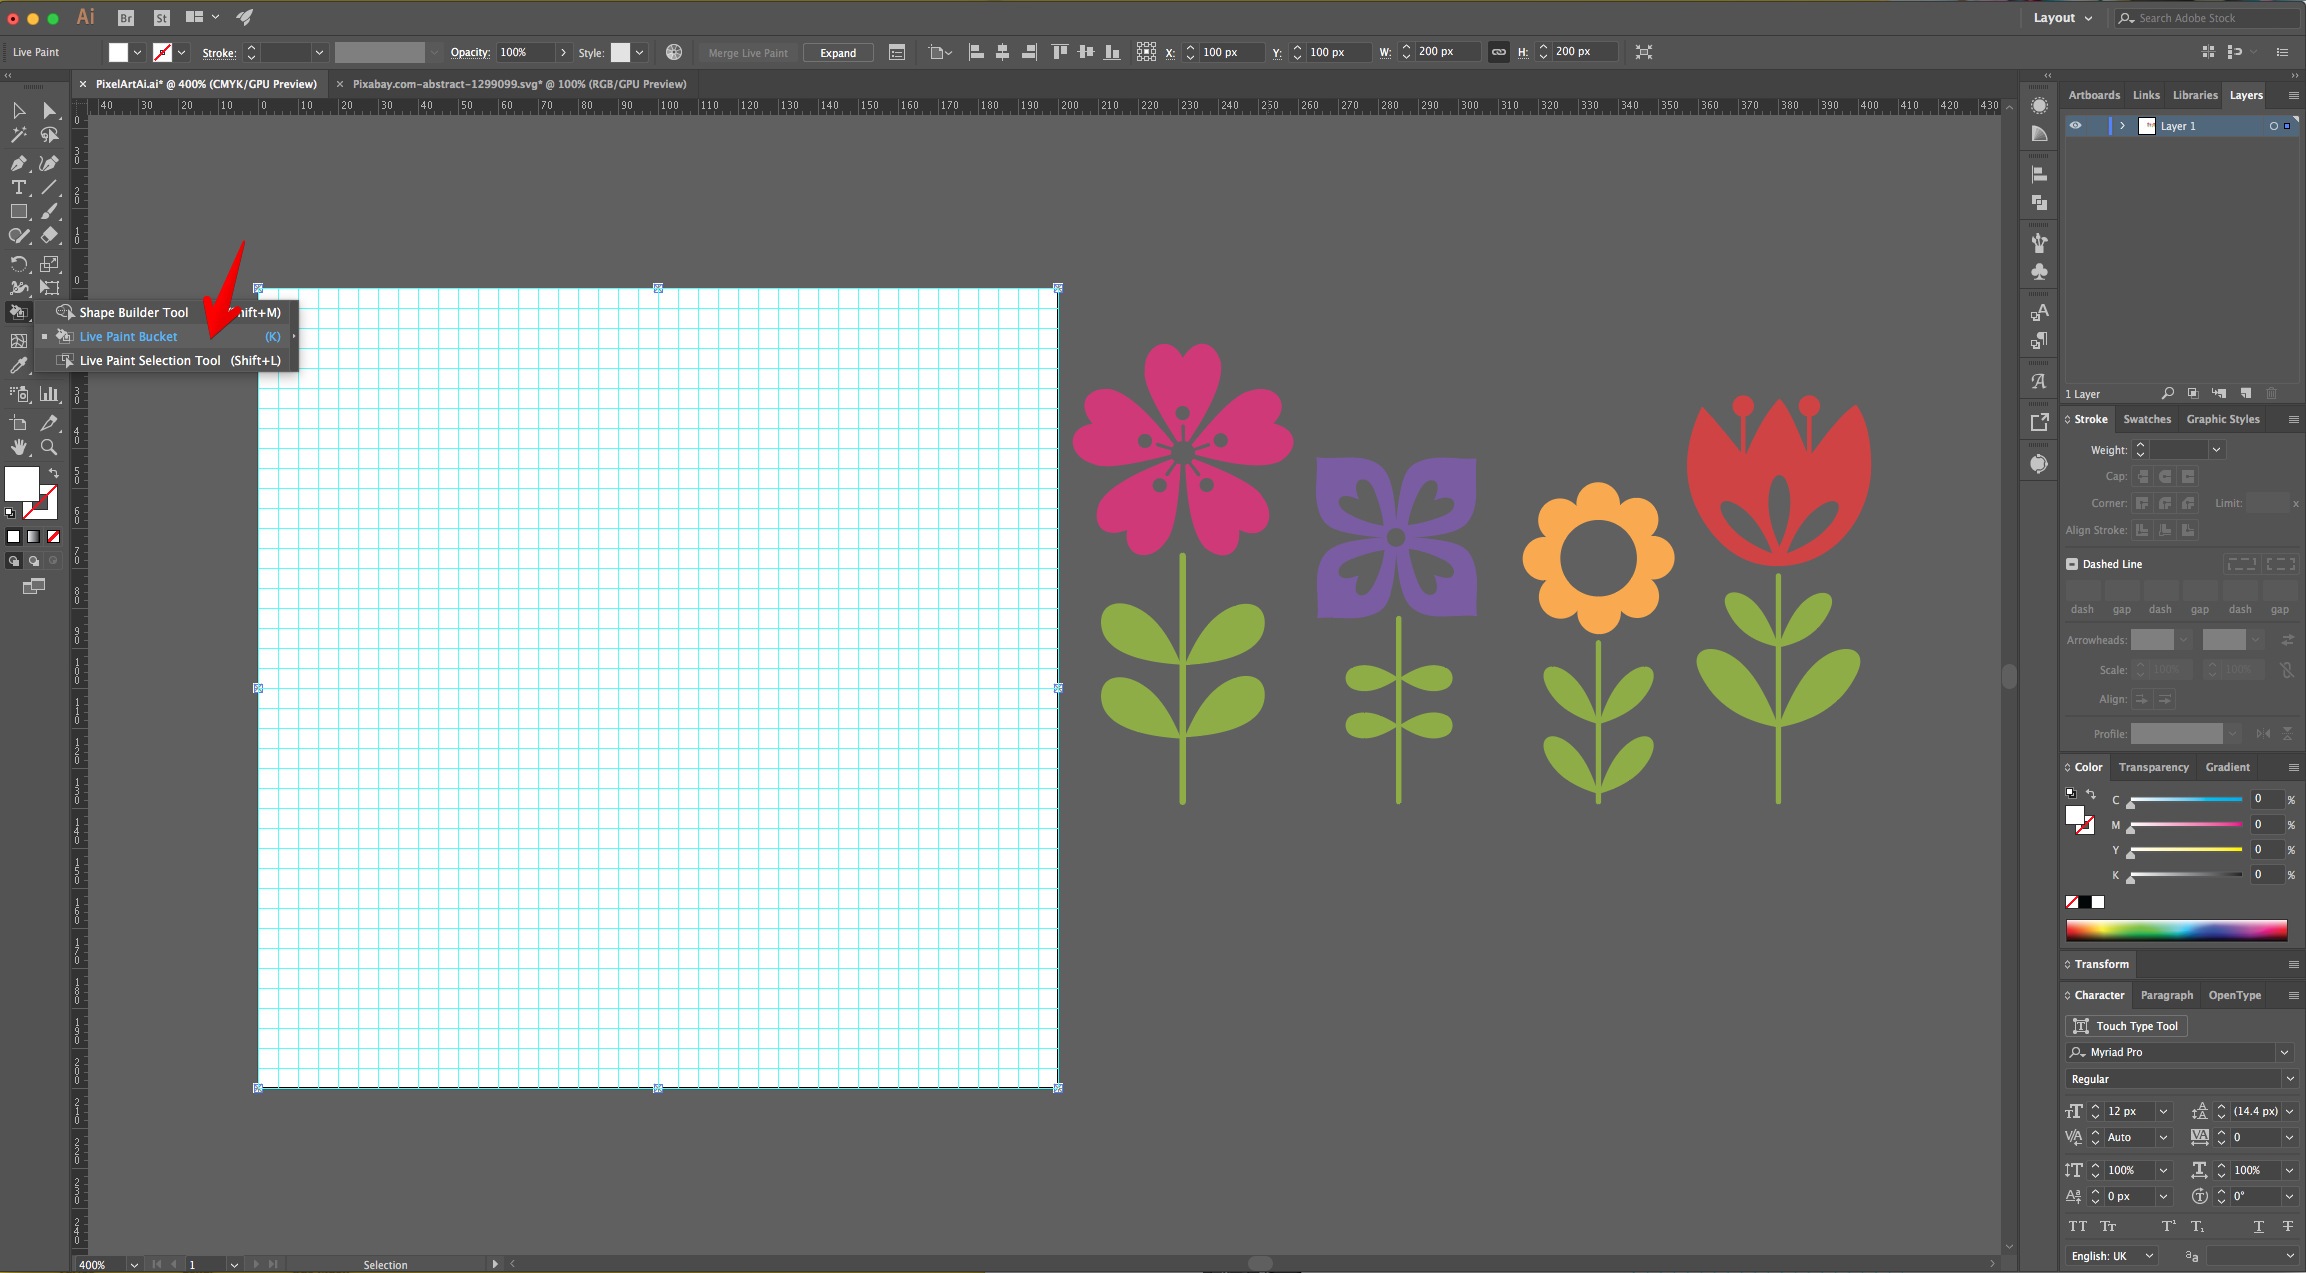
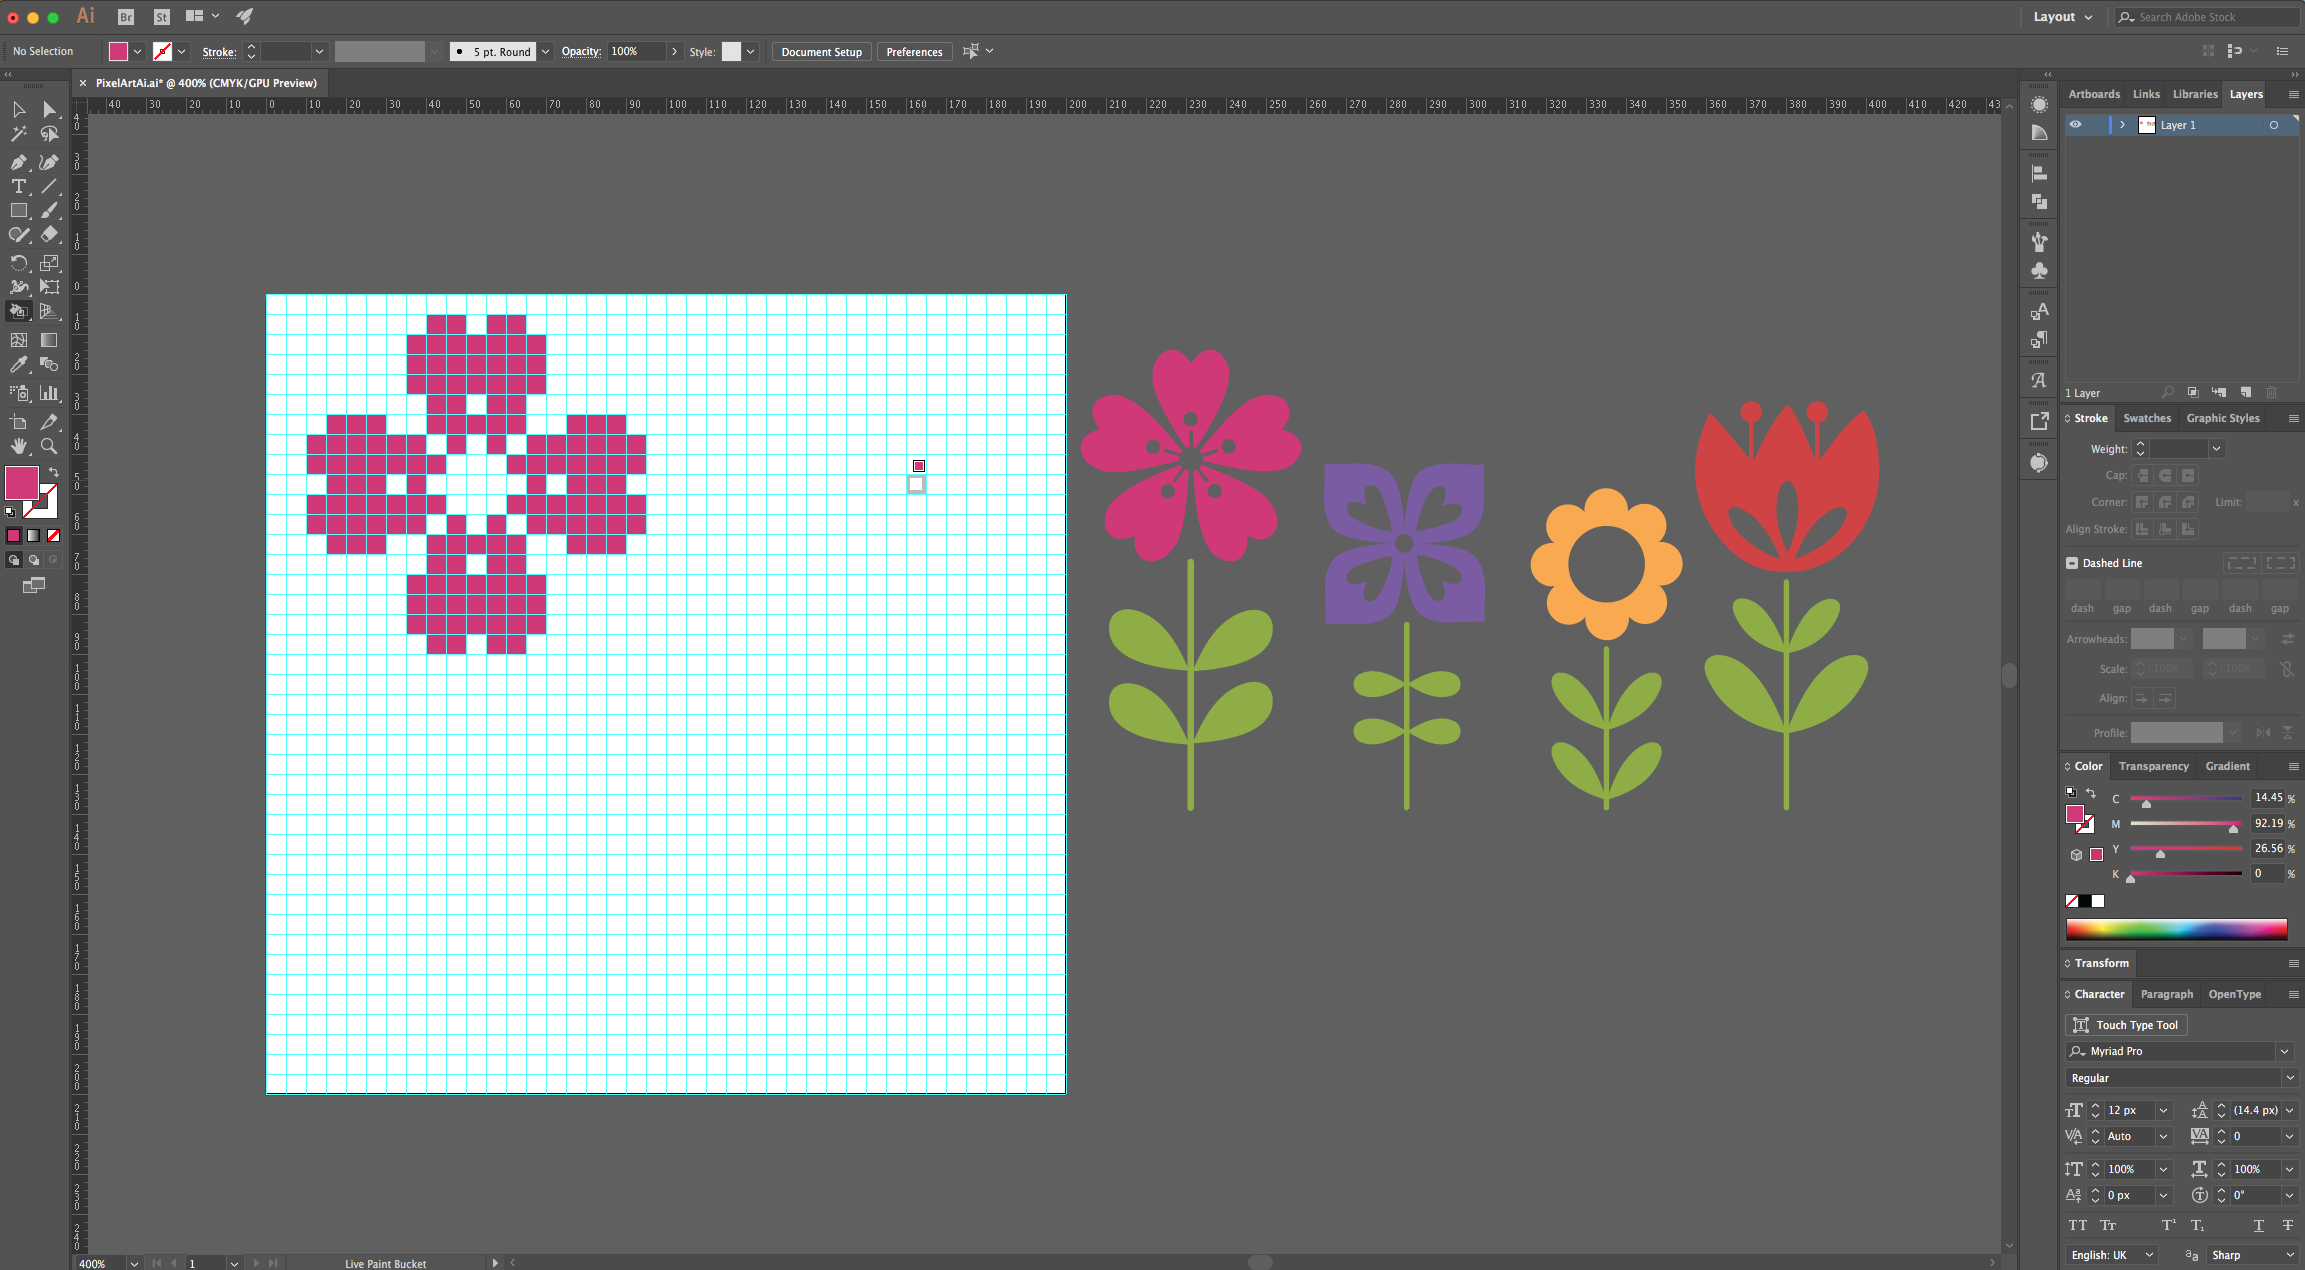
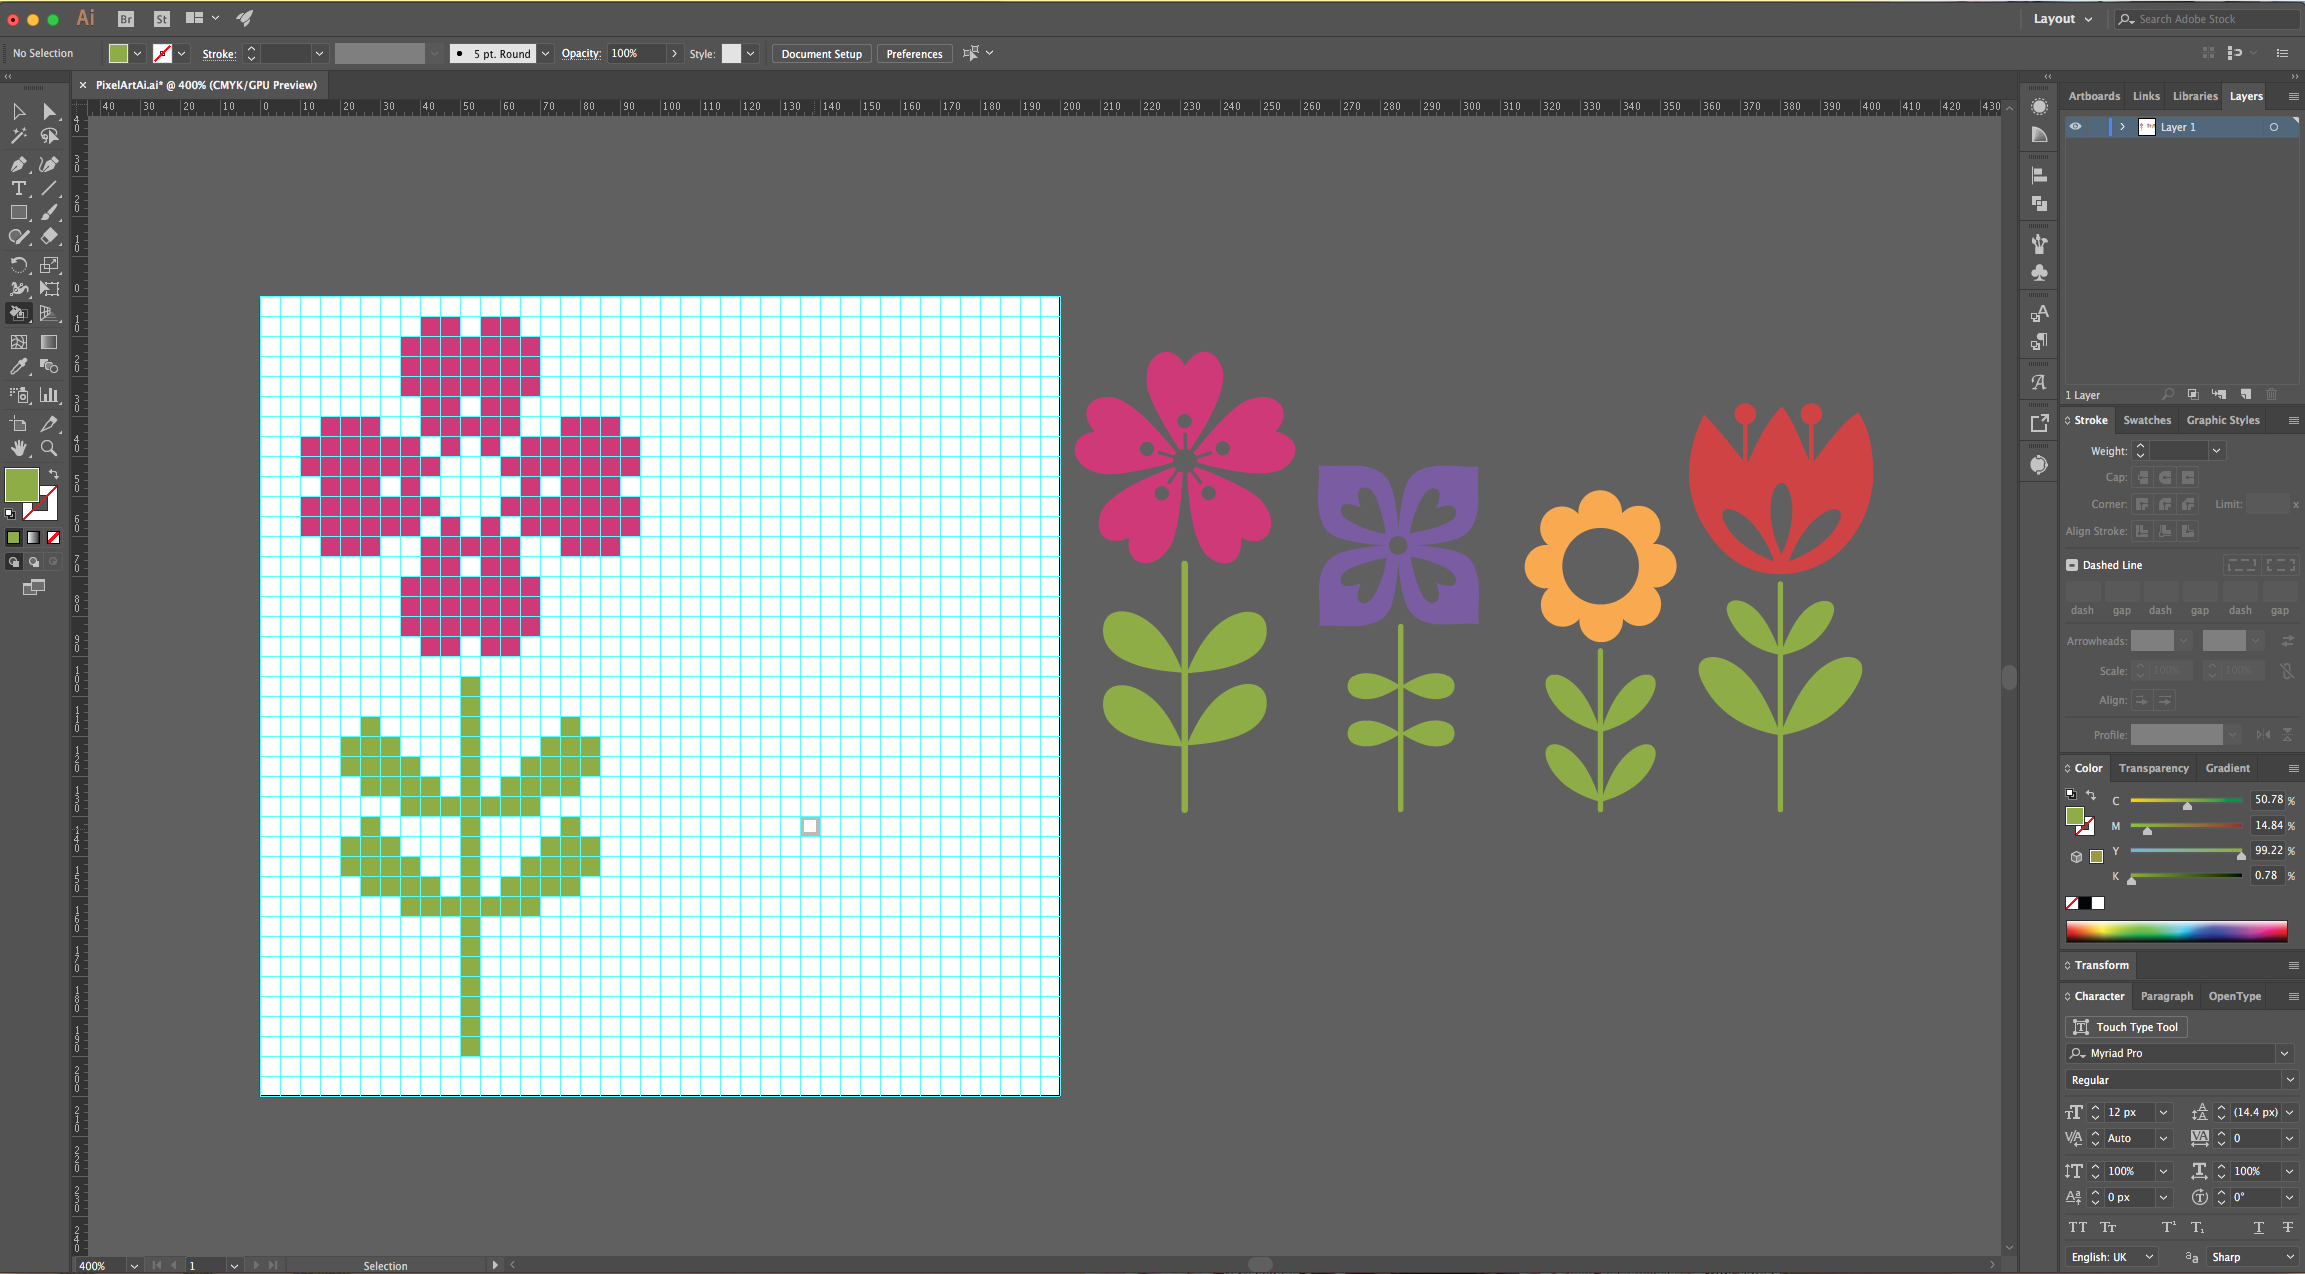
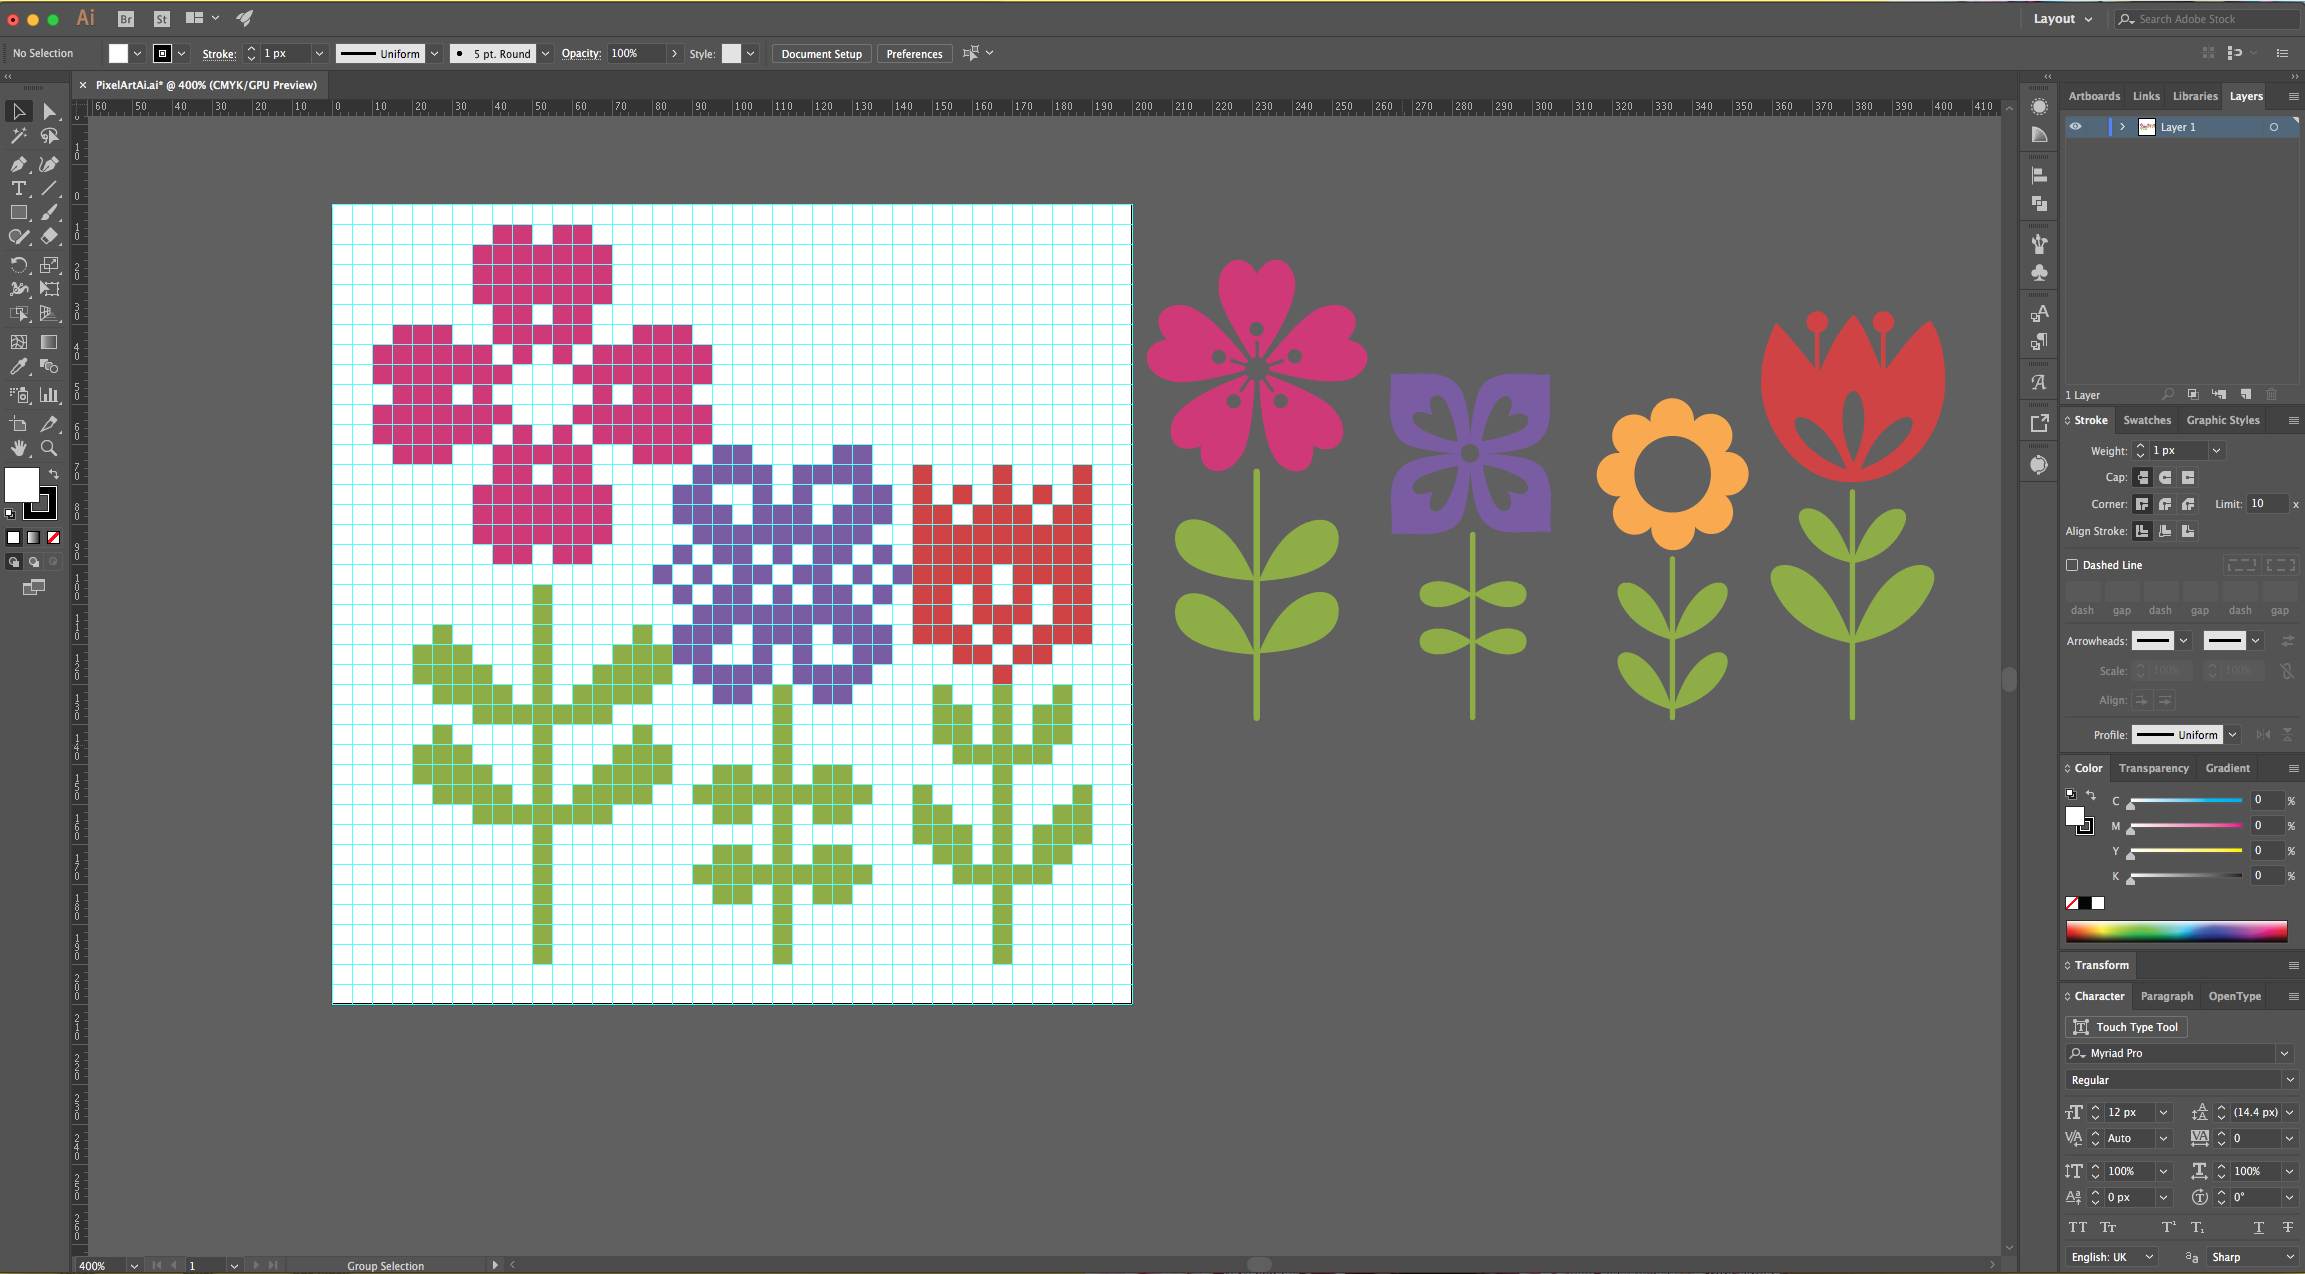
11 - Select the “Live Paint Bucket” (K) from the “Toolbar” and Option/Alt-click on top of the color you want to use to sample it.

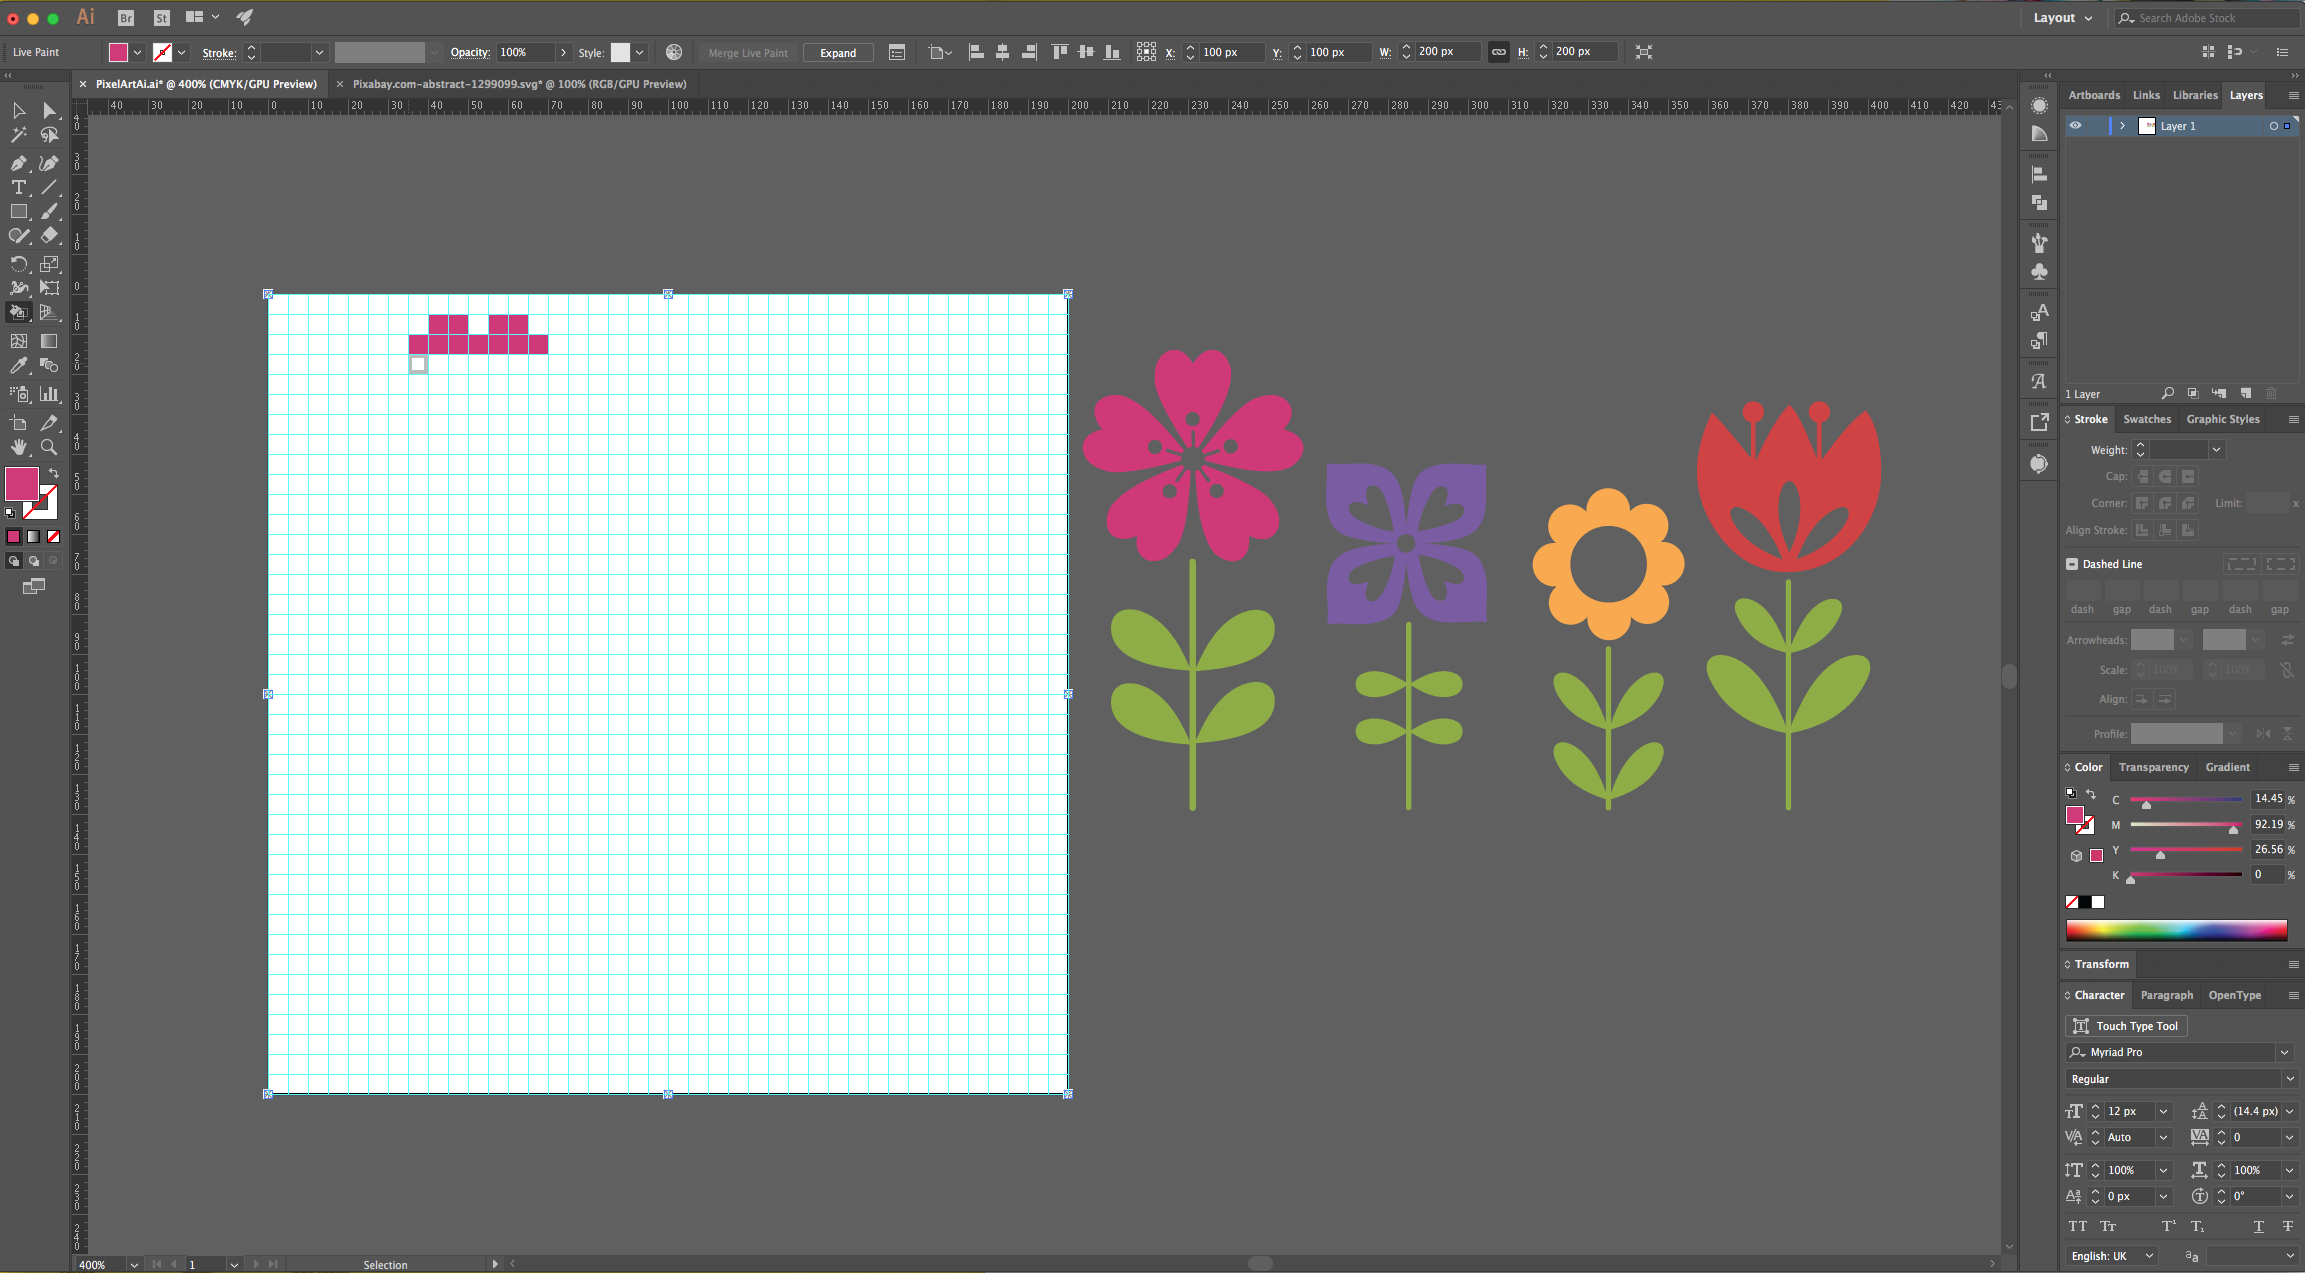
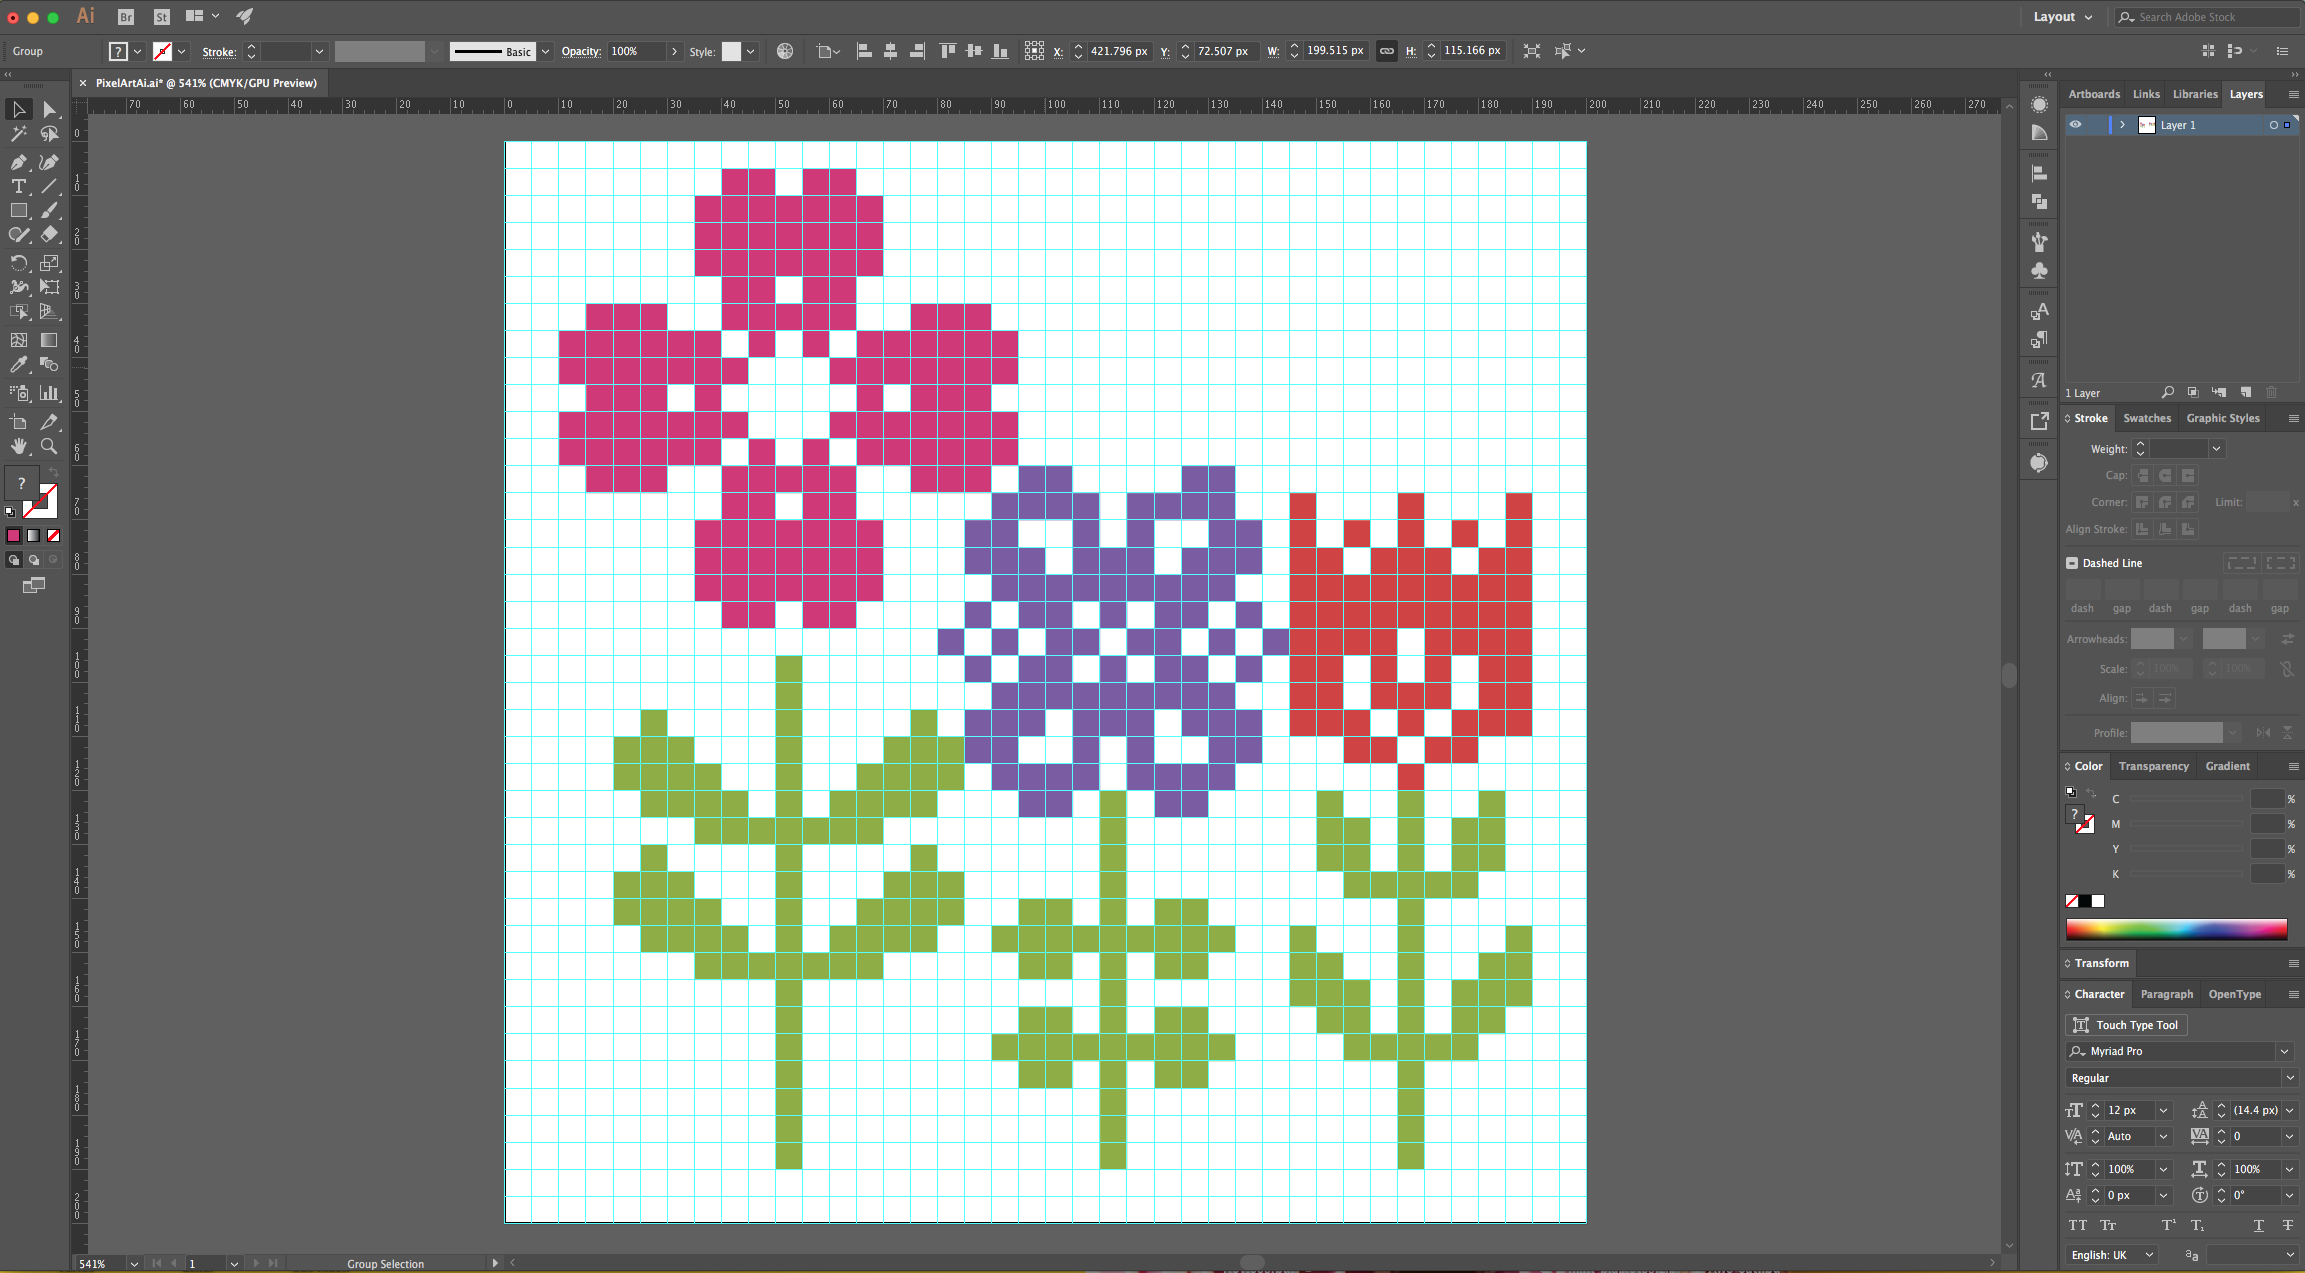
12 - Click and drag the cursor on top of the “Grid” Squares that you want to paint until you copy the Reference Image. Change the color if needed.
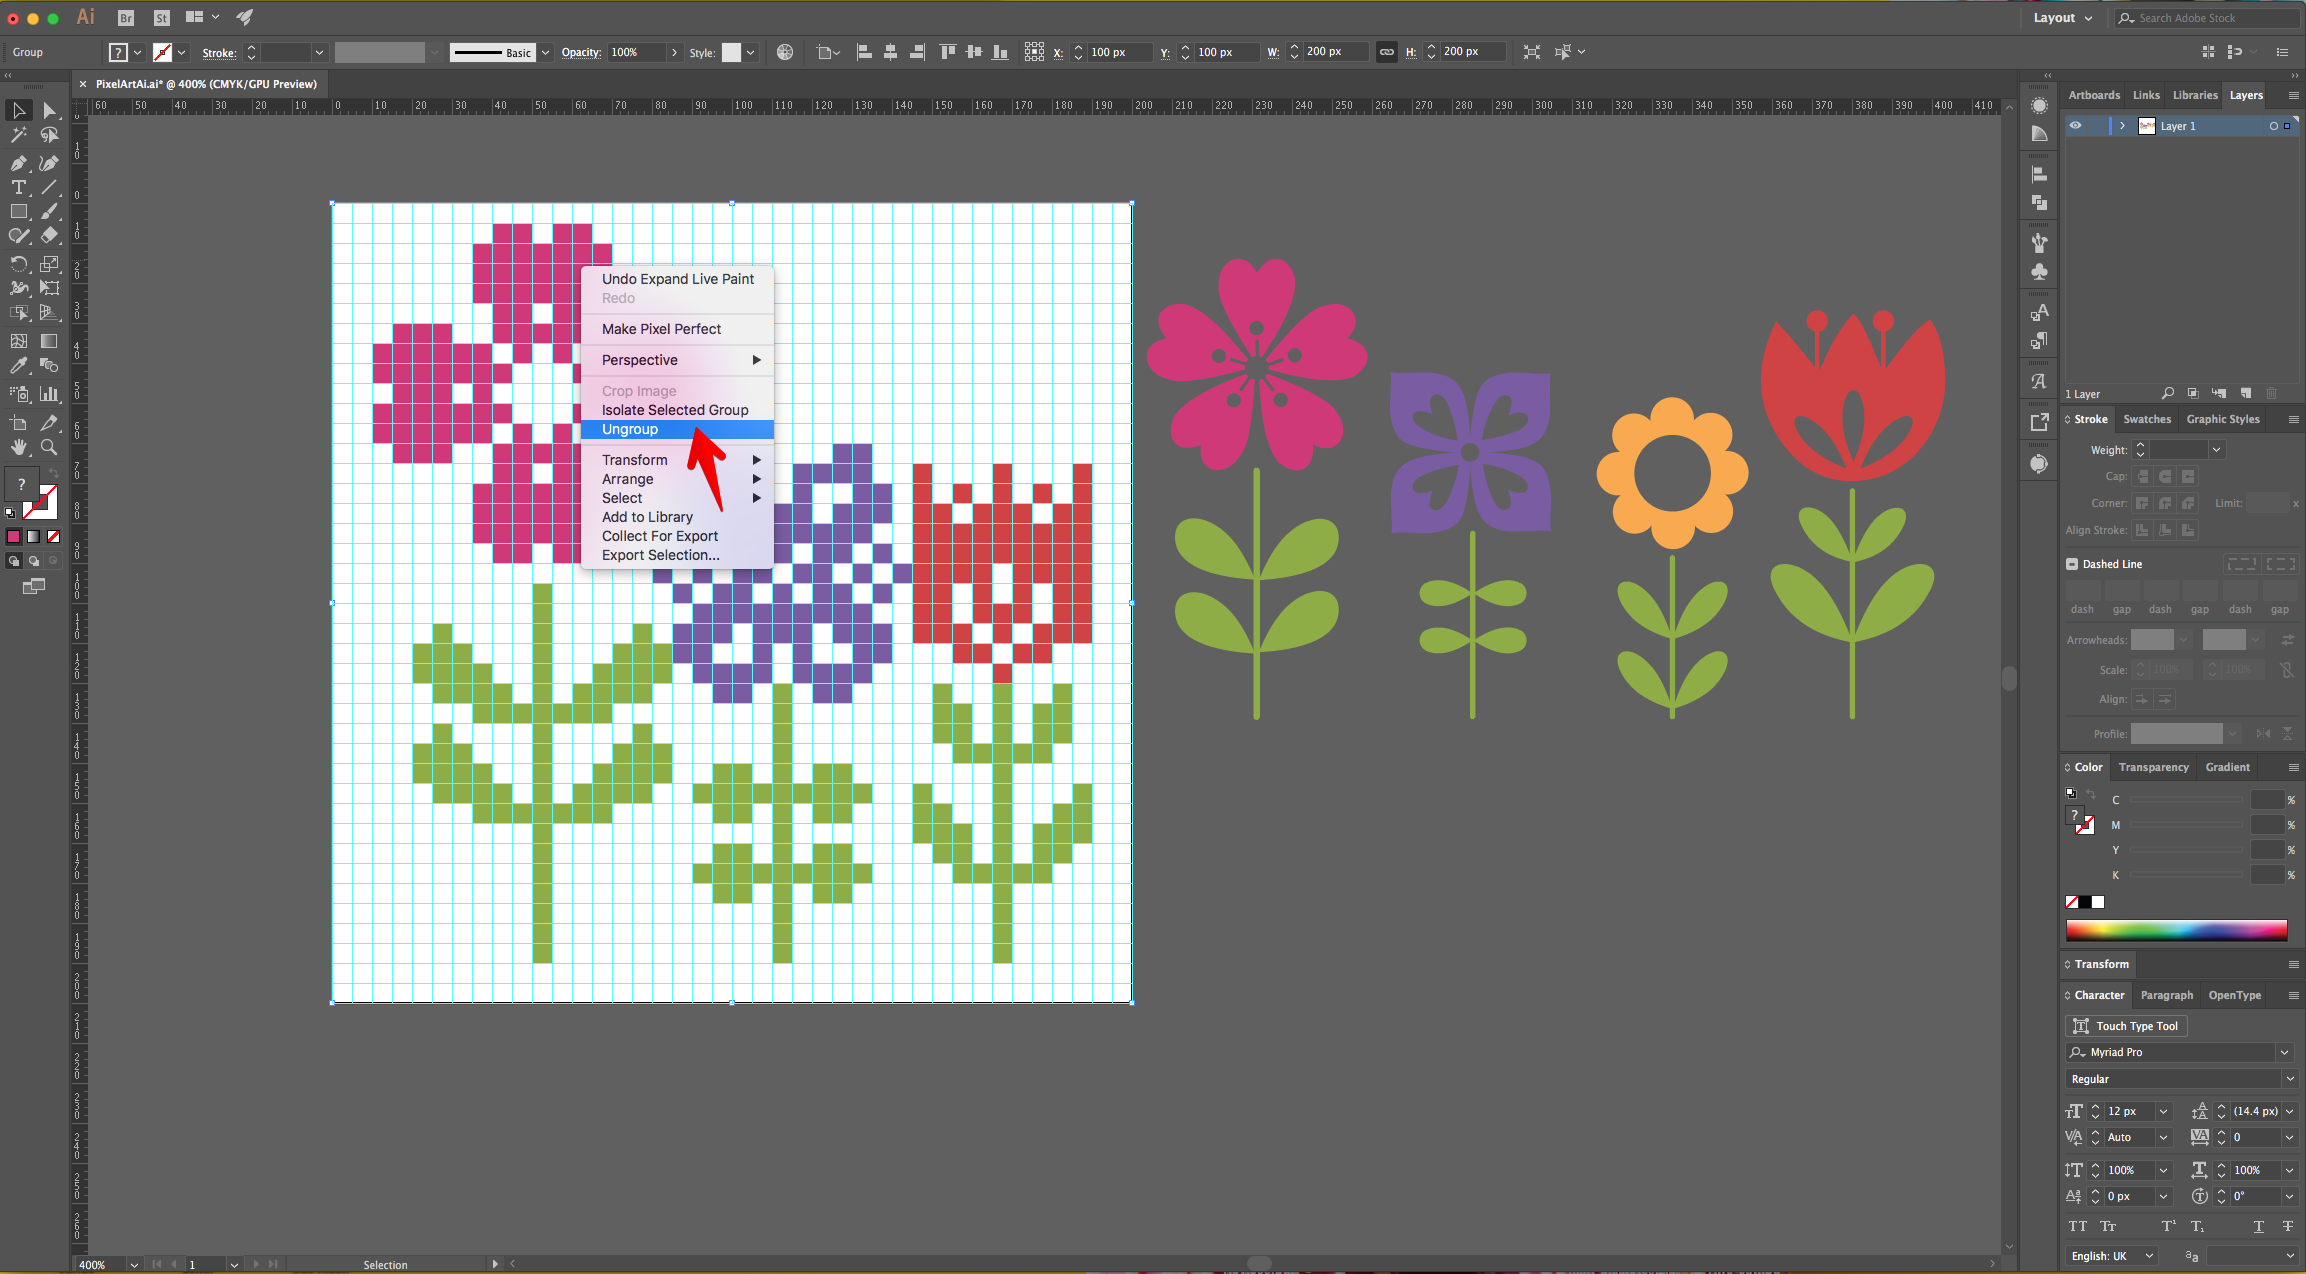
13 - When you are done, click the “Expand” button on the Top Menu to release the “Grid”. Then, right-click on top of it and choose “Ungroup” (Command/Control + G). Now you can select the single squares to modify them if needed.


14 - Check out your work.
1 - In Illustrator, create a “New Document”. Click “More Settings”, change the Units to “Pixels” and use a “Width” and “Height” of 200.
2 - If you need the Document “Rulers” go to View > Rulers > Show Rulers (Command/Control + R).
3 - Select the “Rectangle Tool” (M), click on the Top - Left corner of your document’s and input the same “Width” and “Height” values (200 x 200 px). Use White as “Fill” color.
4 - Center it using the “Horizontal Align Center” option on your Top Menu and make sure that “Align to Artboard” is selected. Or use the same options in the “Align Panel”.
5 - With the Shape still selected go to Object > Path > Split into Grid... Set the number of “Rows” and “Columns” to 40 and the “Width” of both to 5 px.
6 - “Copy” the Grid (Command/Control + C) and “Paste in Front” (Command/Control + F).
7 - With the Copy selected go to View > Guides > Make Guides (Command/Control + 5).
8 - Then, to make sure that the Guides are locked go to View > Guides > Lock Guides.
9 - Open the “Reference File” and bring it into your “Document”.
10 - Select the “Grid” and go to Object > Live Paint > Make.
11 - Select the “Live Paint Bucket” (K) from the “Toolbar” and Option/Alt-click on top of the color you want to use to sample it.
12 - Click and drag the cursor on top of the “Grid” Squares that you want to paint until you copy the Reference Image. Change the color if needed.
13 - When you are done, click the “Expand” button on the Top Menu to release the “Grid”. Then, right-click on top of it and choose “Ungroup” (Command/Control + G). Now you can select the single squares to modify them if needed.
14 - Check out your work.
by @lornacane


