Using Fonts in Adobe Illustrator
In this tutorial you'll learn how to quickly and easily use fonts in Adobe Illustrator.
Fonts are a great tool to personalize and enhance your designs, giving them a unique touch. Using fonts in Illustrator is quite simple, and in this tutorial, we will cover the basic steps you need to use in order to take advantage of this great resource.
We will use the elegant signature font, Witha Sign, but you can head to Font Bundles to browse our fantastic selection of signature fonts.
Step 1 - Install the Font on Your Computer
First of all, since Illustrator automatically imports all the installed fonts available on your computer, make sure your font has been unzipped and properly installed.
If you are not sure how to do this, you can check out our guide on how to install fonts.
Remember that after installing a new font, you may need to close and restart the program since it’s possible that your recently installed fonts won’t show without doing this.
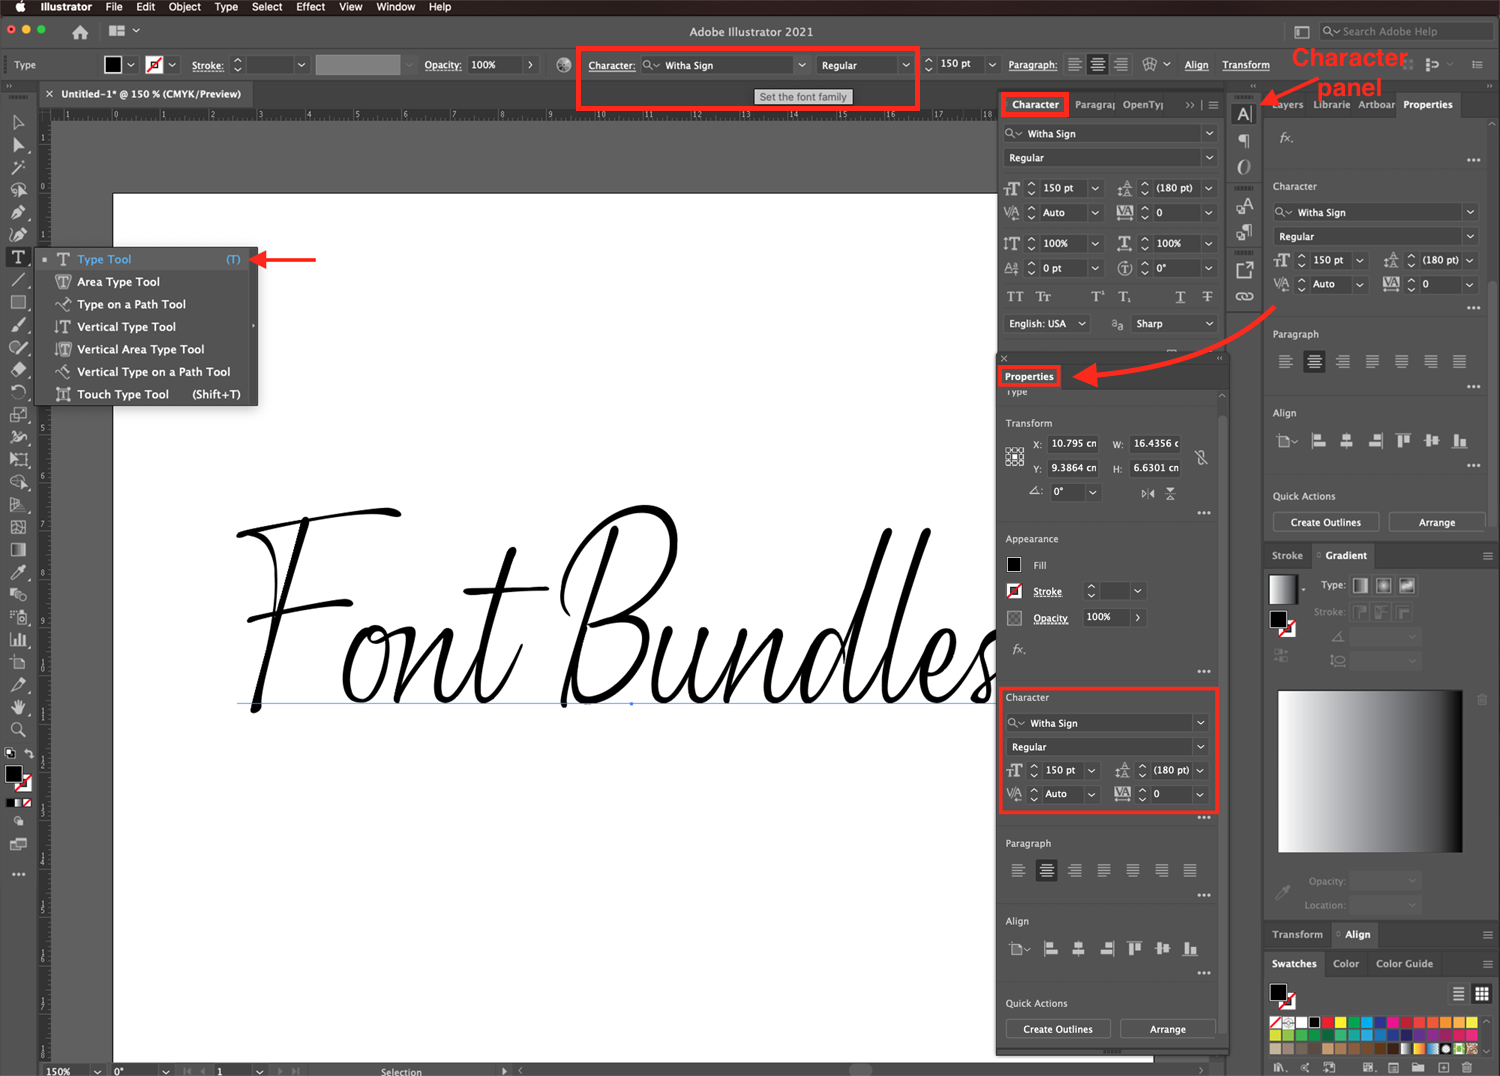
Step 2 - Type Your Text Using the Type Tool
With your document open in Illustrator, select the Typetool (T) from the left toolbar. Click inside the canvas and type your text.

Step 3 - Preview and Select a Font
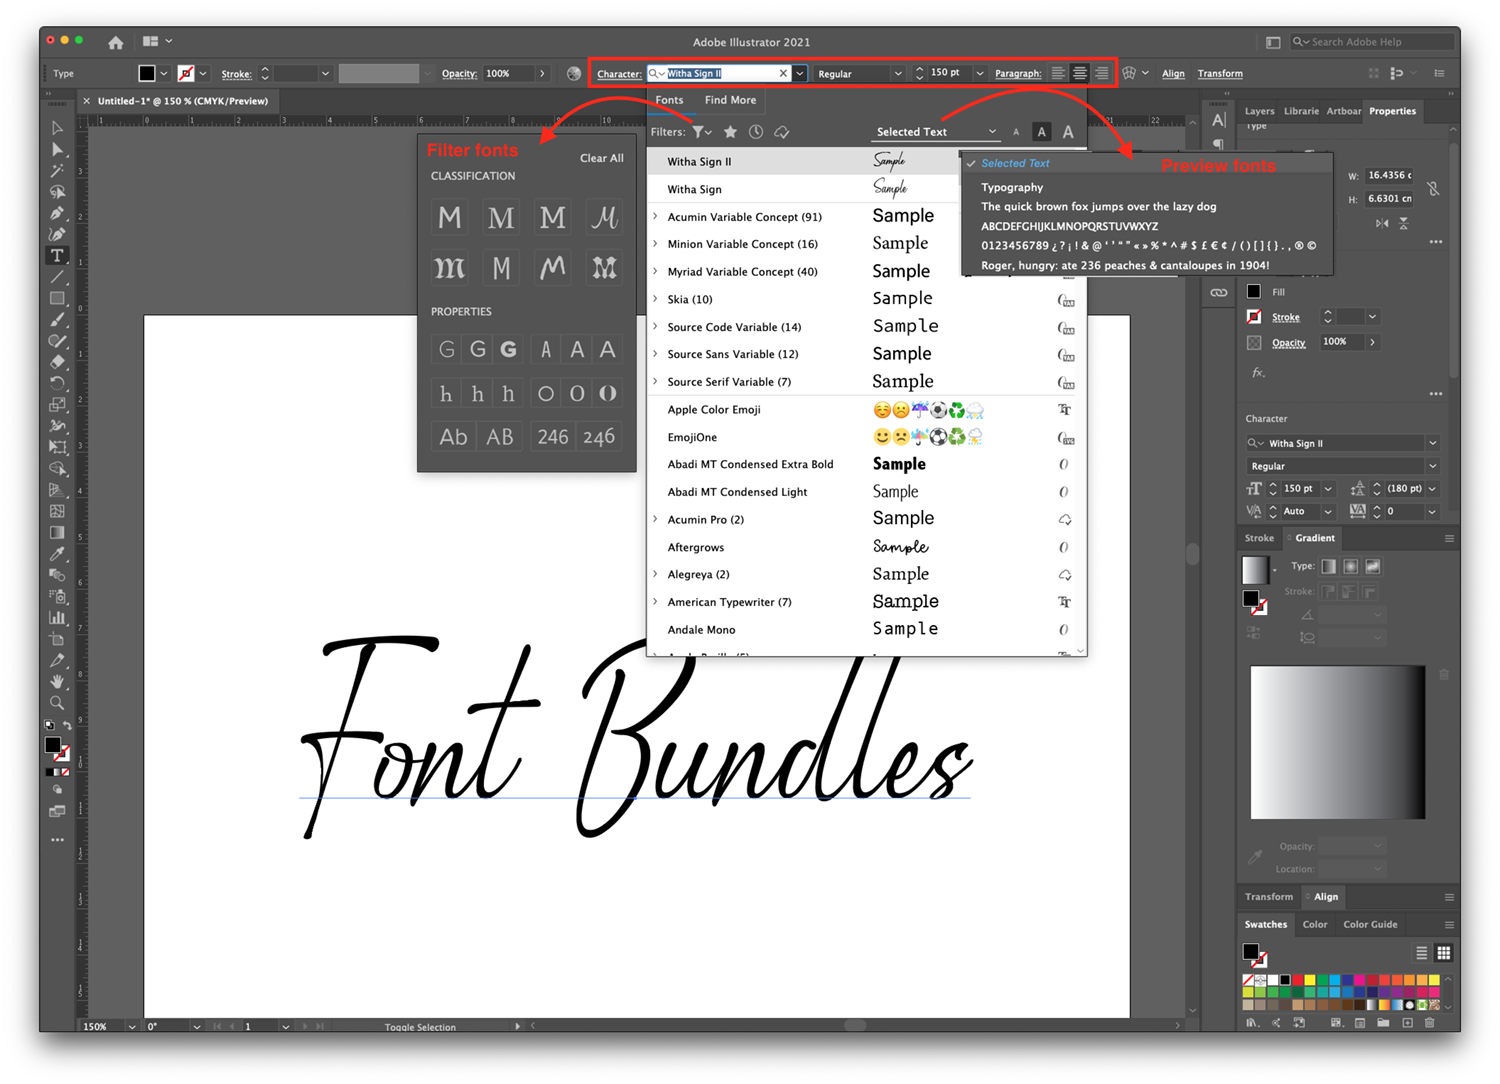
Make sure that the text you want to change is selected. The selection can either be the entire text or just a portion of it.
Now browse through your available fonts in the Character panel, the top toolbar, or the Properties panel. If you don’t see the Character panel, you can open it by going to Window > Type > Character. If it’s not already open, you can do the same for the Properties panel and click Window > Properties.
From within the Set Font Family drop-down menu, you can filter and preview your fonts. The preview will either be of the selected text or a sample text. You can hover over the font names in the list to see how your selected text on the canvas looks with each font.
Then, click the font you want to apply to the selected text.
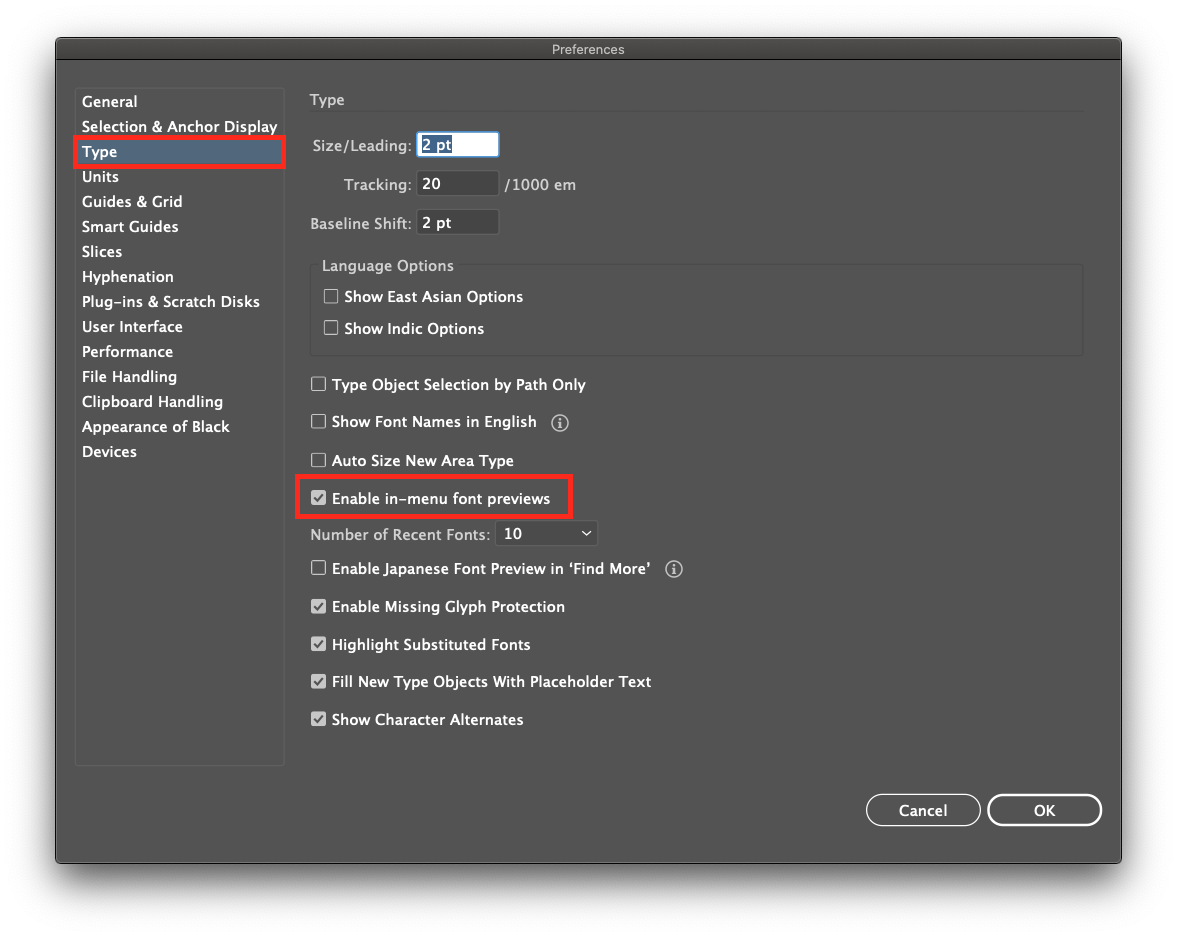
If you wish to turn off the font preview, head to Edit > Preferences > Type and uncheck the box for Enable in-menu font previews and click OK.
Step 4 - Adjust the Text Spacing
You can adjust different aspects of your text like size, leading, tracking, kerning, etc., from the top toolbar, the Character panel, or Properties panel.
Leading controls the amount of space between lines of text.
Kerning adjusts the spacing between pairs of characters or letters within your text. While Tracking adjusts the space uniformly between characters of selected text.

Finally, if your font contains special characters, make sure to check our guide on how to use glyphs in Illustrator if you need some help accessing them.
We hope that you found this tutorial useful. You may also want to take a look at our guides on how to type on paths in Illustrator, create type art in Illustrator, or use fonts in Photoshop.


