
How to Create Watercolor Lettering in Illustrator
Learn how to create watercolor lettering in Illustrator in 2 methods.
Today we will explore how to create the very popular watercolor text effect in Illustrator. This effect is really easy to achieve, and the results are quite nice. Then, you can use your artwork on t-shirts, stickers, postcards, and a good deal of fun stuff!
We will cover a couple of methods to apply watercolor texture to text in Illustrator to create watercolor lettering. The first method involves using a Clipping Mask and works when all of your text is part of the same block, even if it contains several lines. The second method is used when your text is placed on separate blocks for any reason, and it involves the use of Pattern Swatches.

For this tutorial, we are using this cute script font, but you can take a look at our calligraphic fonts to pick one from there. For the watercolor texture, we are using this gold watercolor texture for our first example, and for the second example, this seamless watercolor pattern.
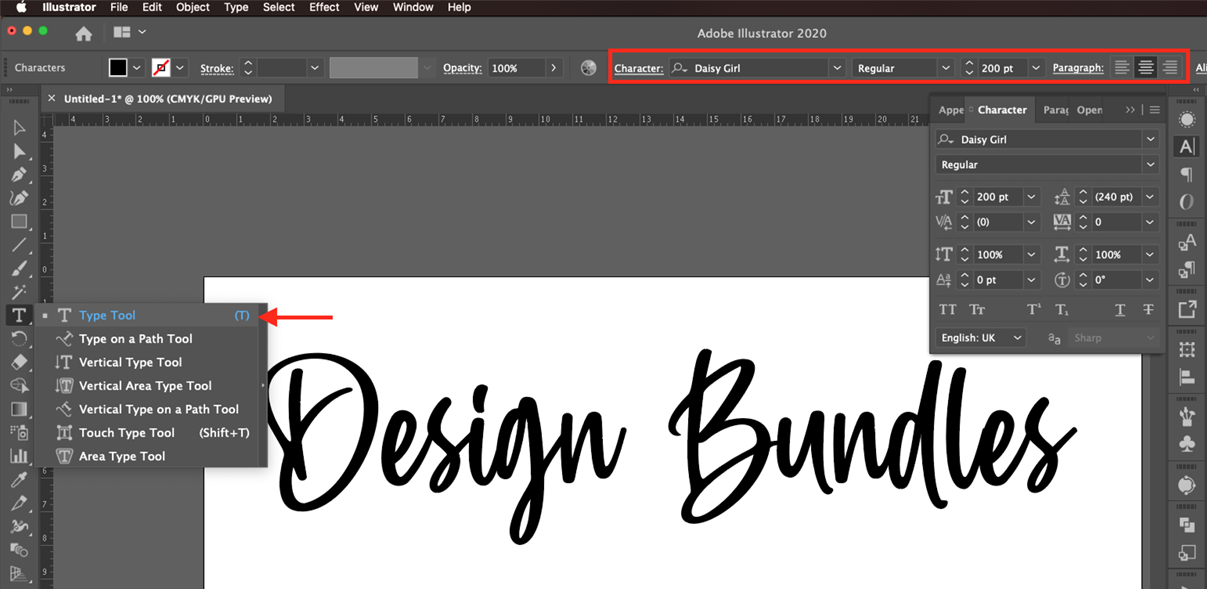
Start by creating a new Illustrator document and typing your text.
Method 1 - Using a Clipping Mask
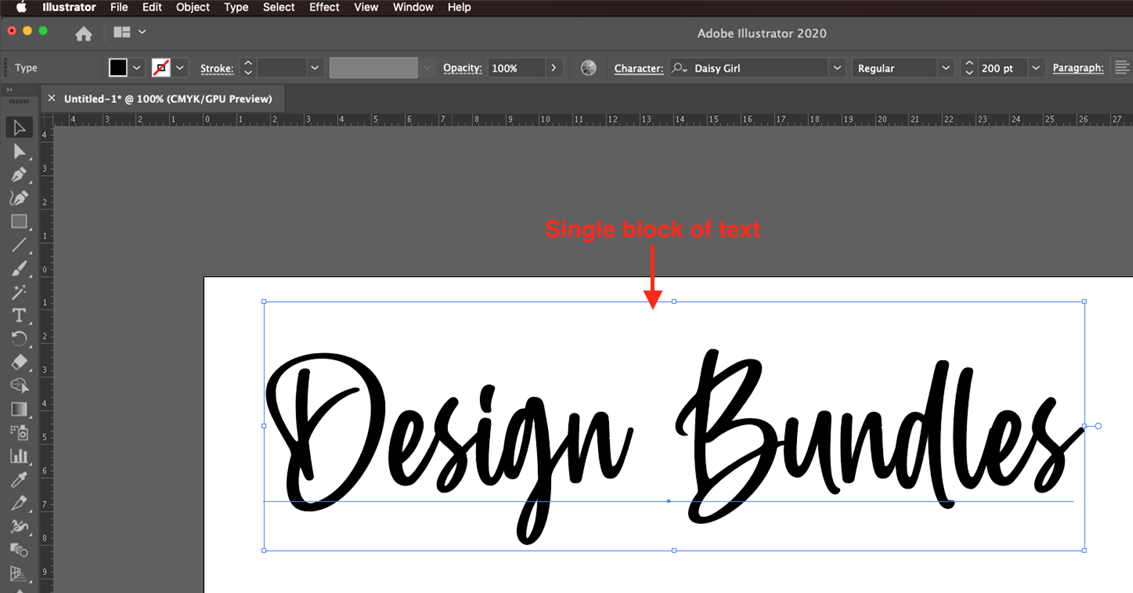
Now, we will learn how to create watercolor lettering using a clipping mask. This method should be used when your text is in a single block, even if it has many lines.
Clipping masks won’t work properly on grouped objects unless we turn them into compound paths. And, to make your text a compound path, you need to use the Create Outlines command, rendering it non-editable.
Step 1 - Place the Watercolor Texture
Remember that the watercolor texture needs to be at a good size and resolution, or you will end up with a blurry result. For example, 2000 x 2000 pixels @ 300 PPI are more than enough.
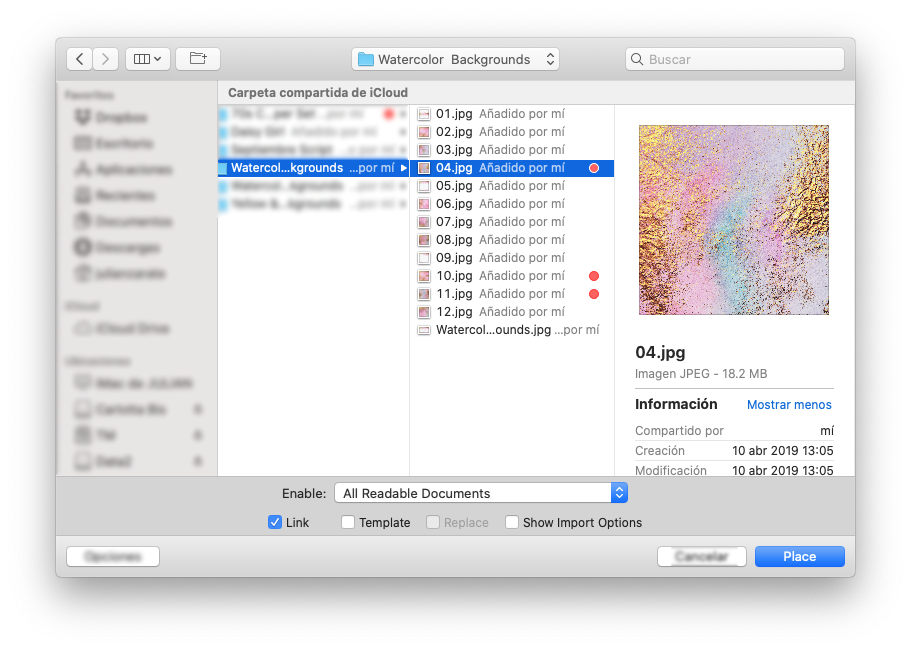
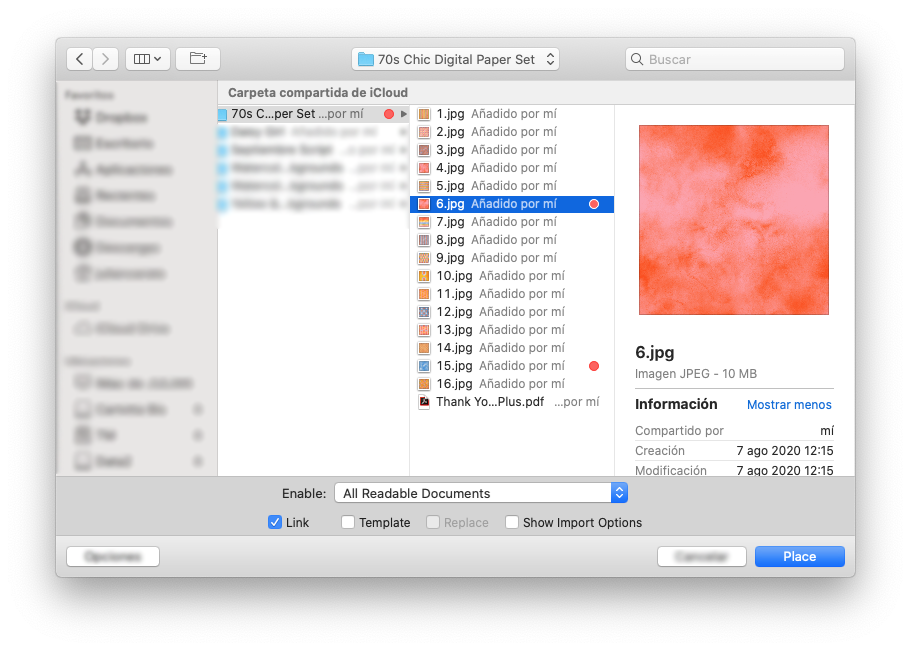
First, to import the watercolor texture, go to File > Place.

Navigate to the location where the watercolor texture was saved, select the one you want to use, and click Place.
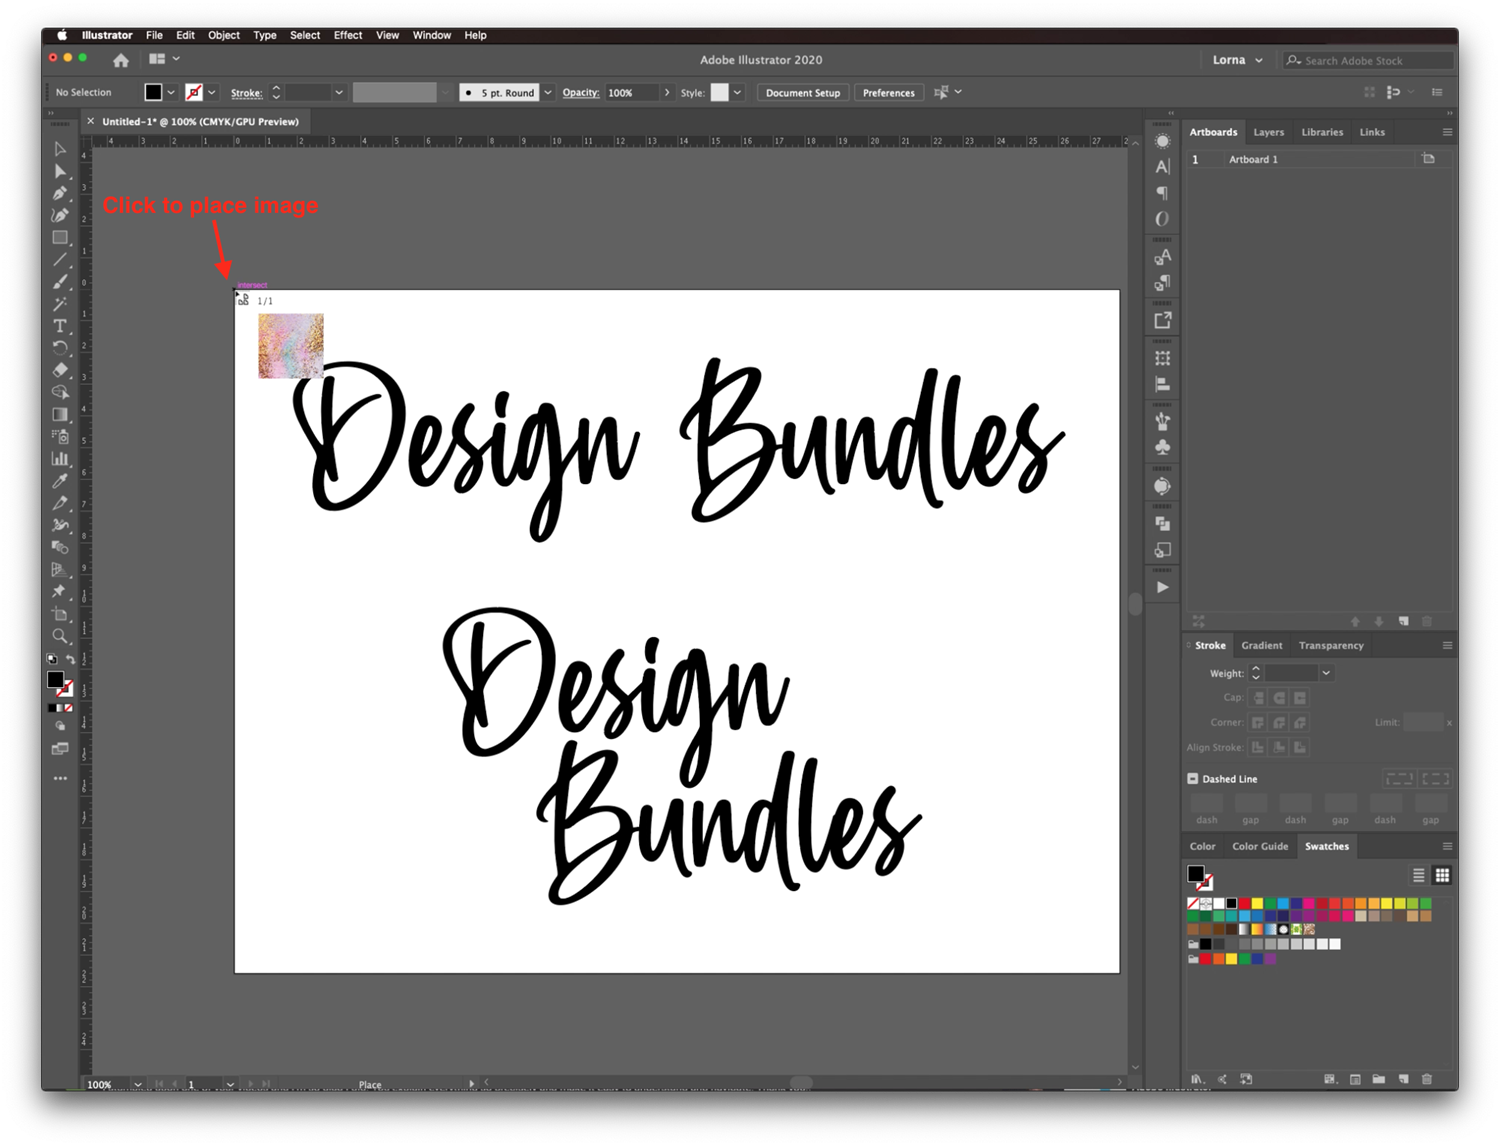
Your cursor should change into an icon with some small pages. Now, click on the location you want to place your watercolor texture.
Step 2 - Resize Your Texture
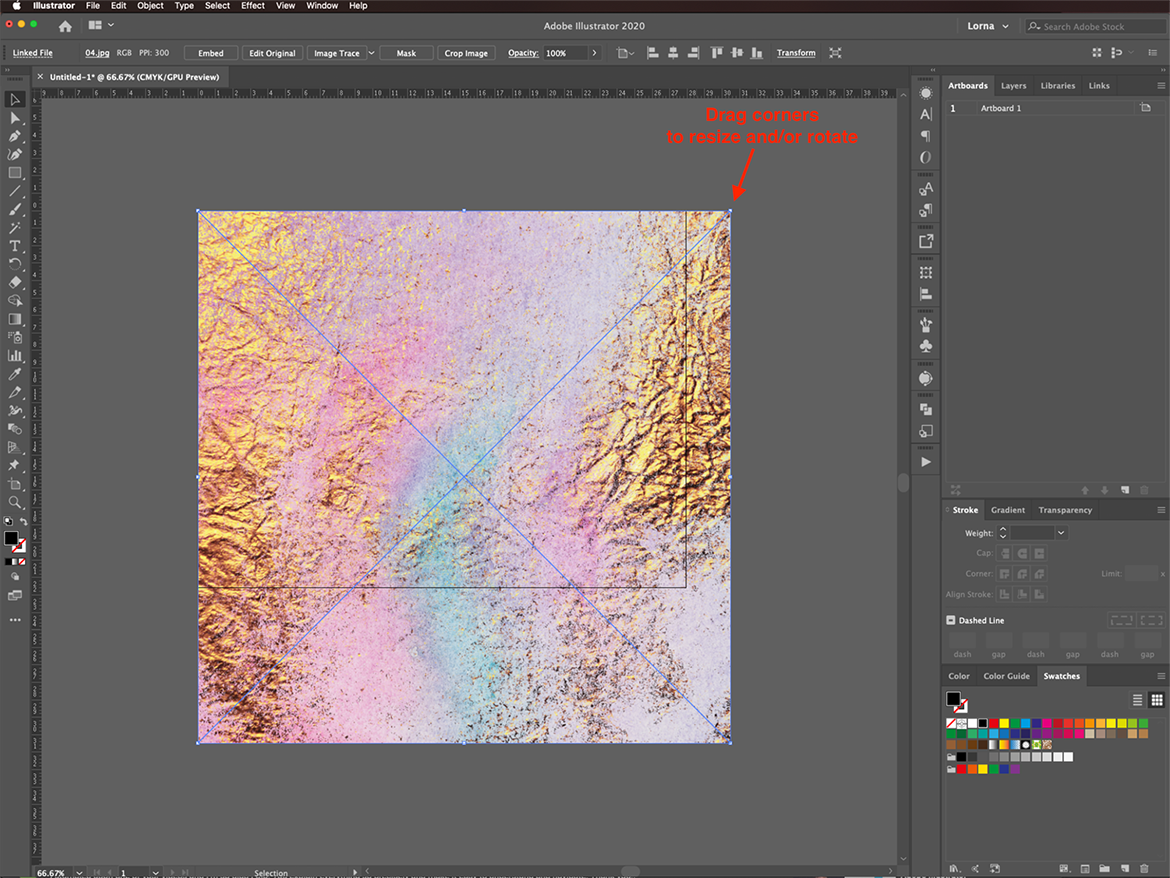
Resize and rotate the image until it looks the way you want.
Step 3 - Place the Texture Behind Your Text
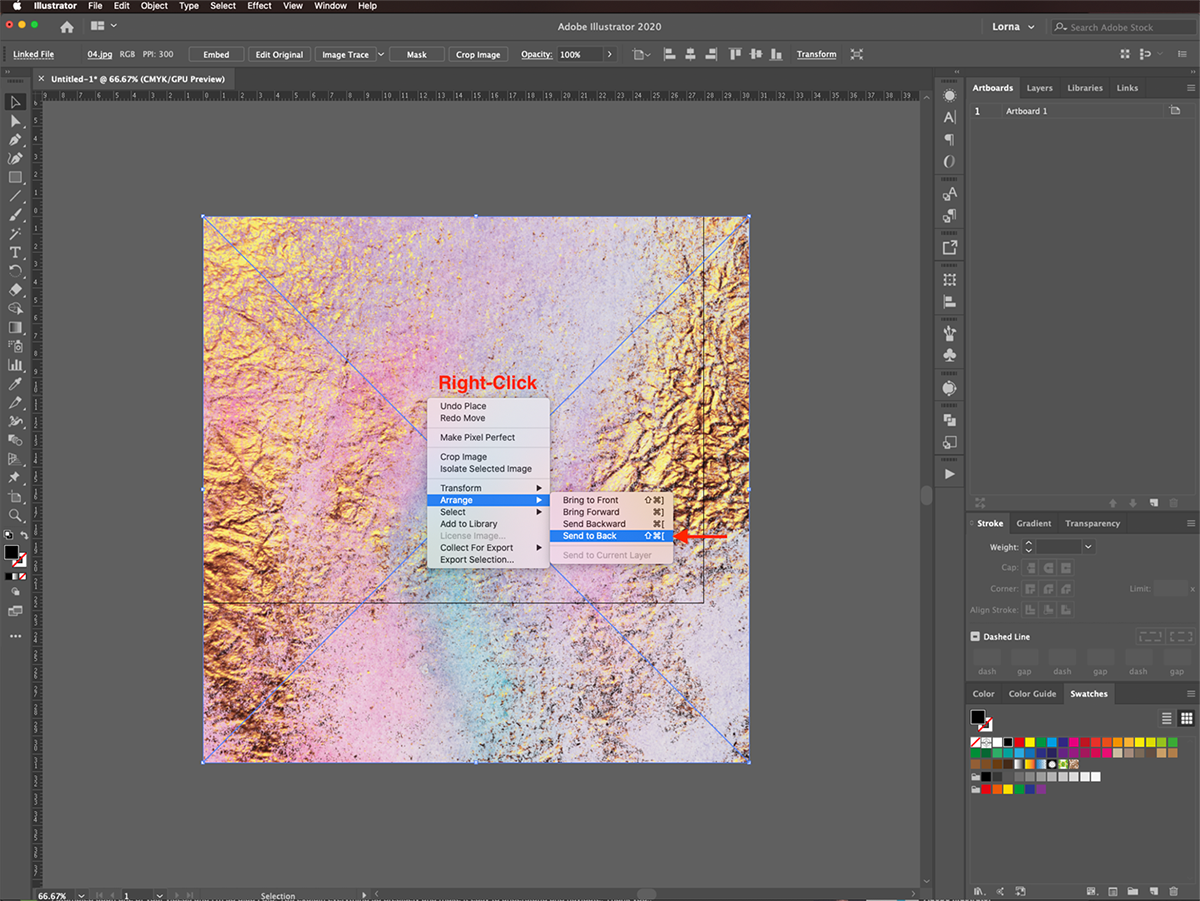
Right-click on top of the watercolor texture and choose Arrange > Send to Back to place it behind the text.
You can make further arrangements to the size and position of the texture if you want.
Step 4 - Make the Clipping Mask
Select both image and text, right-click on top of your selection and choose Make Clipping Mask.

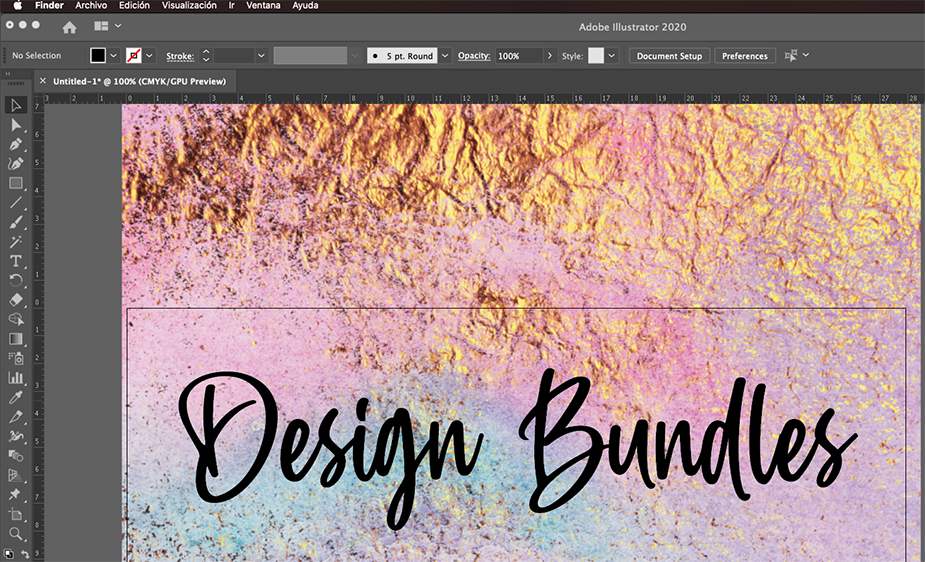
Now, your text should be filled with the watercolor texture.

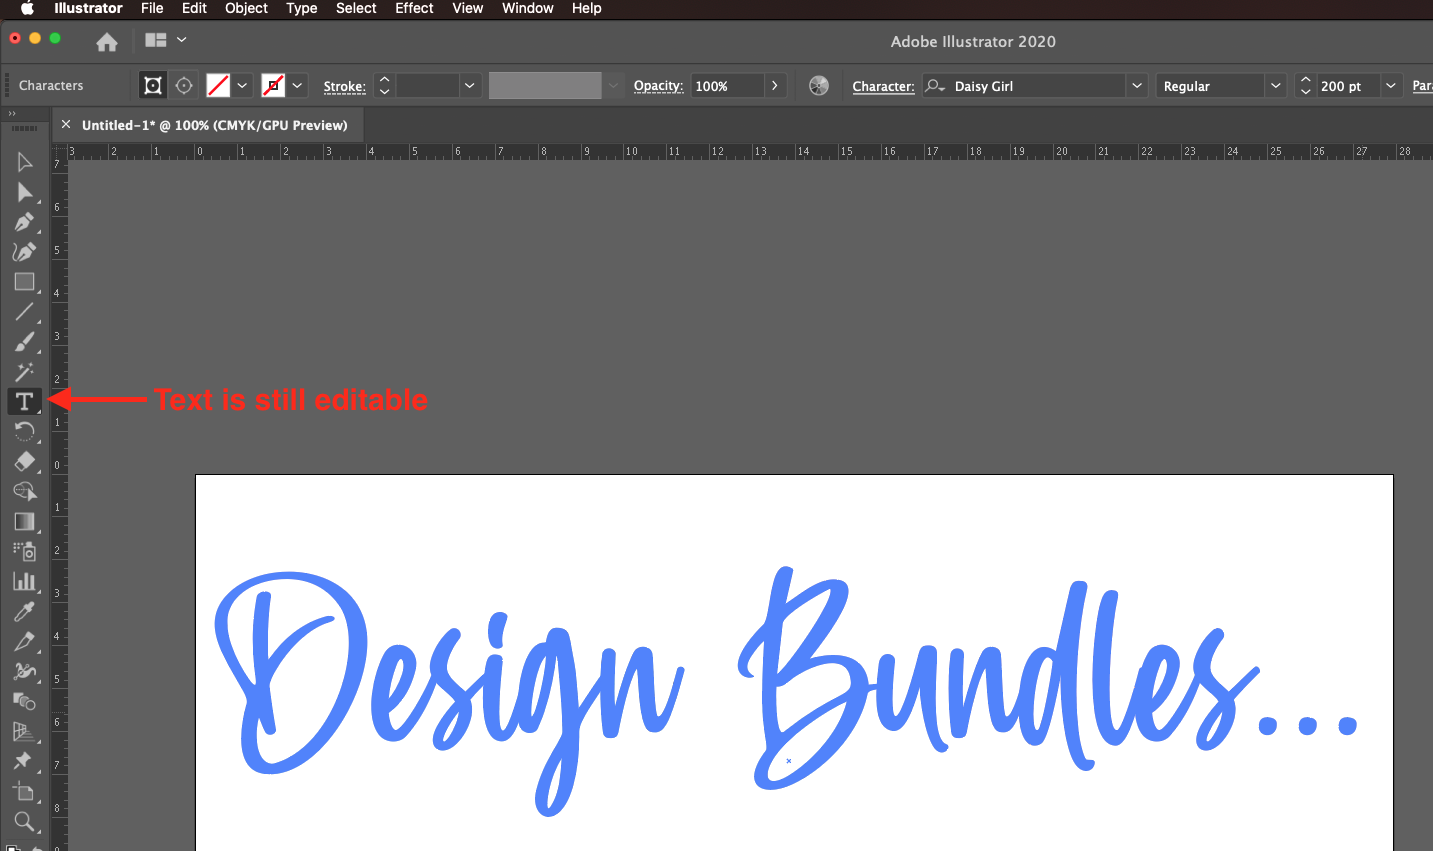
Notice that the text is still editable, but remember that the watercolor fill will only be present where the texture is placed.
Here’s how our text with the watercolor texture clipped inside looks.

Method 2 - Using Pattern Swatches
Now, we will learn how to create the watercolor lettering using Pattern Swatches. This method can be used when your text needs to be placed on different blocks, so the clipping mask won’t work.
To accurately apply the watercolor texture and have it be properly resized, you need to use one that is aseamless pattern. Otherwise, the watercolor fill may have noticeable cuts in the pattern transitions.

Step 1 - Place the Watercolor Texture
Go to File > Place to import the watercolor texture you want to use.
Adjust the Document Color Mode if Needed
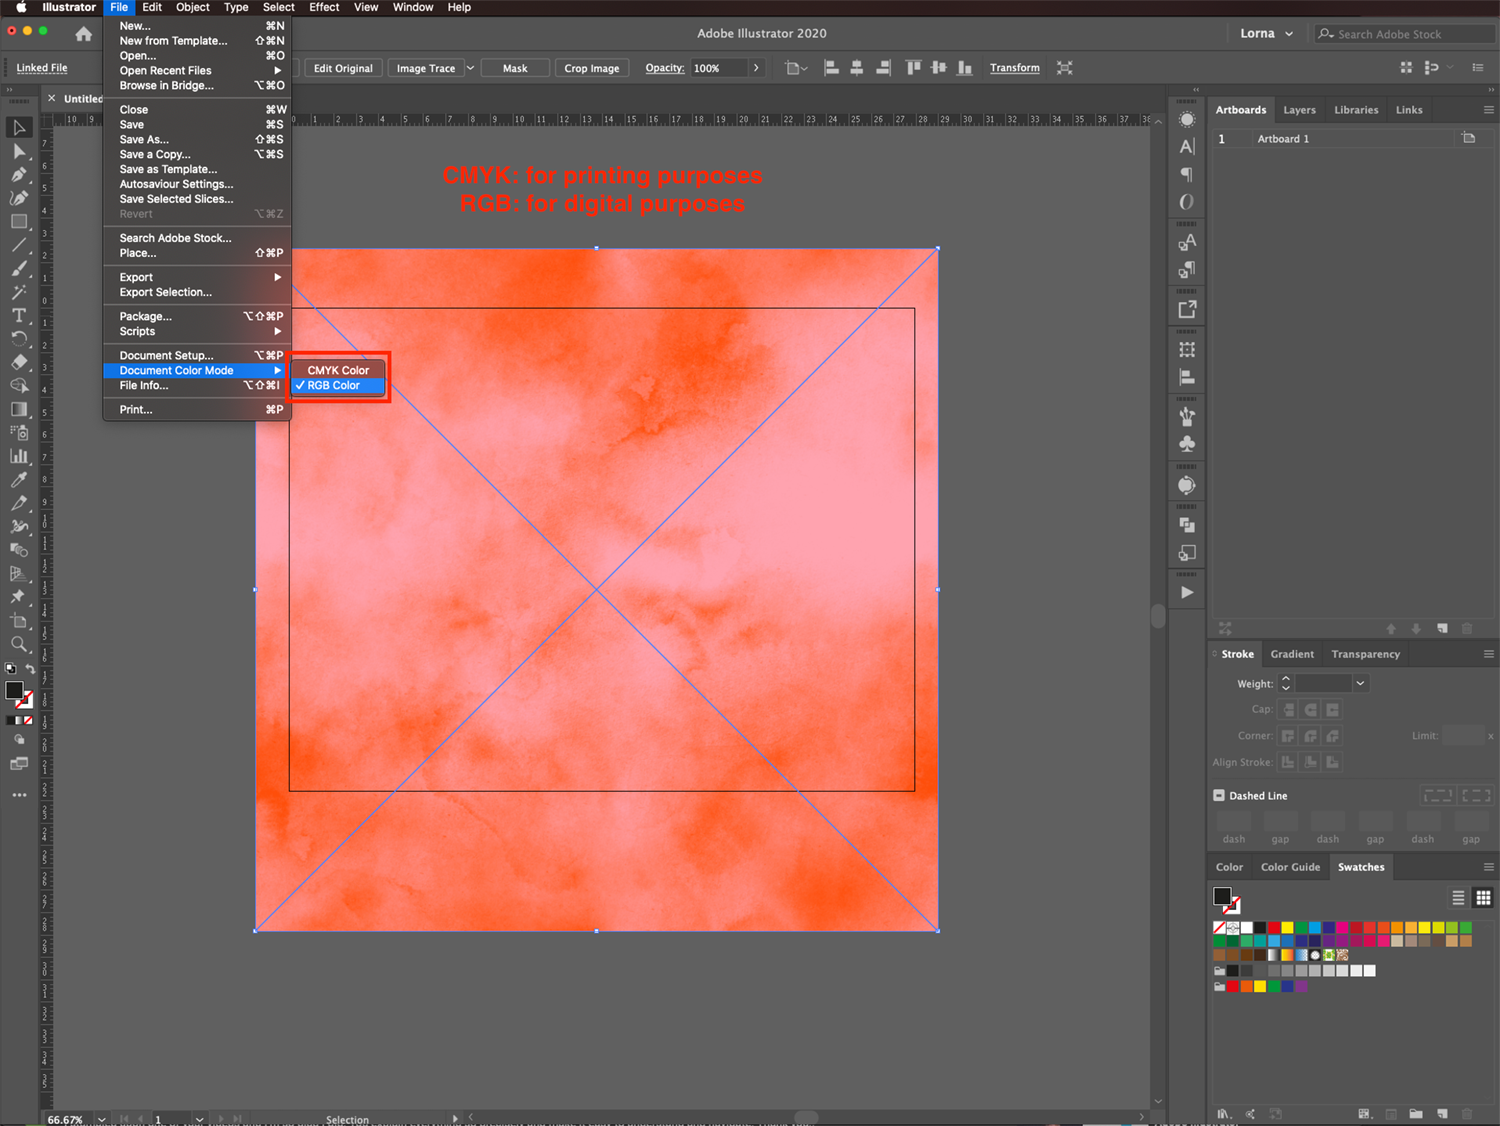
Depending on how you plan to use your artwork, you may need to adjust the document’s color mode if you didn’t do it while creating it. CMYK should be used if you plan to go to print, while RGB is the way to go if your artwork is going to be only viewed on the screen.
To adjust the document color mode, head to File > Document Color Mode and choose the one you need. Remember that if your pattern color mode is RGB, the colors will be a bit duller when converting to CMYK and printing.
You need to do this before rasterizing your textures, or the color mode you want may not be available.
Step 2 - Rasterize or Embed the Watercolor Texture
To make it possible that the imported image is converted into a pattern swatch, you need to embed it or rasterize it. Embedding the image will make it part of the document and not just a linked representation of the original image.
You can embed your image by unchecking the Link box at the bottom of the Place window.

Or, while the image is still selected after placing it, click on the Embed button on the top menu.

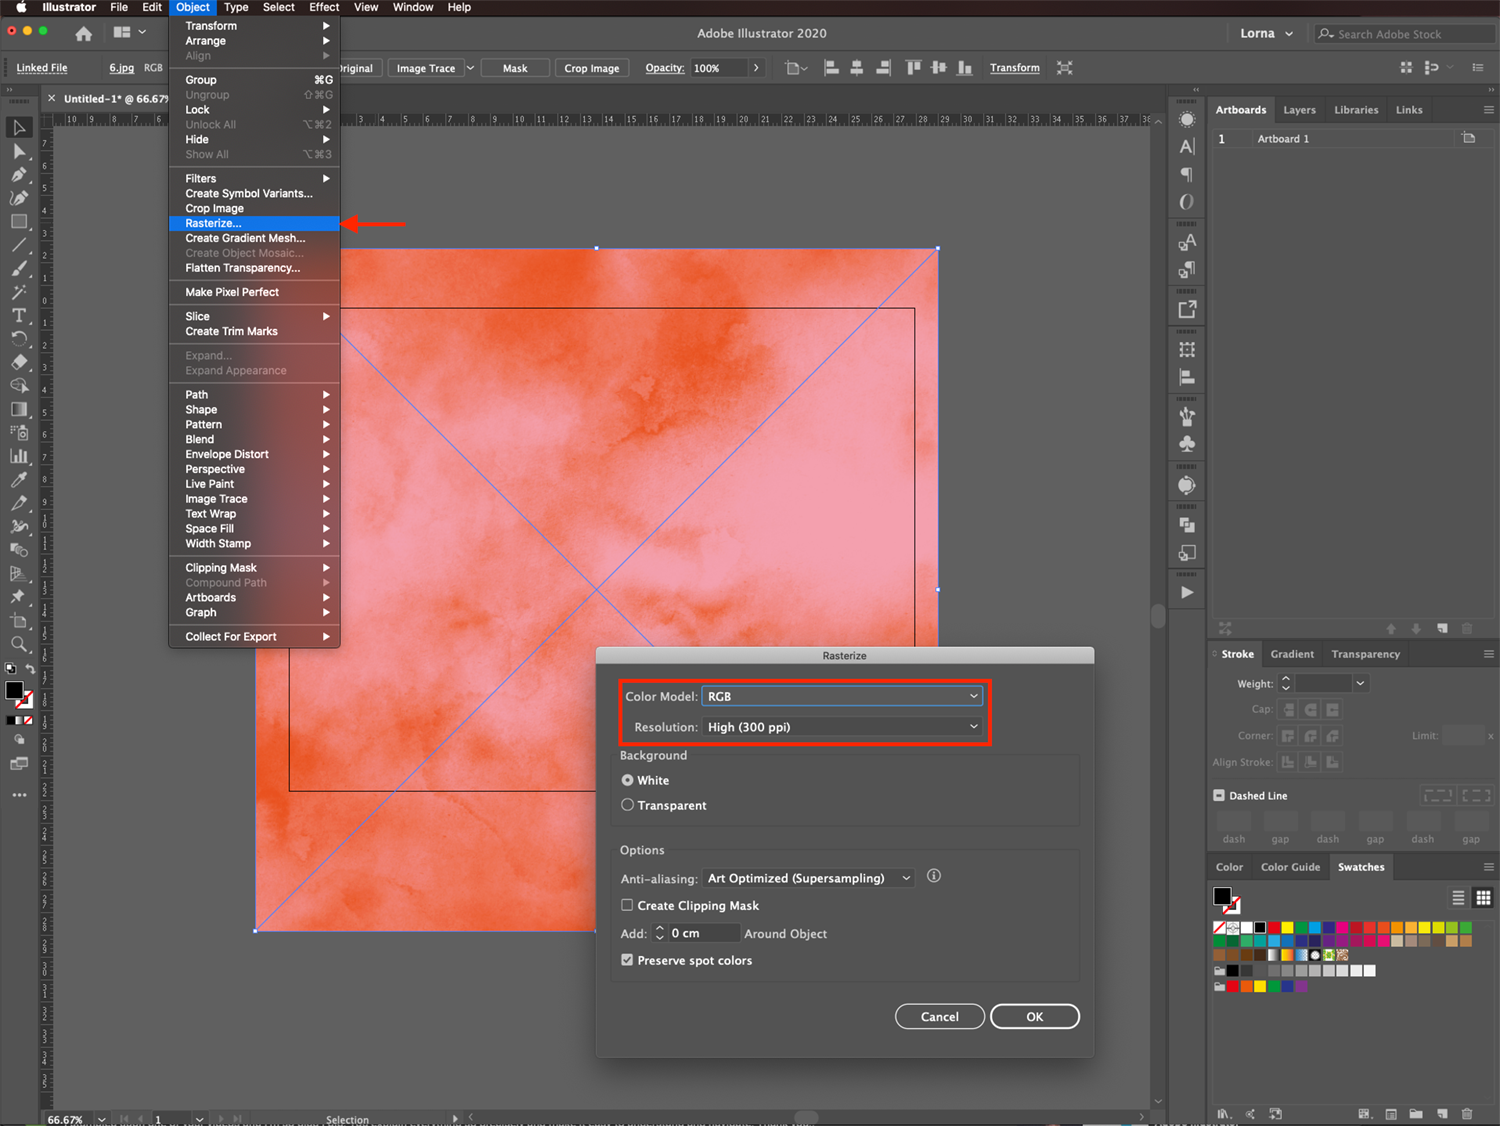
To rasterize the image instead, go to Object > Rasterize, and in the Rasterize panel, choose the color mode and resolution before clicking OK. It is best to keep a higher resolution, like 300 PPI, for better results.
In both cases, you will notice that the X inside your selection box disappears, leaving only the edges meaning the image is no longer linked but embedded in the document.
Step 3 - Turn the Watercolor Texture into a Pattern Swatch
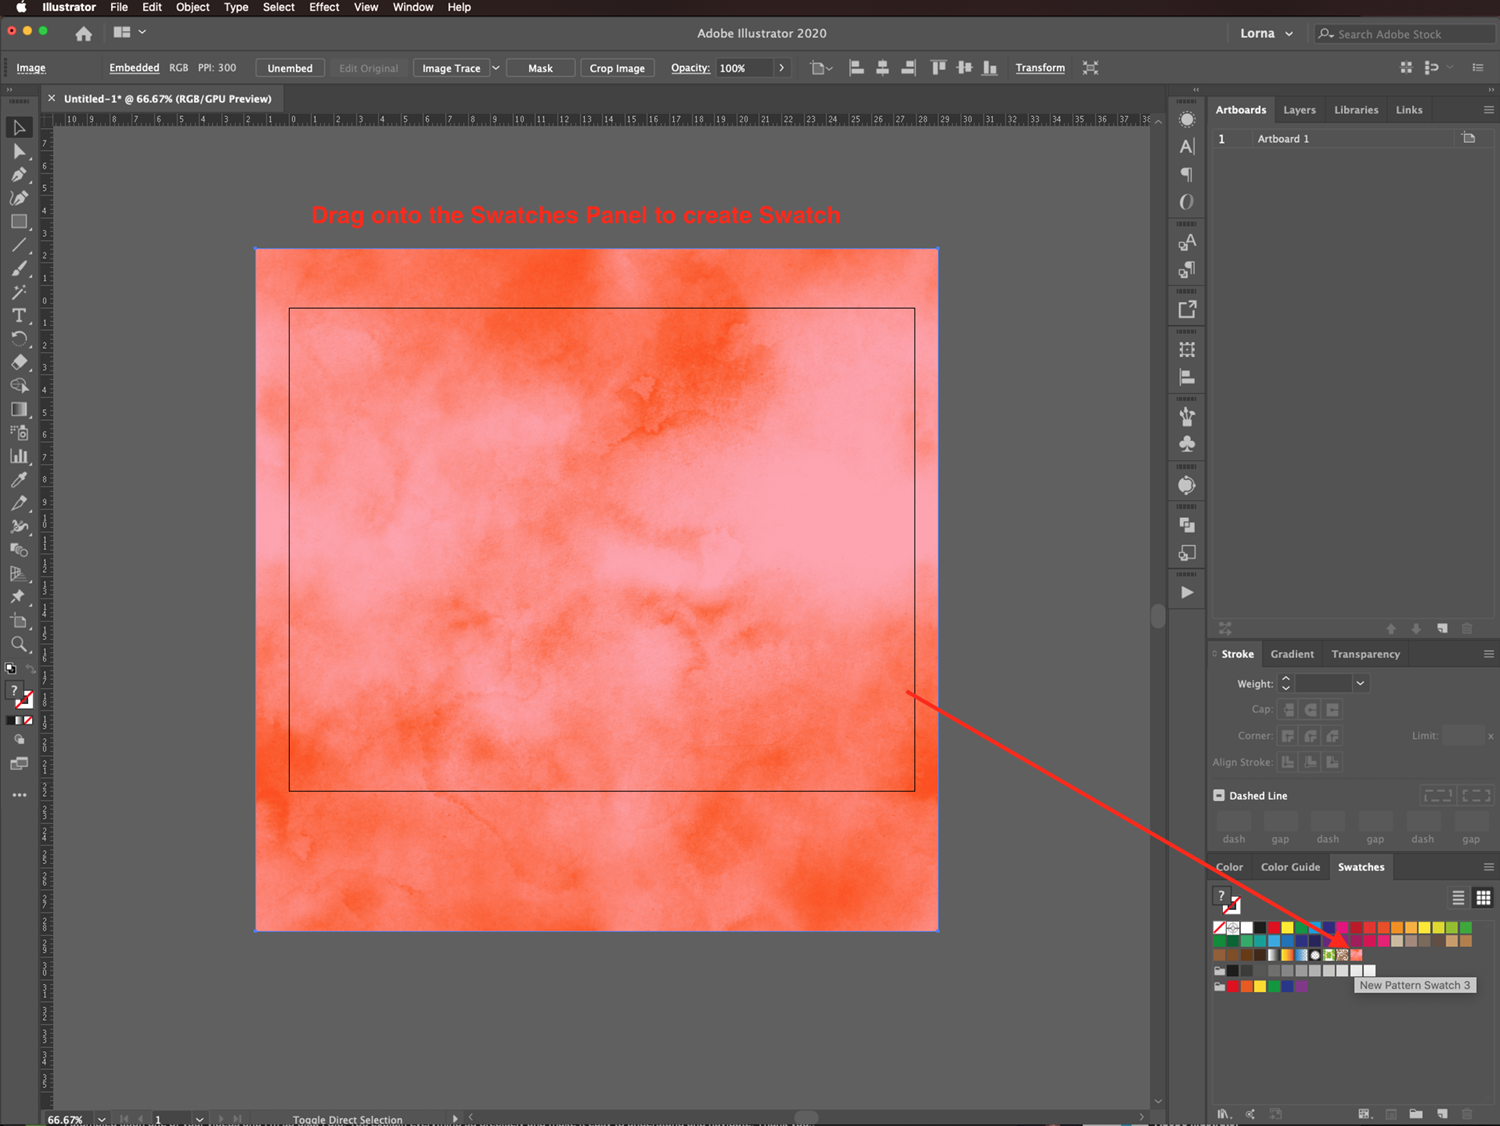
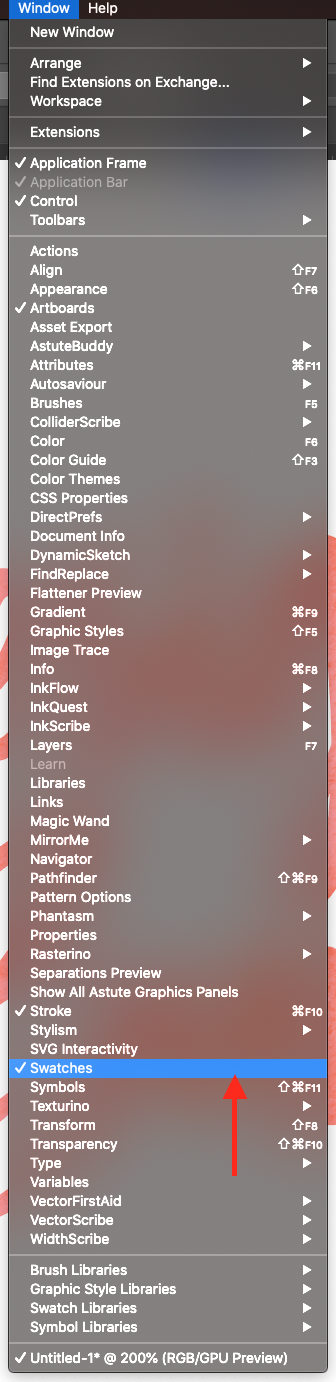
Next, to turn the texture into a pattern swatch, drag it onto the Swatches panel. The new swatch should appear there.
If your Swatches panel is not available, go to Window > Swatches to get it.
Step 4 - Group All the Text Blocks Together
To apply the watercolor pattern to the text, we need to group the different blocks together first. Just select them and go to Object > Group(Cmd/Ctrl + G).

Step 5 - Fill the Text with the Watercolor Pattern Swatch
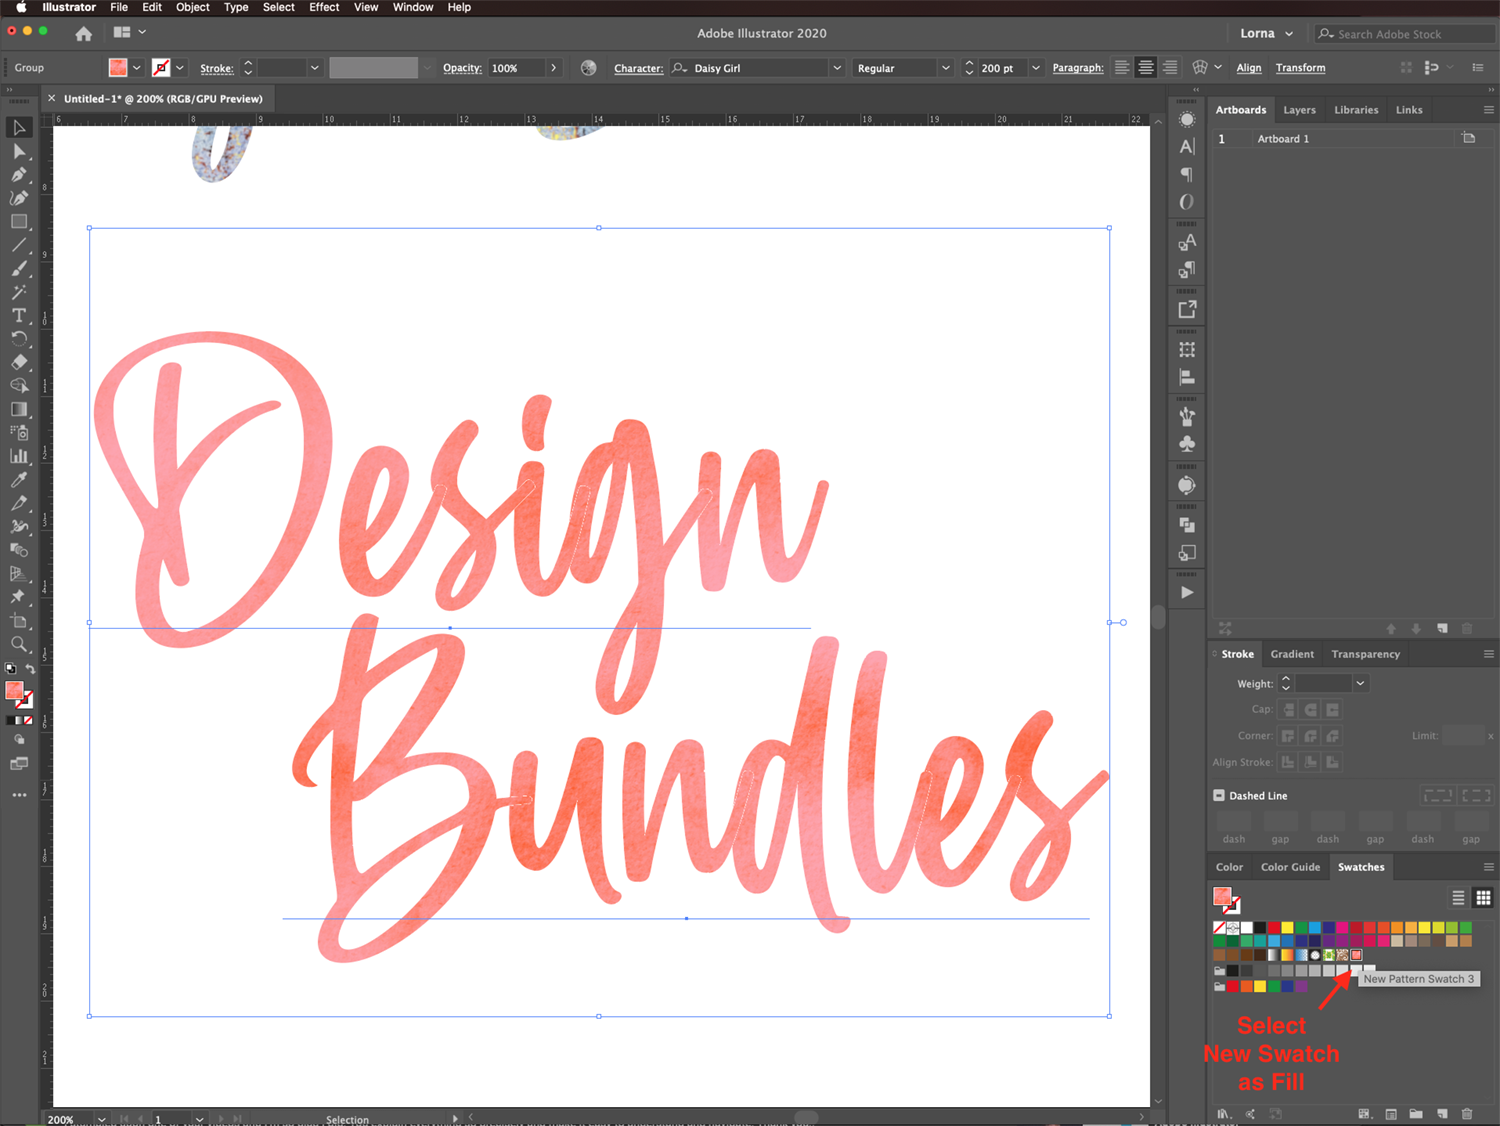
Now, select the newly created watercolor pattern from the Swatches panel as the Fill for your text.
Step 6 - Adjust the Scale of the Watercolor Pattern
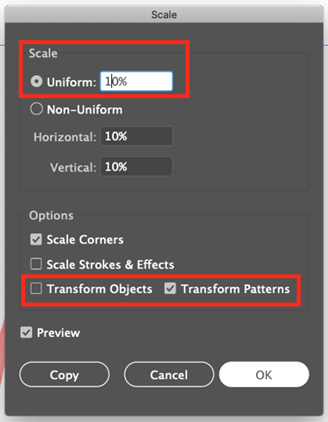
If you want, you can adjust the scale of the watercolor pattern so it looks more realistic. To do it, right-click on the text and choose Transform > Scale.
Change theScale value until you are satisfied with the results, and don’t forget to uncheck the Transform Objects box to resize just the pattern without affecting the text size. In our case, we used a 10% value.
Here’s how our text with the watercolor texture applied as a pattern swatch looks.

Add Details to the Text with a Filter
To make the watercolor lettering effect more realistic, you can add some distortion to the text edges, similar to when watercolor bleeds on paper.
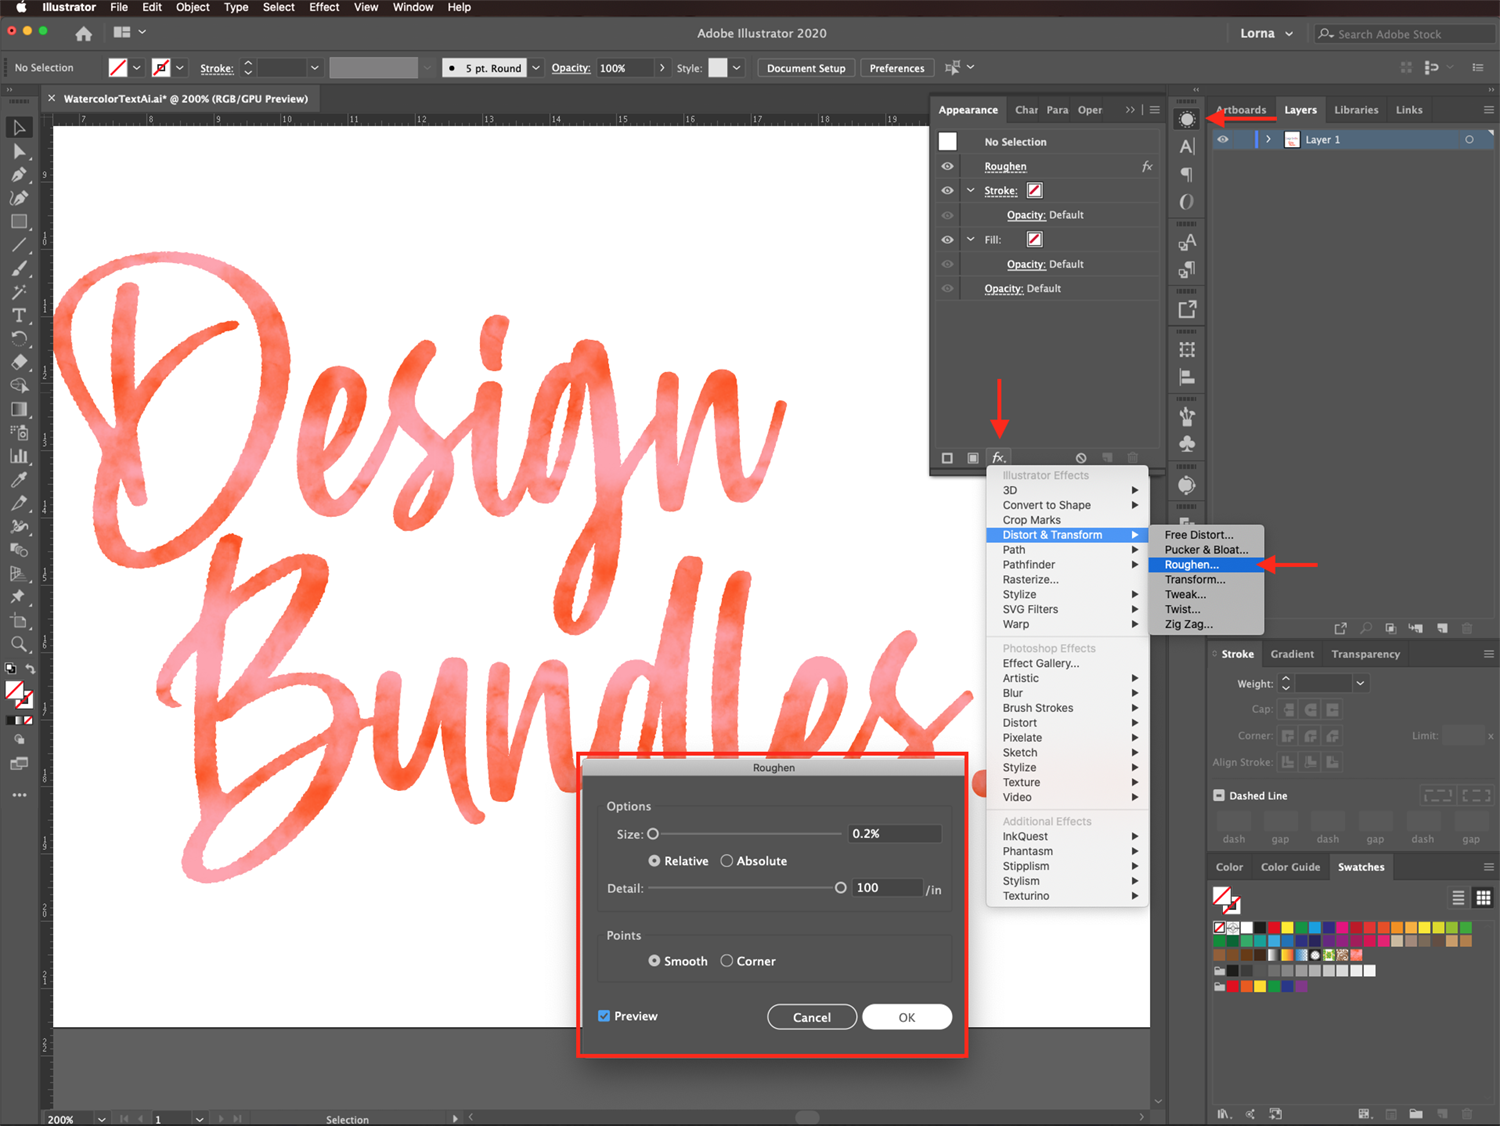
To do it, we are going to use a filter. With your text selected, head to the Appearance panel and click on the Effects icon at the bottom to open the Illustrator Effects menu.
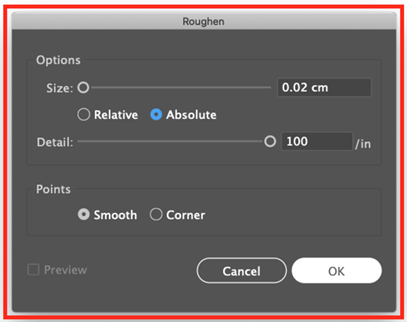
Navigate toDistort & Transform > Roughen and experiment with the values until you get the desired results. Normally, the values used should be very small since we only want a very subtle effect.
With the watercolor text frommethod 2, we used the following values:
- Size: 0.2%
- Relative: checked
- Detail: 100/in
- Points: Smooth
This is the result with the effect applied:

For the watercolor text from method 1, we used the following values:
- Size: 0.02%
- Relative: checked
- Detail: 100/in
- Points: Smooth
And, this is the result with the effect applied:

If you liked this tutorial, you can also check out our tutorial on how to create watercolor brushes in Illustrator if you want to explore more options on how to apply watercolor textures.
Or, if you want more Illustrator tutorials, visit our guides on loading and saving color swatches, creating a floral logo, and making a geometric flower.


