
How to Make a Business Card in Illustrator
Learn how to make a business card in Adobe Illustrator. Free business card checklist included.
Your business card is not only informative, it also showcases the style of your brand. It helps your potential clients/customers identify your business at a glance. When you create your business card, you want to be certain it is cohesive with your style. In this tutorial, we will take you step-by-step on how to make a business card in Illustrator.
We will use this luxury bold font for our main text. Before getting started make sure you've unzipped your file and installed your font. We have guides on how to unzip on a Mac and how to unzip on a PC if needed.

Step 1 - Business card print details
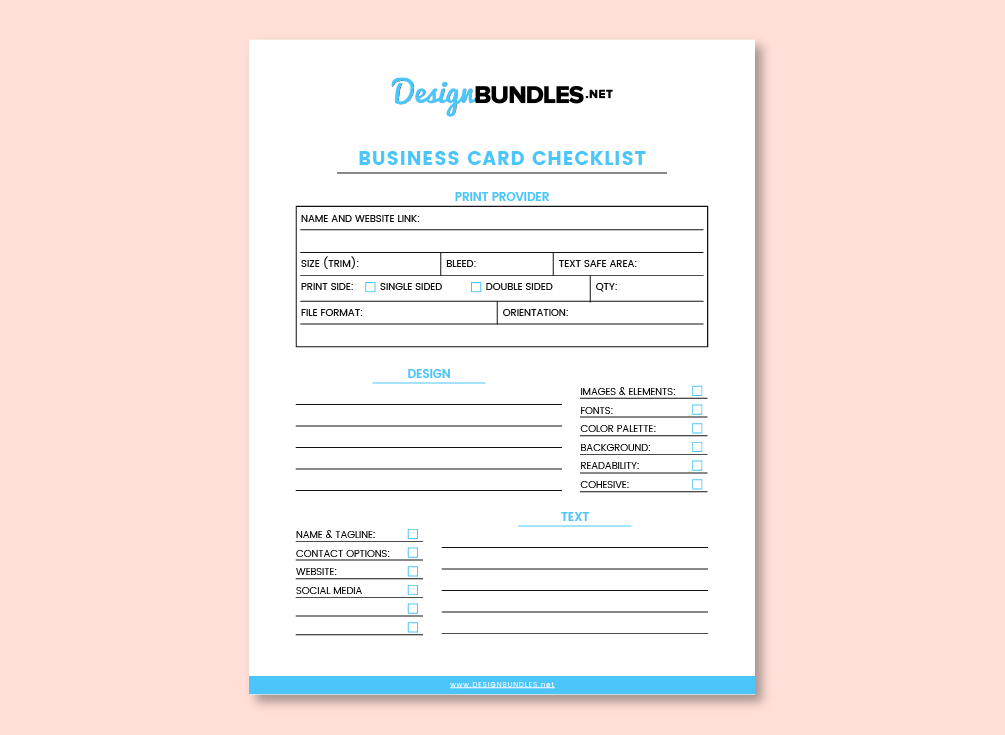
You will need to decide what kind of business card you want before adding design and information. Each country and print provider has different size and format requirements. We created a checklist below that you are welcome to use. This makes it easier to fill in the details and have them on hand.
You will need the following important details for choosing your card:
- Business card size
- Bleed allowance
- Text safe area
Further information for making the business card is based on your selection. For example, do you want a one-sided or double-sided design? Do you want a vertical or horizontal business card?
Step 2 - Design the Business Card
The first part of making your business card is the design aspect of it. This includes setting up your document, size, colors, and elements/images needed to make your business card.
Setup Your Document
Create a new document in Illustrator, then set the size according to your business card specifications.
Choose the orientation (vertical or horizontal) and the number of artboards (1= one-sided or 2= double-sided).
Next, you will need to add the bleed allowance. The standard bleed allowance for most print providers is 0.125” all around and this is what we will use.
Under the “Advanced Options” you can set the color preference and raster effects (300 ppi recommended for print).
Once done adding your settings, create your document.

Add your Guides
To make sure you stay within your “Text Safe” area you should add guides. If your print provider didn’t provide the measurement for where your text safe area should be from the trim line, you can use 0.25-inch size. Start by using the “Rectangle Tool” or shortcut (M), left-click on the artboard to show the size input panel.

Type in 0.25in for both the width and height section then click on “OK”. Next, align the square to the top left of the artboard. Create a copy of the shape (CMND+C&V or CTRL+C&V) and align it to the bottom right.
Make sure the squares are on all artboards.
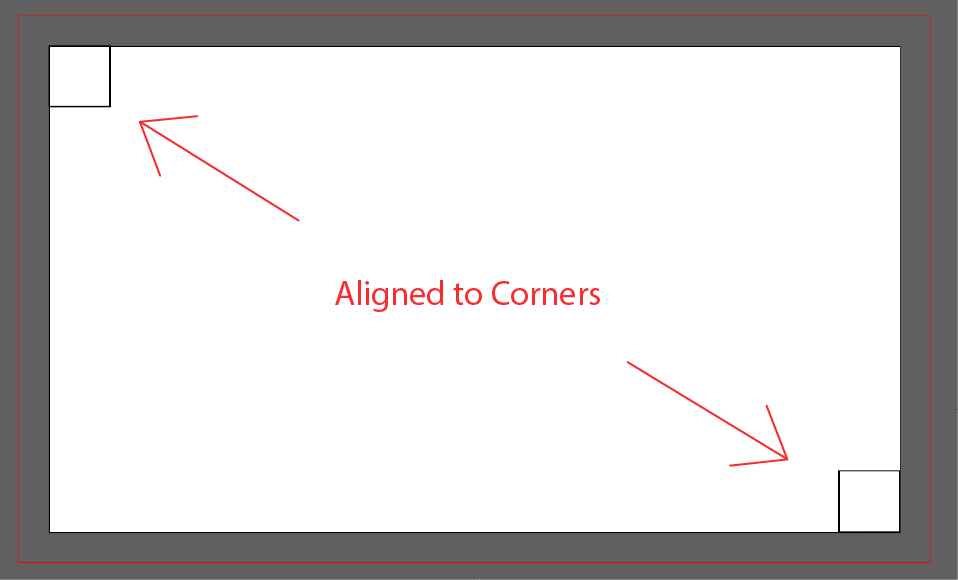
Next, enable “Rulers” by using the shortcut CMND+R or CTRL+R. Alternatively, you can go to “View” > “Rulers” > “Show Rulers”. To add guides, click and hold on a ruler and drag your mouse cursor to the edge of the squares. Now release to place the guide.

Do this for all four sides and all artboards. Delete the squares when you are done adding guidelines.

Use your Color Palette
To stay cohesive with your brand/style, you can load and save color swatches from your custom color palette. This will make it easier to use them when designing your business card. Below is the color palette that we are using with HEX codes.

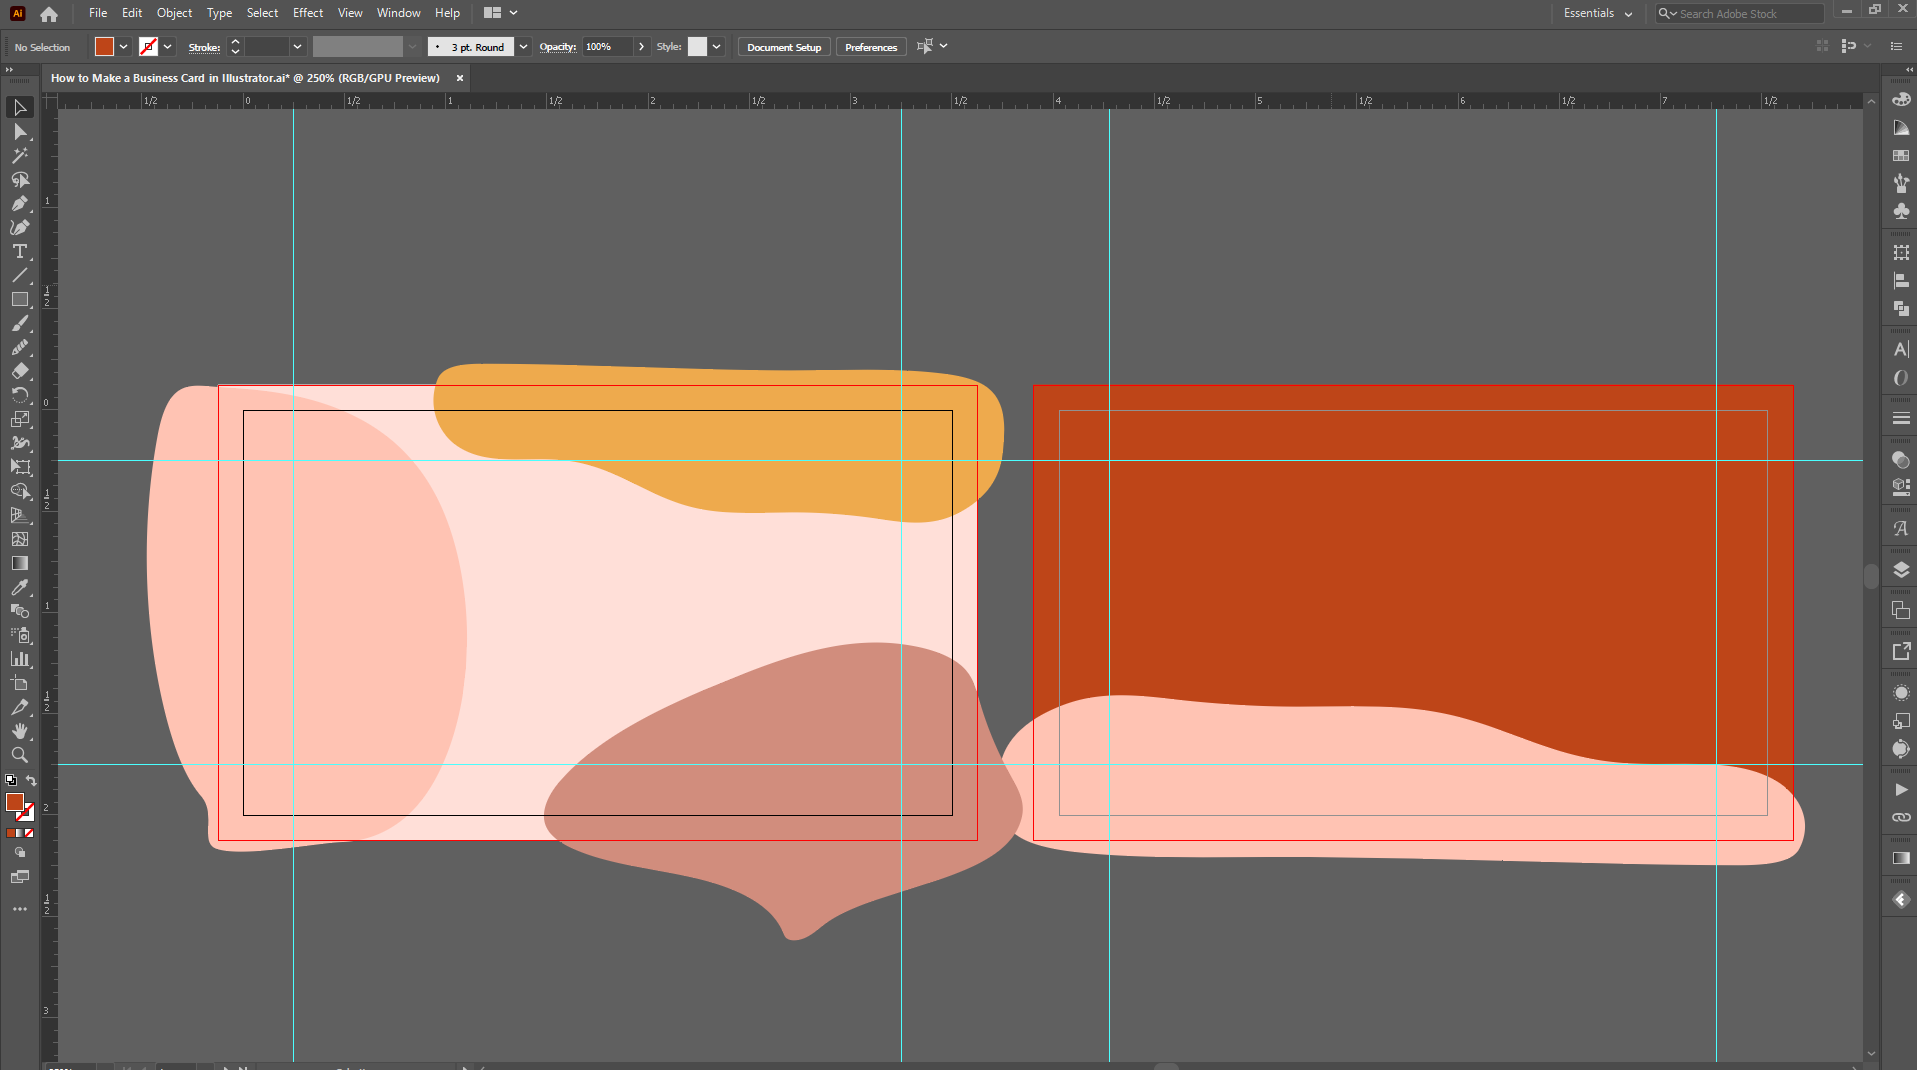
Add a Background
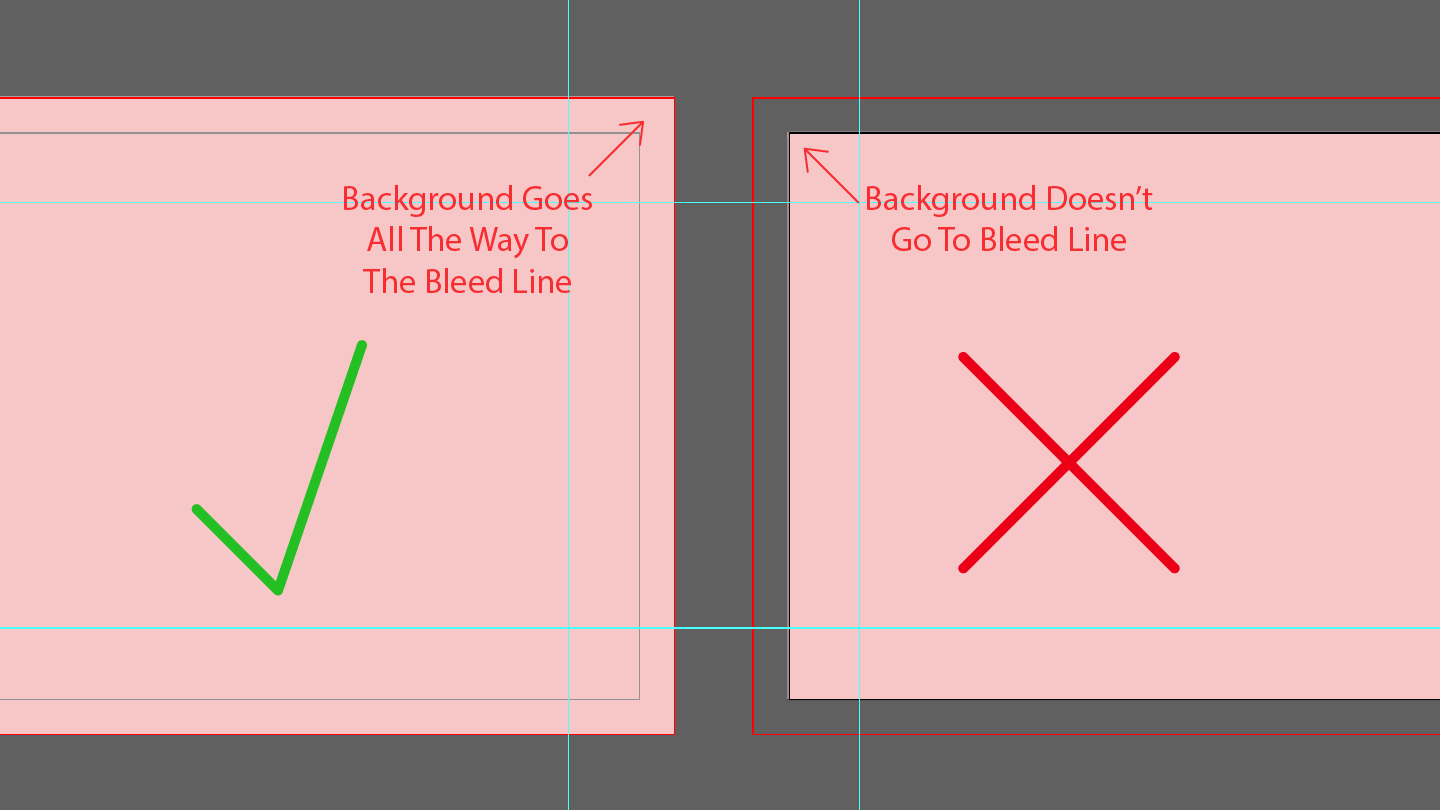
We are making a custom background design for our business cards, but you can easily add a background image or elements. Whether you are making a background or adding a premade design, it’s good to always have a solid fill background. Using the “Rectangle Tool” or shortcut (M), add a solid color fill rectangle on your artboard that is the size of your bleed.
Note: When making designs for print, you need to have your background go all the way to the bleed line. This will help prevent white edges from showing on your print when they cut it to size.
You can easily create your own custom background. For more help on this, have a look at how to make a pastel gradient background or a honeycomb texture/pattern in Illustrator. For this tutorial, we will draw the shapes freehand using the “Pencil Tool” shortcut (N) and use a solid fill color.

Add your Colors
If you didn’t add your palette colors at the beginning, or want to change them, now is the time to do it. We then added our colors as seen in the image below.
Step 3 - Add your Information
Using the “Type Tool” (T) start adding your information to your business card. We are going to use our main font, Bilderberg, for the name on the front and back. We will also apply the font to some text and social media handle. The rest of our text will be a support font that compliments our main font.

The support font we are using is “Garamond”, a pre-installed font in Adobe Illustrator. Alternatively, you can use another type of serif font. Using the support font we are adding our contact details with these UI icons next to them.

To complete the process you will need clean up your design. You can also make your final changes to font, size, and colors. We are going to crop away the excess freehand drawn shapes by using the pathfinder tool. Make a bleed-sized rectangle over your artboard and select all content except the text to crop. Repeat the cropping on all artboards.
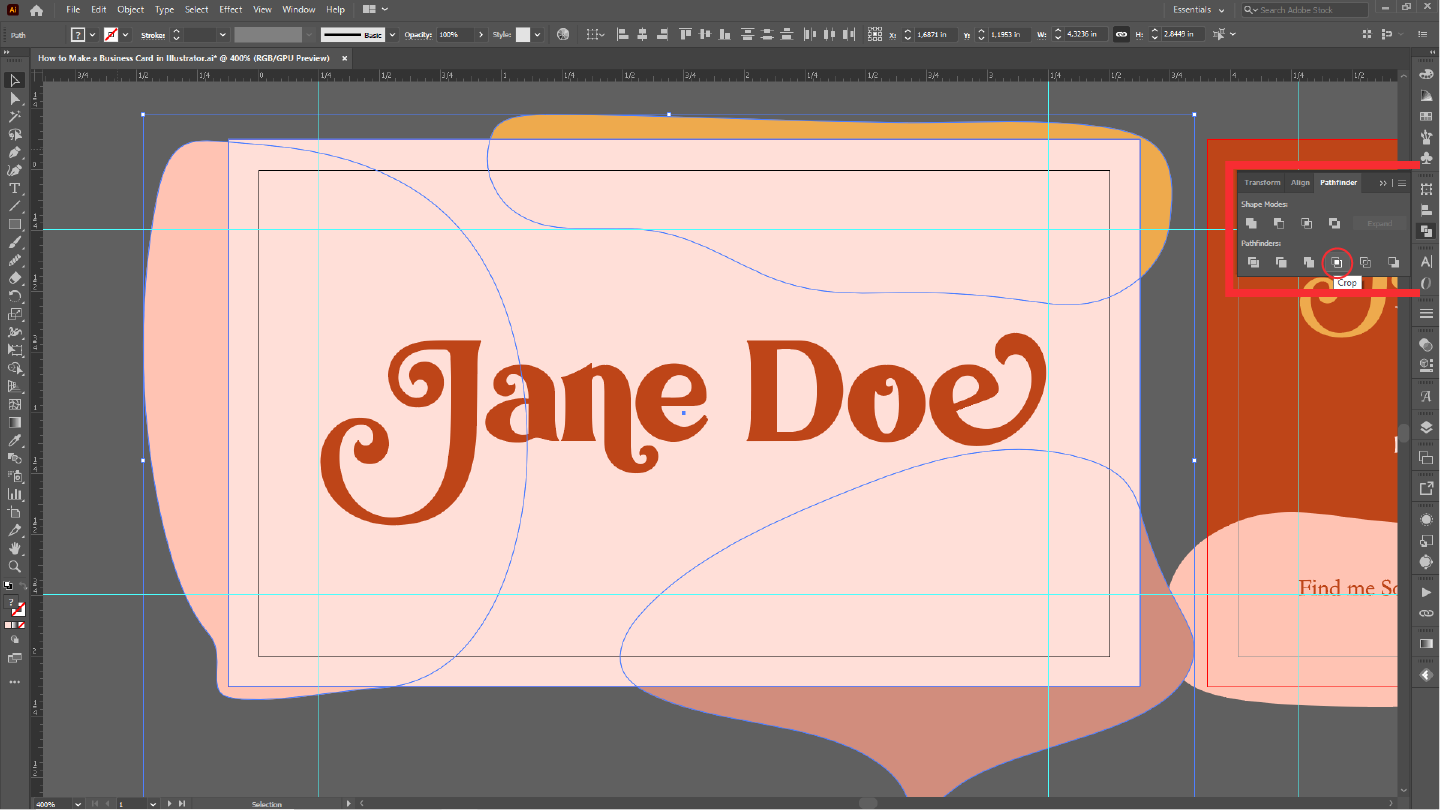
This is how our business card design looks after cropping it.

Step 4 - Export your Files
We are going to batch export files. This will allow us to have both front and back designs with and without a bleed allowance. You are able to export in many formats, but for this tutorial, we are only exporting our business card design in JPG format. If you need further information, be sure to have a look at how to batch export files in Illustrator.
Go to “File” > “Export” and click on “Export for Screens”. In the “Export for Screens” window, we are using the following settings:
- All Artboards
- Exclude Bleed
- Export to your chosen file
- Scale - 300 ppi
- Format - JPG 100
Click “Export Artboard” and follow the process again, but this time to include the bleed. If you need other formats like PDF you can change the “JPG 100”. Remember to save your document for future uses such as updating contact details.

You have now created your own custom business card in Illustrator. If you enjoyed this tutorial you may also enjoy our tutorials on using the character panel, making a seamless pattern, and creating a ribbon banner in Illustrator.


